

 Rules
Rules
by Oldenginerod Today at 1:59 am
» Draco Goes Flying, But Misses the Eclipse
by HalfaDave Yesterday at 9:59 pm
» A prototype Cox Reed-valve marine engine
by davidll1984 Yesterday at 9:15 pm
» Enya .09 II Questions
by Surfer_kris Yesterday at 2:45 pm
» Wen Mac .049 - Conditioning.
by MauricioB Yesterday at 12:21 pm
» Happy 53rd birthday Mauricio!!!
by MauricioB Yesterday at 11:47 am
» Jim Walker Firebaby
by rdw777 Yesterday at 11:22 am
» Testers Sprite engine swap
by Greenman38633 Yesterday at 10:57 am
» UV Restore of Yellowed Decals
by Levent Suberk Yesterday at 8:59 am
» 22mm 2-blade nylon marine prop and solid-shaft drive
by roddie Yesterday at 6:46 am
» Post edit??
by roddie Yesterday at 5:33 am
» Original Super Power fuel formula?
by HalfaDave Wed Apr 17, 2024 7:28 pm


Oriental ARF assembly
Page 1 of 5 • 1, 2, 3, 4, 5 ![]()

 Oriental ARF assembly
![]() RknRusty Thu May 15, 2014 9:09 pm
RknRusty Thu May 15, 2014 9:09 pm
I see that it has a 4" bellcrank installed. Since I will be remaking the leadouts, I'm considering replacing the bellcrank with a 3" one. I read that the kit Oriental has a 3" crank, but the ARC and ARF have a 4"(I know why). As I write this, it occurs to me that a 3" may not easily fit if the holes in the ribs aren't lined up. I know the wing covering needs some attention to prevent it from shedding, but I am really hoping to not remove it yet. Anyone know if this is a quick swap, or should I just plan on using a wide handle and leave it alone? If necessary I can do exploratory surgery to answer this question, I'm just hoping someone already knows the short answer.
Rusty
P.S.: I'm driving up to Joe Nall to pick up my Magnum Saturday. Hoping it'll go into my Mazda P5. Wayne called and said it flies like a dream.
_________________
...and never Ever think about how good you are at something...
while you're doing it!
My Hot Rock & Blues Playlist

RknRusty- Rest In Peace

- Posts : 10869
Join date : 2011-08-10
Age : 68
Location : South Carolina, USA
Re: Oriental ARF assembly
![]() Cribbs74 Thu May 15, 2014 9:44 pm
Cribbs74 Thu May 15, 2014 9:44 pm
If your handle is spaced 4" and your bellcrank is too then that is a good thing. Why do you want to change?
Not being a smarty pants just wondering.
Looking forward to seeing the Magnum up close!
Ron

Cribbs74- Moderator


Posts : 11895
Join date : 2011-10-24
Age : 50
Location : Tuttle, OK
Re: Oriental ARF assembly
![]() RknRusty Thu May 15, 2014 10:20 pm
RknRusty Thu May 15, 2014 10:20 pm
I just don't want it to be sluggish. But I suppose the wide handle takes care of that. Do any of your planes have a 4" crank? I know you like a wide handle like the Hotrock.Cribbs74 wrote:Well,
If your handle is spaced 4" and your bellcrank is too then that is a good thing. Why do you want to change?
Not being a smarty pants just wondering.
Looking forward to seeing the Magnum up close!
Ron
Yeah I'm excited about the Magnum too. I'll get it on video when I fly it Saturday. Wayne and Will say it's really sweet. They told me I'd want to throw my Skyray away.

Rusty
_________________
...and never Ever think about how good you are at something...
while you're doing it!
My Hot Rock & Blues Playlist
RknRusty- Rest In Peace
- Posts : 10869
Join date : 2011-08-10
Age : 68
Location : South Carolina, USA
Re: Oriental ARF assembly
![]() Cribbs74 Thu May 15, 2014 10:26 pm
Cribbs74 Thu May 15, 2014 10:26 pm
Yes I use a Hot Rock as I like the fat grip and although tight it fits my hand well
My Cardinal has a 4" bellcrank and it responds well to input. Very rarely do I ever have to give it full wrist to do what I want.
Ron
Cribbs74- Moderator
-
Posts : 11895
Join date : 2011-10-24
Age : 50
Location : Tuttle, OK
Re: Oriental ARF assembly
![]() Ken Cook Fri May 16, 2014 2:01 am
Ken Cook Fri May 16, 2014 2:01 am
I will add this, while my comments aren't explaining clearly as to why the 3" vs the 4" if this plane isn't balanced and set up correctly it will be very hard to control due to the extremely slow turning rate. When this plane is setup as the instructions indicate you need an extremely large handle to make the plane fly. All I can suggest is to use caution when doing maneuvers until you get used to it. When setup properly the Oriental can turn some extremely tight corners. I've built the Oriental in kit form and have had several ARF's. The kit built version comes with the 3" bellcrank. I found this to be a far superior turning plane and flyer.

Ken Cook- Top Poster

- Posts : 5442
Join date : 2012-03-27
Location : pennsylvania
Re: Oriental ARF assembly
![]() RknRusty Fri Aug 29, 2014 6:41 pm
RknRusty Fri Aug 29, 2014 6:41 pm
Step 1 is to shrink the wrinkles out of the Monokote. Skipping that for later, step 2 is to bore the engine mounting holes and ream them to accept the blind nuts. I had to sand the beams to widen them to fit the fp40, and one of them has the intense odor of mouthwash. I guess so it'll be all minty fresh for when it kisses the ground. The other one is a different color and smells like wood.
In it's previous life someone had hogged out the engine's screw holes, so to make sure my drill was aligned with the hole centers, I found some brass tubes that fit tightly, and used an appropriate sized pointed wood bit to make the marks.

The instructions said to leave about 1/4" clearance between the firewall and the engine. I hope that didn't include the backplate bolts because I just made it 1/4" from the backplate itself. Someone please holler now if that sounds wrong.
I test fit the engine and all seems well so I'm going to paint some thin epoxy on the beams and firewall to fuelproof it.
I'm moving slowly since I still have a bad right arm, but slow is my usual speed anyway. Maybe I'll get back to it later tonight.
Rusty
_________________
...and never Ever think about how good you are at something...
while you're doing it!
My Hot Rock & Blues Playlist
RknRusty- Rest In Peace
- Posts : 10869
Join date : 2011-08-10
Age : 68
Location : South Carolina, USA
Re: Oriental ARF assembly
![]() Ken Cook Fri Aug 29, 2014 7:07 pm
Ken Cook Fri Aug 29, 2014 7:07 pm
As for ironing, I wouldn't go crazy here. The China Kote covering is not very good and it's going to sag and come off regardless. Ironing can make the bubbling worse at times as this stuff is low heat covering. The best thing to do is cut small strips of clear packing tape 1' wide and cover the seams at the leading edge. You can also scuff the covering and shoot clear Lusterkote on the fuse prior to wing assembly. Flaps and elevators are notorious for the covering coming off and I redo those prior to assembly. Ken
Ken Cook- Top Poster
- Posts : 5442
Join date : 2012-03-27
Location : pennsylvania
Re: Oriental ARF assembly
![]() RknRusty Fri Aug 29, 2014 8:13 pm
RknRusty Fri Aug 29, 2014 8:13 pm
The crankcase is pretty close to touching the beams with a tiny amount of wiggle room. I'll check and make sure there's no contact. I'm glad you mentioned the muffler, I'll check that too.Ken Cook wrote:...You want the bearers as close to the engine case as possible, you don't want the bearers touching the case with the exception of the mounting lugs. PUT ON YOUR MUFFLER YOUR GOING TO USE to see if it clears F-1 firewall. This can cause bad vibrations if things are touching and a lot of black oil everywhere.... The wood as you mentioned reminded me of eucalyptus. It made me cough so bad I had to leave for an hour.
Lol, eucalyptus is supposed to soothe coughing. I wonder where they get that Chinese wood. I'm betting it isn't Rock Maple.
I see where the seams are on the wing's LE, what a dumb place to make that. That'll get tape, and I'll see where else needs to be masked for a shot of Lustrekote. Or fingernail clear for small areas.Ken Cook wrote:...scuff the covering and shoot clear Lusterkote on the fuse prior to wing assembly. Flaps and elevators are notorious for the covering coming off and I redo those prior to assembly.
I'm glad you told me it was low temperature covering before I assaulted it with high heat like you have to do with Monokote.
I've got to make some decent leadout connections and am almost out of the 28g spool of copper wire Larry Wilkes gave me, so I'll be going to the tackle shop for some more. I bet 6' of .027 wire in the leadout kits from sig and Brodak is too short, so I better shop for some of that too.
Maybe I should add some top bracing to the bellcrank pivot while I'm at it.
Thanks for the input.
Rusty
_________________
...and never Ever think about how good you are at something...
while you're doing it!
My Hot Rock & Blues Playlist
RknRusty- Rest In Peace
- Posts : 10869
Join date : 2011-08-10
Age : 68
Location : South Carolina, USA
Re: Oriental ARF assembly
![]() RknRusty Mon Sep 01, 2014 11:12 pm
RknRusty Mon Sep 01, 2014 11:12 pm
I removed the bellcrank so I can remake the leadouts, brass bushed and copper wrapped. I'm glad I did because the washers were rusted. I threw them away and will use stainless steel instead.
Rusty
_________________
...and never Ever think about how good you are at something...
while you're doing it!
My Hot Rock & Blues Playlist
RknRusty- Rest In Peace
- Posts : 10869
Join date : 2011-08-10
Age : 68
Location : South Carolina, USA
Re: Oriental ARF assembly
![]() RknRusty Sat Jan 03, 2015 7:27 pm
RknRusty Sat Jan 03, 2015 7:27 pm

.
Opening up the existing slits in the wing with an emery board.

.
Scar the tabs of the hinges to grip the glue, smear Vaseline on the joints with a toothpick, flow it into the joints with a heat gun, clean with acetone, and 30 minute epoxy in place. Set the hinge depth against a flat surface like glass, and it should be a straight line of non binding hinges, ready to be assembled to the control horn and glued to the wing. While gluing the hinges, I smeared a thin coat of epoxy along the Monokote seam on the edge of the flaps between the hinges to keep it from detaching in flight. I also put a strip of clear tape along the TE of the wing before adding the flaps for the same reason.

.
I did decide to put a 3" bellcrank in it. I test fit the wing, and it doesn't come close to matching the contour of the cutout in the fuselage, so I guess I'll put some sawdust filler in the epoxy when I glue it in place. It also doesn't want to sit straight at right angles to the fuselage, so some shaping will be needed. I hope people who aren't experienced builders don't expect it to just fall together.

_________________
...and never Ever think about how good you are at something...
while you're doing it!
My Hot Rock & Blues Playlist
RknRusty- Rest In Peace
- Posts : 10869
Join date : 2011-08-10
Age : 68
Location : South Carolina, USA
Re: Oriental ARF assembly
![]() Cribbs74 Sat Jan 03, 2015 7:38 pm
Cribbs74 Sat Jan 03, 2015 7:38 pm
I have one thing to add though, I nearly lost the Super Clown when a flap came off in flight last time I flew it. If I were to do it again I would drill a hole through the TE and through the hinge at the same time. Then push a toothpick in the hole and epoxy. The plastic does not always adhere to the Epoxy.
My go to hinge is now going to be the stitched hinge. They never fail!
OTOH on a contest plane I'll probably go with pin hinges because of the clean look.
Cribbs74- Moderator
-
Posts : 11895
Join date : 2011-10-24
Age : 50
Location : Tuttle, OK
Re: Oriental ARF assembly
![]() Ken Cook Sat Jan 03, 2015 7:44 pm
Ken Cook Sat Jan 03, 2015 7:44 pm
Last edited by Ken Cook on Sat Jan 03, 2015 11:09 pm; edited 1 time in total
Ken Cook- Top Poster
- Posts : 5442
Join date : 2012-03-27
Location : pennsylvania
Re: Oriental ARF assembly
![]() RknRusty Sat Jan 03, 2015 9:13 pm
RknRusty Sat Jan 03, 2015 9:13 pm
Ken, I've copied your post into my Oriental build folder with others, some of which are from you too. When I print them and go back to work on it, if I can't visualize any of it, I'll give you a holler. Over at Stunthangar there is a thread in which three of us are building the same plane, and I'm posting some of what I'm doing, but saving my questions for CEF.
Thanks
Rusty
_________________
...and never Ever think about how good you are at something...
while you're doing it!
My Hot Rock & Blues Playlist
RknRusty- Rest In Peace
- Posts : 10869
Join date : 2011-08-10
Age : 68
Location : South Carolina, USA
Re: Oriental ARF assembly
![]() Ken Cook Sun Jan 04, 2015 6:19 am
Ken Cook Sun Jan 04, 2015 6:19 am
Ken Cook- Top Poster
- Posts : 5442
Join date : 2012-03-27
Location : pennsylvania
Re: Oriental ARF assembly
![]() RknRusty Sun Jan 04, 2015 9:16 am
RknRusty Sun Jan 04, 2015 9:16 am
The only problem I had with the hinges is that the LE of the flap isn't beveled like I do when I make hinged flaps. It is rounded, but I was correctly expecting it to not be enough Therefore after a certain amount of throw up or down, the wing and flap surfaces meet and cause some pull-out of the hinges. It's mostly noticeable at the two innermost hinges and almost, but not quite negligible at the outermost hinges. After an hour of experimentation I had to make a decision. Rather than removing the covering and sanding a V bevel into the flap LE, I just decided how much maximum deflection was necessary and judged that the amount of gap that that much pullout caused was acceptable. I can always seal it with tape later. So when I glued them in place, I carefully moved the flaps through their throw and let them set their own happy position. If you look at my picture, it's barely noticeable and will be fine, probably with no hinge tape.
I could have possibly shaped the flap edges some with a flat tool and a whammer... naah!
Rusty
_________________
...and never Ever think about how good you are at something...
while you're doing it!
My Hot Rock & Blues Playlist
RknRusty- Rest In Peace
- Posts : 10869
Join date : 2011-08-10
Age : 68
Location : South Carolina, USA
Re: Oriental ARF assembly
![]() Ken Cook Sun Jan 04, 2015 9:42 am
Ken Cook Sun Jan 04, 2015 9:42 am
Ken Cook- Top Poster
- Posts : 5442
Join date : 2012-03-27
Location : pennsylvania
Re: Oriental ARF assembly
![]() RknRusty Sun Jan 04, 2015 1:10 pm
RknRusty Sun Jan 04, 2015 1:10 pm
I'm on my phone which is a struggle for me.
I did recess the hinges into the LE of the flap, as shown in my first picture in yesterdays first post. Ï had read about flimsy flaps so I checked and they seemed stiff enough. There's almost no gap except near the innermost hinge, and even less when deflected. No binding. Gravity makes them fall fully both ways. I tweaked the horn before installing it and they have even deflection now.
EDIT:
The center raised sheeting that keys the wing is crooked by several degrees, so when I build it up for more gluing contact area I can adjust that for proper wing alignment. I can't believe they would botch it that badly. I feel bad for someone who just blindly builds one of these ARFs trusting it to be right.
I bought some B'Laster industrial strength silicone lube at the auto parts store. I'll lube the internal control assembly before I seal it up. It smells like petroleum, so I checked the label and it does have some sort of petro chemical in it.
Rusty
_________________
...and never Ever think about how good you are at something...
while you're doing it!
My Hot Rock & Blues Playlist
RknRusty- Rest In Peace
- Posts : 10869
Join date : 2011-08-10
Age : 68
Location : South Carolina, USA
Question of the day
![]() RknRusty Sun Jan 04, 2015 5:41 pm
RknRusty Sun Jan 04, 2015 5:41 pm
I would like to lube where the bellcrank pivot sits on a washer and that sits on the ply platform. I have the 6-32 nylock nut on top of the pivot spindle as tight as is possible without the crank motion stiffening(+ enough for a hot day). The nut is epoxied in place. If I spray the joint at the other end, I'm concerned the ply crank base may swell, putting more pressure on and fouling the bellcrank. As slight as it may be... I like my controls free.
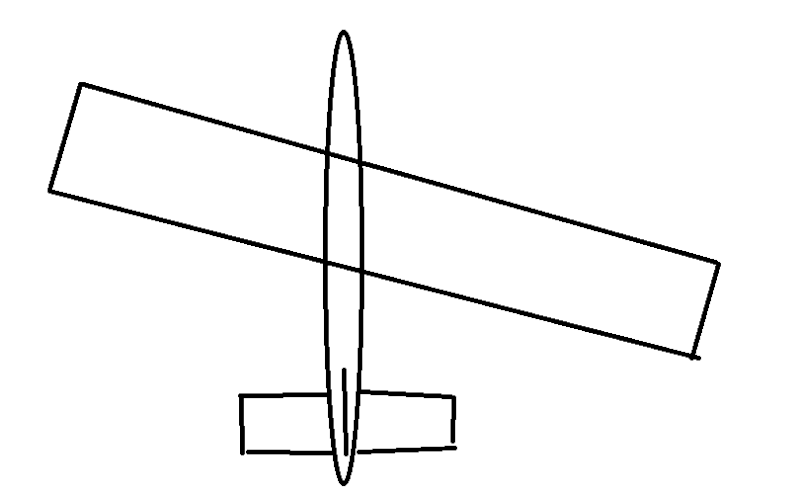
I started trying to figure out the shape the crooked center section needs to be in order to hold the wing straight. Keyed in place like it is, the outboard wing diverges from perpendicular enough to be more than an inch aft at the tip. That's 2" total the wingtips are out of place related to each other. Two freakin' inches. If I'd known sooner I would have called Brodak and gotten a replacement wing. Ah hell. I'll fix it, but I was klutzing it up pretty good in the shop so I quit for the day. Time to chill and watch some trash TV.
See y'all in the funny pages.
Rusty
_________________
...and never Ever think about how good you are at something...
while you're doing it!
My Hot Rock & Blues Playlist
RknRusty- Rest In Peace
- Posts : 10869
Join date : 2011-08-10
Age : 68
Location : South Carolina, USA
Re: Oriental ARF assembly
![]() Ken Cook Sun Jan 04, 2015 7:45 pm
Ken Cook Sun Jan 04, 2015 7:45 pm
Ken Cook- Top Poster
- Posts : 5442
Join date : 2012-03-27
Location : pennsylvania
Re: Oriental ARF assembly
![]() RknRusty Sun Jan 04, 2015 8:10 pm
RknRusty Sun Jan 04, 2015 8:10 pm
This is of course exaggerated:
_________________
...and never Ever think about how good you are at something...
while you're doing it!
My Hot Rock & Blues Playlist
RknRusty- Rest In Peace
- Posts : 10869
Join date : 2011-08-10
Age : 68
Location : South Carolina, USA
Re: Oriental ARF assembly
![]() Ken Cook Mon Jan 05, 2015 4:17 am
Ken Cook Mon Jan 05, 2015 4:17 am
Ken Cook- Top Poster
- Posts : 5442
Join date : 2012-03-27
Location : pennsylvania
Re: Oriental ARF assembly
![]() JPvelo Mon Jan 05, 2015 11:16 am
JPvelo Mon Jan 05, 2015 11:16 am
You made reference to knowing how to slot hinges after watching the windy video. Do you have a link to the video? Or maybe you could do short tutorial for the rest of us?
Thanks?
Jim

JPvelo- Diamond Member

- Posts : 1972
Join date : 2011-12-02
Age : 56
Location : Colorado
Re: Oriental ARF assembly
![]() RknRusty Mon Jan 05, 2015 4:04 pm
RknRusty Mon Jan 05, 2015 4:04 pm
Ken Cook wrote: Yes, that will be an issue. Certainly that needs to be addressed or you won't be happy. Will the covering be exposed on one side once this correction is addressed?....
No, it's only a few degrees of skew, but it adds up along the length of the wing. Wayne says his Smoothie and Vector were both a little askew, so I was just expecting too much of an ARF. This is still the old generation too. When do I ever build without getting all freaked out about something.
I'll remove enough of the alignment strip so the wing can be positioned straight, and figure out where I need to glue some new alignment keys that will provide the strength necessary when assembled.
It's in one of is 2 hour videos that Paul Taylor posted. "Ptay" on Youtube, I think. I'll see if I can find it. It's a simple sanding bar that I can draw if I can't find it. Ian has used it too. I just used the idea and half freehanded it.JPvelo wrote:Rusty,
You made reference to knowing how to slot hinges after watching the windy video. Do you have a link to the video? Or maybe you could do short tutorial for the rest of us?
Thanks?
Jim
Rusty
_________________
...and never Ever think about how good you are at something...
while you're doing it!
My Hot Rock & Blues Playlist
RknRusty- Rest In Peace
- Posts : 10869
Join date : 2011-08-10
Age : 68
Location : South Carolina, USA


ian1954- Diamond Member
- Posts : 2688
Join date : 2011-11-16
Age : 69
Location : England
Re: Oriental ARF assembly
![]() RknRusty Mon Jan 05, 2015 6:28 pm
RknRusty Mon Jan 05, 2015 6:28 pm
And there you have it! You stick the sandpaper to a block that is as deep and wide as the hinge barrel(maybe +1mm wider), glue that to a wide top block that limits the depth of the slot. Make sure there are no ragged edges.
I do the slot gouging first, next I sand the leading edge of the flap into a V for non-binding throw. This also makes for no hinge-line gap and free movement. Then sand the recess.
Leave the TE of the wing flat with only hinge slots and no recesses.
Rusty
Last edited by RknRusty on Tue Jan 06, 2015 10:30 am; edited 1 time in total
_________________
...and never Ever think about how good you are at something...
while you're doing it!
My Hot Rock & Blues Playlist
RknRusty- Rest In Peace
- Posts : 10869
Join date : 2011-08-10
Age : 68
Location : South Carolina, USA
Page 1 of 5 • 1, 2, 3, 4, 5 ![]()
» Skitzoid Phred here with Brodak ARC Oriental addition to the growing fleet
» Another Oriental shakedown flight
» My Oriental's OS 40fp spraybar
» First patterns with the Oriental - Video