

 Rules
Rules
Log in
Search
Latest topics
» music vids.. some of your favoritesby Oldenginerod Today at 1:59 am
» Draco Goes Flying, But Misses the Eclipse
by HalfaDave Yesterday at 9:59 pm
» A prototype Cox Reed-valve marine engine
by davidll1984 Yesterday at 9:15 pm
» Enya .09 II Questions
by Surfer_kris Yesterday at 2:45 pm
» Wen Mac .049 - Conditioning.
by MauricioB Yesterday at 12:21 pm
» Happy 53rd birthday Mauricio!!!
by MauricioB Yesterday at 11:47 am
» Jim Walker Firebaby
by rdw777 Yesterday at 11:22 am
» Testers Sprite engine swap
by Greenman38633 Yesterday at 10:57 am
» UV Restore of Yellowed Decals
by Levent Suberk Yesterday at 8:59 am
» 22mm 2-blade nylon marine prop and solid-shaft drive
by roddie Yesterday at 6:46 am
» Post edit??
by roddie Yesterday at 5:33 am
» Original Super Power fuel formula?
by HalfaDave Wed Apr 17, 2024 7:28 pm
Cox Engine of The Month


CEF Traveling Engine


Win This Engine!

Live on Patrol


Wheel replacements for T-28 Trojan
Page 1 of 2
Page 1 of 2 • 1, 2 ![]()

Paint work on the Trojan
![]() bottomgun Sat Jan 30, 2016 2:15 pm
bottomgun Sat Jan 30, 2016 2:15 pm
Last night I cleaned up and masked off the areas for repainting. Had to wear my reading glasses for this one. Weather here in SoCal was about 71 degrees with rain coming so this morning I went ahead and shot the black on.
The factory wing stickers were dried up and falling apart. I was going to make new ones using Monocote trim sheet but opted to spray them when I did the anti glare panel on the cowling. Before I started I removed the old decals from the fuse sides. They were practically etched on. I don't know if someone used some sort of fuel proofer on them but they were a bite and a half to get off. Used about 8 coats of ELO decal and paint remover to get them off but it turned out well.
Here's a close up of the cowling before any work was done. Some wear here and there but it held up quite well for 50 years.


Got everything masked using Scotch painters tape. It took a while to do this part. I cleaned the cowling and had no problem removing most the old factory paint. I used my old stock of K&B Superpoxy which is about 32 years old. I used it on another project two years ago and it still works great.


Using muh trusty Paasche which is also about the same age.

All airbrushed. I used toothpicks to keep paint out of the filler tubes.


All in all I'm happy with the way it turned out. The wing walk panels look way better than the stickers that were on there. I won't even begin to handle these parts until about another 3 days even though it's dry to the touch in about half an hour and is completely fuel proof from my experience using Superpoxy. I'll concentrate now on how I'll handle the wheel/tire situation.

bottomgun- Gold Member

- Posts : 131
Join date : 2012-12-27
Age : 66
Location : Southern California

cox24711- Platinum Member

- Posts : 722
Join date : 2014-01-18
Age : 21
Location : Noosa Queensland Australia
New Wheels
![]() bottomgun Sun Feb 07, 2016 9:54 pm
bottomgun Sun Feb 07, 2016 9:54 pm
I decided to go ahead and use the Perfect tires and hubs. They are the 1 inch diameter units. The original hubs were to small in diameter and also too wide. I have a good original front (thanks Mark) and if I ever find a good complete pair of rears then I'll replace them with that. I'm not flying it so these will suffice even if I wanted to fly it. I also used some yellow Great Planes striping tape to accent the canopy even though originally it was never like this, but it does look neat. Just waiting now for my Stars and Bars graphics from Callie Graphics and I'll be done.


bottomgun- Gold Member
- Posts : 131
Join date : 2012-12-27
Age : 66
Location : Southern California
Re: Wheel replacements for T-28 Trojan
![]() NEW222 Sun Feb 07, 2016 10:32 pm
NEW222 Sun Feb 07, 2016 10:32 pm
Awesome job there. what and or how did you prep the plastic for the paint? Again, great job.

NEW222- Top Poster

- Posts : 3892
Join date : 2011-08-13
Age : 45
Location : oakbank, mb
Re: Wheel replacements for T-28 Trojan
![]() bottomgun Mon Feb 08, 2016 12:06 am
bottomgun Mon Feb 08, 2016 12:06 am
I used lacquer thinner spread with a cotton swab to condition the plastic to help the epoxy paint stick. I did it sparingly and quickly just before shooting on the paint. I was going to use some of the automotive pre prep spray conditioners like Bulldog or whatnot but I was leery of using them and besides, I've done this method before with good results.
bottomgun- Gold Member
- Posts : 131
Join date : 2012-12-27
Age : 66
Location : Southern California
Re: Wheel replacements for T-28 Trojan
![]() getback Mon Feb 08, 2016 7:08 am
getback Mon Feb 08, 2016 7:08 am
That looks GREAT bottomgun , I got some plastics I am going to have to get on with soon , not really looking forward to it but i'll get through with a little (lot) of advice . Give that man some greenies for a good job .. getback 

getback- Top Poster


Posts : 10097
Join date : 2013-01-18
Age : 66
Location : julian , NC
Re: Wheel replacements for T-28 Trojan
![]() Mark Boesen Mon Feb 08, 2016 1:12 pm
Mark Boesen Mon Feb 08, 2016 1:12 pm
Restoring vintage plastic is a blast, it doesn't take a lot of work and can be very rewarding. It's also a good way to get all those cool airplanes you wanted as a kid without spending a ton of money.
Mark Boesen- Top Poster
- Posts : 3976
Join date : 2011-09-01
Age : 65
Location : Rockford, Il -

Insignia decals
![]() bottomgun Sat Feb 13, 2016 11:16 pm
bottomgun Sat Feb 13, 2016 11:16 pm
I got my stars and bars graphics today in the mail and applied them this evening. I've got to give a big shout out to Callie Graphics for making these insignias made to my specifications for a great price. They did an excellent job and they'll be getting more business from me! They were the final touch on what is now a completed T-28 Trojan.


I'll get a pic or two of the model in full frame tomorrow.
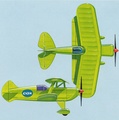
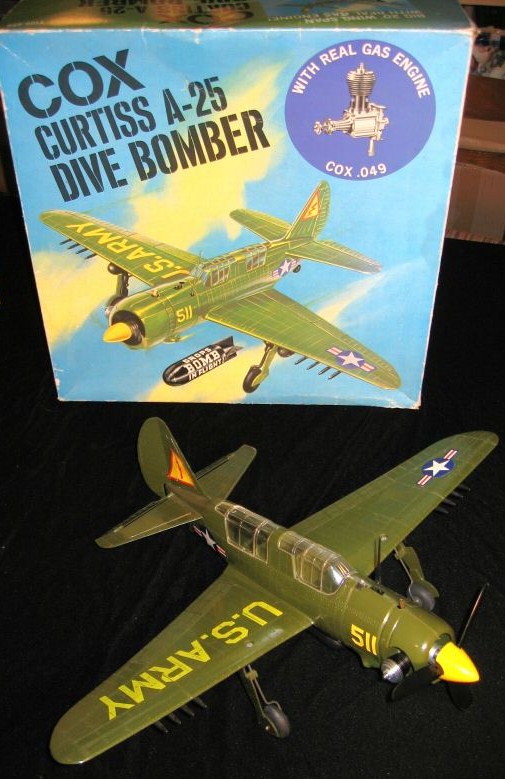
Next on the restoration schedule....


I'll get a pic or two of the model in full frame tomorrow.
Next on the restoration schedule....

bottomgun- Gold Member
- Posts : 131
Join date : 2012-12-27
Age : 66
Location : Southern California
Re: Wheel replacements for T-28 Trojan
![]() akjgardner Sun Feb 14, 2016 5:00 am
akjgardner Sun Feb 14, 2016 5:00 am
Nice job on the T28. Is that next airplane a helldiver ?
akjgardner- Diamond Member

-
Posts : 1469
Join date : 2014-12-28
Age : 64
Location : Greensberg Indiana
Re: Wheel replacements for T-28 Trojan
![]() Mark Boesen Sun Feb 14, 2016 4:21 pm
Mark Boesen Sun Feb 14, 2016 4:21 pm
It's the same mold as the Helldiver, but marketed as the Curtis A-25
Mark Boesen- Top Poster
- Posts : 3976
Join date : 2011-09-01
Age : 65
Location : Rockford, Il -
Page 1 of 2 • 1, 2 ![]()
» Cox Apache CL Helicopter engine propeller(not rotor blade) size and where to get replacements
» O.S. FS 40 Marine
» It's been a nautical day
» Stuka guys
» Dremel cut-off wheel tip
» O.S. FS 40 Marine
» It's been a nautical day
» Stuka guys
» Dremel cut-off wheel tip
Page 1 of 2
Permissions in this forum:
You cannot reply to topics in this forum