

 Rules
Rules
Log in
Search
Latest topics
» music vids.. some of your favoritesby Oldenginerod Today at 1:59 am
» Draco Goes Flying, But Misses the Eclipse
by HalfaDave Yesterday at 9:59 pm
» A prototype Cox Reed-valve marine engine
by davidll1984 Yesterday at 9:15 pm
» Enya .09 II Questions
by Surfer_kris Yesterday at 2:45 pm
» Wen Mac .049 - Conditioning.
by MauricioB Yesterday at 12:21 pm
» Happy 53rd birthday Mauricio!!!
by MauricioB Yesterday at 11:47 am
» Jim Walker Firebaby
by rdw777 Yesterday at 11:22 am
» Testers Sprite engine swap
by Greenman38633 Yesterday at 10:57 am
» UV Restore of Yellowed Decals
by Levent Suberk Yesterday at 8:59 am
» 22mm 2-blade nylon marine prop and solid-shaft drive
by roddie Yesterday at 6:46 am
» Post edit??
by roddie Yesterday at 5:33 am
» Original Super Power fuel formula?
by HalfaDave Wed Apr 17, 2024 7:28 pm
Cox Engine of The Month


CEF Traveling Engine


Win This Engine!

Live on Patrol


Diy tanks in MS
Page 1 of 1

Diy tanks in MS
![]() 944_Jim Mon Nov 12, 2018 8:30 pm
944_Jim Mon Nov 12, 2018 8:30 pm
Hi guys,
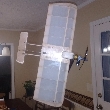
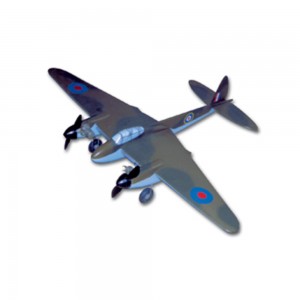
I just got through the worst 4 hours making ONE tank for my Mosquito. Some of you may recall my 10cc thin tanks...and the very short 1:25 runs. My goal is to increase the tank size by 50%.
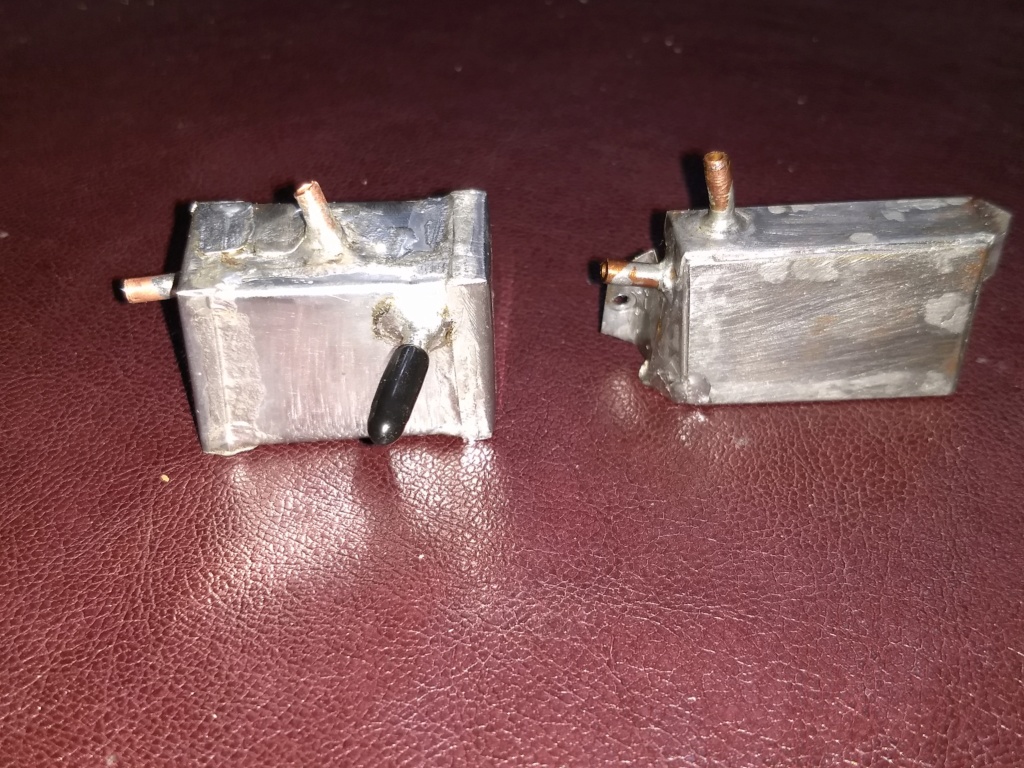
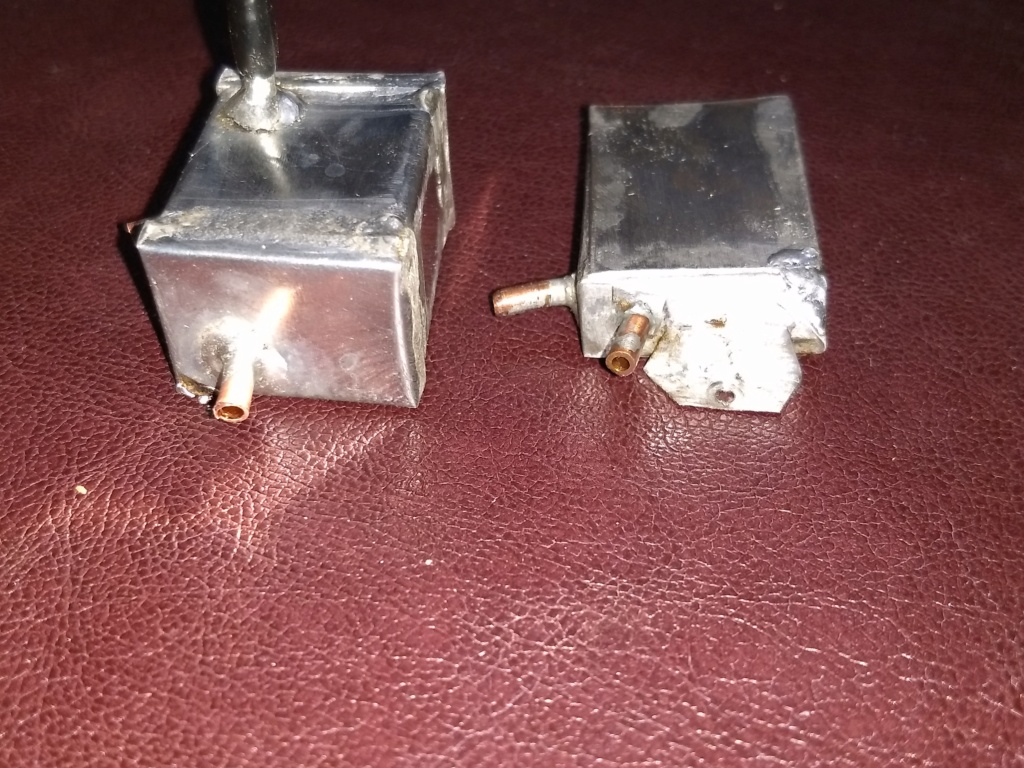
I thought I had it nailed. First the main body was wrapped around a wooden buck. This was for ease of repeatability. Then end caps were made. The fuel pickup tube was installed through the front wall, soldered to the floor, and then soldered to the front wall. The overflow was installed next through the floor and into the top inside front corner. By the time I had a good assembly order, any heat transfer was maximized by closing the tank AFTER the end cap with pressure plumbing was assembled
I got the tank completed except for mounting tabs, and had my wife watch for leaks while I pressurized it with a short length of tubing closing off the overflow and pressure tap. A leak was found and fixed. Tabs were about to be cut when I realized I soldered the pressure tap end cap on upside down. There is no removing this one...my soldering iron doesn't have the grunt to heat the entire end cap. As it was, I was chasing the solder around the joints very slowly!
So, here is the question for all you custom tank builders (Roddie, Ken...feel free to instruct):
What size iron is usually used for soldering up your tanks?
Is there a decent/puny torch that makes this job easier?
How did you bend your lines to get smallest radius bends?
I'll be starting over since this one looks horrendous!
Thanks in advance,
I just got through the worst 4 hours making ONE tank for my Mosquito. Some of you may recall my 10cc thin tanks...and the very short 1:25 runs. My goal is to increase the tank size by 50%.
I thought I had it nailed. First the main body was wrapped around a wooden buck. This was for ease of repeatability. Then end caps were made. The fuel pickup tube was installed through the front wall, soldered to the floor, and then soldered to the front wall. The overflow was installed next through the floor and into the top inside front corner. By the time I had a good assembly order, any heat transfer was maximized by closing the tank AFTER the end cap with pressure plumbing was assembled
I got the tank completed except for mounting tabs, and had my wife watch for leaks while I pressurized it with a short length of tubing closing off the overflow and pressure tap. A leak was found and fixed. Tabs were about to be cut when I realized I soldered the pressure tap end cap on upside down. There is no removing this one...my soldering iron doesn't have the grunt to heat the entire end cap. As it was, I was chasing the solder around the joints very slowly!
So, here is the question for all you custom tank builders (Roddie, Ken...feel free to instruct):
What size iron is usually used for soldering up your tanks?
Is there a decent/puny torch that makes this job easier?
How did you bend your lines to get smallest radius bends?
I'll be starting over since this one looks horrendous!
Thanks in advance,
944_Jim- Diamond Member


Posts : 1950
Join date : 2017-02-08
Age : 59
Location : NE MS
Re: Diy tanks in MS
![]() Dave P. Mon Nov 12, 2018 8:42 pm
Dave P. Mon Nov 12, 2018 8:42 pm
A small butane torch like they sell at cigar shops might do the trick. I got a butane soldering iron / torch from Radio Shack and it works perfectly for that kind of thing with the torch tip installed. I got mine for motorcycling long trips on old bikes. It's saved my bacon more than once.
https://www.radioshack.com/products/mini-butane-gas-powered-iron?variant=20331814533
Clean it up good and use plenty of flux as you try to twist it in place. Keep us posted.
https://www.radioshack.com/products/mini-butane-gas-powered-iron?variant=20331814533
Clean it up good and use plenty of flux as you try to twist it in place. Keep us posted.
Dave P.- Gold Member

- Posts : 477
Join date : 2017-07-31
Age : 66
Location : Durham, NC

Levent Suberk- Diamond Member
- Posts : 2197
Join date : 2017-12-24
Location : Türkiye
Re: Diy tanks in MS
![]() Ken Cook Tue Nov 13, 2018 4:21 am
Ken Cook Tue Nov 13, 2018 4:21 am
A torch will ruin the plating and distort the metal badly. Until you get the knack of using a iron, I wouldn't use it other than taking a tank apart. The heat is too direct and one needs to wave the flame which even then can cause the other joints to fail and tubes come loose. I use a Weller 100/140 watt gun. Anything less will not work properly as the tank will act like a heat sink. Even the trustworthy Weller can be affected at times. As for bending, I have a hand brake I use for metal work. I also have two pieces of 3/8" bar stock screwed together which I slip a piece of tin stock in between them while holding in the vise and bend the metal. Leaks shouldn't happen obviously and if the metal is prepared correctly the joint should be fine.
My advice would not to use plenty of flux as it's not necessary and it will corrode the tank. You want to use as little as possible soldering the front cap on first, then the pipes, solder your pickup to the side of the tank then. Next step is to wash the inside of the tank out using a acid brush and lacquer thinner. Last step is the rear cap and I do this with the cap UP. Don't solder it it down on the table as the flux will flow into the tank. Heat the cap and wick the solder up into the joint and the residual flux will run down the outside of the tank while the solder wicks up. You really want to lessen the chances of getting flux into the tank. In addition, when completed, fill the tank with high castor fuel and leave it sit for at least 24 hrs with the tubes capped. Flush that out on your outing prior to running.
My advice would not to use plenty of flux as it's not necessary and it will corrode the tank. You want to use as little as possible soldering the front cap on first, then the pipes, solder your pickup to the side of the tank then. Next step is to wash the inside of the tank out using a acid brush and lacquer thinner. Last step is the rear cap and I do this with the cap UP. Don't solder it it down on the table as the flux will flow into the tank. Heat the cap and wick the solder up into the joint and the residual flux will run down the outside of the tank while the solder wicks up. You really want to lessen the chances of getting flux into the tank. In addition, when completed, fill the tank with high castor fuel and leave it sit for at least 24 hrs with the tubes capped. Flush that out on your outing prior to running.

Ken Cook- Top Poster

- Posts : 5442
Join date : 2012-03-27
Location : pennsylvania
Re: Diy tanks in MS
![]() Kim Tue Nov 13, 2018 6:58 am
Kim Tue Nov 13, 2018 6:58 am
Yet another "Ken Post", copied and pasted in my "How To" File !!!
Thanks Man !!!!!
Thanks Man !!!!!

Kim- Top Poster
-
Posts : 8519
Join date : 2011-09-06
Location : South East Missouri
Re: Diy tanks in MS
![]() getback Tue Nov 13, 2018 8:35 am
getback Tue Nov 13, 2018 8:35 am
Jim here is some helpful tips i read the other day http://flyinglines.org/Clowntank.html Ken has some good advice , you may want to try (practice ) wicking solder up hill (end cap) before moving to it . Just my thoughts its not as easy as it sounds .

getback- Top Poster
-
Posts : 10095
Join date : 2013-01-18
Age : 66
Location : julian , NC
Re: Diy tanks in MS
![]() ticomareado Tue Nov 13, 2018 11:48 am
ticomareado Tue Nov 13, 2018 11:48 am
I never have fabricated a tank, I've only done a few crude repairs/modifications as a kid a long time ago. However one thing does occur to me regarding that particular craft. It would seem that different solder alloys with different melting temps would be useful in a staged process of tank fabrication.

ticomareado- Account Under Review
- Posts : 1089
Join date : 2013-10-03
Location : NC
Re: Diy tanks in MS
![]() ticomareado Tue Nov 13, 2018 12:19 pm
ticomareado Tue Nov 13, 2018 12:19 pm
Factory made separate metal tanks could be a collectors category in and of themselves. I'll start a list off from memory and a 1951 AHC catalog right now:
Memory: Perfect, Veco, Froom, Ka-Pak, Veco, Acme, Fox. AHC 1951 catalog (in addition to memory): Dale, Maeco, Berkeley
Another old favorite partially fabricated tank for larger engines back in the day was small dipping snuff tins. Remember that stuff? My granny had a Tube Rose habit that wouldn't quit. Always had a quart Mason jar for a spittoon handy. Grossed me out as a kid.
ticomareado- Account Under Review
- Posts : 1089
Join date : 2013-10-03
Location : NC
I
![]() 944_Jim Tue Nov 13, 2018 1:36 pm
944_Jim Tue Nov 13, 2018 1:36 pm
Hi There T!
All good ideas. The problem is the space on the model. I tried tanks above the wings...they flooded out the engine(s) before I could get both running.
Below the wings drops the inboard one in the way of the leadouts. The answer lies in smaller, pressure-fed tanks. The model flew fine on the first set of tanks...just not long enough! The next set is supposed to be bigger for a longer run.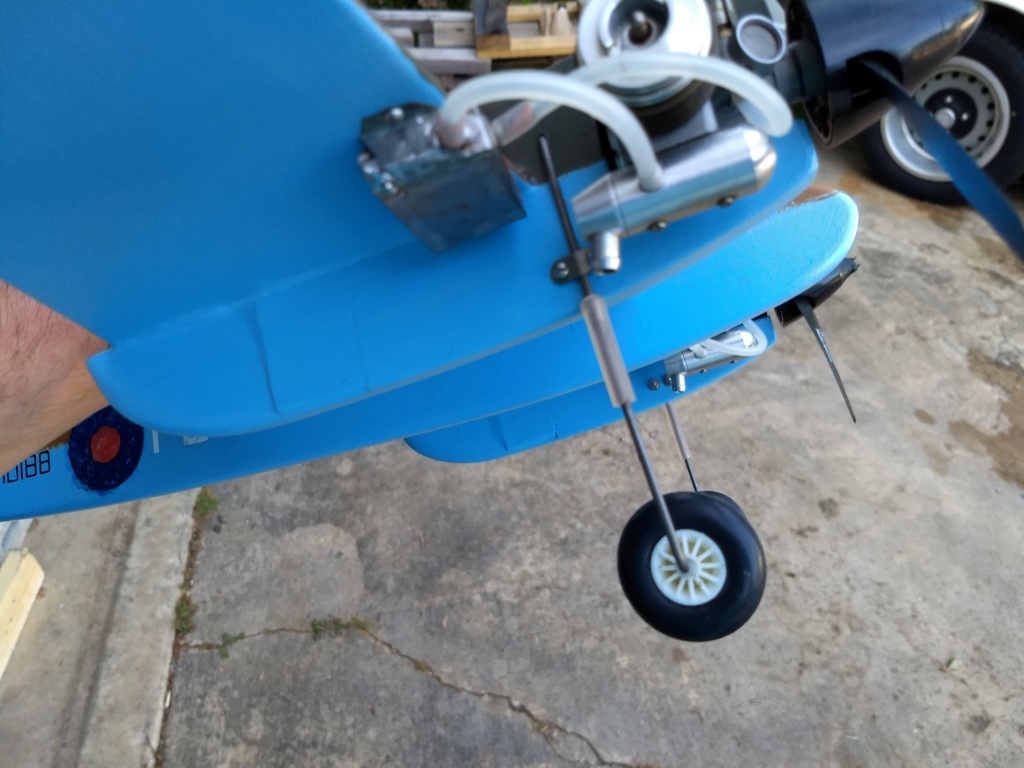
Last edited by 944_Jim on Tue Nov 13, 2018 10:18 pm; edited 2 times in total (Reason for editing : Spelling)
944_Jim- Diamond Member
-
Posts : 1950
Join date : 2017-02-08
Age : 59
Location : NE MS
Re: Diy tanks in MS
![]() ticomareado Tue Nov 13, 2018 1:41 pm
ticomareado Tue Nov 13, 2018 1:41 pm
How about a single large central pressurized tank?
ticomareado- Account Under Review
- Posts : 1089
Join date : 2013-10-03
Location : NC
Re: Diy tanks in MS
![]() Ken Cook Tue Nov 13, 2018 3:42 pm
Ken Cook Tue Nov 13, 2018 3:42 pm
I should've mentioned, don't use Sta- Brite flux. That flux will eat the metal and all metal around where you soldered it and is very difficult to neutralize. I use 60/40 rosin core and paste flux such as Oatey used for home plumbing use. Any silver solder or mention of is typically not silver solder if your finding it in a hardware store or the likes of. It claims silver bearing but it's used for electrical use to provide conductivity. Real silver solder doesn't contain lead and requires very high temperatures to melt it. Silver solder found in electronic stores will fail very quickly as it has a very low melting temperature and little to no shock resistance in which vibration from the engine will cause an almost immediate failure.
Jim, looking at your tank design, I see some things that you could really improve on. There really is no need for muffler pressure. It doesn't adjust for incorrect tank height and it can certainly be problematic if the hose comes off during a run. If you insist on using it, then first get your tank height correct. If that means notching the wing then by all means do so. The problem is going to occur when you do maneuvers. If your tank is lower then your venturi, if you go inverted the engine is going to go dead rich. Now your going to have a hell of a time getting the plane upright.
I would never put a tank on a plane regardless of new or old goes on ANY of my planes unless I pop the back off. I'm sure you could do a search on here as I took about 5 tanks apart that were brand new and pinpointed all the flaws and recommendations on how to fix them. That post was a long time ago. Perfect, Acme, Veco none of these tank manufacturers EVER cleaned these tanks after assembly. Now years later, the corrosion and flux contamination is horrid inside of them. This doesn't mean all of them but for the few minutes it takes to open one, it's well worth it. Veco in my opinion is the worst because tanks like the T-21 had the baffle inside of them which the flux totally eats up the baffle plating due to the holes drilled within it. Shake a tank first and listen for rust or contaminates inside prior to use.
Ken Cook- Top Poster
- Posts : 5442
Join date : 2012-03-27
Location : pennsylvania
Re: Diy tanks in MS
![]() ticomareado Tue Nov 13, 2018 4:31 pm
ticomareado Tue Nov 13, 2018 4:31 pm
Mr. Cook-- That's very informative about manufactured tanks. A question. A friend of mine who restores old real cars swears by a product called MarSolv (sold through marine supply houses) to clean out rusty steel gasoline tanks. Have you ever messed with that before?
ticomareado- Account Under Review
- Posts : 1089
Join date : 2013-10-03
Location : NC
Re: Diy tanks in MS
![]() Ken Cook Tue Nov 13, 2018 5:41 pm
Ken Cook Tue Nov 13, 2018 5:41 pm
I've used a product for my motorcycles called Kreme tank sealer. It was a two part mix that worked extremely well. It was also very expensive. The first part etched the metal. You put 1000 bb's in the tank and shook it with the etch. After a wash you used the other part that coated the inside rolling it around every few hours. I have had a lot of experience with metal tanks due to many that never worked properly. Funny thing about control line is that even though you get what you think is 100 % correct, the damn thing doesn't work. You do something off the wall and it works, go figure. I can't really see Jim's plane real well in regards to wing to engine centerline. My eyes are also problematic and I'm struggling with that as well so things are a bit distorted. This situation however might just require a balloon tank due to the inability to get the tank at the correct height.
Ken Cook- Top Poster
- Posts : 5442
Join date : 2012-03-27
Location : pennsylvania
Re: Diy tanks in MS
![]() roddie Tue Nov 13, 2018 7:26 pm
roddie Tue Nov 13, 2018 7:26 pm
Hi Jim, I would take Ken's advice. Read-over and "re-read" it. Copy/paste his replies into a text-document that you can save somewhere. Printing a hard-copy.. and "archiving" the info. under fuel/control-line/hard-tanks/construction/troubleshooting.. is something "I" would do... but I'm obsessive-compulsive.. when it comes to archiving hobby-related information. 
If you've been able to hard-solder somewhat satisfactorily... then you just need to "experiment"..... with how to isolate the heat from the joints that need to stay soldered. I built half a dozen tiny uni-flow tanks.. albeit "simple/rectangular" ones for my CEF Speed-Contest entries.. BUT had to develop some hard-soldering methods, before I felt confident in what I was doing.
Sinking-heat "away from" where you don't want heat.. requires some thought. I first-used the aluminum bar-stock "bucks" that I'd used to fabricate my tank-bodies...... for soldering them together. I couldn't get the solder to flow. When I replaced the aluminum bucks with "hardwood" ones; I was able to get the solder to flow. You may be able to "sink-heat" to your advantage... dependent on where and how you can apply your heat-sinking in relation to the joint(s) which require it.
Ken mentions "cutting-into" the L/E of the wing to locate your tanks at the correct height. I would personally "try that" with a pair of commercially-available "larger" tanks. I would personally opt for 10+CC tanks.
You could opt for twin "balloon" tanks. I don't have any experience with them.. but they have excellent reviews. Ken Cook mentioned running a pair of them, as a possibility.
I can't report on pressurized fuel-delivery. I don't have any experience with that.
Best of luck jim!!!!!

roddie- Top Poster
- Posts : 8233
Join date : 2013-07-17
Age : 64
Location : N. Smithfield, Rhode Island -

Re: Diy tanks in MS
![]() 944_Jim Tue Nov 13, 2018 8:03 pm
944_Jim Tue Nov 13, 2018 8:03 pm
Hi Ken,
I appreciate your feedback concerning tank assembly and placement. This plane has really good pull on the lines. There is ZERO expectation of inverted flight. Wing-over at 60 degrees are entertaining enough! On two engines, this thing just keeps pulling up...and then races back down with authority. The attached video shows the short duration, and is an 85%-90% flight. When this plane runs right in no wind, I really need to be paying attention while having fun!
The original tanks actually worked fine. Their top surface is about an 1/8" below the center of the venturi. Their floors are almost 3/8" lower. Muffler pressure is used to overcome centripedal force because of the width of the tanks and their placement outboard the engines. The original tanks lack volume, so I hoped to build a pair a little deeper, but using the same foot print under the wings.
I suspect I have engines that are too big on the plane, but it really tracks well in the air under power. Once both engines shut down, the model glides down pretty hot. I had to slide the engines pretty much into the leading edge of the wings in order to ensure a Nose-Heavy condition would not exist. Unfortunately that leaves no room directly behind the engines for tanks. I tried some nice, big ones on top. They immediately flood the engines. cutting into the flat-plate wing is not an option. Directly above the tanks there is a piece of hardwood for a spar. The appropriate fix would be to vertical mount the engine so the tank can be even with the venturi...either above the wing, or below it. A less ideal fix would be to mount the tanks inboard and vertical against the nacelles. While I would still have a draw issue, at least it wouldn't be due to centripedal force.
Except for a really short duration, the only other problem was fueling. Since the original tanks have only feed and pressure, I had to remove the pressure line and hang the model nose down to port in order to fully fill the tanks. Not only was this a pain, but the really short flights were, well, too short! I hoped to include bottom-hanging vents so that I could fuel up without gymnastics, and maybe try a Univent style vent in order to drop the disconnect-fuel up-reconnect (times two). I figure if it will still feed on Hnivent, and fill faster, then the shorter flights may not be so bad.
I have a Weller 260/200 watt iron. I'm using K&L .008" tin, and 1/8" copper line. The local Hobby Lobby doesn't stock .005" tin.
I used No-Korode and silver bearing solder to make the first pair. The tanks were drawn up in cardboard to make the patterns, then transferred to the tin for final cut-out and assembly.
This time I cut a block of wood so I could fold and form around a shape hoping to speed up the process. While it was faster, the process lacks the precision of fold/shape/solder. I most likely will go back to cardboard templates for the next tank(s). Really, I now suspect I have the right stuff. I just need practice, and better planning.
While this plane is a giggle to fly, it was only $30. It has been hard-crashed once already. If I can re-tank it and fly longer, great! If I can only put the original tanks back on, then so be it. I doubt I will rebuild this one next time it crashes. It has already served it's purpose... learning and experiencing twin flight...I'm hooked!
Last edited by 944_Jim on Tue Nov 13, 2018 10:14 pm; edited 1 time in total
944_Jim- Diamond Member
-
Posts : 1950
Join date : 2017-02-08
Age : 59
Location : NE MS
Re: Diy tanks in MS
![]() 944_Jim Tue Nov 13, 2018 8:15 pm
944_Jim Tue Nov 13, 2018 8:15 pm
Hi Roddy,
I got the idea of using a wood form after reading your tank-building exploits! My end caps wound up a smidge too large on this last tank. They needed to be cut for a tighter fit. Most of the joints were sealed/soldered "wicking up." Only one corner leaked...easily fixed.
Oh, and concerning sealing tanks...I prefer Por-15. Been there, done that on my 1971 Triumph TR6 15 years ago, and on my 1983 Honda CB1100F, 1965 Honda S-90. The stuff is too thick for a model airplane tank. Another similar product is Red Kote, which may be thinner. But our tanks are really too small to coat internally.
944_Jim- Diamond Member
-
Posts : 1950
Join date : 2017-02-08
Age : 59
Location : NE MS
Re: Diy tanks in MS
![]() Ken Cook Tue Nov 13, 2018 8:44 pm
Ken Cook Tue Nov 13, 2018 8:44 pm
Jim, I for one would really like to see you get this one back in the air. I thought your video was great and truly looking forward to more. I'm curious though if you were to say rebuild another one, is it possible to change the fuse slightly by raising or lowering the wing? Essentially allowing for more convenient tank height configuration.
Is your Weller a gun or iron? I have noticed many times due to heat cycling that the Weller gun which uses the nuts to retain the replaceable tips come loose. When this happens, the tip gets hot but not as hot as it should. The replaceable tip also becomes black and scaly where it's retained in the gun which causes a lot of resistance. I clean off the scale and reinstall in the gun and it takes seconds to heat up to temp.
Is your Weller a gun or iron? I have noticed many times due to heat cycling that the Weller gun which uses the nuts to retain the replaceable tips come loose. When this happens, the tip gets hot but not as hot as it should. The replaceable tip also becomes black and scaly where it's retained in the gun which causes a lot of resistance. I clean off the scale and reinstall in the gun and it takes seconds to heat up to temp.
Ken Cook- Top Poster
- Posts : 5442
Join date : 2012-03-27
Location : pennsylvania
Re: Diy tanks in MS
![]() 944_Jim Tue Nov 13, 2018 9:45 pm
944_Jim Tue Nov 13, 2018 9:45 pm
Ken, you are spot on concerning my gun. It is time to replace the tip, and will do so before the next tank-attempt. I appreciate your feedback, and support!
I'm not done with this one just yet.
This model is straight up profile...I built it for a quick jump into twins. If I did build another Black Hawk Models Mossie, I'd strongly consider inverting the engines, hanging the tanks under the wings as I did on this one, and top-mounting the controls. It is the separation of controls from the inboard tank that is key here.
With the study of this issue, I am much more willing to build a slightly bigger version with a built-up wing. England's Frog of years ago designed a 36" kit with a slightly symmetrical wing. I have the plans, and bought tracings of the wing ribs from a "chap in the old country"(not published on the plan).
There are also a couple of others in similar configurations within a few inches (bigger and smaller), and the DH Comet (in RED) similar to this ...but the Frog has me jumping!
944_Jim- Diamond Member
-
Posts : 1950
Join date : 2017-02-08
Age : 59
Location : NE MS
Re: Diy tanks in MS
![]() Ken Cook Wed Nov 14, 2018 7:51 pm
Ken Cook Wed Nov 14, 2018 7:51 pm
I agree, the DH 88 is a beautiful plane and worthy of making one. I believe the real one just became airworthy once again.
Ken Cook- Top Poster
- Posts : 5442
Join date : 2012-03-27
Location : pennsylvania
» Pee Wee Tee Dee 020
» COX TeeDee 010 extended run tank/mount
» Metal Fuel Tanks
» Best 2oz fuel tanks
» OK Cub plastic tank
» COX TeeDee 010 extended run tank/mount
» Metal Fuel Tanks
» Best 2oz fuel tanks
» OK Cub plastic tank
Page 1 of 1
Permissions in this forum:
You cannot reply to topics in this forum