

 Rules
Rules
by HalfaDave Today at 9:34 am
» Jim Walker Firebaby
by rsv1cox Today at 8:27 am
» Enya .09 II Questions
by sosam117 Today at 8:24 am
» music vids.. some of your favorites
by crankbndr Today at 8:03 am
» Draco Goes Flying, But Misses the Eclipse
by HalfaDave Yesterday at 9:59 pm
» A prototype Cox Reed-valve marine engine
by davidll1984 Yesterday at 9:15 pm
» Wen Mac .049 - Conditioning.
by MauricioB Yesterday at 12:21 pm
» Happy 53rd birthday Mauricio!!!
by MauricioB Yesterday at 11:47 am
» Testers Sprite engine swap
by Greenman38633 Yesterday at 10:57 am
» UV Restore of Yellowed Decals
by Levent Suberk Yesterday at 8:59 am
» 22mm 2-blade nylon marine prop and solid-shaft drive
by roddie Yesterday at 6:46 am
» Post edit??
by roddie Yesterday at 5:33 am


Revamping my Lil Roughneck

Revamping my Lil Roughneck
![]() balogh Thu Aug 22, 2019 12:32 am
balogh Thu Aug 22, 2019 12:32 am

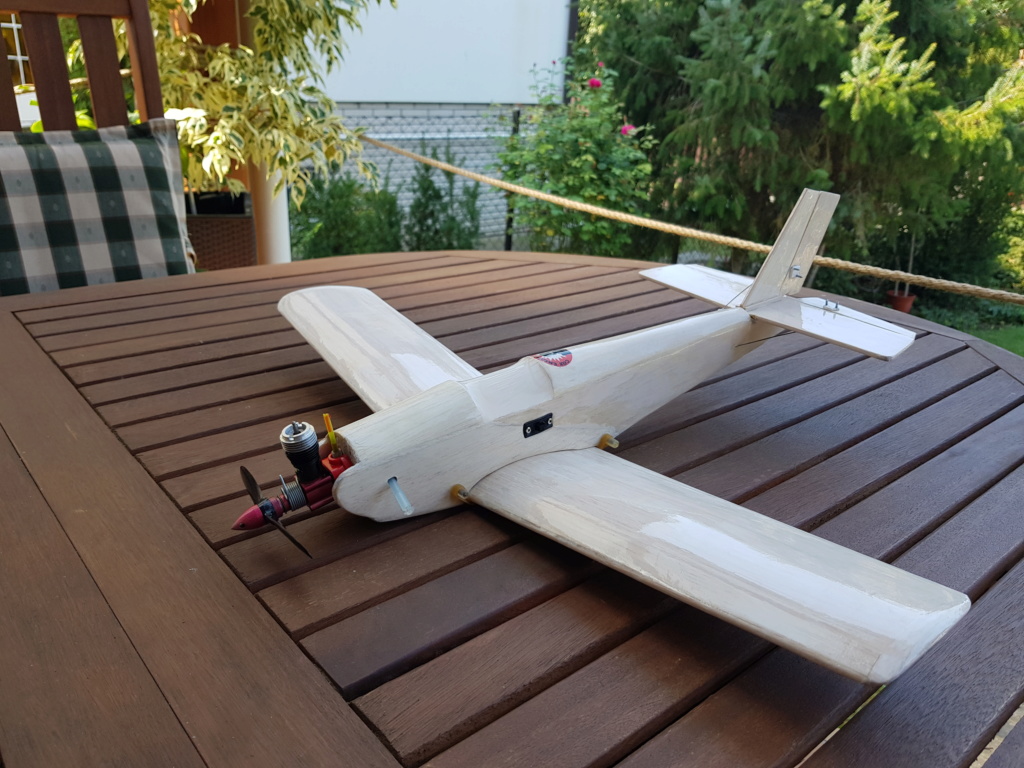
The plane is a ball to fly. Designed originally for 020 engines, the 049 powerplant makes wonders.:
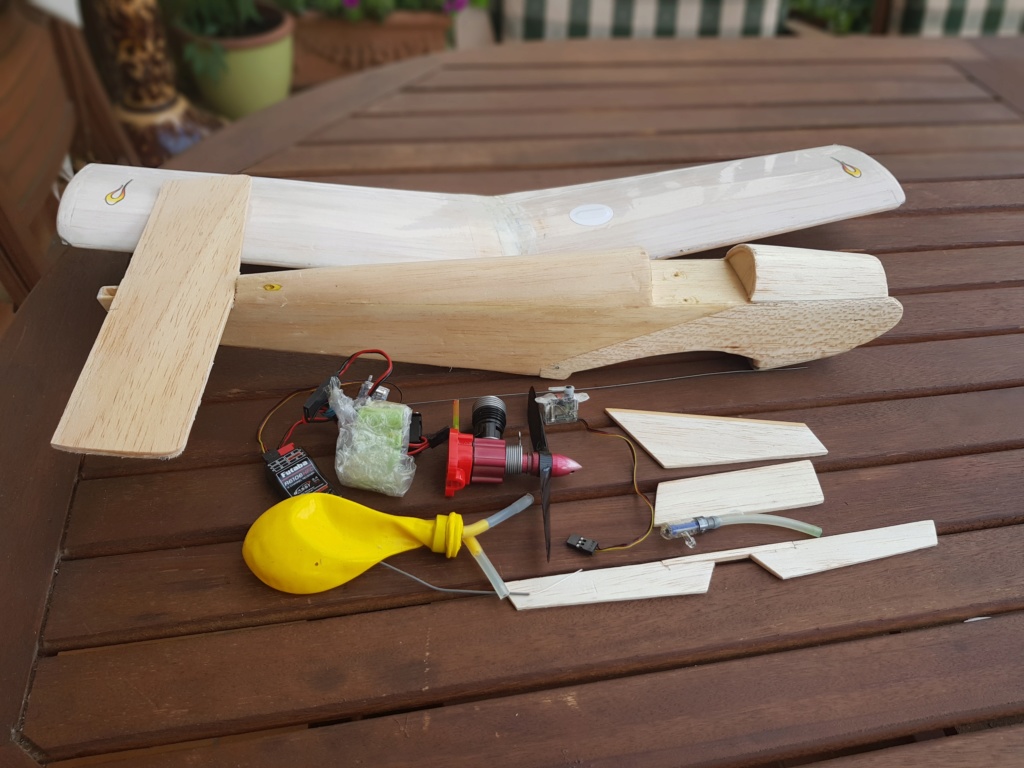
The many hours of stressed use and landings in deep uncut grass have left their marks on the plane. The monocote was punched on several places allowing castor to find its way to the balsa, and I also noticed the stabilizer detached from the fuselage, and both the rudder and elevator, with stock thickness of 1,5mm only, were cracked beyond repair.
The guts of the bird remained relatively intact, with only one of the Hitec 35 HD nano servos (I bought it in a hobby shop near Tampa when visiting the US couple years ago!) had its mounting ears broken.
So I thought it is high time I did something about it...an easy-lazy way would have been to put it into retirement and buy and build another one . Searching ebay gave no results, the last time I saw a Lil Roughneck factory kit there was long ago and it went well over 100 bucks. Plus shipping another 50 bucks, or so and customs duties on top with value added tax would have put the price tag above 200 USD...
My earlier source, Steve from Selecthobbies does not carry the plane anymore, but told me earlier he may design and sell a reproduction...
Back to my plane, I decided to give revamping a try...I am not particularly good at revamping used machinery or anything at all... lack of manual skills of some folks here, wider selection of tools and a dedicated workshop, hence my reluctance and hesitation upfront. I typically build on the porch, and when gusts come, return to the kitchen to the utmost delight of my wife..
Things worked out better than I thought:
Removing the battered, transparent white monocote film from the fuselage left me with a balsa surface rather slimy particularly near the engine mount area. Castor makes its way wherever it wants, there is no way I can stop it!!!
Luckily I had applied some fuel proofing varnish when building it some years ago so the penetration of castor into balsa was only superficial. Discoloration of the wood by castor, however, could not be removed despite my trials with various agents including the nail polish remover of my wife, and the color of castor-soaked balsa became even uglier.
So I cut thin cheek sheeting from scrap balsa, and after applying some polyurethane varnish on its inner side, CA-d it to the fuselage front, cleaned previously from castor by nail polish remover... Also added another thin balsa cover layer to the bent turtle-back top of the fuselage behind the engine, the most castor-impacted area.
I sanded the cheek external doublers to well below 1mm thickness, these doublers serve mainly for cosmetic purpose, and I did not want to add too much drag to the fuselage contour.
Next thing was to replace the broken control surfaces: I cut new vertical stabilizer, rudder, and elevator from 1,5mm thick balsa and doubled each to have 3mm thick parts, as opposed to the stock 2mm. Thoroughly sanded and treated all with polyuretnhane varnish.
I doubled the cracked horizontal stabilizer by gluing a thin balsa doubler over its full surface, now I have a stronger stab of 3mm thickness instead of the stock 2mm - hinges will more easily penetrate into and stick in thicker material, and will hold hopefully better.
All in all not too much weight and drag added, I hope the plane retains its original flying characteristics.
The broken servo ears were doctored by CA gluing some glass reinforced textile hinges cut and bent to size. Practicality prevails over aesthetics. Looks stronger than the factory ears, we will see how they work out...these nano servos became almost unobtainium here and once found, I pay near 30 USD for each... so it is worth repairing them if otherwise functionally OK, which it was...
After spraying the whole fuselage and its components with polyurethane, I started wondering if I should do the revamp on the wing too.
Punched with small micro-holes in the field by stubs of dry grass, there is one major hole about 1cm diameter that I needed to cover up temporarily on the upper side of this boxed, balsa sheeted wing..not nice but at least worked so far, now I have to do something about it too.
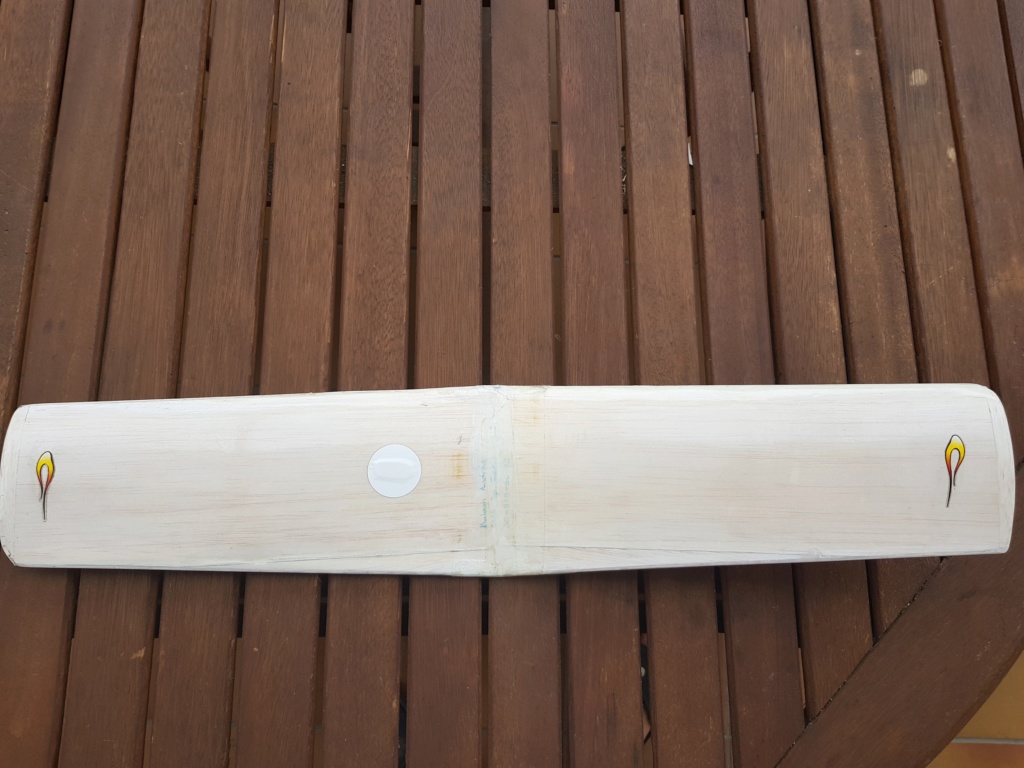
I am not yet sure how I will patch it to keep the patch even with the surrounding balsa cover..I will probably sink a balsa block through the hole down the whole thickness of the wing, glue it to the inside of the bottom sheeting, then sand off the protruding part on the top...not yet sure.
If interested, stay tuned, I will carry this thread up till the maiden flight..I will be away from home the entire next week so it won't happen before early September.
balogh- Top Poster


Posts : 4740
Join date : 2011-11-06
Age : 65
Location : Budapest Hungary
Re: Revamping my Lil Roughneck
![]() NEW222 Thu Aug 22, 2019 1:23 am
NEW222 Thu Aug 22, 2019 1:23 am

NEW222- Top Poster
- Posts : 3892
Join date : 2011-08-13
Age : 45
Location : oakbank, mb
Re: Revamping my Lil Roughneck
![]() Kim Thu Aug 22, 2019 6:50 am
Kim Thu Aug 22, 2019 6:50 am
NEW222 wrote:Cannot speak for anyone else, but I will be watching! I love a good restoration.
Me too! One of my favorite classics!!!

Kim- Top Poster
-
Posts : 8519
Join date : 2011-09-06
Location : South East Missouri
 Sounds Good !!

getback- Top Poster
-
Posts : 10097
Join date : 2013-01-18
Age : 66
Location : julian , NC
Re: Revamping my Lil Roughneck
![]() balogh Fri Aug 23, 2019 6:42 am
balogh Fri Aug 23, 2019 6:42 am
I am done with the restoration less the wing..still need to figure out how to patch up the hole on the top of the left wing so as to keep the patch even with the sheeting..
The fuselage and tail look nice again and more importantly, castor resistant due to the polyurethane spray under the transparent white oracover..the external cheek sheeting has veiled the bad discoloration of the nose by castor ingress, even if only superficial ingress..
My good old home assembled purple Killa' Bee clone that I just call TeeDeeReedy is as new even after many hours of service. Compression is like new...when I built it I hand fitted the cylinder and piston and selected a set with the best pinch at TDC, and now after many hours of seamless performance the mating surfaces have settled in with still a little pinch and perfect fit for compression, and this does not seem to change with more and more flights under its belt..
Once I am back after next week I will maiden the Lil Roughneck and also take care of that aesthetic issue of the wing.


balogh- Top Poster
-
Posts : 4740
Join date : 2011-11-06
Age : 65
Location : Budapest Hungary
Re: Revamping my Lil Roughneck
![]() smooth_bill Fri Aug 23, 2019 4:23 pm
smooth_bill Fri Aug 23, 2019 4:23 pm
It's difficult to patch sheet Balsa, as nicely as you have done.
I'm curious how you built your Killer Bee clone engine?
I have one NIB KB .049 that has all the proper external components, and have picked up lightened cranks from Cox Int, but have no idea what's inside my engine? Makes me wonder if Estes had all the correct parts (at least initially), to put a few of these together?
Bill
smooth_bill- Gold Member

- Posts : 229
Join date : 2012-02-19
Age : 86
Location : Beaverton, OR
RE: Revamping my LIL' Roughneck
![]() 66 Malibu Fri Aug 23, 2019 5:39 pm
66 Malibu Fri Aug 23, 2019 5:39 pm
This is not the 100% gospel truth (considering how Cox and Estes did things in the last years) but I've found on my Cox .049 KB's with gold anodized case/ black backplate and my Cox .051KB with gold anodized case/ red backplate that they have all the "right" high perf parts.smooth_bill wrote:Very nice work Balogh!
It's difficult to patch sheet Balsa, as nicely as you have done.
I'm curious how you built your Killer Bee clone engine?
I have one NIB KB .049 that has all the proper external components, and have picked up lightened cranks from Cox Int, but have no idea what's inside my engine? Makes me wonder if Estes had all the correct parts (at least initially), to put a few of these together?
Bill
My Estes .049KB's with natural aluminum anodized case and black backplate all have "regular Bee crankcases and pistons/rods.
This last statement holds true for a NIB Cox KB that I bought at a LHS in 2008. It did not have the yellow NV either.
FWIW, Steve...…………..
66 Malibu- Gold Member
- Posts : 477
Join date : 2012-02-28
Location : Georgia
Re: Revamping my Lil Roughneck
![]() balogh Sat Aug 24, 2019 2:48 am
balogh Sat Aug 24, 2019 2:48 am
balogh- Top Poster
-
Posts : 4740
Join date : 2011-11-06
Age : 65
Location : Budapest Hungary
Re: Revamping my Lil Roughneck
![]() rsv1cox Sat Aug 24, 2019 6:04 am
rsv1cox Sat Aug 24, 2019 6:04 am
Looking forward to reading about the rest of the story.
Bob

rsv1cox- Top Poster
-
Posts : 10519
Join date : 2014-08-18
Location : West Virginia
Re: Revamping my Lil Roughneck
![]() balogh Sat Aug 24, 2019 6:24 am
balogh Sat Aug 24, 2019 6:24 am
In the meantime - during a long interconti flight I took today - I have figured out how to patch the boxed wing from its inside, thus to avoid any bulge on the outside of the sheeting...so stay tuned, more to come on this.
balogh- Top Poster
-
Posts : 4740
Join date : 2011-11-06
Age : 65
Location : Budapest Hungary
Re: Revamping my Lil Roughneck
![]() balogh Sun Sep 01, 2019 5:23 am
balogh Sun Sep 01, 2019 5:23 am
Some of you may have a better technology, I found mine quick and dirty and amusing too
First I peeled off the oracover from the wing and noted some castor penetration into the sheeting in the wing center area, even if not deep..
Then I removed the temporary plywood patch glued from the outside to the wing some time ago when a wild grass stub in the field where I fly punched the hole, and forming the hole into a rectangular opening, cut a patch from a scrap balsa sheet whose color and patterns resembled the sheet.
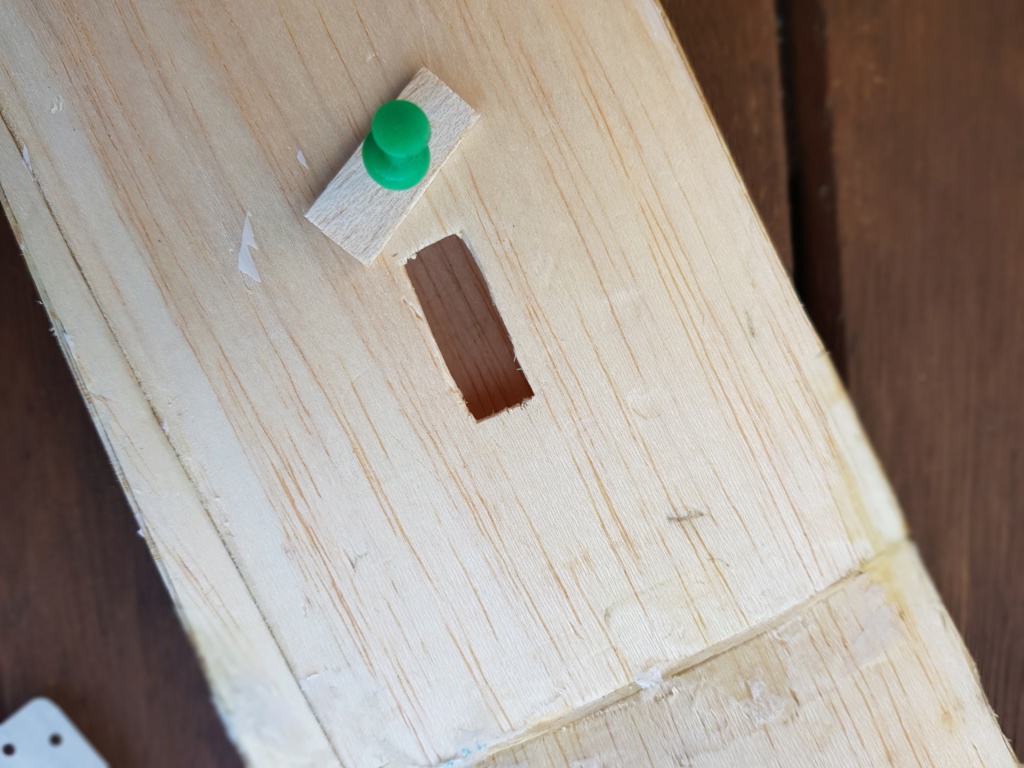
Then overlapped 2 glass fiber reinforced textile hinges along their short side such that their combined length thus achieved exceeded that of the hole. A toothpick stuck into the hinges, and with a drop of CA glue on the other side of the toothpick gave me an assembly that I could shove into the wing through the hole (note that the hinges are still flexible as they were not yet soaked in CA, only around the toothpick, so it was not difficult to tuck the assembly into the hole even if its size is smaller), and manipulate it inside the wing with the toothpick:
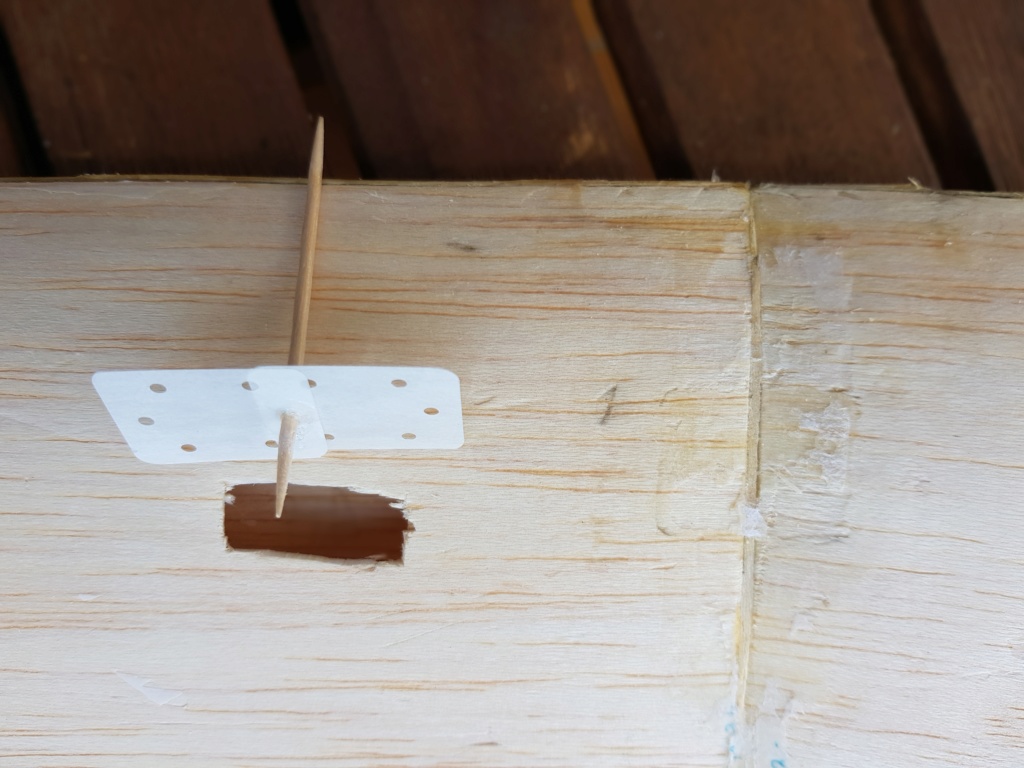
I copied the contour of the hole on the hinges with a pencil to indicate the width of the hinge edges to apply CA on...I moved the hinge assy around with the toothpick until all edges were CA-d and then pulled on the toothpick to press the hinges to the perimeter of the hole , and when the CA cured, cut the excess of the toothpick with a clipper:
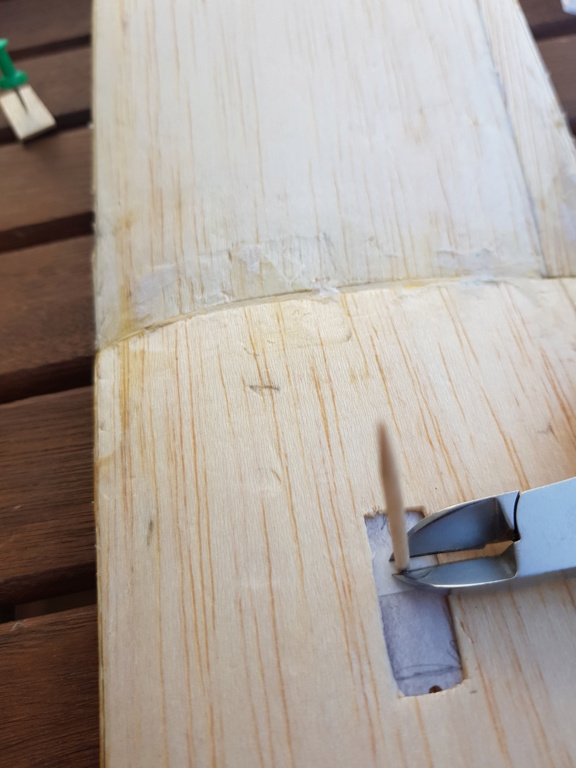
The hinges now soaked in solidified CA will give strength to the wing in the hole area and prevent further cracking of the balsa sheeting.
Then I inserted the pre-cut balsa with CA glue around its edges and on its inside, pushed it on the hinges in the bottom of the hole, then sanded it even with the sheeting around it.
I then cleaned the whole wing with a solvent to remove the castor slime, sanded it and sprayed with Polyurethane - just like the rest of the fuselage while refurbishing it - and covered the wing with a new foil of transparent white Oracover...The patch is not too much visible now, (see North of the switch below, and compare it with the original patch shown a few posts above) , but it is nicely level with the sheeting, holds strongly, and I may decide to hide it later with a COX sticker.

So the refurbishment project is over, next thing on the agenda is the maiden flight of my quasi-new Lil' Roughneck...stay tuned..
balogh- Top Poster
-
Posts : 4740
Join date : 2011-11-06
Age : 65
Location : Budapest Hungary
Re: Revamping my Lil Roughneck
![]() ian1954 Sun Sep 01, 2019 11:39 am
ian1954 Sun Sep 01, 2019 11:39 am
Castor soaked balsa is difficult to deal with. Any solvent tends to dilute it so that, although diluted, it penetrates more. I have seen acetone and sometimes alcohol applied followed by baking powder (sodium bicarbonate) to soak up the residue. It is still messy though - dirty powder everywhere.

ian1954- Diamond Member

- Posts : 2688
Join date : 2011-11-16
Age : 69
Location : England
Re: Revamping my Lil Roughneck
![]() balogh Sun Sep 01, 2019 12:25 pm
balogh Sun Sep 01, 2019 12:25 pm
Even though I used a colorless lacque spray (sold to protect aluminum alloy wheel rings of cars) on the fuselage and wing center when I built this plane, nitro and castor may better be locked out from balsa by polyurethane for which I only recently found a procurement source.
Given that my intervention was not late, the castor penetration was, even if not bleached out from the balsa but, removed sufficiently to allow the polyurethane to cure and produce a solid top surface.
Where penetration was deeper and remained unesthetical after solvent cleaning, I applied the thin doubler sheeting to lend a fresh look to the cowling area again.
Although I rarely manage to build or repair planes to perfection, in the past few months I managed to revamp my Toucan, the Cosmic Wind, the Roaring 20 - I sang my song on those revamps here on CEF - and now the Lil Roughneck, and am happy because with the polyurethane proofing I could extend the life of these cuties by many years.
balogh- Top Poster
-
Posts : 4740
Join date : 2011-11-06
Age : 65
Location : Budapest Hungary
Re: Revamping my Lil Roughneck
![]() 1/2A Nut Sun Sep 01, 2019 1:28 pm
1/2A Nut Sun Sep 01, 2019 1:28 pm
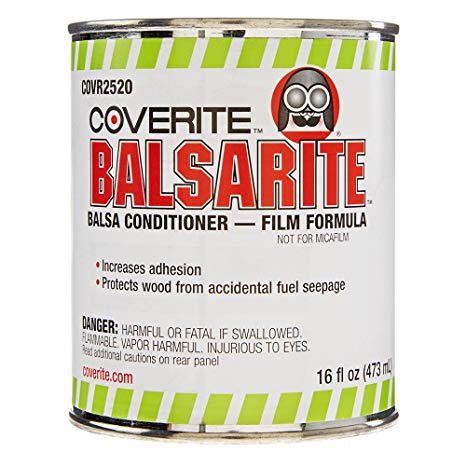
to start using Balsarite!


1/2A Nut- Top Poster
- Posts : 3421
Join date : 2013-10-20
Age : 60
Location : Brad in Texas
Re: Revamping my Lil Roughneck
![]() balogh Mon Sep 02, 2019 12:30 pm
balogh Mon Sep 02, 2019 12:30 pm
balogh- Top Poster
-
Posts : 4740
Join date : 2011-11-06
Age : 65
Location : Budapest Hungary
Re: Revamping my Lil Roughneck
![]() ian1954 Mon Sep 02, 2019 5:14 pm
ian1954 Mon Sep 02, 2019 5:14 pm
https://deluxematerials.co.uk/collections/emulsion-adhesives/products/cover-grip
ian1954- Diamond Member
- Posts : 2688
Join date : 2011-11-16
Age : 69
Location : England
Re: Revamping my Lil Roughneck
![]() 1/2A Nut Mon Sep 02, 2019 11:23 pm
1/2A Nut Mon Sep 02, 2019 11:23 pm
It wicks in and runs over night after a flight you check it the next day
and shocker! Have to coat inside and out full coverage couple of coats.
Since then 3 other ply rolled fuselages have not shown any oil seep.
It started with a TD .010 and ended with a TD .020

Skorch I stayed bone dry along with the Skorch II
Make sure you get it around the switch cutout too the screw holes etc.

1/2A Nut- Top Poster
- Posts : 3421
Join date : 2013-10-20
Age : 60
Location : Brad in Texas
Re: Revamping my Lil Roughneck
![]() balogh Mon Sep 02, 2019 11:40 pm
balogh Mon Sep 02, 2019 11:40 pm
 ..With ICE-based R/C modeling getting scarce in Hungary loners like masself should sniff around long before I find a hobbyshop selling what I want...castor based glow fuel is almost gone...small props for 049 and 09 engines hardly heard of, let alone props for my 010 and 020 COX engines....took me some time to find polyurethane spray etc..
No problem I will always try to improvise - this is part of modeling anyway - at the cost of building heavier and less appealing birds than I could on a rich parts and components availability base

balogh- Top Poster
-
Posts : 4740
Join date : 2011-11-06
Age : 65
Location : Budapest Hungary
Re: Revamping my Lil Roughneck
![]() 1/2A Nut Tue Sep 03, 2019 1:05 am
1/2A Nut Tue Sep 03, 2019 1:05 am
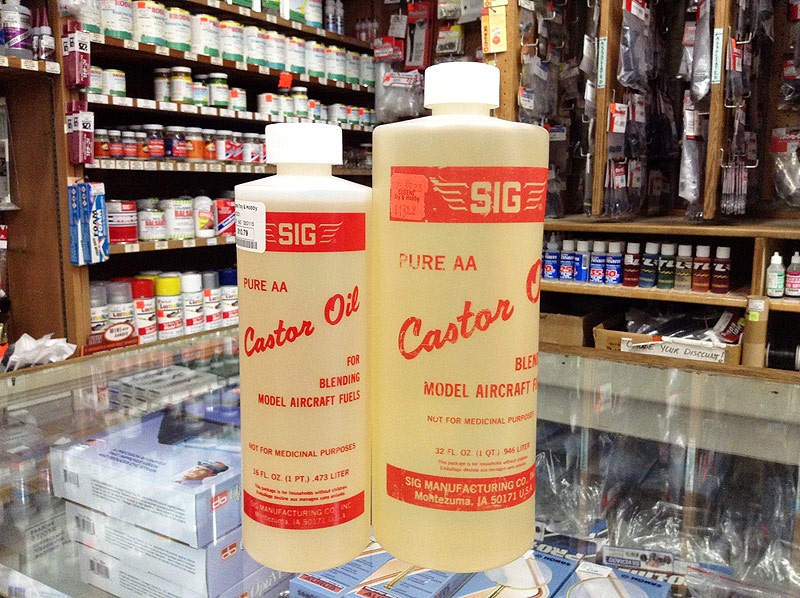
should be able to buy Sig castor oil from the states and mix in some per gallon of fuel. If you can buy from ebay doing a world wide search just a matter
of working out shipping if they are willing.
https://www.ebay.com/itm/COX-Model-Engines-010-020-049-09-15-Fuel-blending-Castor-Oil-After-run-Oil-Combo/254347615115?hash=item3b384c9b8b:g:q7oAAOSw1pZdbDlE
Last edited by 1/2A Nut on Tue Sep 03, 2019 1:15 am; edited 1 time in total
1/2A Nut- Top Poster
- Posts : 3421
Join date : 2013-10-20
Age : 60
Location : Brad in Texas
Re: Revamping my Lil Roughneck
![]() balogh Tue Sep 03, 2019 1:14 am
balogh Tue Sep 03, 2019 1:14 am
balogh- Top Poster
-
Posts : 4740
Join date : 2011-11-06
Age : 65
Location : Budapest Hungary
Re: Revamping my Lil Roughneck
![]() getback Tue Sep 03, 2019 7:41 am
getback Tue Sep 03, 2019 7:41 am
getback- Top Poster
-
Posts : 10097
Join date : 2013-01-18
Age : 66
Location : julian , NC
Re: Revamping my Lil Roughneck
![]() balogh Tue Sep 03, 2019 8:01 am
balogh Tue Sep 03, 2019 8:01 am
One reason I replace hard balsa and hardwood spars and leading edges in my kits with carbon tubes or rectangular hollow sections is for the extra strength against wing folding, buckling, or lead edge breaking when landing on hard terrain. etc..
balogh- Top Poster
-
Posts : 4740
Join date : 2011-11-06
Age : 65
Location : Budapest Hungary
Lil Roughneck
![]() Hopkins Wed Sep 18, 2019 1:26 pm
Hopkins Wed Sep 18, 2019 1:26 pm
I enjoyed your Lil Roughneck restoration story.
Did you know that plans for Lil Roughneck and many similar planes are free for download on outerzone.co.uk?
I see some of the photos show the cylinder head adapted for an ordinary glowplug. What glowplug do you recommend? How does one achieve the right combustion chamber volume with a standard glowplug? How far does the glowplug protrude into the combustion chamber?
Has anyone done a glowhead conversion for the 020?
Regards
Hopkins

Hopkins- New Member

- Posts : 2
Join date : 2015-11-17
Re: Revamping my Lil Roughneck
![]() balogh Wed Sep 18, 2019 2:35 pm
balogh Wed Sep 18, 2019 2:35 pm
Welcome to the forum!!!
Thanks for your comments. My Lil Roughneck was built from probably the last stock of original factory kits so I do everything possible to save this very fine plane in good flying condition for as long as I best can.
The heads on the pics in this thread are Merlin heads with drop in plugs that are hard to find nowadays. Therefore I switched to plug adaptor heads.
The adapter glowheads I use are for turbo plugs not for regular plugs. These latter add the minute volume between the plug and head threads to the combustion space at the heavy cost of rpm-s. Turbo plugs instead seal at their conical tips and, added the special combustion chamber shape, produce more power than stock COX high compression heads.
Turbo heads were used to be known as Galbreath heads which, together with the non-regular size Nelson turbo plugs are still sold at e.g. www.kittingittogether.com. and at http://www.the-printer.net/DookCat.html. You may also bump into them on ebay sometimes..
CEF member Greg of www.kamtechnik.com produces and sells the latest 049size turbo heads for which regular size turbo plugs are sold in common RC hobbyshops. Brad aka 1/2A Nut has tested the Kamtechnik turbo heads and found them very good..my less sophisticated flight tests with Kamtechnik heads confirm the same.
I understand Greg may make and sell 020 size turbo adaptor heads soon too.
balogh- Top Poster
-
Posts : 4740
Join date : 2011-11-06
Age : 65
Location : Budapest Hungary
Lil Roughneck
![]() Hopkins Thu Sep 19, 2019 10:20 am
Hopkins Thu Sep 19, 2019 10:20 am
Thanks for the info on glowheads and plugs.
I didn't think of the threads also adding to volume.. makes sense.. the more relevant the smaller the engine.
I drilled and tapped an 020 head and tried various standard plugs I had with and without washers. I only got one weak run and it wouldn't lean out.
I may well try a turbo plug head one of these days...
Regards
Hopkins
Hopkins- New Member
- Posts : 2
Join date : 2015-11-17
» Lil Roughneck 020/051
» Lil Roughneck kit on ebay
» Lil' Roughneck 049 flight video