

 Rules
Rules
Log in
Search
Latest topics
» Draco Goes Flying, But Misses the Eclipseby HalfaDave Today at 9:59 pm
» A prototype Cox Reed-valve marine engine
by davidll1984 Today at 9:15 pm
» music vids.. some of your favorites
by crankbndr Today at 7:26 pm
» Enya .09 II Questions
by Surfer_kris Today at 2:45 pm
» Wen Mac .049 - Conditioning.
by MauricioB Today at 12:21 pm
» Happy 53rd birthday Mauricio!!!
by MauricioB Today at 11:47 am
» Jim Walker Firebaby
by rdw777 Today at 11:22 am
» Testers Sprite engine swap
by Greenman38633 Today at 10:57 am
» UV Restore of Yellowed Decals
by Levent Suberk Today at 8:59 am
» 22mm 2-blade nylon marine prop and solid-shaft drive
by roddie Today at 6:46 am
» Post edit??
by roddie Today at 5:33 am
» Original Super Power fuel formula?
by HalfaDave Yesterday at 7:28 pm
Cox Engine of The Month


CEF Traveling Engine


Win This Engine!

Live on Patrol


Time to put this one to bed
Page 1 of 1

Time to put this one to bed
![]() batjac Thu Sep 10, 2015 4:36 am
batjac Thu Sep 10, 2015 4:36 am
Last year I cut out parts for two airplanes to use the Cox foam wings, one for a TD and one for a Black Widow. I built the TD version as seen in this thread, and put the Black Widow parts on the shelf. From time to time as I was cleaning up or looking around for things, I’d see the parts and think about finishing the second plane, but there was always another project to get to.
Well, lately the Churchyard field across the street from my house has been dry and brown from the hot weather. I’ve not been wanting to fly there, as I could just see me starting a grass fire with one of my nitro engines. Burning down a churchyard. REAL bad mark in my folder on Judgement Day… So, I figured I need a good 1/2A size electric plane other than my “just adequate” electric coroplast PT-19 Trainer. I’d thought about using some Cox wings for an electric, so I went ahead and pulled the FW-190 parts off the shelf and got back to it, deciding it was time to finish it off and put it to bed. Nothing fancy, just a single color fuse and the wings. Just something Quick and Dirty. Out came the parts and the plans:

Finishing out the fuselage I cut out, I started with the doublers. The plans call for ½” balsa blocks for the cowl blocks, but I decided on 1/16” ply doublers instead. After gluing those in place, I aligned and glued in the wing spars.
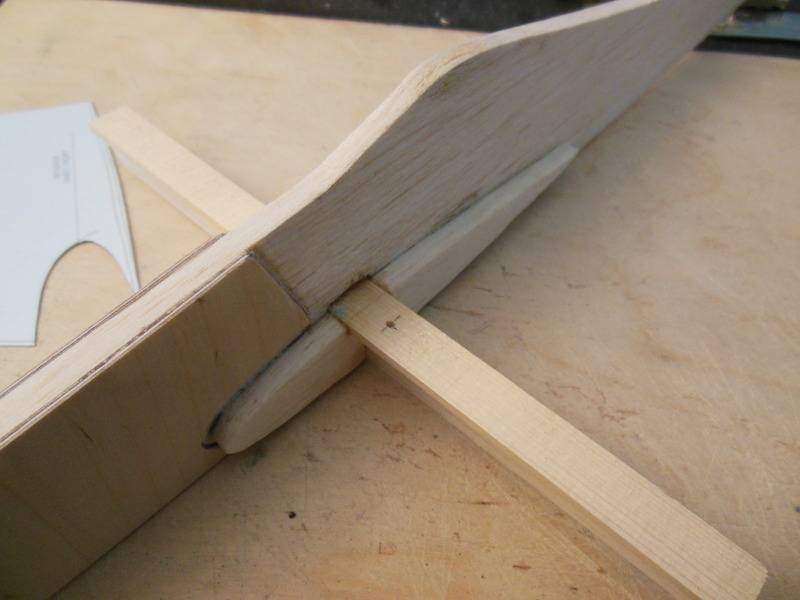
The plans call for a bellcrank in the wing, and that’s what I did the first time. But I wanted to emphasize the “quick” part. I like the Cox plastic wingtip, and the inboard one has the leadout guides molded into it, so I’m going to use that. ‘Sides, it saves me the time of cutting out and shaping balsa wingtips. On the Cox ME-109 Super Stunter, the lines go above the wing into the fuselage instead of through the wingtips and into the wing. So, I’m just going to externally mount the bellcrank. I chose the location for the bellcrank and drilled the spar for the mounting screw.
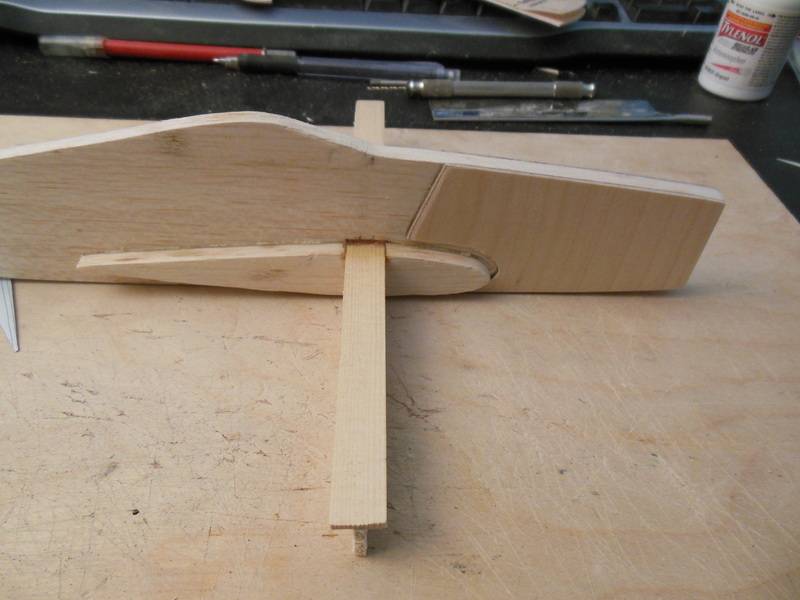
Next step was to fabricate the pushrod. Here’s the method I like to use. First I make lines on the stab to match the sides of the aft fuse. Next, I mount the control horn on the elevator. Then I tape the elevator to the stab and put pins along the lines I drew. The pins jig the stabilizer straight and square while I’m marking the pushrod.

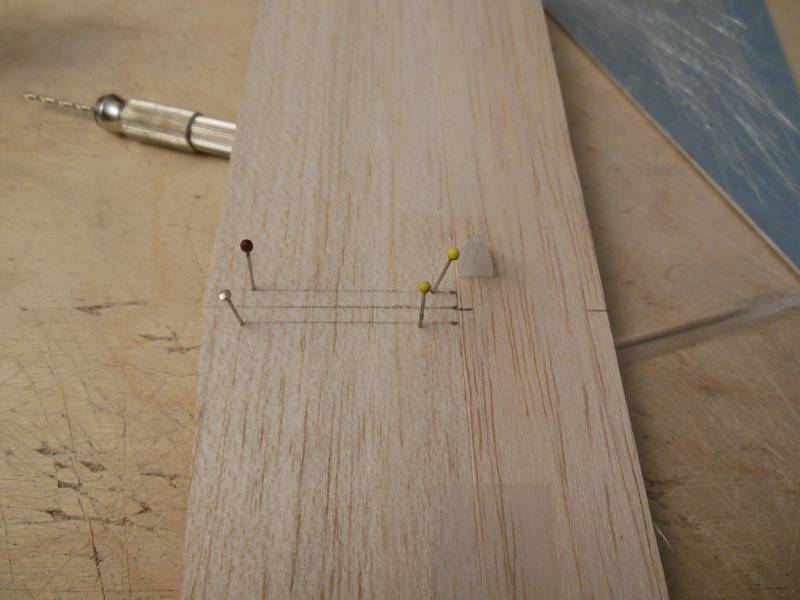
Then I mount the bellcrank to the spar and center it, slide the stab into the cutout in the fuse, and put one end of the pushrod through the control horn with the elevator held in the neutral position. The pushrod already has the z-bend in the elevator end, and a dogleg bent into it for later fine adjustment. I then lay the pushrod on top of the bellcrank and mark the location of the bellcrank hole on the pushrod with a black sharpie permanent marker.

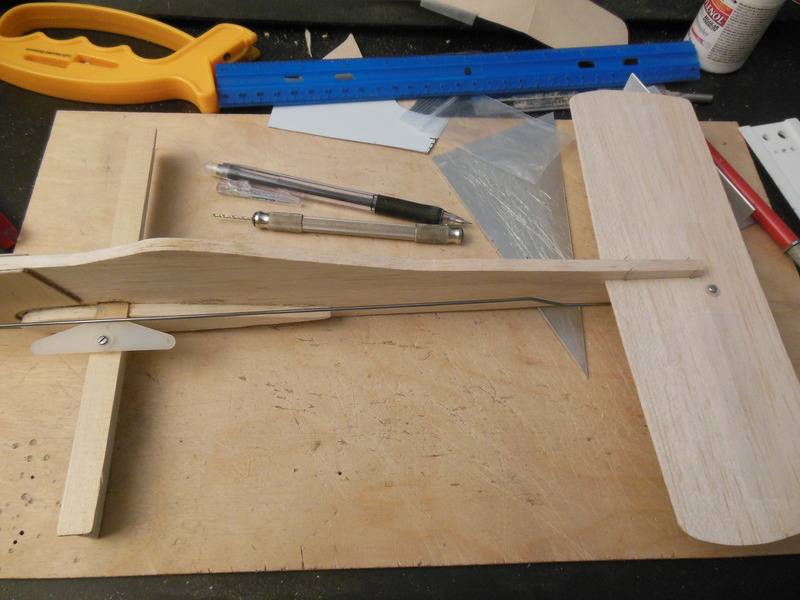
Once I have the location marked, I remove the pushrod and use my new favorite tool to put in the z-bend. This is the tool I should have had 25 years ago. It makes a perfect z-bend.
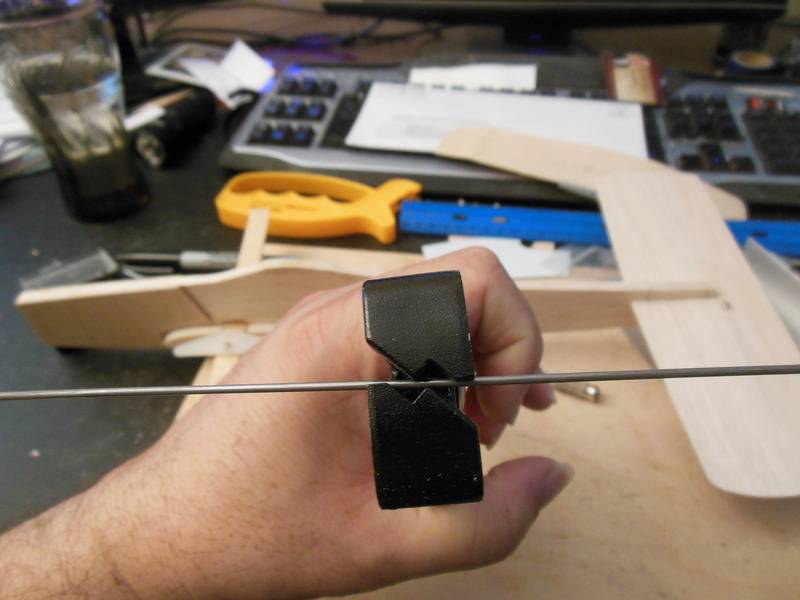

Then I cut off the rest of the rod with a Dremel tool, and here’s what I’m left with.

Last thing for tonight is to mark the hinge line on the 1/16” tail surfaces, insert and glue in place the thread hinge, and then glue the stab/elevator in place. I’ve never really found a good thread I like for the thread hinges, although I’m coming to love thread hinges for my 1/2A control line models. So, I’m now experimenting with using 10# Spectra for the thread.

More to come…
The Cliffhanger Mark
batjac- Diamond Member


Posts : 2333
Join date : 2013-05-22
Age : 61
Location : Broken Arrow, OK, USA
Re: Time to put this one to bed
![]() larrys4227 Thu Sep 10, 2015 5:40 am
larrys4227 Thu Sep 10, 2015 5:40 am
Nice!! Love build threads ..... keep 'em coming, and good job on the sewn hinge line. 

larrys4227- Gold Member

- Posts : 338
Join date : 2015-07-23
Location : Lakeland, FL
Re: Time to put this one to bed
![]() getback Thu Sep 10, 2015 9:01 am
getback Thu Sep 10, 2015 9:01 am
Looking good Mark, I have one of those Z bender tools and cant ever get the right bend I want in small wire / is there a certain way to use this tool or just too small wire like .040-.050 ga. range ? I see yours came out nice ! Eric 

getback- Top Poster

-
Posts : 10095
Join date : 2013-01-18
Age : 66
Location : julian , NC
Re: Time to put this one to bed
![]() RknRusty Thu Sep 10, 2015 9:12 am
RknRusty Thu Sep 10, 2015 9:12 am
I'm watching with interest...
_________________
Don't Panic!
...and never Ever think about how good you are at something...
while you're doing it!
My Hot Rock & Blues Playlist
...and never Ever think about how good you are at something...
while you're doing it!
My Hot Rock & Blues Playlist

RknRusty- Rest In Peace

- Posts : 10869
Join date : 2011-08-10
Age : 68
Location : South Carolina, USA
Re: Time to put this one to bed
![]() roddie Thu Sep 10, 2015 8:57 pm
roddie Thu Sep 10, 2015 8:57 pm
Yea.. that's a cool tool, that Z-bender. I'll admit; I cheat when it comes to making pushrods. I'm frugal with music-wire. The thought of getting the length wrong and having to make another one irks me.. but then; I don't usually add an adjustment-bend (dog leg) either. I make the length "close" to where the bell-crank will mount.. then I lock/clamp the elev. to neutral, with the pushrod installed on both; it's horn.. and in the bell-crank hole. I then position the bell-crank to neutral, and drill "its" mounting-hole. I've always used 1/16" dia. music-wire for my 1/2A size profile designs. It's overkill.. and heavy, but here's where the cheating comes in.. My Rare Bear Speed Contest model utilizes two "L-bends" in the pushrod ends. I used sm. washers.. ("Hob-bits" 0-80 size) and the "Goldberg" type spring-style wheel retainers to secure it. I also generally position the elevator horn so that the pushrod is as close to the profile fuse as possible.. along with the bell-crank. It keeps the weight of the control-system close to the centerline.
I hope you never misplace those pliers.. but here's the L-bends I made for the Rare Bear.

If you make rub-plates for the pushrod (1/64" plywood for example).. and get your elev. horn close enough to the fuse.. you don't actually need to retain the ends. I like to take these clearances into account when installing the controls.
This Focke Wulf is a nice looking model. You're putting an electric motor on it? I'm very curious about that. I accidentally lit a sizable beach-grass field afire years ago on July 4th, when a "jumping-jack" firework ricocheted off a stone in the street.. and went sailing into the grass. By the time it took to run over... the flames were 6 feet high. It was a spectacle... About an acre of beach looked like a war-zone after the fire department left. Not one of my better memories...
I hope you never misplace those pliers.. but here's the L-bends I made for the Rare Bear.
If you make rub-plates for the pushrod (1/64" plywood for example).. and get your elev. horn close enough to the fuse.. you don't actually need to retain the ends. I like to take these clearances into account when installing the controls.
This Focke Wulf is a nice looking model. You're putting an electric motor on it? I'm very curious about that. I accidentally lit a sizable beach-grass field afire years ago on July 4th, when a "jumping-jack" firework ricocheted off a stone in the street.. and went sailing into the grass. By the time it took to run over... the flames were 6 feet high. It was a spectacle... About an acre of beach looked like a war-zone after the fire department left. Not one of my better memories...

roddie- Top Poster
- Posts : 8233
Join date : 2013-07-17
Age : 64
Location : N. Smithfield, Rhode Island -

Looks so good
![]() jmcalata Fri Sep 11, 2015 12:50 am
jmcalata Fri Sep 11, 2015 12:50 am
Wooooow it´s beautiful, it´s a fantastic CL Rare Bear.

jmcalata- Gold Member
- Posts : 442
Join date : 2012-01-30
Age : 56
Location : Guadalajara (Spain) -
nice job on the bellcrank
![]() happydad Fri Sep 11, 2015 1:32 am
happydad Fri Sep 11, 2015 1:32 am
roddie wrote:Yea.. that's a cool tool, that Z-bender. I'll admit; I cheat when it comes to making pushrods. I'm frugal with music-wire. The thought of getting the length wrong and having to make another one irks me.. but then; I don't usually add an adjustment-bend (dog leg) either. I make the length "close" to where the bell-crank will mount.. then I lock/clamp the elev. to neutral, with the pushrod installed on both; it's horn.. and in the bell-crank hole. I then position the bell-crank to neutral, and drill "its" mounting-hole. I've always used 1/16" dia. music-wire for my 1/2A size profile designs. It's overkill.. and heavy, but here's where the cheating comes in.. My Rare Bear Speed Contest model utilizes two "L-bends" in the pushrod ends. I used sm. washers.. ("Hob-bits" 0-80 size) and the "Goldberg" type spring-style wheel retainers to secure it. I also generally position the elevator horn so that the pushrod is as close to the profile fuse as possible.. along with the bell-crank. It keeps the weight of the control-system close to the centerline.
I hope you never misplace those pliers.. but here's the L-bends I made for the Rare Bear.
If you make rub-plates for the pushrod (1/64" plywood for example).. and get your elev. horn close enough to the fuse.. you don't actually need to retain the ends. I like to take these clearances into account when installing the controls.
This Focke Wulf is a nice looking model. You're putting an electric motor on it? I'm very curious about that. I accidentally lit a sizable beach-grass field afire years ago on July 4th, when a "jumping-jack" firework ricocheted off a stone in the street.. and went sailing into the grass. By the time it took to run over... the flames were 6 feet high. It was a spectacle... About an acre of beach looked like a war-zone after the fire department left. Not one of my better memories...
Roddie: You are a man after my own heart. Such a nice job on the bellcrank leadouts. I ALWAYS use thin solid wire. The plane looks great. When will we see a video?
happydad


happydad- Rest In Peace
- Posts : 1592
Join date : 2012-05-28
Age : 78
Location : Escondido, CA
Re: Time to put this one to bed
![]() roddie Fri Sep 11, 2015 8:50 pm
roddie Fri Sep 11, 2015 8:50 pm
happydad wrote:
Roddie: You are a man after my own heart. Such a nice job on the bellcrank leadouts. I ALWAYS use thin solid wire. The plane looks great. When will we see a video?
happydad
sending PM
roddie- Top Poster
- Posts : 8233
Join date : 2013-07-17
Age : 64
Location : N. Smithfield, Rhode Island -
Re: Time to put this one to bed
![]() batjac Sun Sep 13, 2015 12:59 am
batjac Sun Sep 13, 2015 12:59 am
getback wrote:Looking good Mark, I have one of those Z bender tools and cant ever get the right bend I want in small wire / is there a certain way to use this tool or just too small wire like .040-.050 ga. range ? I see yours came out nice ! Eric
Eric, I can't think of any time it didn't work for me. I'm not sure what the smallest size wire I've ever tried it on is, but it's always done me right.
The Dudley Mark
batjac- Diamond Member
-
Posts : 2333
Join date : 2013-05-22
Age : 61
Location : Broken Arrow, OK, USA
Re: Time to put this one to bed
![]() batjac Sun Sep 13, 2015 1:09 am
batjac Sun Sep 13, 2015 1:09 am
roddie wrote:Yea.. that's a cool tool, that Z-bender. I'll admit; I cheat when it comes to making pushrods. I'm frugal with music-wire. The thought of getting the length wrong and having to make another one irks me.. but then; I don't usually add an adjustment-bend (dog leg) either. I make the length "close" to where the bell-crank will mount.. then I lock/clamp the elev. to neutral, with the pushrod installed on both; it's horn.. and in the bell-crank hole. I then position the bell-crank to neutral, and drill "its" mounting-hole.
Roddie,
I do that too for sheet wings, even though I usually still put the dogleg in anyway. But, since I have to mount the bellcrank to the center of the existing spar on this one, I had to do it the way I did.
The Versatile Mark
batjac- Diamond Member
-
Posts : 2333
Join date : 2013-05-22
Age : 61
Location : Broken Arrow, OK, USA
Re: Time to put this one to bed
![]() batjac Sun Sep 13, 2015 1:14 am
batjac Sun Sep 13, 2015 1:14 am
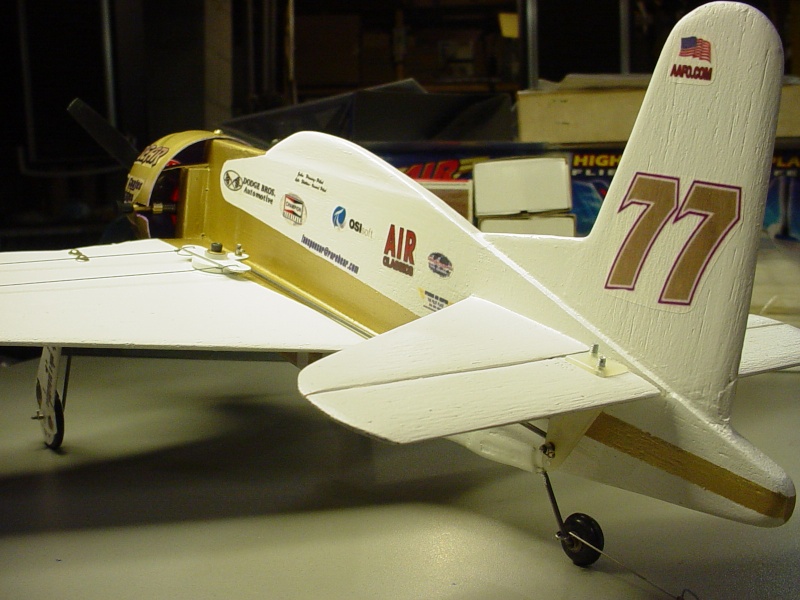
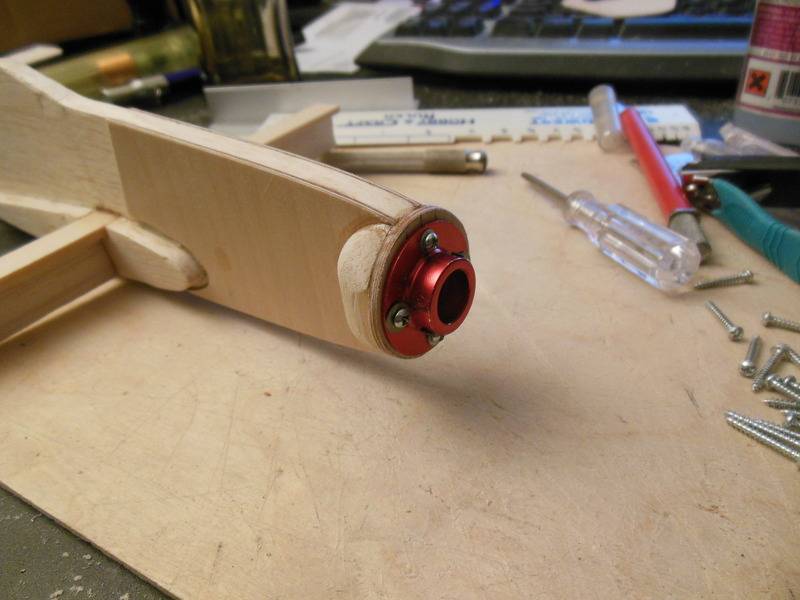
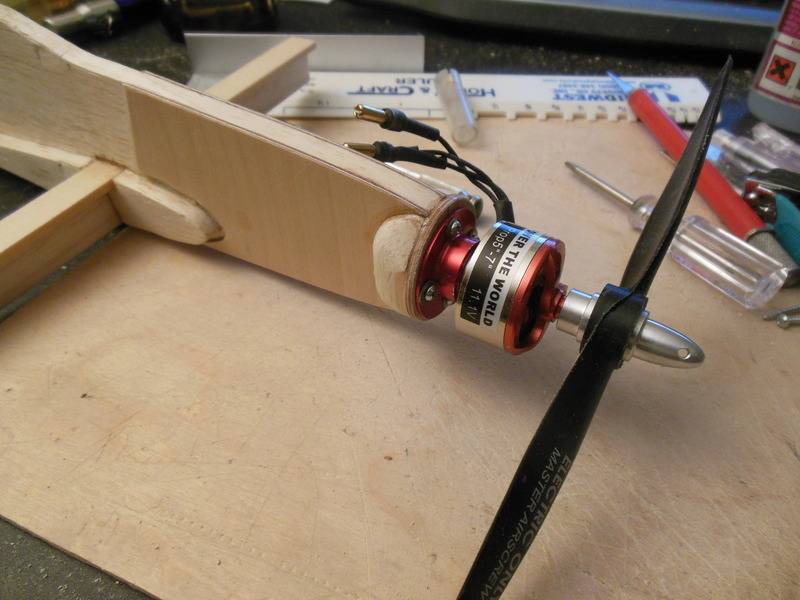
Well, I had a couple of hours free this evening, so I put some time into the new plane. I cut a firewall from 3/32” ply and glued it in place. Then made a couple of blocks behind for support. I drilled holes and mounted the motor mount to the firewall, then installed the motor.
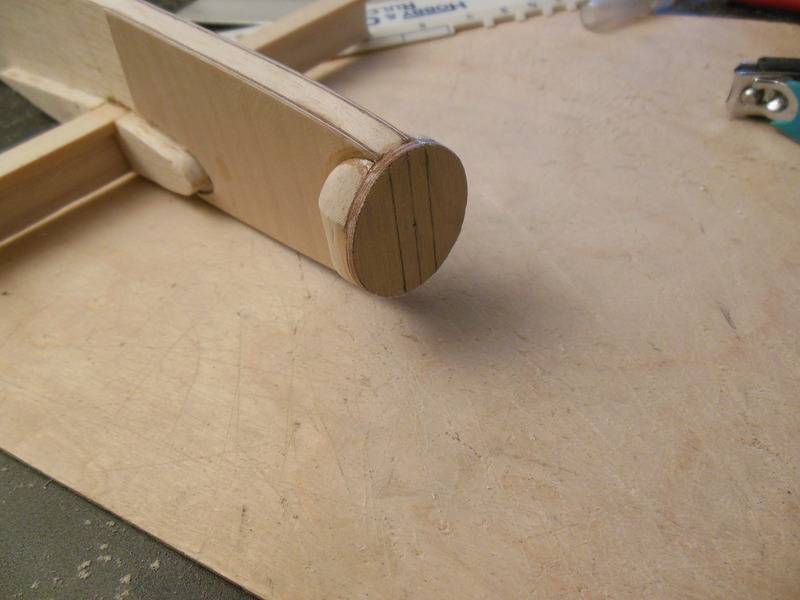
A quick fitting of things before retiring for the evening. The nose looks extremely long with the motor in place, but it balances out close to where it’s going to need to be.
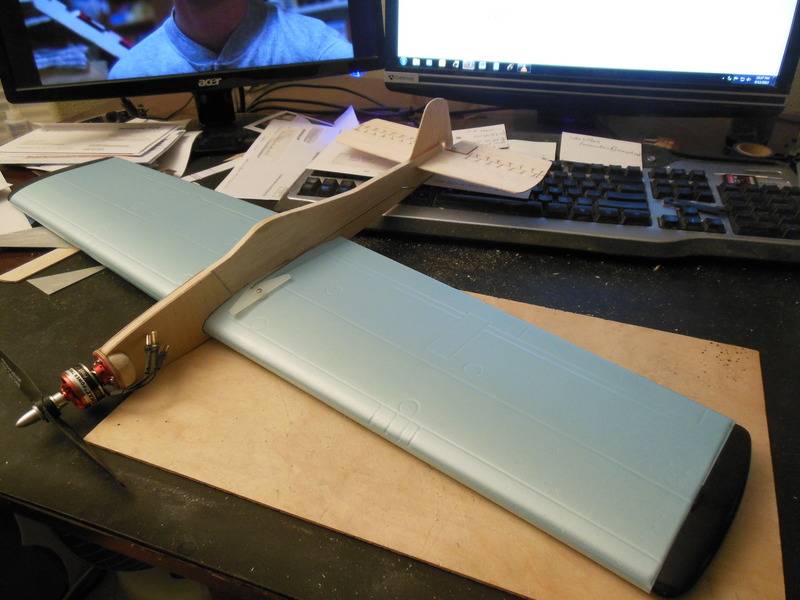
The Retiring Mark
edit: I couldn't leave well enough alone, so I measured the length of the electric motor as compared to a Black Widow installation. The electric motor is actually almost 3/4" shorter to the prop flange than a Black Widow would be to the prop flange. Hmmm...
The Stickler Mark
batjac- Diamond Member
-
Posts : 2333
Join date : 2013-05-22
Age : 61
Location : Broken Arrow, OK, USA
» If you have the time.............
» Triva Time II (an easy one this time)
» Is your time off
» How much run time do your Black Widows get on 8cc?
» TD .049 run time
» Triva Time II (an easy one this time)
» Is your time off
» How much run time do your Black Widows get on 8cc?
» TD .049 run time
Page 1 of 1
Permissions in this forum:
You cannot reply to topics in this forum