

 Rules
Rules
by GallopingGhostler Today at 12:20 am
» Speed plane - Crispy but not too crispy
by GallopingGhostler Today at 12:00 am
» *Cox Engine of The Month* Submit your pictures! -May 2024-
by layback209 Yesterday at 11:48 pm
» Jim Walkers FireBee - This is going to be fun
by roddie Yesterday at 6:51 pm
» Post your Older ignition books
by lla Yesterday at 6:34 pm
» S1 Ringmaster
by Onelife Yesterday at 8:40 am
» O&R 23 & Brown Jr
by getback Yesterday at 7:47 am
» Introducing our Cox .049 TD Engines
by MauricioB Yesterday at 2:31 am
» Jim Walker Firebaby
by rdw777 Tue Apr 30, 2024 4:16 pm
» Hemostat clamp/smooth-jaws
by roddie Tue Apr 30, 2024 3:48 pm
» Black Widow Run time
by Ken Cook Tue Apr 30, 2024 3:44 pm
» 1:64 scale Diecast (Hot Wheels)
by roddie Tue Apr 30, 2024 3:33 pm


Ebay Ringmaster Resto (finishing pics!)
Page 1 of 3 • 1, 2, 3 ![]()

Ebay Ringmaster Resto (finishing pics!)
![]() Cribbs74 Tue Dec 18, 2012 8:29 pm
Cribbs74 Tue Dec 18, 2012 8:29 pm
I am not sure where this one falls project wise, but I want to get a .35 sized plane in the air pretty bad. Anybody have an idea in how to remove the old silkspan that didn't just fall off?
Ron
https://i.imgur.com/UFtMf.jpg

https://i.imgur.com/M7eqd.jpg

https://i.imgur.com/cjq67.jpg

https://i.imgur.com/yExNT.jpg

https://i.imgur.com/Tsx8j.jpg

Last edited by cribbs74 on Sun Feb 10, 2013 9:16 pm; edited 2 times in total

Cribbs74- Moderator


Posts : 11895
Join date : 2011-10-24
Age : 50
Location : Tuttle, OK
Re: Ebay Ringmaster Resto (finishing pics!)
![]() Ken Cook Wed Dec 19, 2012 4:52 am
Ken Cook Wed Dec 19, 2012 4:52 am
That would be the fast way, I do it the old fashioned way and pick every little piece off using a #11 blade and safety single edged razor blades on the flat trying not to dig into the wood. Believe it or not , heavy grit paper like 50 and 60 garnet paper works well as long as your on top of the silkspan. Once the sanding block comes off your eating balsa rapidly. Finish up with 80 and move to 100. I usually recover with silkspan when I re do a winglike this. I wouldn't suggest that here as it's your first .35 and it will just get torn up and the constant repairs will quickly put your mindset in a bad disposition. My suggestion would be to smooth it up as best as possible, I would then Monokote right over top of it. Get this plane into the air as quickly as possible but make it accurate so that you can enjoy the experience. Having Monokote will also allow you to twist and warp the wing as needed in the advent of a warp. Also, covering the Ringmaster is great experience as it just may be one of the most difficult wingtips to cover without wrinkles. It takes practice and these are the planes to do it on. The wing tip has quite a complex compound curve and wrinkle real bad at the tip. This will give you some good experience trying to make it wrinkle free.
Unfortunately, things aren't always going to stay intact, things will break inversion can get confusing and the inevitable will take place. Keeping the plane as simple as possible without going overboard in the painting and decorating is highly suggested. I would at this point do the fiberglass joint over the trailing edges in the middle like I suggested on the Baby Ring. I would also dowel the stab onto the fuse with toothpicks and epoxy the stab onto the fuse. The Ring has a large stab and it's subject to breaking and the epoxy dowel trick keeps things together.
In addition, I would certainly go with Dubro pin hinges vs the cloth as these aren't going to flutter. I epoxy my nylon pin hinges in and I have some good tips on how to do it without gluing your hinges so they don't move. Making a new fuse will also allow you to go with a slightly thinner doubler like 3/32 5 ply which not only you can make longer but it would also be a tad lighter as the stock 1/8th" is a bit of overkill. Is this plane glued with Ambroid? I would also suggest pricking small holes with a pin in the area of the sheeting under the fuse body. This would just insure that the fuse gets properly glued as well. Your only gluing to the old sheeting and if that's already loose that can cause some vibrations. Ken

Ken Cook- Top Poster

- Posts : 5461
Join date : 2012-03-27
Location : pennsylvania
Re: Ebay Ringmaster Resto (finishing pics!)
![]() pkrankow Wed Dec 19, 2012 8:29 am
pkrankow Wed Dec 19, 2012 8:29 am
Now, 1 layer of silk = no worry
Several layers of silk = you need to strip as dimensions will be off and too much weight may be added.
Phil

pkrankow- Top Poster
- Posts : 3025
Join date : 2012-10-02
Location : Ohio
Re: Ebay Ringmaster Resto (finishing pics!)
![]() Cribbs74 Wed Dec 19, 2012 9:11 am
Cribbs74 Wed Dec 19, 2012 9:11 am
That's the info I was looking for. I was planning on cutting a new rudder and stab anyway. The fuse is still plenty strong and appears to have never suffered a mishap. I was thinking of reusing it. The entire plane was glued with ambroid. So removing the ply doublers will be very easy. New ones will be thinner and longer. I think I can get away with using the old fuse unless you really think I should change it out. 1/2" balsa sheet ain't cheap!
I will probably just sand the old silkspan smooth and recover in Ultracote like you and Phil suggested.
I will employ all the tips suggested and fly this thing!
Cribbs74- Moderator
-
Posts : 11895
Join date : 2011-10-24
Age : 50
Location : Tuttle, OK
Re: Ebay Ringmaster Resto (finishing pics!)
![]() jhaye Thu Dec 20, 2012 5:43 pm
jhaye Thu Dec 20, 2012 5:43 pm
Mix up some talc and dope and fill the defects in the fuselage, then cover it with silkspan. Pretty easy and will look good. Then you can Monokote the wing and your new tail feathers. When it's done fly it with the CG further forward at first so it's nose heavy. It will be more stable till you get use to it. Then you can move the CG back as you start doing some stunting. Why you have the wing open you might consider a adjustable leadout. It's easy to make and will allow you to do some fine tuning when you start flying it. A weight box in the outside wingtip is something to consider also. Not sure if you have the S-1 plans, I would make a horn for the tail off the original plans, there are two to choose from, one with a single hole and one that is adjustable, The adjustable one is what I made for mine and it was perfect. I made it out of plywood and then bushed the holes with copper tubing. Looks like fun. fox .35 will be in the mail by the weekend. I'm going to pick it up tomorrow
Jim

jhaye- Silver Member

- Posts : 89
Join date : 2012-09-08
Age : 59
Location : Albuquerque, NM
Re: Ebay Ringmaster Resto (finishing pics!)
![]() Cribbs74 Thu Dec 20, 2012 7:46 pm
Cribbs74 Thu Dec 20, 2012 7:46 pm
jhaye wrote:Ron,
Mix up some talc and dope and fill the defects in the fuselage, then cover it with silkspan. Pretty easy and will look good. Then you can Monokote the wing and your new tail feathers. When it's done fly it with the CG further forward at first so it's nose heavy. It will be more stable till you get use to it. Then you can move the CG back as you start doing some stunting. Why you have the wing open you might consider a adjustable leadout. It's easy to make and will allow you to do some fine tuning when you start flying it. A weight box in the outside wingtip is something to consider also. Not sure if you have the S-1 plans, I would make a horn for the tail off the original plans, there are two to choose from, one with a single hole and one that is adjustable, The adjustable one is what I made for mine and it was perfect. I made it out of plywood and then bushed the holes with copper tubing. Looks like fun. fox .35 will be in the mail by the weekend. I'm going to pick it up tomorrow
Jim
Thanks Jim, all good suggestions how much tip weight on these? Right now it has solder wrapped around the wing spar.
Ron
Cribbs74- Moderator
-
Posts : 11895
Join date : 2011-10-24
Age : 50
Location : Tuttle, OK
Re: Ebay Ringmaster Resto (finishing pics!)
![]() Ken Cook Thu Dec 20, 2012 8:01 pm
Ken Cook Thu Dec 20, 2012 8:01 pm
Ken Cook- Top Poster
- Posts : 5461
Join date : 2012-03-27
Location : pennsylvania
Re: Ebay Ringmaster Resto (finishing pics!)
![]() jhaye Thu Dec 20, 2012 8:09 pm
jhaye Thu Dec 20, 2012 8:09 pm
your grin is gonna last for days after your first flight. 1/2 oz. to start with then go from there. When it is in flight look for level wings, add more if the outboard wing is high or if it is lite on the lines. I ended up adding a trim tab to the outboard wing on mine also. It was my first big build and I think the wing was far from perfect. Fly's straight now. On the subject of CG I wasn't trying to confuse you. Weight added to the nose or tail moves the CG front or back. A tailheavy ringmaster is squirrely as hell, trust me, I cracked mine up when I added a 1/2 oz. to the tail trying to stunt better. You will end up adding 1 to 1.5 oz's to the tail from the gitgo, but be careful. I think my CG is about a inch from the leading edge. Anyhoo, good luck and keep the pictures coming.
Jim
jhaye- Silver Member
- Posts : 89
Join date : 2012-09-08
Age : 59
Location : Albuquerque, NM
Re: Ebay Ringmaster Resto (finishing pics!)
![]() Cribbs74 Sun Dec 23, 2012 7:37 am
Cribbs74 Sun Dec 23, 2012 7:37 am
I have no clue as to what size leadouts I need to be using on this thing.
Cribbs74- Moderator
-
Posts : 11895
Join date : 2011-10-24
Age : 50
Location : Tuttle, OK
Re: Ebay Ringmaster Resto (finishing pics!)
![]() Ken Cook Sun Dec 23, 2012 8:37 am
Ken Cook Sun Dec 23, 2012 8:37 am
I strongly suggest using quality blind nuts on the backside of the doublers followed up with Nyloc nuts used as jam nuts. Many times if I have a shaker, I make steel pads to go under the engine and sometimes on the nut side of the fuse to keep the engine solidly tight and prevent the fuse and doublers from crushing.
In the event you decide to use the muffler which I provided on that particular Fox, keep one thing in mind if using the stock gear wire for the Ring. The back of the muffler stinger will catch the gear wire if the gear isn't located properly. That particular muffler has been drilled out to almost 3/8". I also ground out the internals allowing for a free flow. Many of my mufflers have the necked down stinger cut off allowing a hole of 1/2"-5/8". This is simple to cut off if needed for clearance. It will only further the performance of that particular muffler. Ken
Ken Cook- Top Poster
- Posts : 5461
Join date : 2012-03-27
Location : pennsylvania
Re: Ebay Ringmaster Resto (finishing pics!)
![]() Ken Cook Sun Dec 23, 2012 10:13 am
Ken Cook Sun Dec 23, 2012 10:13 am


Ken Cook- Top Poster
- Posts : 5461
Join date : 2012-03-27
Location : pennsylvania
Re: Ebay Ringmaster Resto (finishing pics!)
![]() Cribbs74 Sun Dec 23, 2012 10:30 am
Cribbs74 Sun Dec 23, 2012 10:30 am
Thanks Ken. That's a wealth of info and most helpful. There are a few more things to consider on this bigger stuff.
I really wish I hadn't extended the bearers, but the damage is done. I have good quality thin rubber sheet and I wonder if it would be helpful under the engine mounts to keep the vibes down. It should be plenty strong still with blind nuts and lock nuts to keep things secure.
Thanks for writing that up and providing pictures.
Ron
Cribbs74- Moderator
-
Posts : 11895
Join date : 2011-10-24
Age : 50
Location : Tuttle, OK
Re: Ebay Ringmaster Resto (finishing pics!)
![]() John Goddard Sun Dec 23, 2012 10:38 am
John Goddard Sun Dec 23, 2012 10:38 am
Dunno if it's available in the States yet but I stumbled
On a product called QBond last week.
It is Mustard.
Might help with the resto.

John Goddard- Diamond Member

- Posts : 2447
Join date : 2011-11-24
Age : 59
Location : Leyton North East London
Re: Ebay Ringmaster Resto (finishing pics!)
![]() Ken Cook Sun Dec 23, 2012 10:47 am
Ken Cook Sun Dec 23, 2012 10:47 am
Ken Cook- Top Poster
- Posts : 5461
Join date : 2012-03-27
Location : pennsylvania
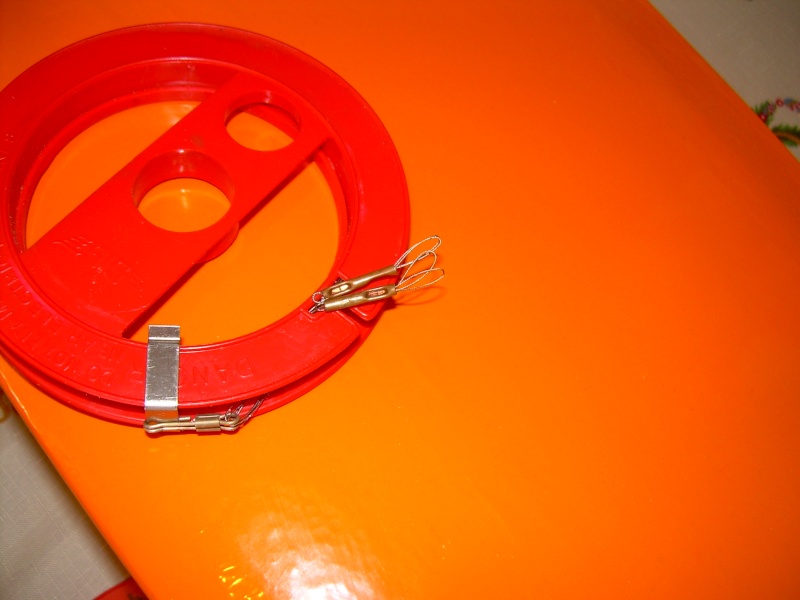
Lead outs
![]() jhaye Sun Dec 23, 2012 3:46 pm
jhaye Sun Dec 23, 2012 3:46 pm
Go on the Tulsa Gluedobber's CL'er website and there is a illustrated article in the builder's tips section for wrapping your lead outs. It is the AMA approved method. I used it when I first was learning how to wrap line's and found it real helpful. Also a good article on how to mod a fox .35 so it won't burp.
Jim Hayes
jhaye- Silver Member
- Posts : 89
Join date : 2012-09-08
Age : 59
Location : Albuquerque, NM
Re: Ebay Ringmaster Resto (finishing pics!)
![]() Cribbs74 Sun Dec 23, 2012 7:03 pm
Cribbs74 Sun Dec 23, 2012 7:03 pm
I just need some leadouts to try it out on!!!!!

Cribbs74- Moderator
-
Posts : 11895
Join date : 2011-10-24
Age : 50
Location : Tuttle, OK
Control lines
![]() jhaye Sun Dec 23, 2012 8:46 pm
jhaye Sun Dec 23, 2012 8:46 pm
Jim Hayes
jhaye- Silver Member
- Posts : 89
Join date : 2012-09-08
Age : 59
Location : Albuquerque, NM
Re: Ebay Ringmaster Resto (finishing pics!)
![]() andrew Sun Dec 23, 2012 9:36 pm
andrew Sun Dec 23, 2012 9:36 pm
jhaye wrote:There's a guy on e'bay that sells spools of wire,........The company is called "fly by wire"......
Jim Hayes
Hi Jim ---
Good find and excellent pricing. Is this wire un-coated?
andrew

andrew- Diamond Member
- Posts : 1813
Join date : 2011-08-11
Age : 76
Location : Western Kentucky -

Re: Ebay Ringmaster Resto (finishing pics!)
![]() Ken Cook Mon Dec 24, 2012 4:52 am
Ken Cook Mon Dec 24, 2012 4:52 am
Ken Cook- Top Poster
- Posts : 5461
Join date : 2012-03-27
Location : pennsylvania
Re: Ebay Ringmaster Resto (finishing pics!)
![]() jhaye Tue Dec 25, 2012 3:13 pm
jhaye Tue Dec 25, 2012 3:13 pm
Merry Christmas everyone.
Jim Hayes
jhaye- Silver Member
- Posts : 89
Join date : 2012-09-08
Age : 59
Location : Albuquerque, NM
Re: Ebay Ringmaster Resto (finishing pics!)
![]() jhaye Tue Dec 25, 2012 3:19 pm
jhaye Tue Dec 25, 2012 3:19 pm
Jim Hayes
jhaye- Silver Member
- Posts : 89
Join date : 2012-09-08
Age : 59
Location : Albuquerque, NM
Re: Ebay Ringmaster Resto (finishing pics!)
![]() Cribbs74 Tue Dec 25, 2012 5:36 pm
Cribbs74 Tue Dec 25, 2012 5:36 pm
I'll check it out.
I've made some headway with the Ring over the last few days. I'll post some pics tonight.
Ron
Cribbs74- Moderator
-
Posts : 11895
Join date : 2011-10-24
Age : 50
Location : Tuttle, OK
Re: Ebay Ringmaster Resto (finishing pics!)
![]() Cribbs74 Tue Dec 25, 2012 9:06 pm
Cribbs74 Tue Dec 25, 2012 9:06 pm
https://i.imgur.com/SSWrk.jpg

https://i.imgur.com/wQekv.jpg

https://i.imgur.com/rpHZw.jpg

https://i.imgur.com/F6TCW.jpg

Cribbs74- Moderator
-
Posts : 11895
Join date : 2011-10-24
Age : 50
Location : Tuttle, OK
pkrankow- Top Poster
- Posts : 3025
Join date : 2012-10-02
Location : Ohio
Re: Ebay Ringmaster Resto (finishing pics!)
![]() Cribbs74 Wed Dec 26, 2012 12:38 pm
Cribbs74 Wed Dec 26, 2012 12:38 pm
Heading out to cut doublers now!
Cribbs74- Moderator
-
Posts : 11895
Join date : 2011-10-24
Age : 50
Location : Tuttle, OK
Page 1 of 3 • 1, 2, 3 ![]()
» Finishing touches
» It’s the Pitts….
» finishing up old project
» Balsa model finishing