

 Rules
Rules
Log in
Search
Latest topics
» Fox .35 Modifications by Onelife Today at 6:47 pm
» Happy Anzac Day!
by 706jim Today at 6:44 pm
» Project Cox .049 r/c & Citabrian Champion
by MauricioB Today at 4:08 pm
» Jim Walkers FireBee - This is going to be fun
by rsv1cox Today at 3:56 pm
» Revivng Some Childhood Classics
by rsv1cox Today at 7:17 am
» Introducing our Cox .049 TD Engines
by getback Today at 6:20 am
» Roddie's flat-bottomed boat..
by Levent Suberk Today at 12:23 am
» Cox powered jet-pump for model Sprint Boat
by roddie Yesterday at 10:25 pm
» Micro Draco Gets to Fly on a Beautiful Morning.
by rdw777 Yesterday at 8:15 pm
» Jim Walker Firebaby
by rdw777 Yesterday at 8:06 pm
» Hydro-bat by Vic Smeed: engine probs
by GallopingGhostler Yesterday at 5:12 pm
» Roddie-Rigger.. a 2005 original design
by roddie Yesterday at 3:39 pm
Cox Engine of The Month


CEF Traveling Engine


Win This Engine!

Live on Patrol


Crankcase upgrade/repair
Page 1 of 1

Crankcase upgrade/repair
![]() ian1954 Fri Jun 14, 2013 2:46 pm
ian1954 Fri Jun 14, 2013 2:46 pm
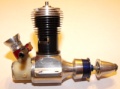
There I was starting to prepare for the Cox flight contest and deciding which engine I could use. Difficult decision in my case - too many options.
Anyway, it had to be beam mounted for the aeroplane I have chosen (this has arrived but I am still waiting for balsa cement and dope - no longer can I walk to the local model shop! - everything has to be mail order.
It also has to be quiet and so needs a good silencer (muffler) and a bit of throttle control. Matt had supplied me with a Hiscott muffley thingy and so I selected one of my restored Medallions to go with it.
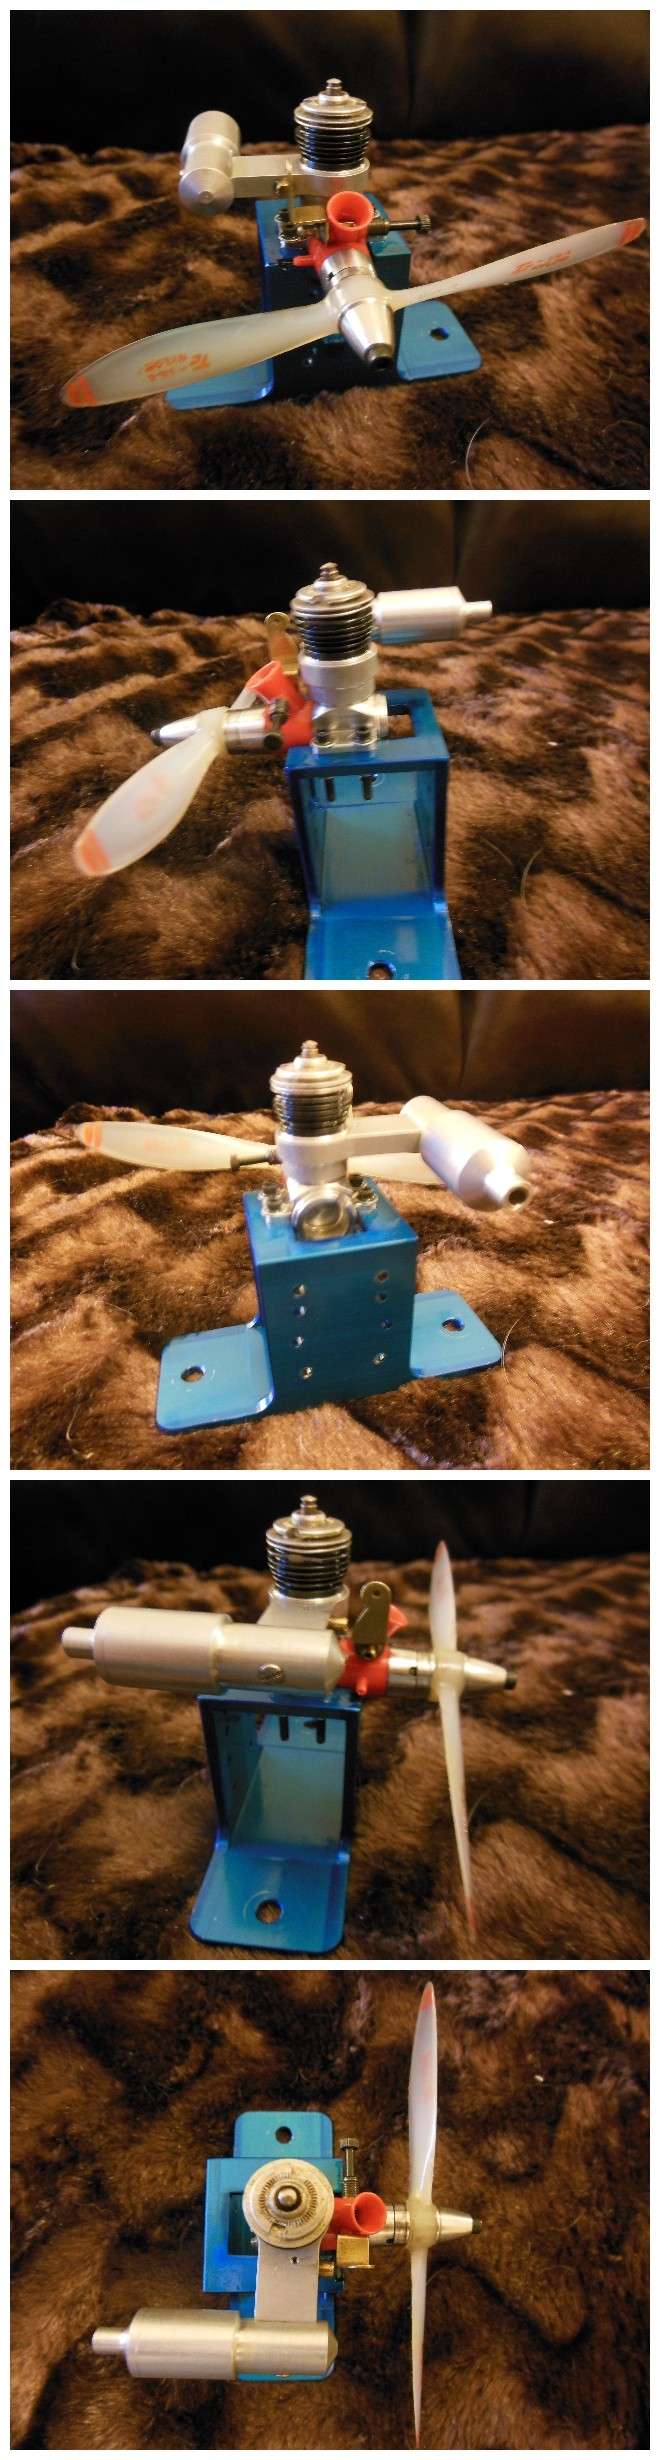
It looks the boy but was not to be a runner at the first attempt!
I was prepared for a lot of messing about with heads as the Hiscott system raises the cylinder and reduces the compression. Messing about turned into two and a half hours of flick - flick - flicking!
It started a couple of times, ran for a couple of minutes and then stopped abruptly. It would not restart while hot.
I thought it was compression and I had not chosen the right head, number of gaskets and so on.................
However. when it ran - the silencer was superb and the throttle control was excellent - along with idling.
After a while I notice fuel spewing from between the prop driver and the crankcase. Further examination showed that the crankshaft was a sloppy fit to say the least!
So ...... not being one to scrap anything - it was time to strip the thing a let it visit the workshop. Where it was.........
drilled and reamed

a suitable piece of brass selected

I made a mistake and turned it too small and so worked further on it for a Bee crankcase


anyway - back to the Medallion


off to the mill!


Reassembly ready for testing. Too late to test tonight but fingers crossed for tomorrow. What am I saying? Better not cross my fingers while flicking the thing!

Anyway, it had to be beam mounted for the aeroplane I have chosen (this has arrived but I am still waiting for balsa cement and dope - no longer can I walk to the local model shop! - everything has to be mail order.
It also has to be quiet and so needs a good silencer (muffler) and a bit of throttle control. Matt had supplied me with a Hiscott muffley thingy and so I selected one of my restored Medallions to go with it.
It looks the boy but was not to be a runner at the first attempt!
I was prepared for a lot of messing about with heads as the Hiscott system raises the cylinder and reduces the compression. Messing about turned into two and a half hours of flick - flick - flicking!
It started a couple of times, ran for a couple of minutes and then stopped abruptly. It would not restart while hot.
I thought it was compression and I had not chosen the right head, number of gaskets and so on.................
However. when it ran - the silencer was superb and the throttle control was excellent - along with idling.
After a while I notice fuel spewing from between the prop driver and the crankcase. Further examination showed that the crankshaft was a sloppy fit to say the least!
So ...... not being one to scrap anything - it was time to strip the thing a let it visit the workshop. Where it was.........
drilled and reamed
a suitable piece of brass selected
I made a mistake and turned it too small and so worked further on it for a Bee crankcase
anyway - back to the Medallion
off to the mill!
Reassembly ready for testing. Too late to test tonight but fingers crossed for tomorrow. What am I saying? Better not cross my fingers while flicking the thing!

ian1954- Diamond Member

- Posts : 2688
Join date : 2011-11-16
Age : 69
Location : England
Re: Crankcase upgrade/repair
![]() Cribbs74 Fri Jun 14, 2013 3:45 pm
Cribbs74 Fri Jun 14, 2013 3:45 pm
Impressive....... I would love to bush some of mine.
Ron
Ron

Cribbs74- Moderator


Posts : 11895
Join date : 2011-10-24
Age : 50
Location : Tuttle, OK
Re: Crankcase upgrade/repair
![]() RknRusty Fri Jun 14, 2013 7:11 pm
RknRusty Fri Jun 14, 2013 7:11 pm
Me too, nice work, Ian. Do you cut an oil groove in the bushing? I don't remember if the TeeDallion crankcase has one. Is brass as good as bronze?
_________________
Don't Panic!
...and never Ever think about how good you are at something...
while you're doing it!
My Hot Rock & Blues Playlist
...and never Ever think about how good you are at something...
while you're doing it!
My Hot Rock & Blues Playlist

RknRusty- Rest In Peace

- Posts : 10869
Join date : 2011-08-10
Age : 68
Location : South Carolina, USA
Re: Crankcase upgrade/repair
![]() Jason_WI Fri Jun 14, 2013 7:24 pm
Jason_WI Fri Jun 14, 2013 7:24 pm
Nice work! Did you add an oil groove to the bushing or is it not needed? What material did you use. I need to get a collet system for my lathe 
Jason_WI- Top Poster

-
Posts : 3123
Join date : 2011-10-09
Age : 48
Location : Neenah, WI
Re: Crankcase upgrade/repair
![]() ian1954 Sat Jun 15, 2013 9:51 am
ian1954 Sat Jun 15, 2013 9:51 am
Bronze - phosphor bronze - is better than brass by far. It is easy to machine but very difficult to drill. The material "grabs" drills and it is difficult to get a straight and clean bore. Drills will wander off line. It also heats up quite quickly when drilling. It has to be done slowly with modified drill bits.
The Medallions and Tee Dees don't need a groove but the Bee might. I will run it without and see what happens!
The Medallions and Tee Dees don't need a groove but the Bee might. I will run it without and see what happens!
ian1954- Diamond Member
- Posts : 2688
Join date : 2011-11-16
Age : 69
Location : England
Re: Crankcase upgrade/repair
![]() ian1954 Sat Jun 15, 2013 9:53 am
ian1954 Sat Jun 15, 2013 9:53 am
I got it running but it needs a bit more patience setting the head and gasketing.
A bit boring but the engine is quiet!
A bit boring but the engine is quiet!
ian1954- Diamond Member
- Posts : 2688
Join date : 2011-11-16
Age : 69
Location : England
Re: Crankcase upgrade/repair
![]() reptile Sat Jun 15, 2013 3:57 pm
reptile Sat Jun 15, 2013 3:57 pm
Nice muffler may work good on a cox car...do you have the site that sells them?
THANKS
THANKS

reptile- Gold Member

- Posts : 149
Join date : 2013-05-22
Re: Crankcase upgrade/repair
![]() ian1954 Sat Jun 15, 2013 4:34 pm
ian1954 Sat Jun 15, 2013 4:34 pm
I am afraid they are no longer easily obtainable.
ian1954- Diamond Member
- Posts : 2688
Join date : 2011-11-16
Age : 69
Location : England
Re: Crankcase upgrade/repair
![]() MeerschaumSteve Thu Jun 27, 2013 6:11 am
MeerschaumSteve Thu Jun 27, 2013 6:11 am
I was thinking the same thing, looks like a great car muffler!

MeerschaumSteve- Gold Member
- Posts : 121
Join date : 2012-10-21
Location : Oklahoma
Re: Crankcase upgrade/repair
![]() ian1954 Sat Jun 29, 2013 3:05 pm
ian1954 Sat Jun 29, 2013 3:05 pm
I finally got around to building up the Bee. Thought it strange watching the fuel dancing in the filler tube!
ian1954- Diamond Member
- Posts : 2688
Join date : 2011-11-16
Age : 69
Location : England
Re: Crankcase upgrade/repair
![]() RknRusty Sat Jun 29, 2013 9:01 pm
RknRusty Sat Jun 29, 2013 9:01 pm
Nice and steady, that's as smooth as they get. Sounds ready yo fly.
_________________
Don't Panic!
...and never Ever think about how good you are at something...
while you're doing it!
My Hot Rock & Blues Playlist
...and never Ever think about how good you are at something...
while you're doing it!
My Hot Rock & Blues Playlist
RknRusty- Rest In Peace
- Posts : 10869
Join date : 2011-08-10
Age : 68
Location : South Carolina, USA
Re: Crankcase upgrade/repair
![]() sdjjadk Sun Jun 30, 2013 6:38 pm
sdjjadk Sun Jun 30, 2013 6:38 pm
Excellent work Ian! And thanks for the videos as well.
Shawn
Shawn

sdjjadk- Platinum Member

- Posts : 640
Join date : 2012-04-07
Location : Southern Maryland
» Repair/Upgrade
» Crankcase Repair Method
» Engine Upgrade
» My PT-19 Upgrade
» "Cox Gravity Warbirds" F4-U Corsair RC upgrade thread
» Crankcase Repair Method
» Engine Upgrade
» My PT-19 Upgrade
» "Cox Gravity Warbirds" F4-U Corsair RC upgrade thread
Page 1 of 1
Permissions in this forum:
You cannot reply to topics in this forum