

 Rules
Rules
by lla Today at 4:17 pm
» Fox .35 Modifications
by Onelife Today at 3:54 pm
» Jim Walkers FireBee - This is going to be fun
by rsv1cox Today at 3:33 pm
» *Cox Engine of The Month* Submit your pictures! -May 2024-
by getback Today at 10:23 am
» S1 Ringmaster
by Onelife Today at 8:40 am
» Speed plane - Crispy but not too crispy
by rsv1cox Today at 7:54 am
» O&R 23 & Brown Jr
by getback Today at 7:47 am
» Introducing our Cox .049 TD Engines
by MauricioB Today at 2:31 am
» Jim Walker Firebaby
by rdw777 Yesterday at 4:16 pm
» Hemostat clamp/smooth-jaws
by roddie Yesterday at 3:48 pm
» Black Widow Run time
by Ken Cook Yesterday at 3:44 pm
» 1:64 scale Diecast (Hot Wheels)
by roddie Yesterday at 3:33 pm


Broken nose, all fixed... Final Installment(s)
Page 1 of 5 • 1, 2, 3, 4, 5 ![]()

Re: Broken nose, all fixed... Final Installment(s)
![]() Ken Cook Sat Aug 22, 2015 8:53 pm
Ken Cook Sat Aug 22, 2015 8:53 pm
I don't know how you installed your canopy, but carefully taking a #11 blade and cutting all the way around it carefully can also be helpful. Don't cut through the stringers. The balsa was formed over the stringers and you just need to cut through the sheeting only. Carefully remove the sheeting that was just cut. If it can be removed in one piece, all the better, You now have access to the top of the wing. The cutout in the stock Oriental wing is very large which will also reveal the bellcrank. You will be able to see any damage to the leading edge through that opening and it can possibly be repaired with a strip of carbon fiber or 1/32" ply. The sheeting can be glued right back onto the fuse. Fill the groove created by cutting with #11 with epoxy and push the canopy down into it holding it down with masking tape or a rubber band around the canopy and fuse. Clean any epoxy off with alcohol.

Ken Cook- Top Poster

- Posts : 5461
Join date : 2012-03-27
Location : pennsylvania
Re: Broken nose, all fixed... Final Installment(s)
![]() RknRusty Mon Aug 24, 2015 11:12 pm
RknRusty Mon Aug 24, 2015 11:12 pm
It passed the pull test without so much as a creak. I did it three times, pulling slightly over the legal pull. That's a relief.
The controls seem fine and free except the flaps are shifted slightly so one is almost touching the fairing and the other has a wider gap. I'm not sure why, but they move freely and are still coupled with no new slop anywhere. It might be because of all the busted hinges, but I'll cut them flush with the edges and stitch new ones. My wire flap hinge retainers are all in place and not bent.
The fuselage had some cracks above the wing root on the side of the fuselage. I pressed them all into place and soaked them with thin CA. The outboard wing has cracked sheeting on the bottom causing it to sag. Same area as the cracks from it's previous deadstick collision with the pavement. I sprung the cracks open some more in order to align the wing. I'm not too sure how that came to be, but I inserted a 1/32 strip of balsa to hold it in place and tacked it with CA. It's aligned now, so tomorrow, I'll finish the area with more shims and fiberglass.
Here she is right now:
The fuselage cracks. The lengthwise one is invisible.

This is the underside of the outboard wing. There is a shim in that crack, but it's not very visible in the picture.
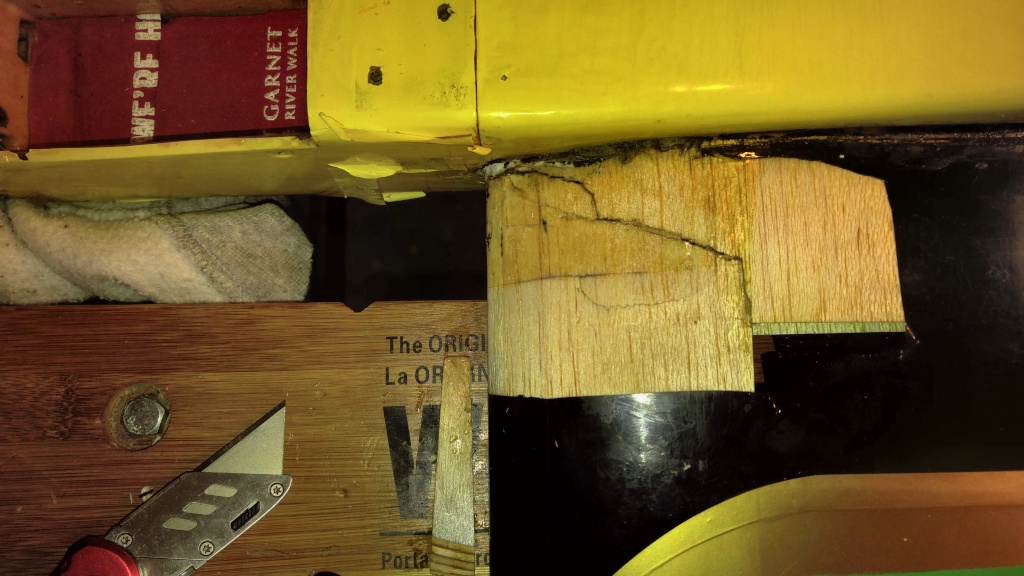
Top view. No cracks in the sheeting there, but the fiberglass is going to wrap around from the underside to partially cover it. I wish I had some lighter glass, but all I get around here is medium weight. But it's good and strong, just unsightly and a bit heavy.
And how's this look for alignment.
I hope to finish the wing tomorrow so I can start figuring how to use the engine mount. I thought of trying to bolt it to the inside of the firewall, so only the beams protrude through the front of the firewall, if it doesn't change the height of the engine. But the old crutches might interfere with that. Otherwise, bolted in front, the engine may be a little farther forward than it was. I hope to figure some way to keep it the same. I have some extra room behind the tank, so I could saw the nose off shorter and make a new firewall. We shall see. I'll let y'all know what I do.
Rusty
_________________
...and never Ever think about how good you are at something...
while you're doing it!
My Hot Rock & Blues Playlist

RknRusty- Rest In Peace

- Posts : 10869
Join date : 2011-08-10
Age : 68
Location : South Carolina, USA
Re: Broken nose, all fixed... Final Installment(s)
![]() Ken Cook Tue Aug 25, 2015 5:46 am
Ken Cook Tue Aug 25, 2015 5:46 am
Ken Cook- Top Poster
- Posts : 5461
Join date : 2012-03-27
Location : pennsylvania
Re: Broken nose, all fixed... Final Installment(s)
![]() RknRusty Sun Aug 30, 2015 9:36 pm
RknRusty Sun Aug 30, 2015 9:36 pm
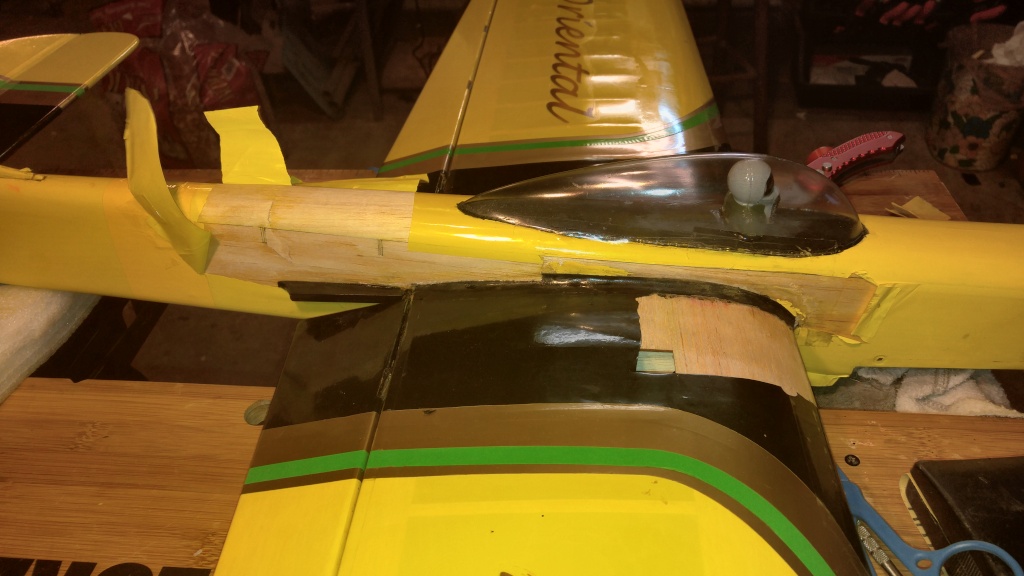
Now I am working on the flaps. After cutting all of the hinges out, it no longer is "off" and shifted to one side. The flap coupler hinge lays in place just as I built it. That's a relief, no problem there as I had feared. I punched stitch holes on one side and will sew it tomorrow evening, and do the other side too. Then I can get to work on that mount.
I would show pictures, but the glass is almost invisible, so it looks a lot like it did in the previous pre-repair pic. Since I have no yellow Monokote, the front end of the Oriental is going to be aluminum colored, left over from my ex neighbor's P-51.
Will Davis sent me a whole brand new fuselage, wing, flap and tail assembly as spare parts for my Nobler. Hopefully I won't need them for repairs and can one day build a whole new plane from them.
I quit before I got sloppy today. I'm exhausted from a badass concert in Charlotte at the Time Warner Arena last night. Got home and hit the sack about 3:30am. Alice Cooper and Motley Crue. It's been a Looong time since I went to a full blown high end rock show. I'll post videos and pictures this week. My son shucked out $600 bucks for three tickets for Himself, Holley and me. Can't wait to make a thread about it. We have lots of pics and vids.
Rusty
_________________
...and never Ever think about how good you are at something...
while you're doing it!
My Hot Rock & Blues Playlist
RknRusty- Rest In Peace
- Posts : 10869
Join date : 2011-08-10
Age : 68
Location : South Carolina, USA
Re: Broken nose, all fixed... Final Installment(s)
![]() Ken Cook Mon Aug 31, 2015 3:14 pm
Ken Cook Mon Aug 31, 2015 3:14 pm
Ken Cook- Top Poster
- Posts : 5461
Join date : 2012-03-27
Location : pennsylvania
Re: Broken nose, all fixed... Final Installment(s)
![]() RknRusty Mon Aug 31, 2015 3:30 pm
RknRusty Mon Aug 31, 2015 3:30 pm
Don't think I haven't thought of it. But I'm hurrying, not rushing, and sewn will be better. I learned that Stunter's mantra from one of your club mates.Ken Cook wrote: Now is good time to use those CA hinges that come with the plane.
Rusty
_________________
...and never Ever think about how good you are at something...
while you're doing it!
My Hot Rock & Blues Playlist
RknRusty- Rest In Peace
- Posts : 10869
Join date : 2011-08-10
Age : 68
Location : South Carolina, USA
Re: Broken nose, all fixed... Final Installment(s)
![]() RknRusty Tue Sep 01, 2015 9:47 pm
RknRusty Tue Sep 01, 2015 9:47 pm
First I sprung it open slightly and trickled some CA into it, then let it go back to its resting position which is with the crack closed. That's why it was hidden, but one day the wing would have folded in an outside 90 degree corner. I saw one do that on the Expert circle over the pavement in May. Matt Colan's Vector exploded into a pile of garbage in a fraction of a second during a wingover. I heard it. I wish I'd seen it. I must still have a little NASCAR blood in me, Haha. Matt's an Aerospace student at Embry Riddle. I bet his buddies gave him hell over that one. Beware with ARFs, when you slice the monokote along the gluing surface and do Not score the wood... same with the stab. Anyway, I dremeled the filet off as much as I dared. It's a good gluing surface anyway, epoxy and microballoons. I love that stuff. Here's a pic with the filet removed. The crack is barely visible, an inch and half or so, near the LE, right against the edge of the ground-off filet.

____________________
Hers's a pic of the fiberglass on the top sheeting and folded up the side of the fuselage a half inch. It overlaps the bottom glass right under the apex of the LE. It's not sanded yet.

The test puddle of epoxy hardened perfectly. Again I can barely bend it, but it doesn't snap. That's 30 min glue, after setting 2 hours. The last one set that fast and still has the same properties days later. It's Great Planes glue. I have always had excellent results with that brand. I know there is much more sophisticated epoxy available, but I don't need it for my small hobby. Some brands require slightly different amounts of each part, but the GP stuff is usually spot-on. I think I got a batch that was slightly off once, but just make a note of the proportions and it's fine. I miss my Loctite 60 in the bottles.
___________________
Here's the wider bottom glass I did last week. It is sanded, and looks and feels much better than the picture suggests.

_____________________
Poor Girl
_____________________
Straight as an arrow. The yellow monokote I tore up will be replaced with silvery aluminum covering. I think it'll look cool. This contest plane needs a name! please tell me what to write on her side.


Stay tuned for re-hinging the flaps and re-mounting the engine.
Rusty
_________________
...and never Ever think about how good you are at something...
while you're doing it!
My Hot Rock & Blues Playlist
RknRusty- Rest In Peace
- Posts : 10869
Join date : 2011-08-10
Age : 68
Location : South Carolina, USA
Re: Broken nose, all fixed... Final Installment(s)
![]() akjgardner Tue Sep 01, 2015 10:05 pm
akjgardner Tue Sep 01, 2015 10:05 pm

akjgardner- Diamond Member


Posts : 1470
Join date : 2014-12-28
Age : 64
Location : Greensberg Indiana
Re: Broken nose, all fixed... Final Installment(s)
![]() RknRusty Tue Sep 01, 2015 10:46 pm
RknRusty Tue Sep 01, 2015 10:46 pm
Ah!, so you're the kinda people I need, thanks, Gardener. I'm on long term C/P/M narcotics too.akjgardner wrote:I'd name It ......NUT-N-HONEY......I don't know why....Just thought it was funny....PS...I am on drugs from a knee operation today LOL
Maybe that's why I fly so much better in my head than I do in the air

I hope your knee works out great. They're pretty good at that these days. Do all of your PT homework!
Rusty
Okay, that's one, lessee what y'all got. I'll send the winner a prize.
_________________
...and never Ever think about how good you are at something...
while you're doing it!
My Hot Rock & Blues Playlist
RknRusty- Rest In Peace
- Posts : 10869
Join date : 2011-08-10
Age : 68
Location : South Carolina, USA
KariFS- Diamond Member
- Posts : 2002
Join date : 2014-10-10
Age : 52
Re: Broken nose, all fixed... Final Installment(s)
![]() akjgardner Wed Sep 02, 2015 5:29 am
akjgardner Wed Sep 02, 2015 5:29 am
akjgardner- Diamond Member
-
Posts : 1470
Join date : 2014-12-28
Age : 64
Location : Greensberg Indiana
Re: Broken nose, all fixed... Final Installment(s)
![]() Marleysky Wed Sep 02, 2015 3:46 pm
Marleysky Wed Sep 02, 2015 3:46 pm
Oriental As it's place of birth ( or construction )
Phoenix. As it's re-birth from the ashes ( balsa dust) from where it came!

Marleysky- Top Poster

Posts : 3618
Join date : 2014-09-28
Age : 71
Location : Grand Rapids, MI
Re: Broken nose, all fixed... Final Installment(s)
![]() JPvelo Wed Sep 02, 2015 3:55 pm
JPvelo Wed Sep 02, 2015 3:55 pm
Jim

JPvelo- Diamond Member
- Posts : 1972
Join date : 2011-12-02
Age : 56
Location : Colorado
Re: Broken nose, all fixed... Final Installment(s)
![]() RknRusty Wed Sep 02, 2015 4:23 pm
RknRusty Wed Sep 02, 2015 4:23 pm
Rusty
_________________
...and never Ever think about how good you are at something...
while you're doing it!
My Hot Rock & Blues Playlist
RknRusty- Rest In Peace
- Posts : 10869
Join date : 2011-08-10
Age : 68
Location : South Carolina, USA
Re: Broken nose, all fixed... Final Installment(s)
![]() crankbndr Wed Sep 02, 2015 4:39 pm
crankbndr Wed Sep 02, 2015 4:39 pm

Fortune Cookie is good

Last edited by crankbndr on Wed Sep 02, 2015 4:51 pm; edited 1 time in total

crankbndr- Top Poster
- Posts : 3067
Join date : 2011-12-10
Location : Homestead FL
Re: Broken nose, all fixed... Final Installment(s)
![]() Ken Cook Wed Sep 02, 2015 4:42 pm
Ken Cook Wed Sep 02, 2015 4:42 pm
Ken Cook- Top Poster
- Posts : 5461
Join date : 2012-03-27
Location : pennsylvania
Re: Broken nose, all fixed... Final Installment(s)
![]() RknRusty Wed Sep 02, 2015 5:23 pm
RknRusty Wed Sep 02, 2015 5:23 pm
I have an all tubes forward Brodak metal tank. The plastic one you're thinking of is in the Nobler. I haven't pressure checked it yet. I guess I should take a look inside first and see that everything is in place and secure.
Rusty
_________________
...and never Ever think about how good you are at something...
while you're doing it!
My Hot Rock & Blues Playlist
RknRusty- Rest In Peace
- Posts : 10869
Join date : 2011-08-10
Age : 68
Location : South Carolina, USA
Re: Broken nose, all fixed... Final Installment(s)
![]() Ken Cook Wed Sep 02, 2015 5:40 pm
Ken Cook Wed Sep 02, 2015 5:40 pm
Ken Cook- Top Poster
- Posts : 5461
Join date : 2012-03-27
Location : pennsylvania
Re: Broken nose, all fixed... Final Installment(s)
![]() RknRusty Wed Sep 02, 2015 6:54 pm
RknRusty Wed Sep 02, 2015 6:54 pm
I'll get back to the flaps later. I'm happy with my other repairs, they'll be nearly invisible and plenty strong.
Rusty
_________________
...and never Ever think about how good you are at something...
while you're doing it!
My Hot Rock & Blues Playlist
RknRusty- Rest In Peace
- Posts : 10869
Join date : 2011-08-10
Age : 68
Location : South Carolina, USA
Re: Broken nose, all fixed... Final Installment(s)
![]() RknRusty Fri Sep 04, 2015 8:54 pm
RknRusty Fri Sep 04, 2015 8:54 pm
I'll fit some balsa triangle stock in all four corners behind the firewall, being careful not to obstruct the tank. It's all tubes forward, but it'll sit a little farther back, since all but the engine feed line and hole is blocked by the engine mount. I'll make some external copper plumbing exiting from the tank compartment for uni and overflow vents.
Just doing a little something every day. It's never as simple as it looks at first.

_________________
Maybe this is where I can wrap a strip of 1/2 oz fiberglass around the outside? Or should I use the heavier glass like on the wing?


Maybe this is where I can wrap a strip of 1/2 oz fiberglass around the outside? Or should I use the heavier glass like on the wing?
I was just looking at the mess I made of the yellow monokote. I have no idea how I'm going to make that look good again. I do have some silkspan and Aerogloss clear and black. And silver Monokote. Some combination of all that I suppose.
Rusty
_________________
...and never Ever think about how good you are at something...
while you're doing it!
My Hot Rock & Blues Playlist
RknRusty- Rest In Peace
- Posts : 10869
Join date : 2011-08-10
Age : 68
Location : South Carolina, USA
Re: Broken nose, all fixed... Final Installment(s)
![]() RknRusty Tue Sep 08, 2015 10:15 pm
RknRusty Tue Sep 08, 2015 10:15 pm

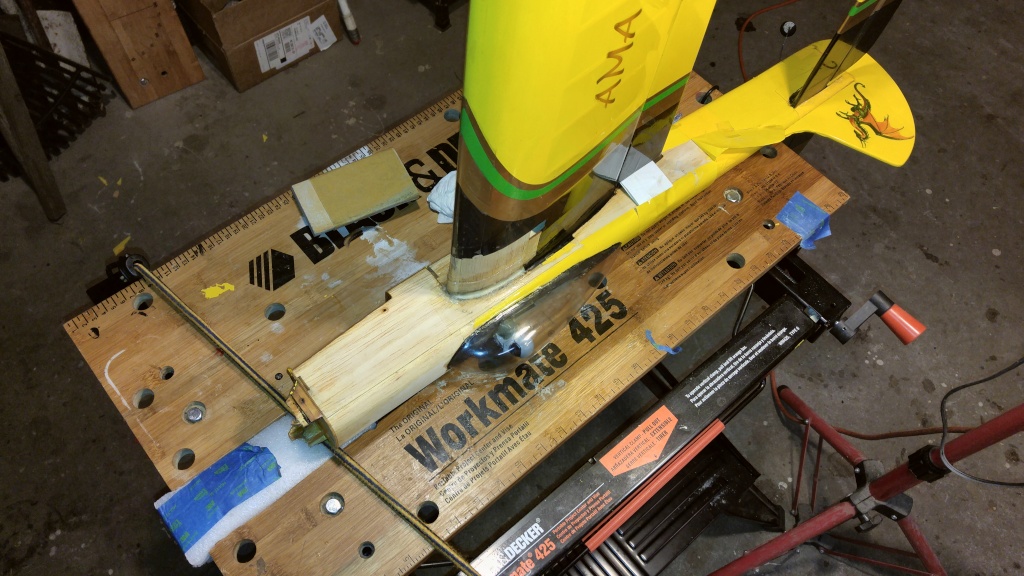
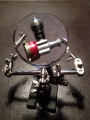
Then glued the new face plate in and discovered two bolt holes for the engine mount don't go through into the tank compartment. I had to open up the top sheeting of the fuselage to get the blind nuts in place. I was going to paint some epoxy in there but it looks to be already covered with something Chinese... hot glue, I guess. I was careful not to cut that stringer in the center.

Here's a view of the blind nuts in the top. I will coat all the screws with epoxy because they ain't coming back out. And the mount will be glued to the firewall too. If this plane ever crashes again, it's history. There is no telling what's still broken that I can't see.

I think I'll put an aluminum bearer across the screws and secure with nylock nuts and cut them to length.

I bought some CA hinges today for the flaps. Monokoting the rest will be a pain in the ass. All the new covering will be silver.
Rusty
_________________
...and never Ever think about how good you are at something...
while you're doing it!
My Hot Rock & Blues Playlist
RknRusty- Rest In Peace
- Posts : 10869
Join date : 2011-08-10
Age : 68
Location : South Carolina, USA
Re: Broken nose, all fixed... Final Installment(s)
![]() akjgardner Wed Sep 09, 2015 6:18 am
akjgardner Wed Sep 09, 2015 6:18 am
akjgardner- Diamond Member
-
Posts : 1470
Join date : 2014-12-28
Age : 64
Location : Greensberg Indiana
Re: Broken nose, all fixed... Final Installment(s)
![]() rsv1cox Wed Sep 09, 2015 6:19 am
rsv1cox Wed Sep 09, 2015 6:19 am
"You guys never cease to amaze me with the projects you are inspired to take on."
Right back at ya good friend.
Bob

rsv1cox- Top Poster
-
Posts : 10575
Join date : 2014-08-18
Location : West Virginia
Re: Broken nose, all fixed... Final Installment(s)
![]() RknRusty Thu Sep 10, 2015 5:03 pm
RknRusty Thu Sep 10, 2015 5:03 pm
Okay, I'm at another tough place. The tank does not fit conveniently to say the least. I thought I was going to have more room than this. Obviously I can shorten the copper lines exiting the tank, to get some bend in the silicon lines. I could use 1/2A line for the vents, though I'd rather not. I could try bending the copper lines, but they're the hardest copper I ever met. I just turned out the lights for a while. All sorts of ideas seem simple until I go look at the actual situation. I sure don't want the plumbing to be any less than perfect. A shorter tank is not an option either, as it needs all of the gas I can get in it. Not so bad on warm days but certainly it will in October. Last year stunters were falling like flies when one of the first cool days coincided with the contest. It woulda been funny... if it wasn't, Lol.
I just don't know. While I think on it, I'll gladly take ideas. Just assume the pictures look better than real life. And the blocky mount on the front end is adding to the lack of room.
Rusty


_________________
...and never Ever think about how good you are at something...
while you're doing it!
My Hot Rock & Blues Playlist
RknRusty- Rest In Peace
- Posts : 10869
Join date : 2011-08-10
Age : 68
Location : South Carolina, USA
Re: Broken nose, all fixed... Final Installment(s)
![]() Ken Cook Thu Sep 10, 2015 6:30 pm
Ken Cook Thu Sep 10, 2015 6:30 pm
Ken Cook- Top Poster
- Posts : 5461
Join date : 2012-03-27
Location : pennsylvania
Page 1 of 5 • 1, 2, 3, 4, 5 ![]()
» Cape Girardeau's Christmas Holiday Float...The Baby Snowbird's Last Installment!!!!!
» Cox Stocker 0.49 / Indy Car / Nissan GTP
» Fixed my Fox!
» surestart wont stay running!