

 Rules
Rules
Log in
Search
Latest topics
» A choke-tube with velocity-stack configured Beeby roddie Today at 6:12 am
» Jim Walkers FireBee - This is going to be fun
by cstatman Yesterday at 6:58 pm
» Prop Rod - resto to a runner
by cstatman Yesterday at 6:56 pm
» Hawk had breakfast and then took a bath
by rdw777 Yesterday at 5:38 pm
» Jim Walker Firebaby
by rdw777 Yesterday at 4:58 pm
» WenMac 049 - Glow Plug & Head Gasket replacements?
by rdw777 Yesterday at 4:32 pm
» Nostalgia alert, my 1959 Corvette revisited
by rsv1cox Yesterday at 2:25 pm
» Prayers for my Wife Please
by akjgardner Yesterday at 10:28 am
» Cox prop rod
by Wiggy Fri May 17, 2024 4:30 pm
» "Red Neck" .049 elec. starter
by getback Fri May 17, 2024 7:19 am
» Cox prop rod
by Wiggy Fri May 17, 2024 5:35 am
» Looking For Comet Tri-Pacer
by latole Fri May 17, 2024 3:45 am


CEF Traveling Engine


Win This Engine!

Live on Patrol


Disassembling the Cox Mercedes W-196
Page 1 of 1

Disassembling the Cox Mercedes W-196
![]() rsv1cox Tue Jan 15, 2019 3:07 pm
rsv1cox Tue Jan 15, 2019 3:07 pm
First let me say that I don't propose to instruct anyone on this forum on disassembly procedures on any Cox product. Most here have knowledge about Cox products that puts me to shame. But, on the oft chance that someone finds one of these Mercedes in the future and itches to take it apart, maybe he/she can google and learn from my mistakes.
That said:
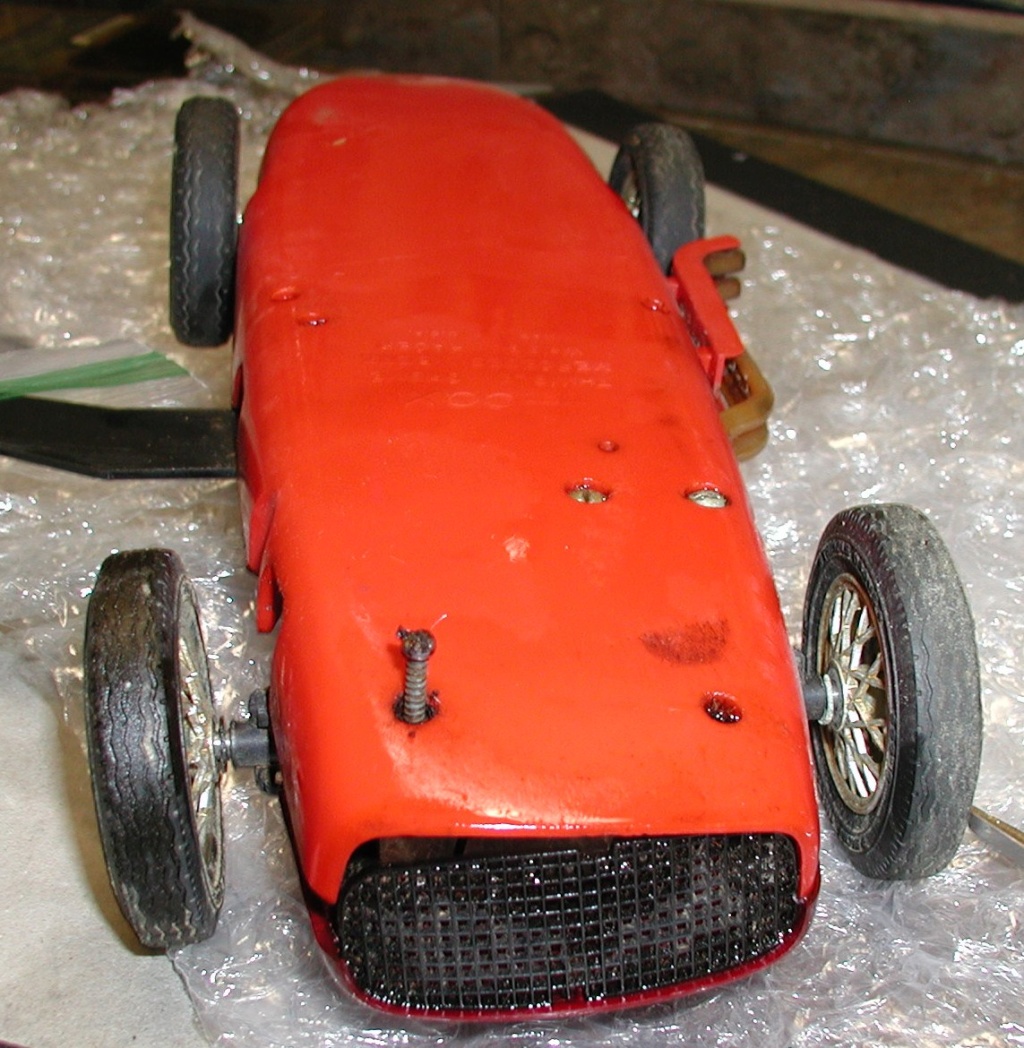
Of all the Cox tether cars, these W-196's (a number taken from the full scale racer) are the most complex and most fragile. Be like a doctor - first do no harm. Easy to say, difficult to accomplish. I tell myself "Better a little dirty than a little broken" and proceed from there.
Most of these outside of "new in the box" examples have been ran and taken apart. You must take the rear body off to install the fixed bridle. Cars that have been disassembled - front to back - come apart pretty easy. Those that have not been disassembled do not.
Of the six that I have only two were not previously disassembled. Of those, all body screws loosened with difficulty finally giving up with a distinct snap. Mudhen once cautioned crankbender to pre-tap the bodies mounting posts on his kit Mercedes before assembling. Good advice.
Just my opinion, but tether cars are not a heck of a lot of fun. You stick a nail in the ground, start it and watch it go round and round. What fun is that! Not like a control line airplane where you have a tiger by the tail and your desperately trying to keep it in the air while not falling down. (Me at least.)
Therefore, many of these were ran a few times and retired. Good for us. My joy is making them whole again.
My first one, old #2 posted about here before was - well, smashed. Everything that could break, broke. It didn't even have the correct engine. Now my favorite it's completely repaired and will be a runner. Two others have been lightly used and are near pristine, but both needed repairs. The rest are just average, likely what you would encounter should you find one of your own.
If you have never laid hands on one, be careful opening the hood. The release is pulling back on the steering wheel to extract the pin holding the hood secure. Be careful, the pin gets clogged with castor residue and may not release. Remember, better a little dirty than a little broken.
If this is the case, you must remove the upper body. On heavily castor coated cars, I like to turn them upside down and fill the mounting holes with Remoil and spray the posts where they separate. Difficult but possible. Wait awhile and clean the self tappers slots and carefully unscrew each, but not the oval screws that hold the engine.
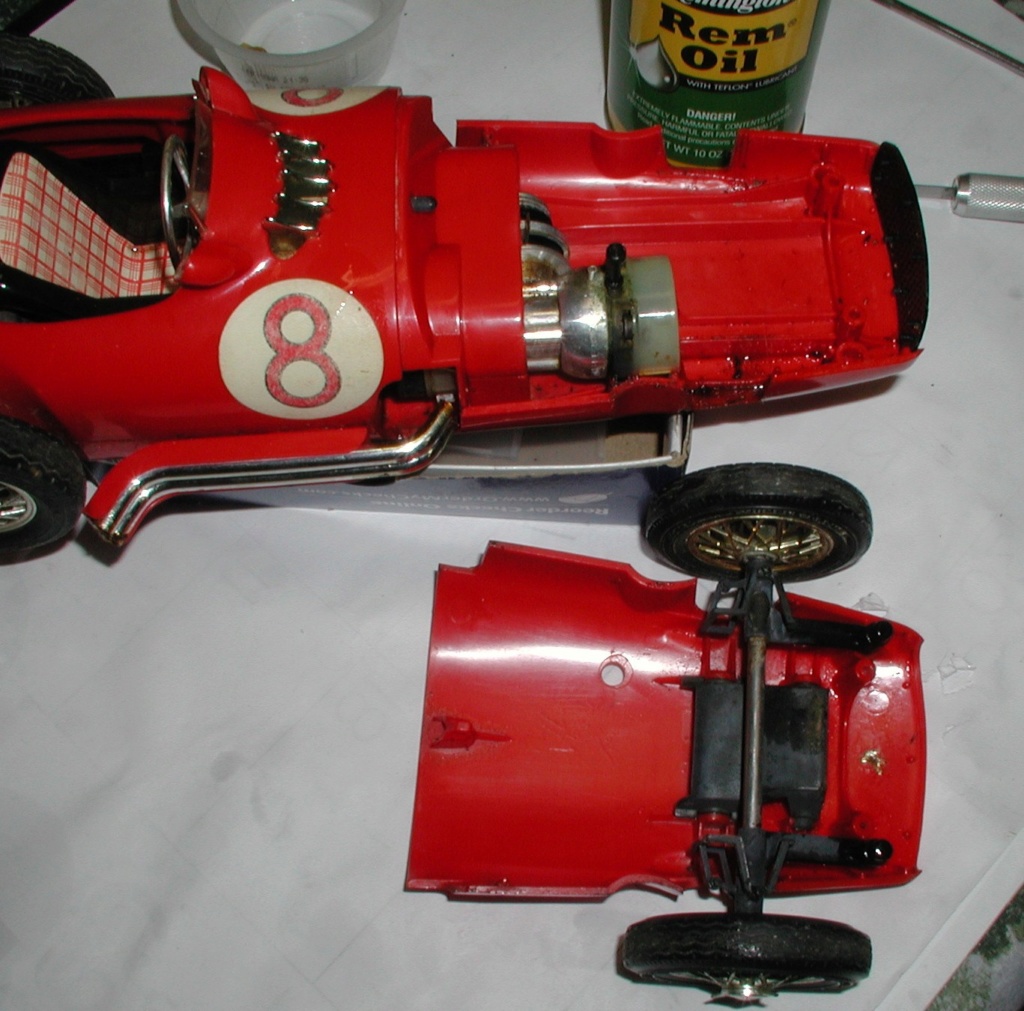
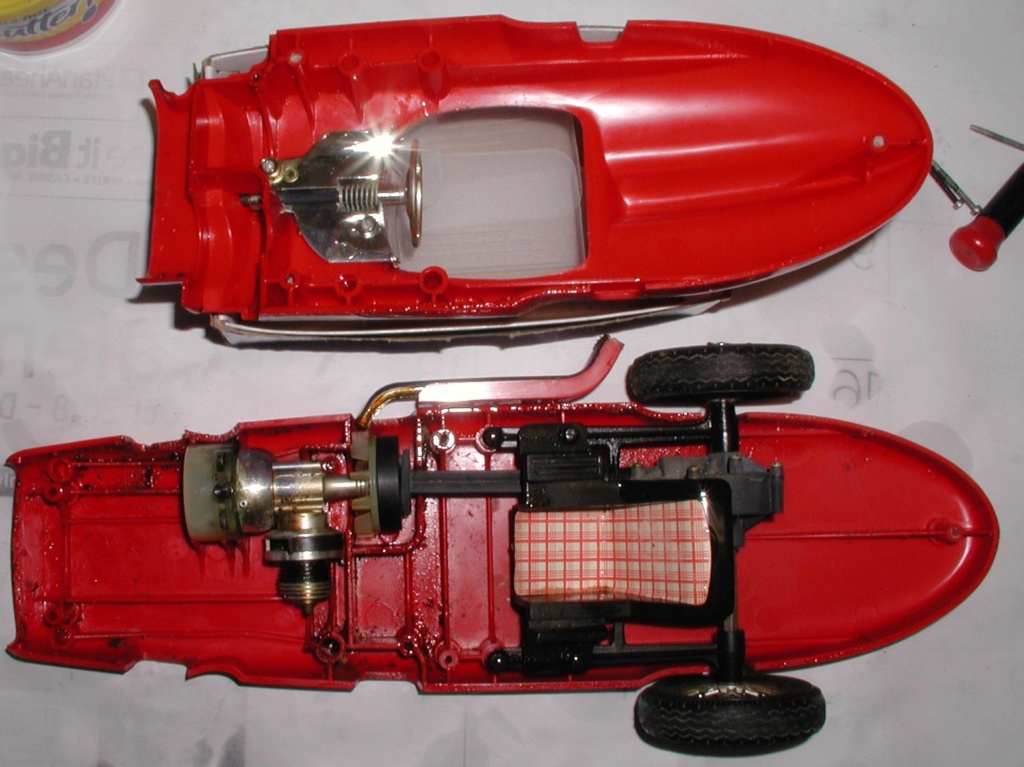
The front piece is the most difficult to remove. This is because the position of the muffler on the engine blows the exhaust castor forward coating everything with castor goo and this is in an almost completely enclosed space, not like a Prop Rod or Shrike where the engine is setting out in the breeze. It's like coal tar and gets in the seams of the front piece. I spray these areas with Remoil and use a fine blade between the seam to separate then lift straight up off the suspensions sway arms and slide forward off the hoods restraining pin. Then you can remove the bodies rear section.

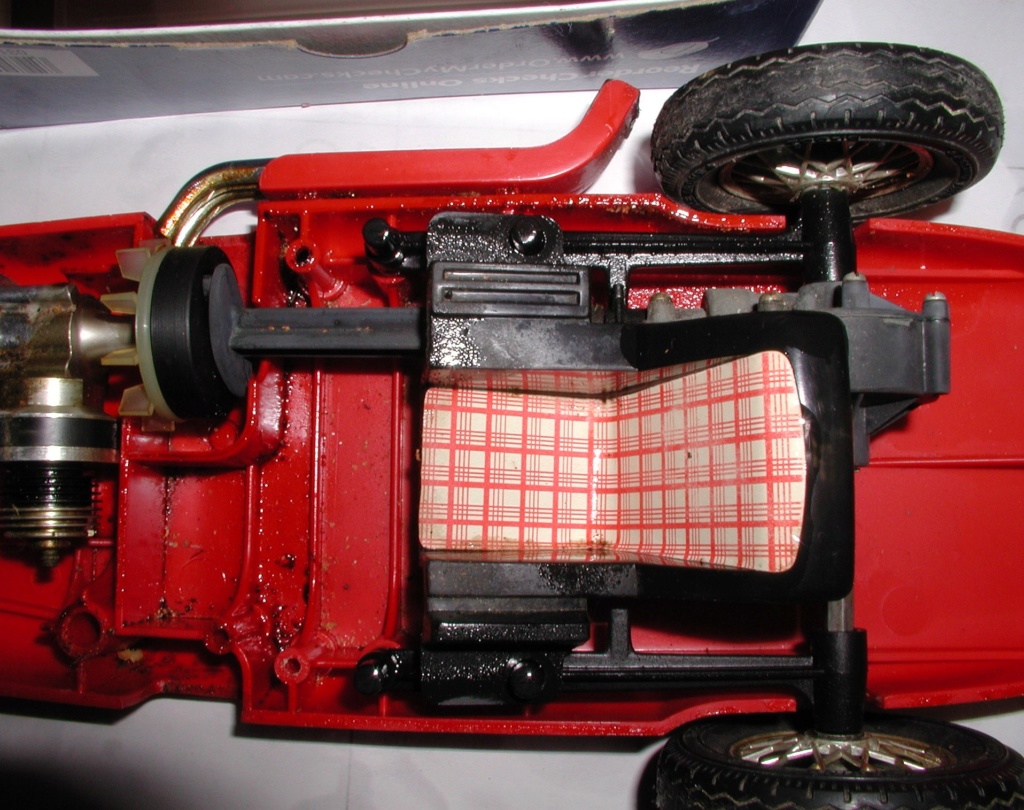
Castor goo

There is a whole lot more, and I'm just getting started, but having put most of you to sleep, I will continue later without the preamble, mostly just pictures.
Bob
That said:
Of all the Cox tether cars, these W-196's (a number taken from the full scale racer) are the most complex and most fragile. Be like a doctor - first do no harm. Easy to say, difficult to accomplish. I tell myself "Better a little dirty than a little broken" and proceed from there.
Most of these outside of "new in the box" examples have been ran and taken apart. You must take the rear body off to install the fixed bridle. Cars that have been disassembled - front to back - come apart pretty easy. Those that have not been disassembled do not.
Of the six that I have only two were not previously disassembled. Of those, all body screws loosened with difficulty finally giving up with a distinct snap. Mudhen once cautioned crankbender to pre-tap the bodies mounting posts on his kit Mercedes before assembling. Good advice.
Just my opinion, but tether cars are not a heck of a lot of fun. You stick a nail in the ground, start it and watch it go round and round. What fun is that! Not like a control line airplane where you have a tiger by the tail and your desperately trying to keep it in the air while not falling down. (Me at least.)
Therefore, many of these were ran a few times and retired. Good for us. My joy is making them whole again.
My first one, old #2 posted about here before was - well, smashed. Everything that could break, broke. It didn't even have the correct engine. Now my favorite it's completely repaired and will be a runner. Two others have been lightly used and are near pristine, but both needed repairs. The rest are just average, likely what you would encounter should you find one of your own.
If you have never laid hands on one, be careful opening the hood. The release is pulling back on the steering wheel to extract the pin holding the hood secure. Be careful, the pin gets clogged with castor residue and may not release. Remember, better a little dirty than a little broken.
If this is the case, you must remove the upper body. On heavily castor coated cars, I like to turn them upside down and fill the mounting holes with Remoil and spray the posts where they separate. Difficult but possible. Wait awhile and clean the self tappers slots and carefully unscrew each, but not the oval screws that hold the engine.
The front piece is the most difficult to remove. This is because the position of the muffler on the engine blows the exhaust castor forward coating everything with castor goo and this is in an almost completely enclosed space, not like a Prop Rod or Shrike where the engine is setting out in the breeze. It's like coal tar and gets in the seams of the front piece. I spray these areas with Remoil and use a fine blade between the seam to separate then lift straight up off the suspensions sway arms and slide forward off the hoods restraining pin. Then you can remove the bodies rear section.
Castor goo
There is a whole lot more, and I'm just getting started, but having put most of you to sleep, I will continue later without the preamble, mostly just pictures.
Bob

rsv1cox- Top Poster


Posts : 10656
Join date : 2014-08-18
Location : West Virginia
Re: Disassembling the Cox Mercedes W-196
![]() crankbndr Tue Jan 15, 2019 5:46 pm
crankbndr Tue Jan 15, 2019 5:46 pm
Good job!! I will say my assembly was tough, my hats off to whoever put these together at Cox. It is a complex model. Some of my parts had to be fitted.

crankbndr- Top Poster
- Posts : 3073
Join date : 2011-12-10
Location : Homestead FL
Re: Disassembling the Cox Mercedes W-196
![]() Cribbs74 Tue Jan 15, 2019 6:41 pm
Cribbs74 Tue Jan 15, 2019 6:41 pm
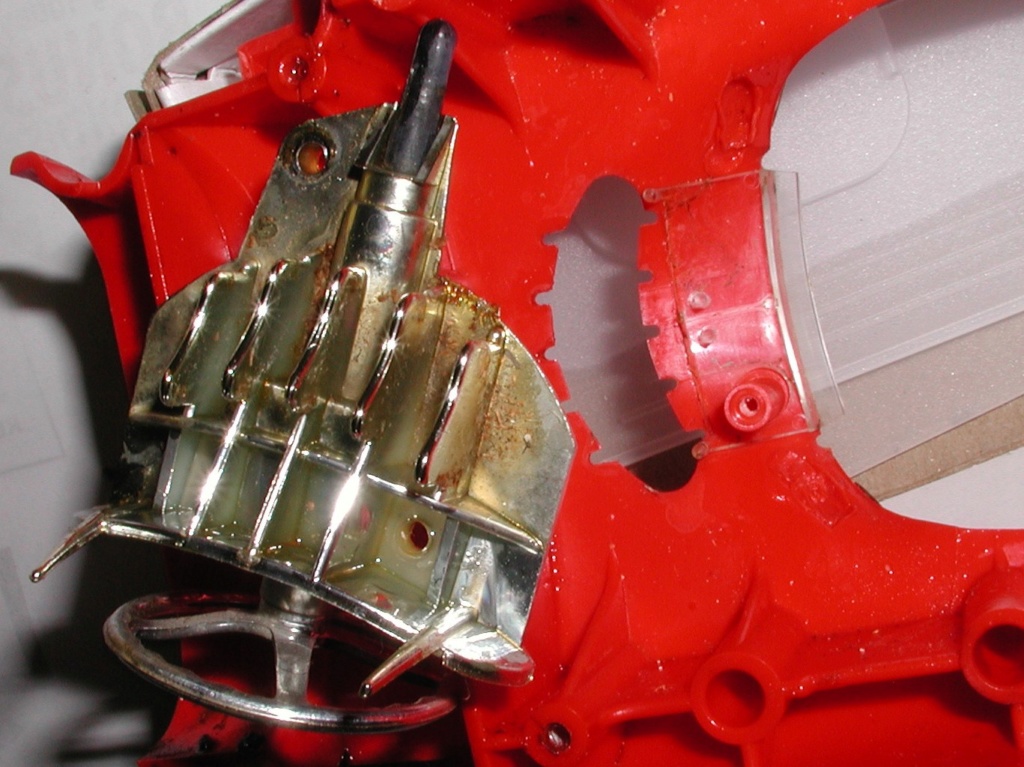
I just wonder why they went with a fluted drive shaft. 
Probably strength, but I could think of better ways
Probably strength, but I could think of better ways

Cribbs74- Moderator
-
Posts : 11899
Join date : 2011-10-24
Age : 50
Location : Tuttle, OK
Re: Disassembling the Cox Mercedes W-196
![]() DrCox Tue Jan 15, 2019 8:13 pm
DrCox Tue Jan 15, 2019 8:13 pm
Great info for future disassemblers. I'll be following.
DrCox- Gold Member

- Posts : 229
Join date : 2018-07-18
Location : Wisconsin
Re: Disassembling the Cox Mercedes W-196
![]() rsv1cox Wed Jan 16, 2019 7:21 am
rsv1cox Wed Jan 16, 2019 7:21 am
Cribbs74 wrote:I just wonder why they went with a fluted drive shaft.
Probably strength, but I could think of better ways
Save weight and mass on a rotating shaft maybe. There is some built in slop, and it's a straight shot from engine to differential saving the need for some sort of universal joint.
I should have mentioned Chancey's method of removing stuck Cox self tapping assembly screws, and they are everywhere, Cox planes, trains, and automobiles. There are eight in the Mercedes alone. Chancey uses a pencil soldering iron just touching the head of the screws and heating until they break the castor bond. With my shaky hands and recessed screw heads that's not an option for me.
Once you have the two half's separated the rest is pretty routine, except for the very fragile and impossible to get steering wheel/windshield assembly. If your fortunate enough to find one without a broken windshield, protect it during disassembly. I set it in a box when removing the body screws, necessary for me, with shaky hands I need both to hit the screw heads.

Be careful when removing the assembly. I put a drop of oil on the screw heads before removing them. Don't try to push down on the outside of the "chrome" vent (not original to the full scale) because of the hood pin. These assemblies are usually castor locked. Because these structures are curved, I pry up from the screw locations, then gently lift up and slide back.


Sometimes the windshield comes along, sometimes it doesn't.
Front and rear suspension and differential dis-assembly covered in another thread.
Bob
rsv1cox- Top Poster
-
Posts : 10656
Join date : 2014-08-18
Location : West Virginia
» Baja Bug and Buggy replacement wheels
» ebay Cox Mercedes, rough.....but check out that glow head.
» Cox Mercedes W-196 - New on me
» Automobiles you don't see everyday...
» Cox Mercedes tech
» ebay Cox Mercedes, rough.....but check out that glow head.
» Cox Mercedes W-196 - New on me
» Automobiles you don't see everyday...
» Cox Mercedes tech
Page 1 of 1
Permissions in this forum:
You cannot reply to topics in this forum