

 Rules
Rules
Log in
Search
Latest topics
» M1Fan...who are you?by 944_Jim Yesterday at 10:07 pm
» My Cox .049 Marine inboard engine
by 1/2A Nut Yesterday at 9:52 pm
» Roddie's water-cooled bench-run vid
by roddie Yesterday at 8:55 pm
» Fox .35 Modifications
by Ken Cook Yesterday at 7:19 pm
» Artwork for Otto Kuhni
by Ken Cook Yesterday at 6:42 pm
» Cox AT-6 Texan repaint.....Pretty nice
by rsv1cox Yesterday at 6:25 pm
» Jim Walker Firebaby
by rsv1cox Yesterday at 6:14 pm
» B-25 Mitchell
by roddie Yesterday at 3:09 pm
» Roddie's water-cooling bottle for bench-running
by roddie Yesterday at 2:24 pm
» Cox water wizard
by Wiggy Yesterday at 2:23 pm
» Jim Walkers FireBee - This is going to be fun
by rsv1cox Yesterday at 10:54 am
» Norvel Needle Needed
by Ken Cook Yesterday at 6:52 am


CEF Traveling Engine


Win This Engine!

Live on Patrol


The Stork
Page 1 of 1

The Stork
![]() Ken Cook Fri Jul 31, 2020 7:05 pm
Ken Cook Fri Jul 31, 2020 7:05 pm
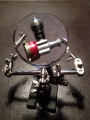
I'm almost done my Golden State Models Stork. This kit was horrid. I have a older A&J freeflight Stork which is immaculate compared to this one. Not much direction on what to do for the inexperienced. The inked parts didn't align with the prints and other additional issues. I had to cut all new ribs as the originals were not even close to the print. It makes you want to set it on fire. It really makes me mad when this kind of stuff happens and I see it with kits all the time. John Brodak purchased Golden State many years ago and my flying partner provided him the Stork due to him not having a kit. John had it redesigned and from what I'm seeing it's a much nicer building plane. I'm at 5.25 ounces as it sits. Plans say not to exceed 12 ounces. Originally my thought was Norvel .061 but I'm strongly leaning on the Medallion .049.
 I still have to put fillets around all intersections. I checked the Medallion and it was a nice drop in fit. I also need to complete the hinges.
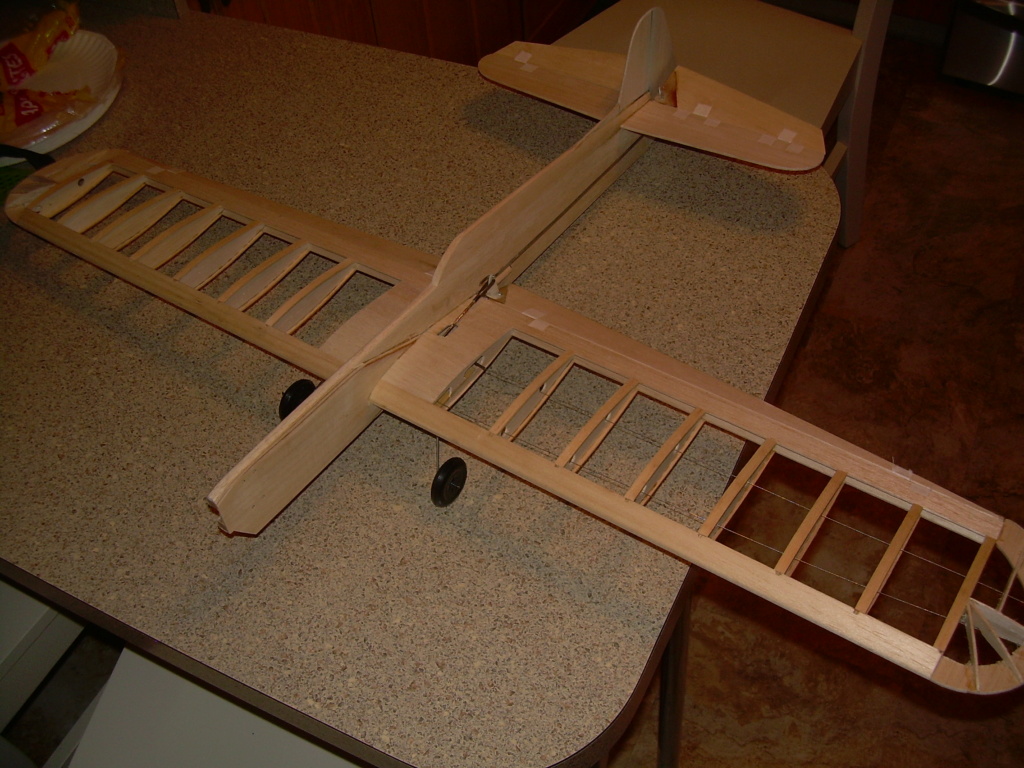 36" wingspan, it's a large 1/2A.
I still have to put fillets around all intersections. I checked the Medallion and it was a nice drop in fit. I also need to complete the hinges. 36" wingspan, it's a large 1/2A.
Ken Cook- Top Poster

- Posts : 5484
Join date : 2012-03-27
Location : pennsylvania
Re: The Stork
![]() 944_Jim Fri Jul 31, 2020 9:13 pm
944_Jim Fri Jul 31, 2020 9:13 pm
That's looking good, Ken! I noticed you and Larry Renger started this kit/build around the same time. I'm drawn by the idea of a wider wingspan in 1/2A, to the point that I picked up an old Pinto kit.
Will you also build adjustable lead-outs?
What do you plan to do for tank and plumbing?
Dope and Docspan or iron-on?
I'm looking forward to watch this build progress.
Will you also build adjustable lead-outs?
What do you plan to do for tank and plumbing?
Dope and Docspan or iron-on?
I'm looking forward to watch this build progress.
944_Jim- Diamond Member


Posts : 1961
Join date : 2017-02-08
Age : 59
Location : NE MS
Re: The Stork
![]() Ken Cook Sat Aug 01, 2020 6:01 am
Ken Cook Sat Aug 01, 2020 6:01 am
Jim, I placed my leadouts slightly forward from what the plans called for. In general when I do a build, I tack the leadout guides to the wingtip with ca. I hang the plane like a plumb bob. While the norm is to have the nose pointing down, I prefer the fuse being parallel to ground or level. I use no rudder offset, no engine offset. I want the plane flying tangent to the circle. All of those old practices strain performance rather than help.
As for covering, using silkspan on a 1/2A is a big waste of time and money. The end result is tearing and a constant battle of repairing. Monokote works just fine not to mention it's durability. The problem with this build is that I'm using nylon ripstop hinges which makes applying iron on difficult to make it look nice. So, I'm a bit up in the air as to what to do here. I have some of Phil Cartier's SLC covering but I was never happy with it's endurance. Silkspan would offer the best results. I believe I have some old K&S still left, Brodak silkspan is not the same and it's only good for solid sheeting as it's just too weak. The fuse will certainly be dope and more than likely the insignia yellow I just mixed up or a blue. I buy the colors in quarts which is like syrup in the can. It takes a lot of thinner to make it brushable. I make a pint of each and then those colors are what I use on all the planes until I run out. The Norvel will run just fine on 5% - 10% nitro whereas the Cox Medallion is going to need a bit more which can destroy your dope finish if it spills on it.
The tank will be a plastic 1 oz. Sullivan which will have a uniflow clunk. This is as simple as one can get. No muffler pressure or case pressure as none of that is needed.
Ken Cook- Top Poster
- Posts : 5484
Join date : 2012-03-27
Location : pennsylvania
Re: The Stork
![]() Cribbs74 Sat Aug 01, 2020 11:07 am
Cribbs74 Sat Aug 01, 2020 11:07 am
Ken,
I really like how you blend the doubler into the fuselage. What method do you use to achieve that result? When I attempt to do that I end up gouging into the soft wood of the fuselage. I am sure some of it is due to a steady hand, but is there a special tool that you use?
Ron
I really like how you blend the doubler into the fuselage. What method do you use to achieve that result? When I attempt to do that I end up gouging into the soft wood of the fuselage. I am sure some of it is due to a steady hand, but is there a special tool that you use?
Ron

Cribbs74- Moderator
-
Posts : 11897
Join date : 2011-10-24
Age : 50
Location : Tuttle, OK
Re: The Stork
![]() PV Pilot Sat Aug 01, 2020 4:27 pm
PV Pilot Sat Aug 01, 2020 4:27 pm
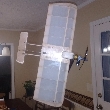
A shame to put any color on it. So long as there is no big fingerprints, and since it was an real terror to put together, clear it with a 2 part, like West Systems thinned and shot thru a HVLP, or something like that. It will keep the weight down and the clear-film see thru wing will show the hard work. Mind the fabric hinges of course. The West Systems is good for 70%+ nitro laying on it for weeks, months, years.
Naked Stork.
Naked Stork.

PV Pilot- High Tech Balsa Basher
- Posts : 1854
Join date : 2011-08-11
Age : 57
Location : The ragged end of the Universe.
Re: The Stork
![]() Ken Cook Sat Aug 01, 2020 4:31 pm
Ken Cook Sat Aug 01, 2020 4:31 pm
Ron, I sand the doubler first prior to gluing them on. When you thin them out like that, you really need to clamp the edge during glue up. I place them right on the edge of the table and I have pieces of Corian that I made to tightly accept belt sander belts. I use 40 grit and sand the edge aggressively. I use the lamination lines as a reference to insure I'm sanding evenly. I also did that with the 1/64" on the elevator and flap horn pieces.
Ken Cook- Top Poster
- Posts : 5484
Join date : 2012-03-27
Location : pennsylvania
Re: The Stork
![]() Ken Cook Sat Aug 01, 2020 4:34 pm
Ken Cook Sat Aug 01, 2020 4:34 pm
PV, one thing that has stopped me from going clear on this one is the fact that the parts were not die cut but inked. This kit was like a old Comet kit where it was just inked patterns that you cut. I always leave some line and the fuse was 3 pieces which all reveal a smeary blue inkline where butt together. If I had of cleaned that off prior to glue up, this would look pretty neat. From the start I had intentions of painting. The wings though may look good if I just do them in clear.
Ken Cook- Top Poster
- Posts : 5484
Join date : 2012-03-27
Location : pennsylvania
Re: The Stork
![]() PV Pilot Sun Aug 02, 2020 10:34 am
PV Pilot Sun Aug 02, 2020 10:34 am
Ken Cook wrote: PV, one thing that has stopped me from going clear on this one is the fact that the parts were not die cut but inked. This kit was like a old Comet kit where it was just inked patterns that you cut. I always leave some line and the fuse was 3 pieces which all reveal a smeary blue inkline where butt together. If I had of cleaned that off prior to glue up, this would look pretty neat. From the start I had intentions of painting. The wings though may look good if I just do them in clear.
I see. Yep, the dreaded ink lines. Seen a 1/8 scale control line low wing that hung in the hobby shop when I was a wee lad and the builder had cleared everything minus the wing. It was tissue, but see thru enough. I was rooted to the spot staring at that HUGE model,,lol. Have 2 complete CG Shoestring Stunter kits for a Mc Red Head .19 and such. Thinking I might clear one. They are so dried out they may be good for nothing but patterns.
PV Pilot- High Tech Balsa Basher
- Posts : 1854
Join date : 2011-08-11
Age : 57
Location : The ragged end of the Universe.
Re: The Stork
![]() Ken Cook Sat Jan 16, 2021 5:33 pm
Ken Cook Sat Jan 16, 2021 5:33 pm
This afternoon I got back to the Stork. Between other builds and everything else I was doing this one got sidelined. I painted it last week and started covering it last evening. I have rolls of Monokote pieces and half rolls in a large box. I found cream which I thought looked better than any other color I owned currently. I barely have enough but it looks like I will make it. The one flap needs covering which is a pain in the rear due to the cuts around the hinge material.
The Brodak rocket blue turned out pretty well and this whole project was brushed. Brushing Brodak colors is a task in itself. Last weekend the temps were not exactly as high as I would've liked but I was practically throwing the paint at it as I was brushing. Fast, thin and frantic is the best way to describe. I back masked the stripe and cleared the tape and quickly brushed on the white. One pass in one direction otherwise it will bleed into the blue and mix the two colors making a irreversible problem without sanding it all off.

The gear wire was bent to the pattern on the print which is now too short. Probably good for asphalt flying but not grass. I might just use a piece of Masonite on grass takeoff. In addition, I noticed the long tail moment is going to require some nose weight. My PAW .049 would be PERFECT for this plane and I don't know why I didn't opt for it from the start. I would need to open the bearers slightly and make 1/8" thick plates under the lugs. I still might if the Norvel proves too hard to work out.
The Brodak rocket blue turned out pretty well and this whole project was brushed. Brushing Brodak colors is a task in itself. Last weekend the temps were not exactly as high as I would've liked but I was practically throwing the paint at it as I was brushing. Fast, thin and frantic is the best way to describe. I back masked the stripe and cleared the tape and quickly brushed on the white. One pass in one direction otherwise it will bleed into the blue and mix the two colors making a irreversible problem without sanding it all off.
The gear wire was bent to the pattern on the print which is now too short. Probably good for asphalt flying but not grass. I might just use a piece of Masonite on grass takeoff. In addition, I noticed the long tail moment is going to require some nose weight. My PAW .049 would be PERFECT for this plane and I don't know why I didn't opt for it from the start. I would need to open the bearers slightly and make 1/8" thick plates under the lugs. I still might if the Norvel proves too hard to work out.
Ken Cook- Top Poster
- Posts : 5484
Join date : 2012-03-27
Location : pennsylvania
Re: The Stork
![]() Cribbs74 Sat Jan 16, 2021 6:04 pm
Cribbs74 Sat Jan 16, 2021 6:04 pm
Looks really good for just throwing paint on it. I guess that hinge setup kind of limits how you cover it. I usually do it separately and then attach when using pin hinges.
Still though you made it work!
Still though you made it work!
Cribbs74- Moderator
-
Posts : 11897
Join date : 2011-10-24
Age : 50
Location : Tuttle, OK
Re: The Stork
![]() Ken Cook Sat Jan 16, 2021 6:12 pm
Ken Cook Sat Jan 16, 2021 6:12 pm
The flap material is only 3/32" which isn't thick enough to accept pin hinges. Technically, the best scenario would've been to use over and under Monokote strips and then cover the entire wing and flap. I've done that several times and it seals the hinge gap as well. Reason for the rip stop hinges I used was because I was going to cover this in nylon. I don't use silkspan or the likes of it anymore. The only way to achieve strength out of those coverings is to have at least 10 coats of plasticized clear on them. It's a waste of money and time unless your flying over asphalt. I even switched to Polyspan which can puncture as well. I prefer synthetics as they're much stronger and allow for the wing to be twisted easier if need be. I have a inverter in my truck for my Monokote iron.
Ken Cook- Top Poster
- Posts : 5484
Join date : 2012-03-27
Location : pennsylvania
Re: The Stork
![]() getback Sun Jan 17, 2021 7:47 am
getback Sun Jan 17, 2021 7:47 am
Looking Good Ken , if i may ask how is it the fuse has a small what looks like the flap on it ? Looks like it was all glued in and cut off at the wing and that is alot of span for a 1/2A should bee stable though.

getback- Top Poster
-
Posts : 10151
Join date : 2013-01-18
Age : 66
Location : julian , NC
Re: The Stork
![]() Ken Cook Sun Jan 17, 2021 8:03 am
Ken Cook Sun Jan 17, 2021 8:03 am
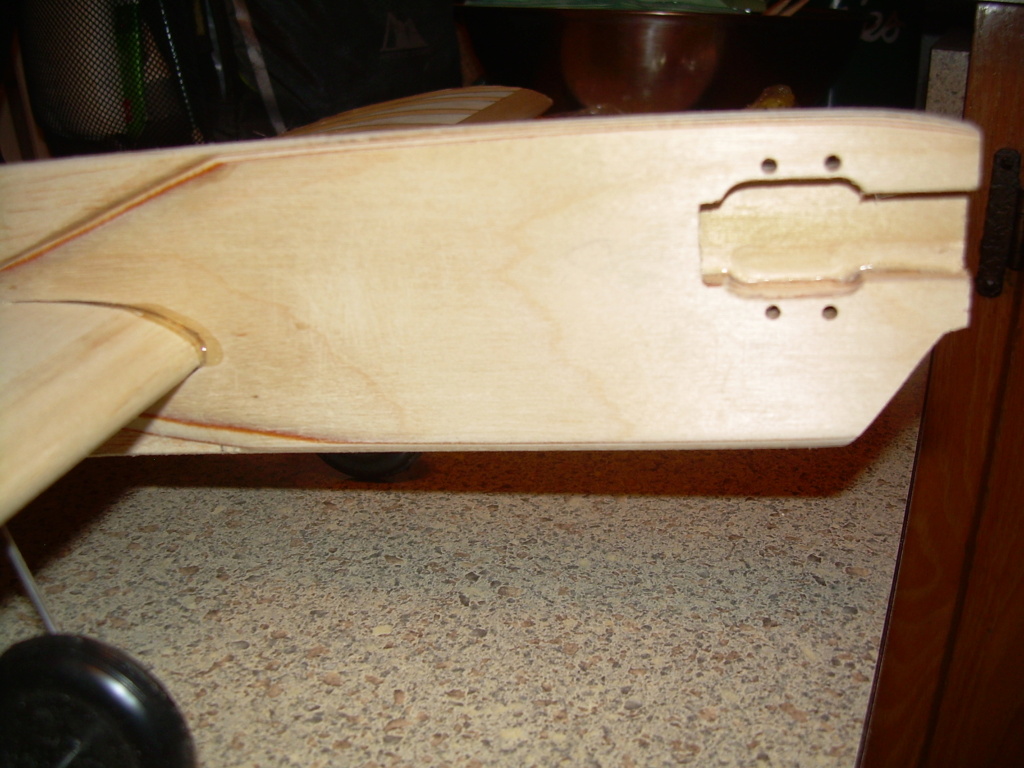
Eric, the span is 36". The plane doesn't even weigh in at 6 oz's as it sits. It's remarkably light and my power is a Norvel .061 which is WAAAY more than enough. A Cox Medallion .049 will fly this model. It does appear funny looking due to .15 sized models not even being this large. I'm not certain as to what your asking about the fuse. The plane is flapped and as of this morning, I finally and painfully completed the Monokote on the flap. It's difficult to cover when the plane has it's flaps attached but patience allows it to be possible. The small piece attached to the fuse is a fillet. I scalloped the rear of it for design. I don't run the flaps all the way to the fuse. I glue the fillets on dead center of my centerline of wing. This offers me a register to insure that my wing installed on the proper incidence and gives reference to my flaps from one side to the others. It's more a design thing than a function. I also have a brass bushing going through the fuse with the horn wire passing through it. The bushing is epoxied to the trailing edge of the wing insuring that the pivot point is on the centerline of wing and prevents bowing of the flap horn wire.
Those fillet pieces are notched around the bushing and conceals the bushing as well.
Those fillet pieces are notched around the bushing and conceals the bushing as well.
Ken Cook- Top Poster
- Posts : 5484
Join date : 2012-03-27
Location : pennsylvania
Re: The Stork
![]() OhBee Sun Jan 17, 2021 6:32 pm
OhBee Sun Jan 17, 2021 6:32 pm
I don't understsand these planes that have flaps that work in the opposite direction of the elevator. Whats that supposed to do? I'd sure never do that with one of my RC planes!

OhBee- Platinum Member

- Posts : 698
Join date : 2016-03-23
Age : 73
Location : Minnesota
Re: The Stork
![]() Ken Cook Sun Jan 17, 2021 6:56 pm
Ken Cook Sun Jan 17, 2021 6:56 pm
Flaps on the wing decrease the lift on the wing. Therefore, if the elevator is operated to the down position, this creates lift in the tail and the opposite reaction on the wing. This allows for a rotation on the trailing edge. The opposite happens when the elevator is operated in the up position. Stunters like this model use flaps to assist the maneuverability of the turn. Without them, the plane tends to slide through the maneuvers vs abruptly turning through them. The square maneuvers actually look like square maneuvers .
Ken Cook- Top Poster
- Posts : 5484
Join date : 2012-03-27
Location : pennsylvania
Re: The Stork
![]() Cribbs74 Sun Jan 17, 2021 9:11 pm
Cribbs74 Sun Jan 17, 2021 9:11 pm
Yep they work. and work well, seems odd from an RC perspective I imagine. If you think about how flaps work conventionally it will make more sense. That and what Ken said.... 
Cribbs74- Moderator
-
Posts : 11897
Join date : 2011-10-24
Age : 50
Location : Tuttle, OK
Re: The Stork
![]() OhBee Mon Jan 18, 2021 12:21 am
OhBee Mon Jan 18, 2021 12:21 am
My knowledge of flaps in the rc and full scale world ...is that they create more lift at slower speed deployed down,sometimes requiring a bit of down elevator to compensate for ballooning. I don't get deploying the 2 in opposite directions though.....not an aerobatic pilot so I guess I'm missing something.
OhBee- Platinum Member
- Posts : 698
Join date : 2016-03-23
Age : 73
Location : Minnesota
Re: The Stork
![]() KariFS Mon Jan 18, 2021 12:43 am
KariFS Mon Jan 18, 2021 12:43 am
I think that on a full-scale stunt aircraft you could use ”flaps up” (or negative flaps) with down elevator but it would probably cause too much negative g for the pilot 
I wonder of anyone has ever tried it in R/C?
Control line flying also differs from ”normal” flying, be it free-fly or R/C (or full-scale), in that you only control the up/down controls of the plane. Control lines and centrifugal force take care of the bank angle and left/right stability. Think about the C/L speed planes with only one wing and no rudder. No way they would fly without the lines.
Could be that negative flaps is something that only works with C/L, anything with ”no strings attached” might go out of control
KariFS- Diamond Member
- Posts : 2004
Join date : 2014-10-10
Age : 52
Re: The Stork
![]() getback Mon Jan 18, 2021 6:39 am
getback Mon Jan 18, 2021 6:39 am
Yes the fillets is what i was referring to i think they look good and sever the purpose you described , and if I remember correctly the not flaps but ailerons are for banking , rolls without them like a 2 channel will skid in effect around a corner/turn. https://en.wikipedia.org/wiki/Aileron
getback- Top Poster
-
Posts : 10151
Join date : 2013-01-18
Age : 66
Location : julian , NC
Page 1 of 1
Permissions in this forum:
You cannot reply to topics in this forum