

 Rules
Rules
Log in
Search
Latest topics
» A choke-tube with velocity-stack configured Beeby MauricioB Today at 12:37 am
» Jim Walkers FireBee - This is going to be fun
by cstatman Yesterday at 6:58 pm
» Prop Rod - resto to a runner
by cstatman Yesterday at 6:56 pm
» Hawk had breakfast and then took a bath
by rdw777 Yesterday at 5:38 pm
» Jim Walker Firebaby
by rdw777 Yesterday at 4:58 pm
» WenMac 049 - Glow Plug & Head Gasket replacements?
by rdw777 Yesterday at 4:32 pm
» Nostalgia alert, my 1959 Corvette revisited
by rsv1cox Yesterday at 2:25 pm
» Prayers for my Wife Please
by akjgardner Yesterday at 10:28 am
» Cox prop rod
by Wiggy Fri May 17, 2024 4:30 pm
» "Red Neck" .049 elec. starter
by getback Fri May 17, 2024 7:19 am
» Cox prop rod
by Wiggy Fri May 17, 2024 5:35 am
» Looking For Comet Tri-Pacer
by latole Fri May 17, 2024 3:45 am


CEF Traveling Engine


Win This Engine!

Live on Patrol


sandpaper organizing tip
Page 1 of 1

sandpaper organizing tip
![]() roddie Sat Oct 12, 2013 10:59 am
roddie Sat Oct 12, 2013 10:59 am
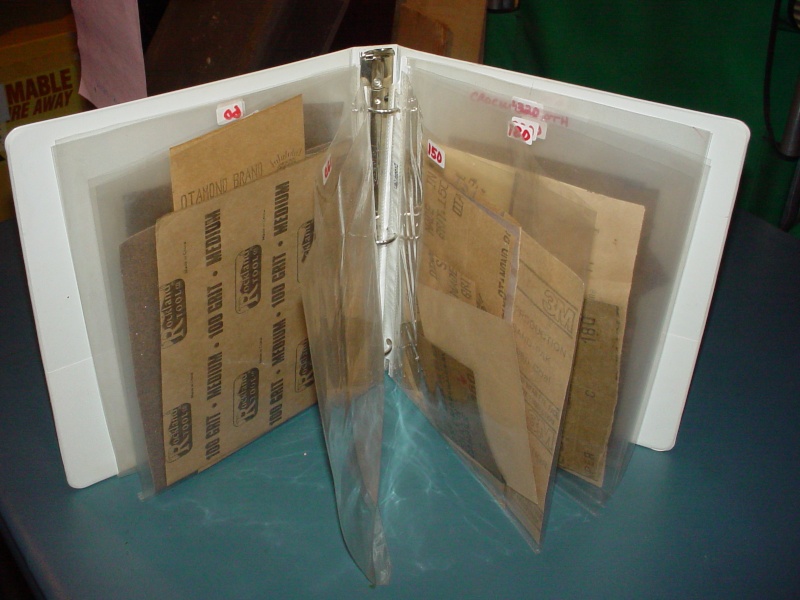
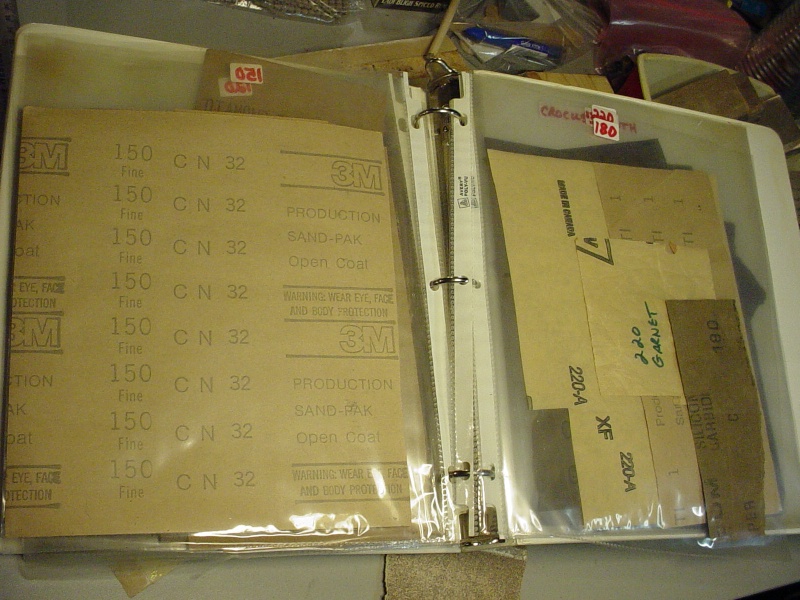
After I cut a piece of sandpaper from a full sheet, I keep the remnant sheets in a 3-ring binder, indexed with page protectors labeled by "grit". It's a big help when you need a sm. pc. of a specific grit... and prevents you from cutting up your nice full sheets for just a little piece...
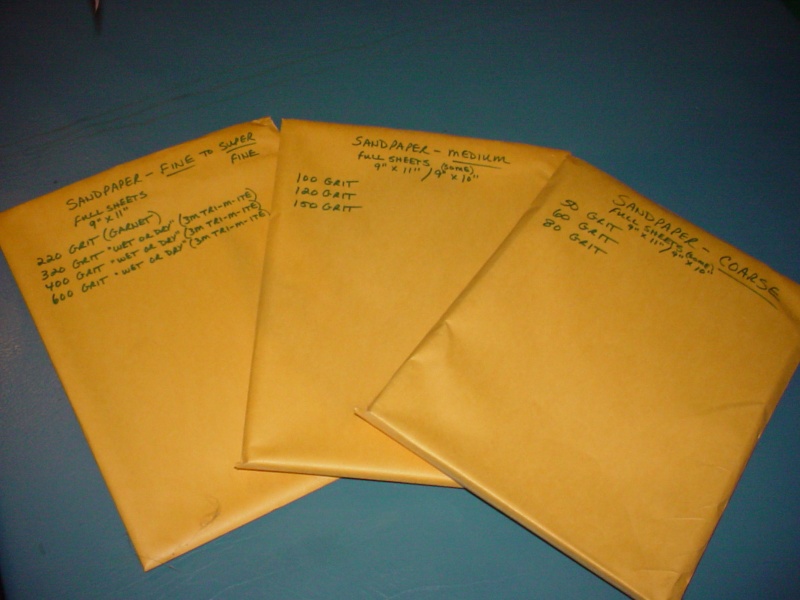
My "full sheets" are kept in (x3) 10" x 13" clasp envelopes, labeled fine/med./coarse. Stored vertically along with the binder; this takes up very little space in your workshop, and you always know where to look, when you need sandpaper.
My "full sheets" are kept in (x3) 10" x 13" clasp envelopes, labeled fine/med./coarse. Stored vertically along with the binder; this takes up very little space in your workshop, and you always know where to look, when you need sandpaper.

roddie- Top Poster

- Posts : 8322
Join date : 2013-07-17
Age : 64
Location : N. Smithfield, Rhode Island -

Re: sandpaper organizing tip
![]() RknRusty Sat Oct 12, 2013 11:12 am
RknRusty Sat Oct 12, 2013 11:12 am
Daayumn. I'm pretty organized, but if I start doing stuff like that, it just snowballs and I get bogged.
_________________
Don't Panic!
...and never Ever think about how good you are at something...
while you're doing it!
My Hot Rock & Blues Playlist
...and never Ever think about how good you are at something...
while you're doing it!
My Hot Rock & Blues Playlist

RknRusty- Rest In Peace

- Posts : 10869
Join date : 2011-08-10
Age : 68
Location : South Carolina, USA
Re: sandpaper organizing tip
![]() Cribbs74 Sat Oct 12, 2013 11:26 am
Cribbs74 Sat Oct 12, 2013 11:26 am
And here I thought artistic folks are messy...

Cribbs74- Moderator


Posts : 11899
Join date : 2011-10-24
Age : 50
Location : Tuttle, OK
Re: sandpaper organizing tip
![]() roddie Sat Oct 12, 2013 1:04 pm
roddie Sat Oct 12, 2013 1:04 pm
Cribbs74 wrote:And here I thought artistic folks are messy...
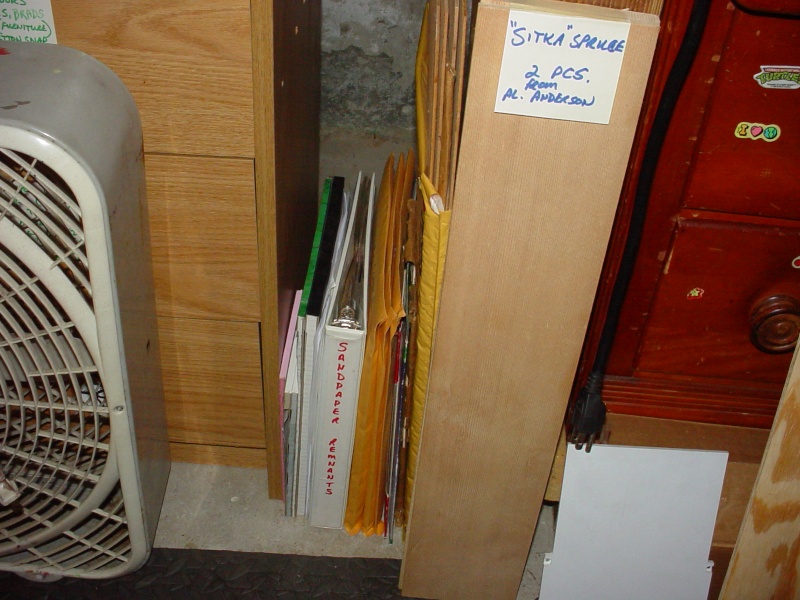
 my shop...
roddie- Top Poster
- Posts : 8322
Join date : 2013-07-17
Age : 64
Location : N. Smithfield, Rhode Island -
Cribbs74- Moderator
-
Posts : 11899
Join date : 2011-10-24
Age : 50
Location : Tuttle, OK
Re: sandpaper organizing tip
![]() ian1954 Sun Oct 13, 2013 1:19 pm
ian1954 Sun Oct 13, 2013 1:19 pm
I am disorganised with sandpaper and I like the ring binder suggestion. I end up with used and unused, cut and pristine sheets all over the place. The only thing I do is, after tearing off a piece, write the grit on the back.
I always seem to manage to take off a strip without the grit printed on the back!
I always seem to manage to take off a strip without the grit printed on the back!

ian1954- Diamond Member

- Posts : 2688
Join date : 2011-11-16
Age : 69
Location : England
Re: sandpaper organizing tip
![]() roddie Sun Oct 13, 2013 3:59 pm
roddie Sun Oct 13, 2013 3:59 pm
That's what you'd think, Ron... but I move everything "once a week" to dust... (It's the sandpaper's fault...)Cribbs74 wrote:Phew! All is right in the world...
roddie- Top Poster
- Posts : 8322
Join date : 2013-07-17
Age : 64
Location : N. Smithfield, Rhode Island -
Re: sandpaper organizing tip
![]() roddie Sun Oct 13, 2013 4:17 pm
roddie Sun Oct 13, 2013 4:17 pm
Yes Ian... we are constantly "challenged" in this hobby... excellent for the mind...ian1954 wrote:I am disorganised with sandpaper and I like the ring binder suggestion. I end up with used and unused, cut and pristine sheets all over the place. The only thing I do is, after tearing off a piece, write the grit on the back.
I always seem to manage to take off a strip without the grit printed on the back!
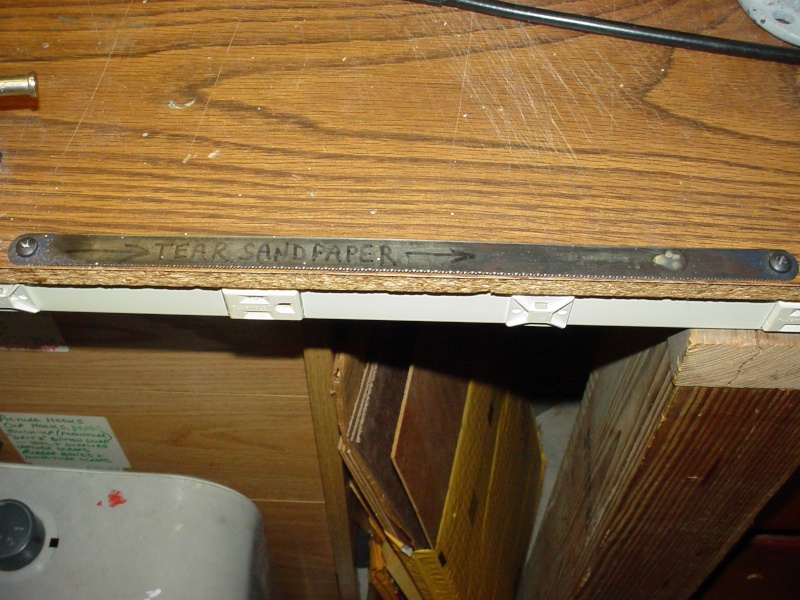
just thought of another "topic related" shop tool... a "Sandpaper Cutter"! Screw a 32 t.p.i. hacksaw blade to a 6" x 12" pc. of plywood to cut your sandpaper with. If you need a certain size, mark it on the back and tear off; grit-face down. You can store it with your 3-ring binder and clasp envelopes. Better than ruining the edge on a straight blade... and you end up with more remnants; completely justifying the use of a binder.
roddie- Top Poster
- Posts : 8322
Join date : 2013-07-17
Age : 64
Location : N. Smithfield, Rhode Island -
Re: sandpaper organizing tip
![]() roddie Fri Mar 11, 2016 9:28 pm
roddie Fri Mar 11, 2016 9:28 pm
Update.. I did make a sheet-cutter from a hacksaw blade screwed to the edge of my workbench.
I decided to finally reface my sanding blocks and such. I attach my paper with double-sided tape on the backside of a block or completely around a dowel without over-lapping. It's great for dowels.
I cut some 1/2" PVC blocks from a smooth-sided sheet back when I worked at the sign shop. They're 2" x 3.5" and make a nice block for smalls.. and sanding spackled holes in walls.. Grits from 60 thru 600.. utilizing my 3-ring remnant binder.
I have wood blocks too.. You can staple into soft pine blocks with a paper-stapler opened-up. Removing the staples later is easy with the point of a hobby blade. I like the tape. it peels off in one piece usually.
Getting started over the last few nights.. stripping old paper.

This is the type of project that will help me get back into model woodworking. Tools are everything.
I decided to finally reface my sanding blocks and such. I attach my paper with double-sided tape on the backside of a block or completely around a dowel without over-lapping. It's great for dowels.
I cut some 1/2" PVC blocks from a smooth-sided sheet back when I worked at the sign shop. They're 2" x 3.5" and make a nice block for smalls.. and sanding spackled holes in walls.. Grits from 60 thru 600.. utilizing my 3-ring remnant binder.
I have wood blocks too.. You can staple into soft pine blocks with a paper-stapler opened-up. Removing the staples later is easy with the point of a hobby blade. I like the tape. it peels off in one piece usually.
Getting started over the last few nights.. stripping old paper.
This is the type of project that will help me get back into model woodworking. Tools are everything.
roddie- Top Poster
- Posts : 8322
Join date : 2013-07-17
Age : 64
Location : N. Smithfield, Rhode Island -
Page 1 of 1
Permissions in this forum:
You cannot reply to topics in this forum