

 Rules
Rules
Log in
Search
Latest topics
» Roddie's water-cooling bottle for bench-runningby roddie Today at 7:26 pm
» Hawk had breakfast and then took a bath
by rsv1cox Today at 6:28 pm
» Feed Station Zebra.. Spring 2022
by roddie Today at 5:59 pm
» Jim Walker Firebaby
by rsv1cox Today at 12:26 pm
» **VOTE-ON-THE-NEXT-COX-ENGINE-OF-THE-MONTH** (May 2024)
by GallopingGhostler Today at 11:12 am
» Jim Walkers FireBee - This is going to be fun
by rsv1cox Today at 7:43 am
» Artwork for Otto Kuhni
by Mark Boesen Yesterday at 11:53 pm
» Baja Bug / Dune Buggy Recoil Starter
by vambrosini Yesterday at 8:57 pm
» Wanted: Pull Starter reapir kit for a Cox Dune Buggy.
by vambrosini Yesterday at 8:55 pm
» cox dune buggy/ baja bug
by vambrosini Yesterday at 8:49 pm
» Joe Wagners Sioux
by GallopingGhostler Yesterday at 7:37 pm
» B-25 Mitchell
by rdw777 Yesterday at 9:49 am


CEF Traveling Engine


Win This Engine!

Live on Patrol


My latest build for the 2017 Ringmaster fly-A-Thon
Page 1 of 1

My latest build for the 2017 Ringmaster fly-A-Thon
![]() batjac Fri Sep 29, 2017 5:04 pm
batjac Fri Sep 29, 2017 5:04 pm
Well, after my miserable failure last year to build an XA-8 in two hours like the magazine article said I should be able to, and my finishing it early this year, I started thinking about how I would make a nice looking airplane that I could build from scratch in only two hours. It would be powered by a Bee engine of some kind, and for purposes of build speed it would use a Brodak engine mount and landing gear. I thought long and hard about how to do the design and what it would look like. I’m pretty sure I’ve come up with a design that could be completed in two hours if one was willing to settle for one color for the whole plane.
After several months of refining the design in my head, I sat down to my work table and promptly discarded the design. Since the Ringmaster Fly-A-Thon is next month, I figured I’d use my ideas on a Beginner’s Ringmaster and see if I could get the plane built in two hours. As with the XA-8, I’ve documented the build on video for posterity. Enjoy the video.
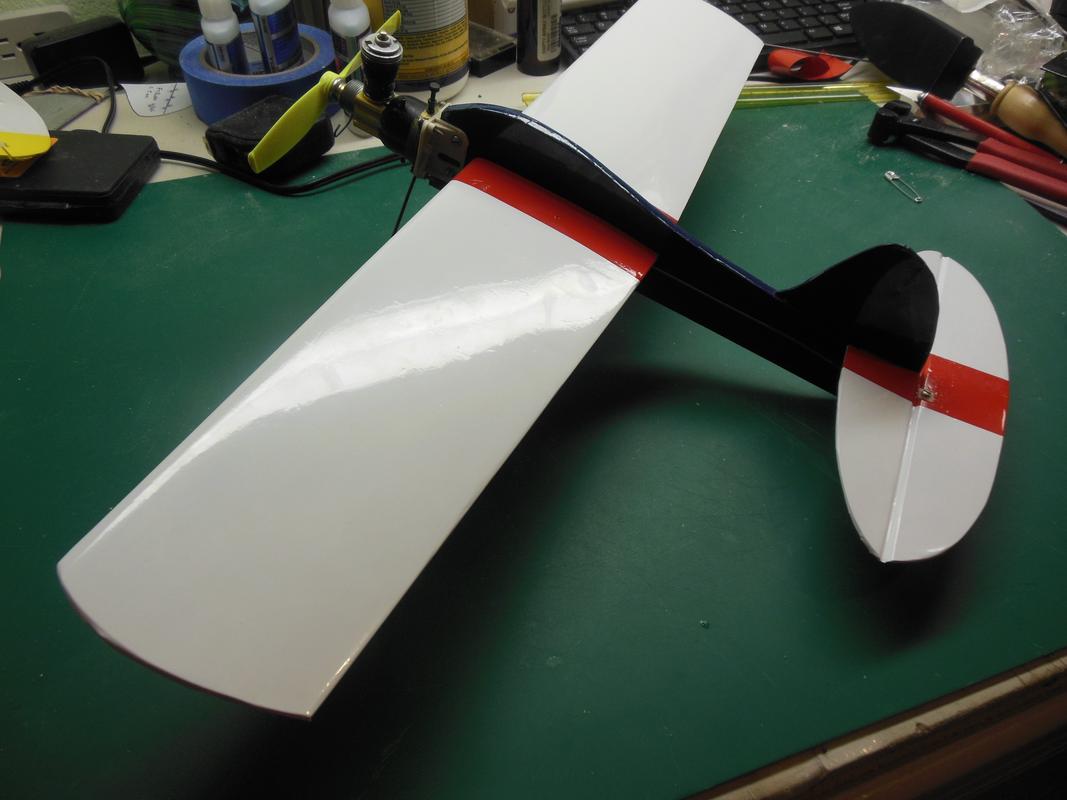
I didn’t make the two hours that I had planned on with this. The build time was closer to two hours and 45 minutes. Start to finish was three hours, but I had to stop several times to sip some rootbeer and re-think how to do this for a Ringmaster rather than my original idea, so two and 45 for the build. The final weight ready to fly is 5.7 ounces. A little more than I’d hoped, but still quite flyable on a Black Widow with a 5x3 Cox prop and 25% nitro. The balance point is at 10%, which would be plenty stable for a Beginner. I’ll move it back to 20%, and then tweak as necessary. The elevator throw is ±22 degrees. With that huge elevator it should work pretty well. I can move the pushrod in one hole on the horn later if necessary and get more throw than I need.
I still think that with better tool and material staging, doing my original idea with one color and all straight lines rather than the Ringmaster’s curves, I could do it in two hours. The design in my head was very straightforward, kind of like a miniature Pathfinder. Maybe in a month or two I’ll go back to my original idea and time that.
Anyway, here’s the result of my power build:


Today was my day off, so I set my alarm clock early. I didn’t even sleep in because I wanted to fly this thing. So up I got and looked out the window. Rain…. *SIGH* I even took the engine back off last night and changed out the original copper/beryllium reed with a new mylar reed, replaced the rock hard venturi gasket with a new rubber gasket, installed a new case gasket, and gave the tank a good cleaning. The engine is all dressed up with nowhere to go...
The Rapido Mark
After several months of refining the design in my head, I sat down to my work table and promptly discarded the design. Since the Ringmaster Fly-A-Thon is next month, I figured I’d use my ideas on a Beginner’s Ringmaster and see if I could get the plane built in two hours. As with the XA-8, I’ve documented the build on video for posterity. Enjoy the video.
I didn’t make the two hours that I had planned on with this. The build time was closer to two hours and 45 minutes. Start to finish was three hours, but I had to stop several times to sip some rootbeer and re-think how to do this for a Ringmaster rather than my original idea, so two and 45 for the build. The final weight ready to fly is 5.7 ounces. A little more than I’d hoped, but still quite flyable on a Black Widow with a 5x3 Cox prop and 25% nitro. The balance point is at 10%, which would be plenty stable for a Beginner. I’ll move it back to 20%, and then tweak as necessary. The elevator throw is ±22 degrees. With that huge elevator it should work pretty well. I can move the pushrod in one hole on the horn later if necessary and get more throw than I need.
I still think that with better tool and material staging, doing my original idea with one color and all straight lines rather than the Ringmaster’s curves, I could do it in two hours. The design in my head was very straightforward, kind of like a miniature Pathfinder. Maybe in a month or two I’ll go back to my original idea and time that.
Anyway, here’s the result of my power build:
Today was my day off, so I set my alarm clock early. I didn’t even sleep in because I wanted to fly this thing. So up I got and looked out the window. Rain…. *SIGH* I even took the engine back off last night and changed out the original copper/beryllium reed with a new mylar reed, replaced the rock hard venturi gasket with a new rubber gasket, installed a new case gasket, and gave the tank a good cleaning. The engine is all dressed up with nowhere to go...
The Rapido Mark
batjac- Diamond Member


Posts : 2338
Join date : 2013-05-22
Age : 61
Location : Broken Arrow, OK, USA
Re: My latest build for the 2017 Ringmaster fly-A-Thon
![]() akjgardner Fri Sep 29, 2017 5:17 pm
akjgardner Fri Sep 29, 2017 5:17 pm
Very Nice Power Build
akjgardner- Diamond Member
-
Posts : 1475
Join date : 2014-12-28
Age : 64
Location : Greensberg Indiana
Re: My latest build for the 2017 Ringmaster fly-A-Thon
![]() Kim Fri Sep 29, 2017 6:32 pm
Kim Fri Sep 29, 2017 6:32 pm
Way to Go (Build) Mark !!!!!!

Kim- Top Poster

-
Posts : 8536
Join date : 2011-09-06
Location : South East Missouri
Re: My latest build for the 2017 Ringmaster fly-A-Thon
![]() TLAnderson Fri Sep 29, 2017 8:35 pm
TLAnderson Fri Sep 29, 2017 8:35 pm
Cool build video. Thanks for posting it. Took me a month to get my Skyray done.

TLAnderson- Gold Member

- Posts : 242
Join date : 2016-07-21
Location : Northern Wisconsin
Re: My latest build for the 2017 Ringmaster fly-A-Thon
![]() batjac Sat Sep 30, 2017 9:17 pm
batjac Sat Sep 30, 2017 9:17 pm
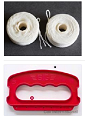
Since it was raining and I couldn’t fly the THT Beginner’s Ringmaster, I thought I’d give it some trim. I tried several shapes for the canopy, but couldn’t find anything I liked, so I’ll leave it without a canopy. I don’t have any checkerboard MonoKote trim sheet, and at $5.99 a sheet I’m not going to buy any. So, this gives me a chance to try the GLAD Press N’ Seal method of applying MonoKote trim.
For those not familiar with it, it uses the super-clingy Press N’ Seal plastic film made by GLAD. The procedure is to:
1) Spray Windex on a sheet of glass and put a sheet of MonoKote on the glass.
2) Squeegee the Windex out from under the covering sheet.
3) Put the pattern for your decal/lettering/whatever over the sheet.
4) Cut out the pattern with a NEW knife blade.
5) Apply a sheet of Press N’ Seal over your design.
6) Peel the plastic up with your design stuck to it.
7) Spray Windex on the surface you’re attaching your design to.
8 ) Apply the design to the surface and work all the air bubbles out from under it.
9) Let set overnight.
10) Peel off the plastic the next morning, using light heat from a heat gun to make the Press N’ Seal release
11) Use an iron or MonoKote Trim Solvent to seal the edges of your design.
Here’s my first try at using this method to trim a plane. You don’t need to use tape to hold the film down, it’ll naturally stick to the glass firmly. I just used the tape so I’d have something to draw grid lines on to ensure the squares were uniform. I also think I was a little to aggressive in squeegeeing the Windex out from under the MonoKote sheet, as the squares were a little reluctant to peel up with the Press N' Seal.

Not a bad first try at this method. I could have made my lines more uniform. And using covering leftovers is definitely better than shelling out $6.00 for trim sheet. Besides, it's got a nice feeling of accomplishment to make the checkerboard myself.
The Neophyte Mark
For those not familiar with it, it uses the super-clingy Press N’ Seal plastic film made by GLAD. The procedure is to:
1) Spray Windex on a sheet of glass and put a sheet of MonoKote on the glass.
2) Squeegee the Windex out from under the covering sheet.
3) Put the pattern for your decal/lettering/whatever over the sheet.
4) Cut out the pattern with a NEW knife blade.
5) Apply a sheet of Press N’ Seal over your design.
6) Peel the plastic up with your design stuck to it.
7) Spray Windex on the surface you’re attaching your design to.
8 ) Apply the design to the surface and work all the air bubbles out from under it.
9) Let set overnight.
10) Peel off the plastic the next morning, using light heat from a heat gun to make the Press N’ Seal release
11) Use an iron or MonoKote Trim Solvent to seal the edges of your design.
Here’s my first try at using this method to trim a plane. You don’t need to use tape to hold the film down, it’ll naturally stick to the glass firmly. I just used the tape so I’d have something to draw grid lines on to ensure the squares were uniform. I also think I was a little to aggressive in squeegeeing the Windex out from under the MonoKote sheet, as the squares were a little reluctant to peel up with the Press N' Seal.
Not a bad first try at this method. I could have made my lines more uniform. And using covering leftovers is definitely better than shelling out $6.00 for trim sheet. Besides, it's got a nice feeling of accomplishment to make the checkerboard myself.
The Neophyte Mark
batjac- Diamond Member
-
Posts : 2338
Join date : 2013-05-22
Age : 61
Location : Broken Arrow, OK, USA
Re: My latest build for the 2017 Ringmaster fly-A-Thon
![]() MauricioB Sun Oct 01, 2017 2:24 am
MauricioB Sun Oct 01, 2017 2:24 am
batjac wrote:Since it was raining and I couldn’t fly the THT Beginner’s Ringmaster, I thought I’d give it some trim. I tried several shapes for the canopy, but couldn’t find anything I liked, so I’ll leave it without a canopy. I don’t have any checkerboard MonoKote trim sheet, and at $5.99 a sheet I’m not going to buy any. So, this gives me a chance to try the GLAD Press N’ Seal method of applying MonoKote trim.
For those not familiar with it, it uses the super-clingy Press N’ Seal plastic film made by GLAD. The procedure is to:
1) Spray Windex on a sheet of glass and put a sheet of MonoKote on the glass.
2) Squeegee the Windex out from under the covering sheet.
3) Put the pattern for your decal/lettering/whatever over the sheet.
4) Cut out the pattern with a NEW knife blade.
5) Apply a sheet of Press N’ Seal over your design.
6) Peel the plastic up with your design stuck to it.
7) Spray Windex on the surface you’re attaching your design to.
8 ) Apply the design to the surface and work all the air bubbles out from under it.
9) Let set overnight.
10) Peel off the plastic the next morning, using light heat from a heat gun to make the Press N’ Seal release
11) Use an iron or MonoKote Trim Solvent to seal the edges of your design.
Here’s my first try at using this method to trim a plane. You don’t need to use tape to hold the film down, it’ll naturally stick to the glass firmly. I just used the tape so I’d have something to draw grid lines on to ensure the squares were uniform. I also think I was a little to aggressive in squeegeeing the Windex out from under the MonoKote sheet, as the squares were a little reluctant to peel up with the Press N' Seal.
Not a bad first try at this method. I could have made my lines more uniform. And using covering leftovers is definitely better than shelling out $6.00 for trim sheet. Besides, it's got a nice feeling of accomplishment to make the checkerboard myself.
The Neophyte Mark
beautiful job Batjac!
At the moment of placing the Monokote on the board, you remove the transparent film, does that, I guess ... 0.33 minute of your video.
You use a spray, what kind of liquid is it ?, to stick my decals and I use a dose of laundry soap and water, in your case is something like ?.
What is it called or what material is the Nylon that you apply above the monokote square to be able to transfer ?, is a special material or is in common use ... 4.17 minute of your video.
I like your job

MauricioB- Top Poster
- Posts : 3591
Join date : 2016-02-16
Age : 53
Location : ARG
Re: My latest build for the 2017 Ringmaster fly-A-Thon
![]() Kim Sun Oct 01, 2017 7:43 am
Kim Sun Oct 01, 2017 7:43 am
batjac wrote:Since it was raining and I couldn’t fly the THT Beginner’s Ringmaster, I thought I’d give it some trim. I tried several shapes for the canopy, but couldn’t find anything I liked, so I’ll leave it without a canopy. I don’t have any checkerboard MonoKote trim sheet, and at $5.99 a sheet I’m not going to buy any. So, this gives me a chance to try the GLAD Press N’ Seal method of applying MonoKote trim.
The Neophyte Mark
HOLY CATS!!! Post like these make me wish there was a 'Multi-Greenie Button' !!!!!
Kim- Top Poster
-
Posts : 8536
Join date : 2011-09-06
Location : South East Missouri
Re: My latest build for the 2017 Ringmaster fly-A-Thon
![]() getback Sun Oct 01, 2017 8:26 am
getback Sun Oct 01, 2017 8:26 am
Beautiful job Mark !! The plane turned out nice especially since you were rushing for a time test. I have heard of the press and seal checker board method but not seen it done , you did a terrific job for a first time try . 

getback- Top Poster
-
Posts : 10155
Join date : 2013-01-18
Age : 66
Location : julian , NC
Re: My latest build for the 2017 Ringmaster fly-A-Thon
![]() KariFS Sun Oct 01, 2017 9:55 am
KariFS Sun Oct 01, 2017 9:55 am
Mauricio, I think the spray chemical Mark uses is "Windex", it is a product for cleaning windows and mirrors and such surfaces at home.
The plastic is something you would use to wrap your picnic sandwiches with, or covering a bowl of food. I am not sure if it needs to be "extra sticky"... The ones available here in Finland are not very sticky, I think I will have to buy a few different brands to test
The plastic is something you would use to wrap your picnic sandwiches with, or covering a bowl of food. I am not sure if it needs to be "extra sticky"... The ones available here in Finland are not very sticky, I think I will have to buy a few different brands to test
KariFS- Diamond Member
- Posts : 2004
Join date : 2014-10-10
Age : 52
Re: My latest build for the 2017 Ringmaster fly-A-Thon
![]() Marleysky Sun Oct 01, 2017 3:50 pm
Marleysky Sun Oct 01, 2017 3:50 pm
One word to describe two videos AWESOME!
Two words to describe two videos: TOTALLY AWESOME!!
Great job Mark, thanks for taking the time and sharing with us. I'm sure I'll be using the checkerboard press and seal method in a build in the future.
Two words to describe two videos: TOTALLY AWESOME!!
Great job Mark, thanks for taking the time and sharing with us. I'm sure I'll be using the checkerboard press and seal method in a build in the future.

Marleysky- Top Poster
-
Posts : 3618
Join date : 2014-09-28
Age : 71
Location : Grand Rapids, MI
Re: My latest build for the 2017 Ringmaster fly-A-Thon
![]() MauricioB Sun Oct 01, 2017 9:51 pm
MauricioB Sun Oct 01, 2017 9:51 pm
KariFS wrote:Mauricio, I think the spray chemical Mark uses is "Windex", it is a product for cleaning windows and mirrors and such surfaces at home.
The plastic is something you would use to wrap your picnic sandwiches with, or covering a bowl of food. I am not sure if it needs to be "extra sticky"... The ones available here in Finland are not very sticky, I think I will have to buy a few different brands to test
Thanks Kari for your clarification, it is very useful to know the type of material or the similarities of which one can use in different places.
Thanks for the clarification!

MauricioB- Top Poster
- Posts : 3591
Join date : 2016-02-16
Age : 53
Location : ARG
Re: My latest build for the 2017 Ringmaster fly-A-Thon
![]() batjac Mon Oct 02, 2017 1:12 pm
batjac Mon Oct 02, 2017 1:12 pm
Mauricio, Kari is correct. The fluid is Windex brand glass cleaner. It is soapy and lets you slide the work around like your soap and water. It also has ammonia in it, which is what I think helps the MonoKote trim to stick to the MonoKote on the wing. I think the ammonia somewhat “activates” the adhesive on the bottom of the trim piece and makes it stick overnight. I’m sure any ammonia based glass cleaner available to you would work just as well.
Kari, the GLAD Press N’ Seal is like a super cling wrap. The standard GLAD plastic wrap doesn’t stick all that well, but the Press N’ Seal has a sticky side that sticks extremely well to surfaces. Here’s a commercial to show how it is different from regular plastic wrap films. Yes, it really IS this good:
I’d be surprised if GLAD didn’t sell this in Finland.
The Clingy Mark
batjac- Diamond Member
-
Posts : 2338
Join date : 2013-05-22
Age : 61
Location : Broken Arrow, OK, USA
Re: My latest build for the 2017 Ringmaster fly-A-Thon
![]() batjac Sat Oct 07, 2017 10:08 pm
batjac Sat Oct 07, 2017 10:08 pm
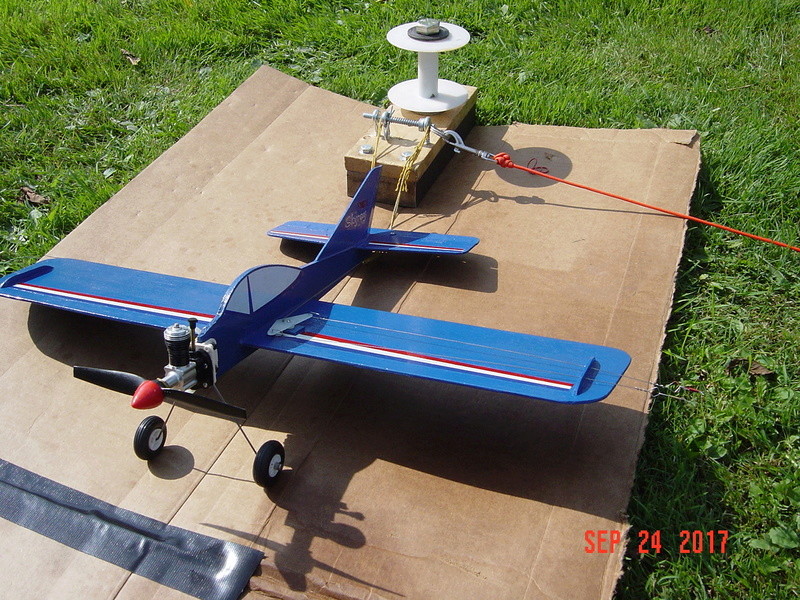
Well, I made the maiden flight of this plane today. I went out to Delta Park, but I was the only one there. All the other Fireballs were down at the Fall Follies in Salem. I brought along my stooge and runway, just in case, so I was able to get in 11 flights for the Fly-A-Thon. I had planned on getting ten flights, but I threw in one extra just in case I got my count wrong. The engine wasn’t cooperating, so I only did wing-overs and loops. The video shows the entire maiden flight where I just did roundy-roundy to feel out the plane out and note how much I had to adjust the handle for neutral. After that are just the launches for the remaining flights as video proof of the flights for the Fly-A-Thon tally. Well, mostly just launches. I also included the landing for the fourth flight, as it was mildly interesting when it occurred.
Unfortunately, I couldn’t fly my electric S-1 Ringmaster ARF, as the grass field I had the stooge on wasn’t quite large enough for 60 foot lines. Ah, well.
The Lonely Mark
Unfortunately, I couldn’t fly my electric S-1 Ringmaster ARF, as the grass field I had the stooge on wasn’t quite large enough for 60 foot lines. Ah, well.
The Lonely Mark
batjac- Diamond Member
-
Posts : 2338
Join date : 2013-05-22
Age : 61
Location : Broken Arrow, OK, USA
Re: My latest build for the 2017 Ringmaster fly-A-Thon
![]() MauricioB Sat Oct 07, 2017 10:13 pm
MauricioB Sat Oct 07, 2017 10:13 pm
batjac wrote:Mauricio, Kari is correct. The fluid is Windex brand glass cleaner. It is soapy and lets you slide the work around like your soap and water. It also has ammonia in it, which is what I think helps the MonoKote trim to stick to the MonoKote on the wing. I think the ammonia somewhat “activates” the adhesive on the bottom of the trim piece and makes it stick overnight. I’m sure any ammonia based glass cleaner available to you would work just as well.
Kari, the GLAD Press N’ Seal is like a super cling wrap. The standard GLAD plastic wrap doesn’t stick all that well, but the Press N’ Seal has a sticky side that sticks extremely well to surfaces. Here’s a commercial to show how it is different from regular plastic wrap films. Yes, it really IS this good:
I’d be surprised if GLAD didn’t sell this in Finland.
The Clingy Mark
thanks for your clarification, You have done a very nice job!
MauricioB- Top Poster
- Posts : 3591
Join date : 2016-02-16
Age : 53
Location : ARG
Re: My latest build for the 2017 Ringmaster fly-A-Thon
![]() Marleysky Sat Oct 07, 2017 10:20 pm
Marleysky Sat Oct 07, 2017 10:20 pm
Great flights! All eleven of 'em! CONGRATULATIONS for your contributions to the Ringmastr flyaton!
Nice stooge work, you really like to get vertical right off the runway.
Nice stooge work, you really like to get vertical right off the runway.
Marleysky- Top Poster
-
Posts : 3618
Join date : 2014-09-28
Age : 71
Location : Grand Rapids, MI
Re: My latest build for the 2017 Ringmaster fly-A-Thon
![]() getback Sun Oct 08, 2017 9:10 am
getback Sun Oct 08, 2017 9:10 am
Way to GO Mark !! Sounds like the engine was running fine to me ? She likes to get airborne quick , thats cool . Had to do some repair to my Ring that caught fire last year and i got somewaht pied about it . Hopefully today some flights the Rain was coming down hard yesterday afternoon as we were getting outside . 
getback- Top Poster
-
Posts : 10155
Join date : 2013-01-18
Age : 66
Location : julian , NC
Re: My latest build for the 2017 Ringmaster fly-A-Thon
![]() roddie Sun Oct 08, 2017 1:25 pm
roddie Sun Oct 08, 2017 1:25 pm
Nice job with EVERYTHING Mark! Very nice looking little airplane.. and it climbs-out of the gate like a scared monkey going up a tree! Congrats. on your 11 RM flight-contributions!
Very nice looking little airplane.. and it climbs-out of the gate like a scared monkey going up a tree! Congrats. on your 11 RM flight-contributions! 
roddie- Top Poster
- Posts : 8315
Join date : 2013-07-17
Age : 64
Location : N. Smithfield, Rhode Island -

» The 2017 International Ringmaster Fly-a-Thon is History!!!
» RINGMASTER FLY-A-THON
» Beginners Ringmaster
» My Latest, a Jr. Ringmaster
» Ringmaster Fly-a-Thon Residual Effects !
» RINGMASTER FLY-A-THON
» Beginners Ringmaster
» My Latest, a Jr. Ringmaster
» Ringmaster Fly-a-Thon Residual Effects !
Page 1 of 1
Permissions in this forum:
You cannot reply to topics in this forum