

 Rules
Rules
Log in
Search
Latest topics
» Prayers for my Wife Please by fit90 Today at 7:34 am
» audio-tach anyone?
by balogh Today at 7:04 am
» Prop Rod - resto to a runner
by getback Today at 6:19 am
» WenMac 049 - Glow Plug & Head Gasket replacements?
by Ken Cook Yesterday at 7:50 pm
» 12 string guitar suggestions
by akjgardner Yesterday at 7:08 pm
» A choke-tube with velocity-stack configured Bee
by roddie Yesterday at 2:54 pm
» Jim Walkers FireBee - This is going to be fun
by rsv1cox Yesterday at 2:43 pm
» Nostalgia alert, my 1959 Corvette revisited
by Admin Yesterday at 1:11 pm
» Hawk had breakfast and then took a bath
by rsv1cox Yesterday at 10:26 am
» Jim Walker Firebaby
by rdw777 Sat May 18, 2024 4:58 pm
» Cox prop rod
by Wiggy Fri May 17, 2024 4:30 pm
» "Red Neck" .049 elec. starter
by getback Fri May 17, 2024 7:19 am


CEF Traveling Engine


Win This Engine!

Live on Patrol


Restoring Cox Engines in general
Page 1 of 1

Restoring Cox Engines in general
![]() ian1954 Sat Jan 12, 2013 12:57 pm
ian1954 Sat Jan 12, 2013 12:57 pm
I read with interest the postings following the advice on restoring Jason's Strato bug. Rather than follow the same topic, I would like to start a new one that follows the same lines but is more general.
Firstly, my techniques are not for the faint hearted. I have no concept of health and safety and believe that everyone learns from their mistakes but caution is advised as these procedures can be dangerous if care and protection is not taken. You could also ruin what was to be your pride and joy and so I would recommend practise on less valuable engines.
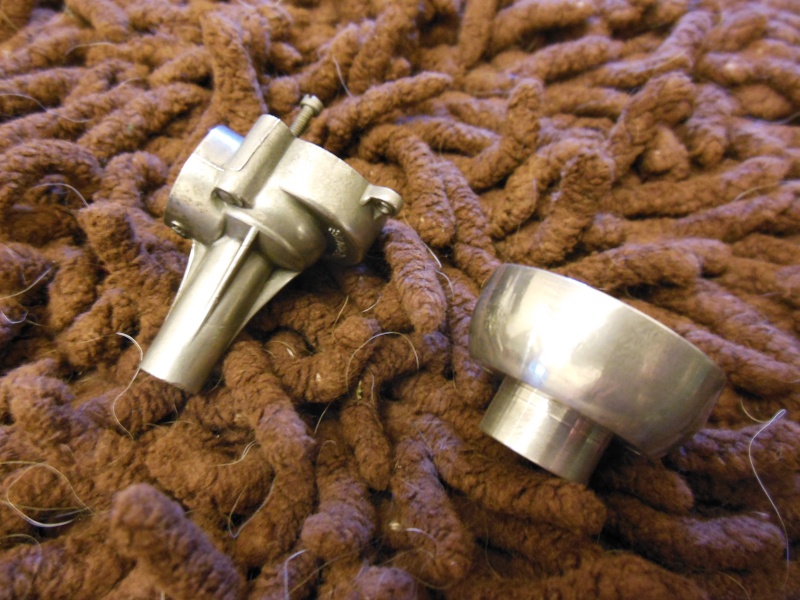
This is what I started off with (earlier this afternoon) and selected a grotty crankcase from a bug and a tank from a bee. No fuel tubes to keep it simple.

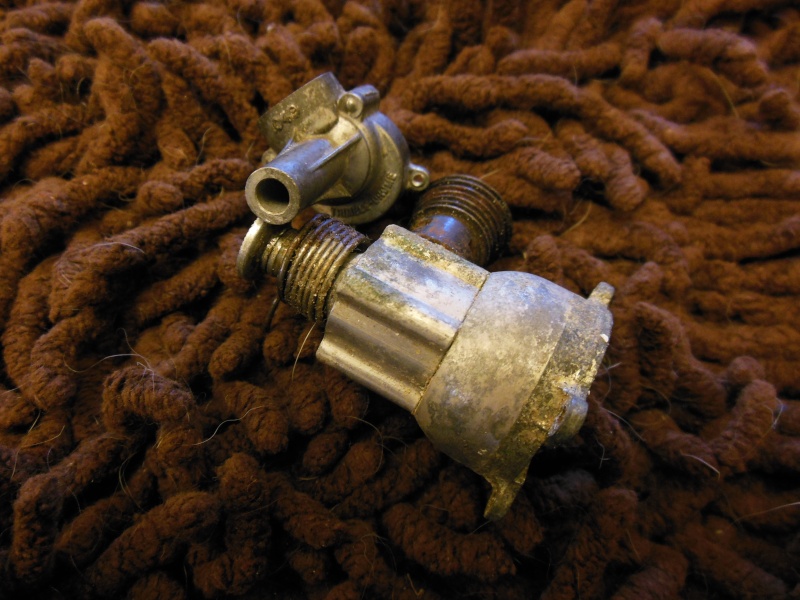
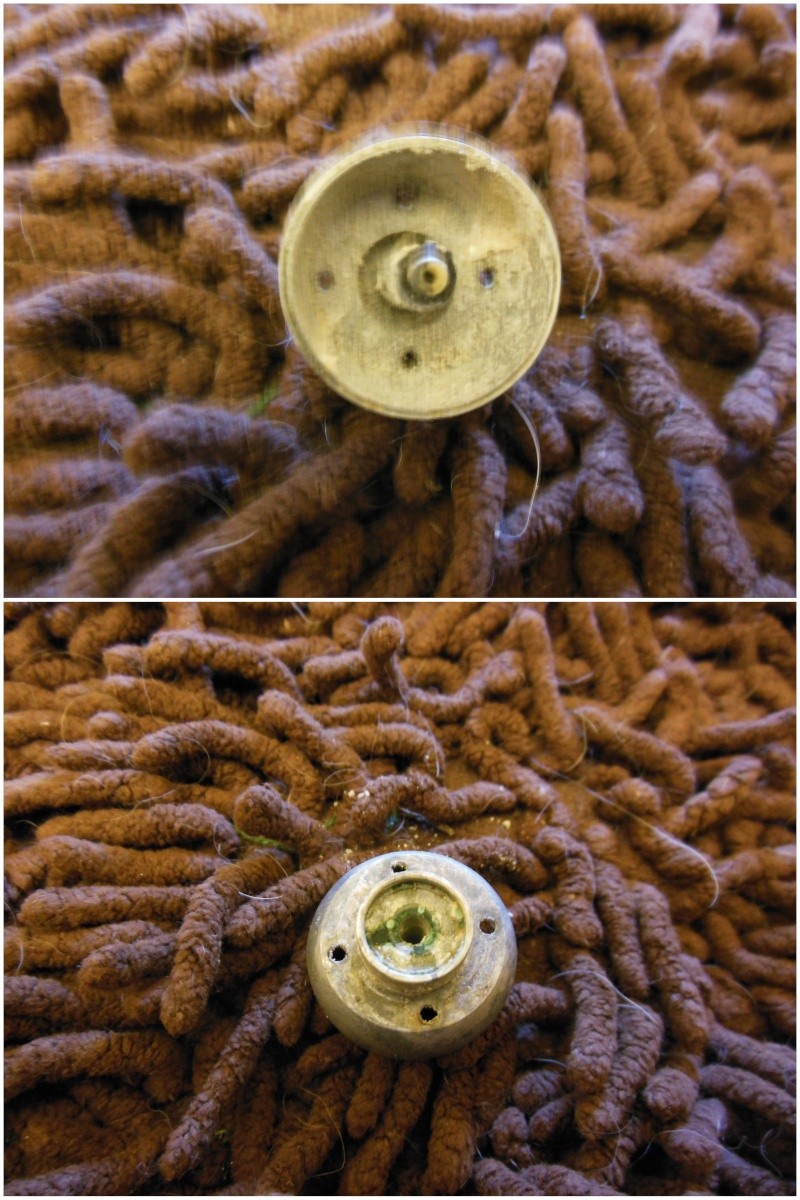
Both beset with corrosion.
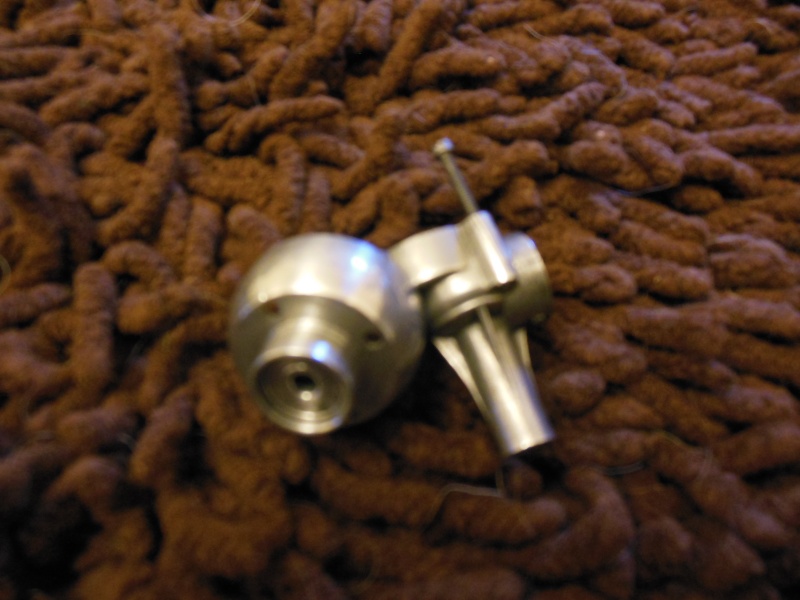
This is not always easy to remove with abrasives as some areas are more corroded than others and the corrosion runs deeper. Using abrasives can result in too much material being removed and so I embark on chemical warfare from the very start.
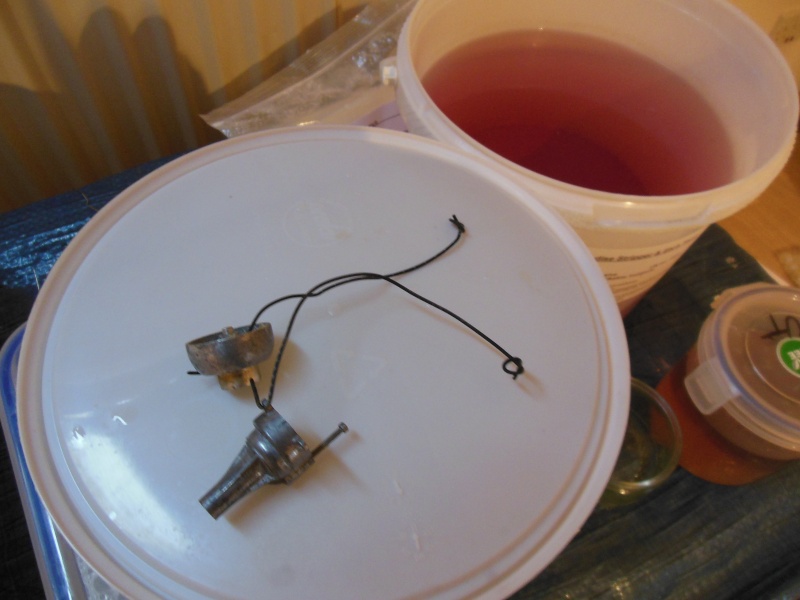
Firstly, tie the offending objects using a plastic coated wire. The reddish liquid you see is sodium hydroxide - started off clear but has been used on many metals and adopted a reddish hue- this liquid will strip skin, blind and during the process gives off nasty and very unhealthy fumes.
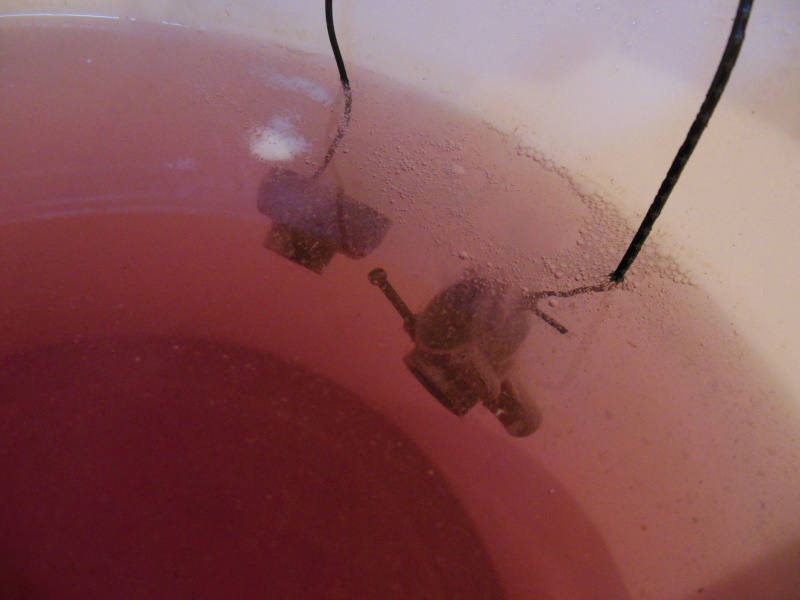
Within a few seconds bubbles appear and this accelerates.
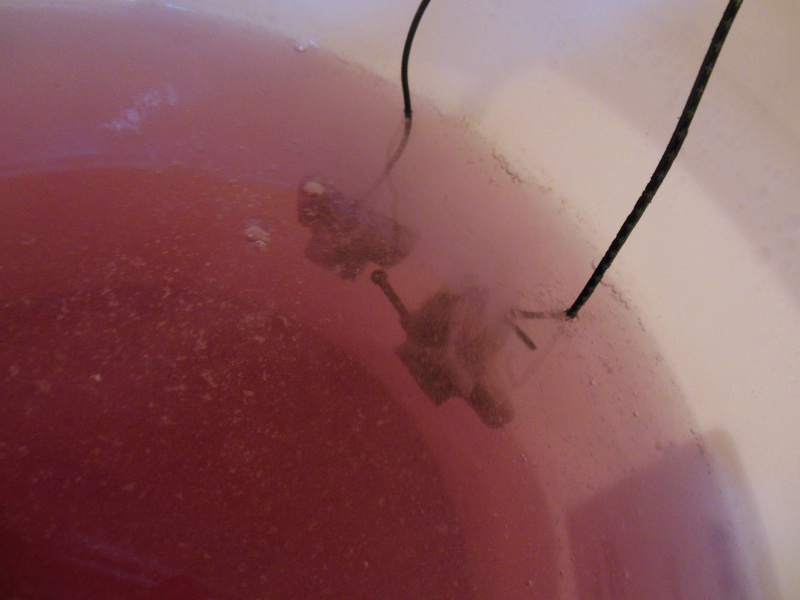
We are talking seconds not minutes! Leave it too long and the parts will dissolve. All gum, varnish and oil will be removed in seconds together with the corrosion.
Then the parts are taken out and rinsed in water.

Then the second phase of chemical warfare - desmutting! This is nitric acid - again, very user unfriendly, corrosive and the process gives off even worse fumes.
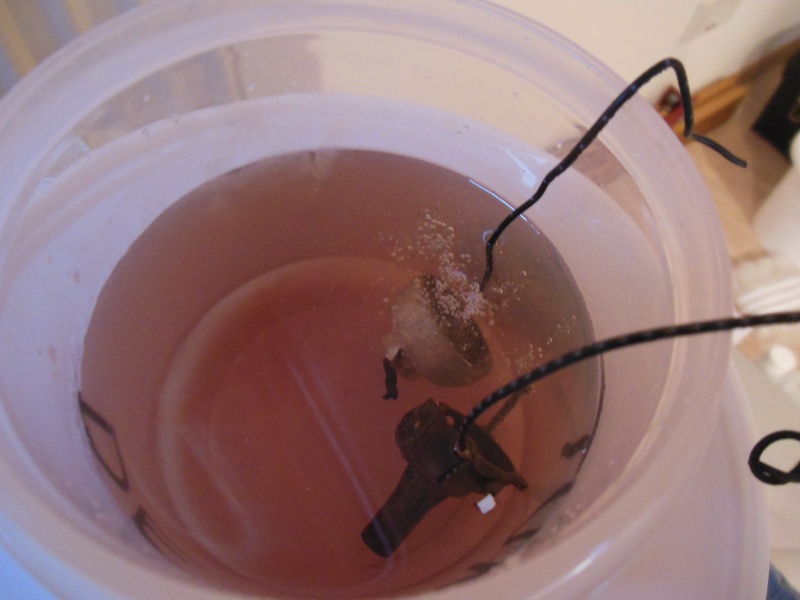
Followed by another rinse.
This whole process took less than 40 seconds. Not enough time for a cigarette!
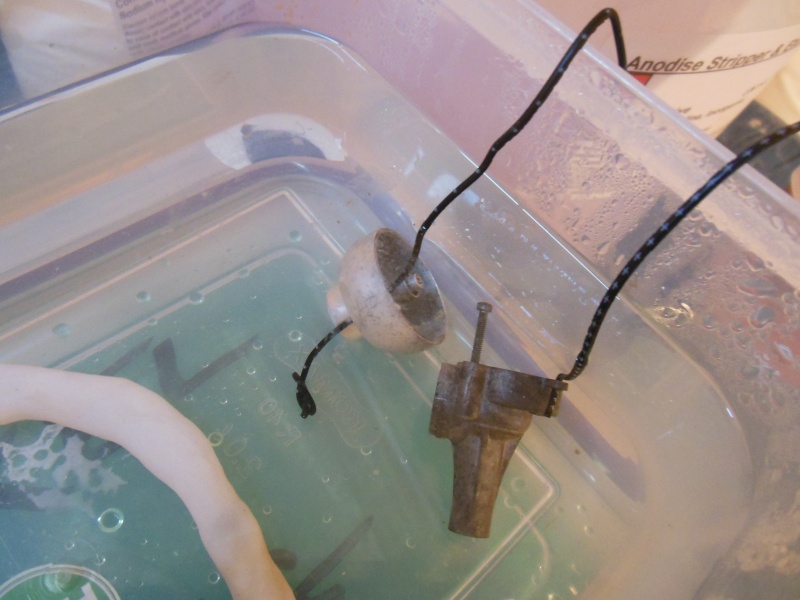
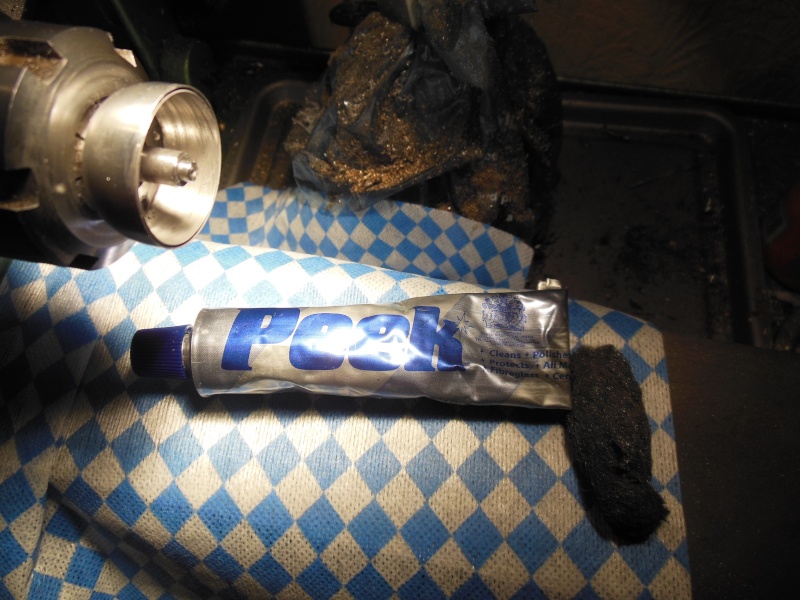
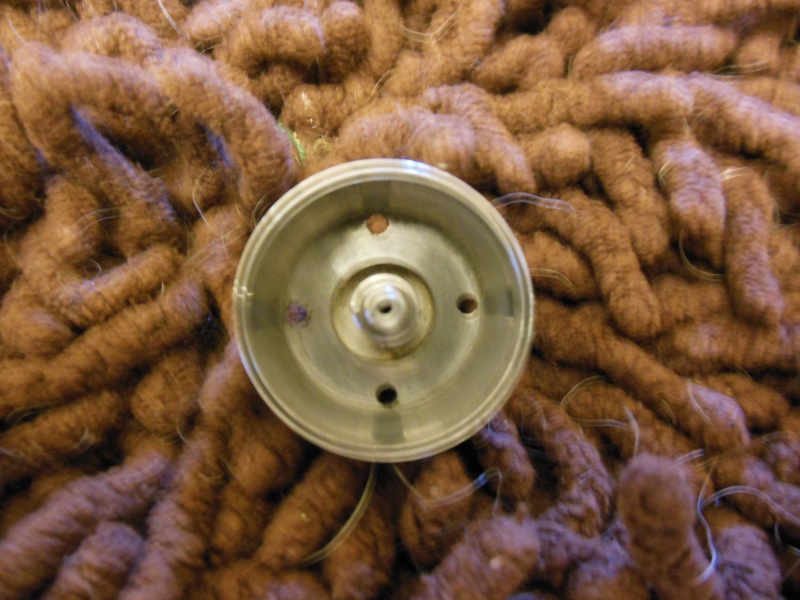
Then all that needs doing is a quick wipe with paper towel and the application of some fine steel wool. I use "0000" grade. This can be manual or:-
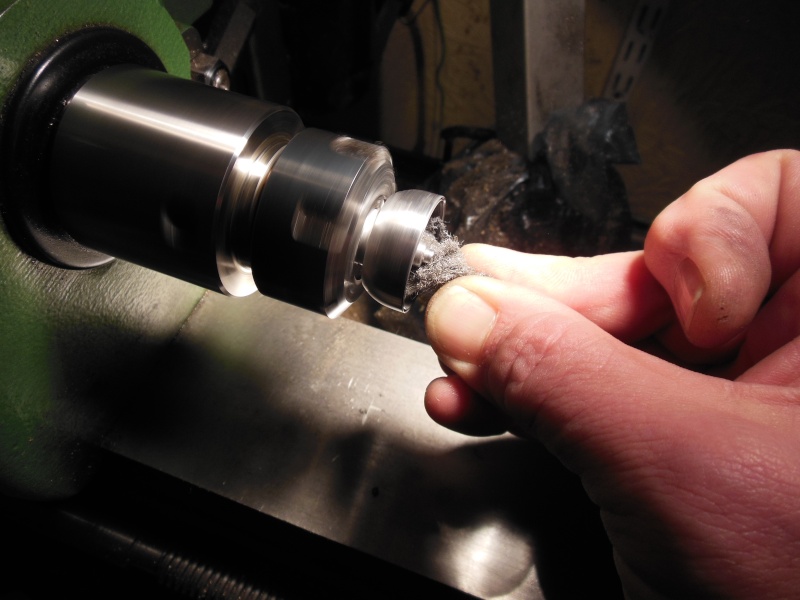
How long depends on the finish you like - a quick skirmish with just the fine steel wool gives a very clean finish - on the lathe we are again talking seconds. If you want a shiny finish then use polish with the steel wool.
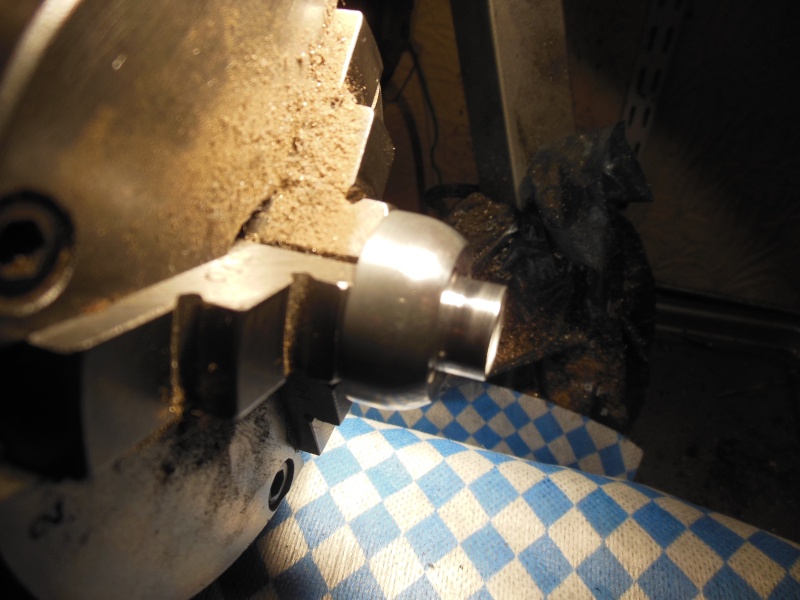
The polish for the tank was completed in two minutes whuch included the chuck change. Please also be aware the fingers near spinning lumps of metal in a lathe is also not considered a good idea but I do it!
It is not necessary to use machinery and in the example of the crankcase I just gave it a quick rub over with the steel wool and polish. About a minute.
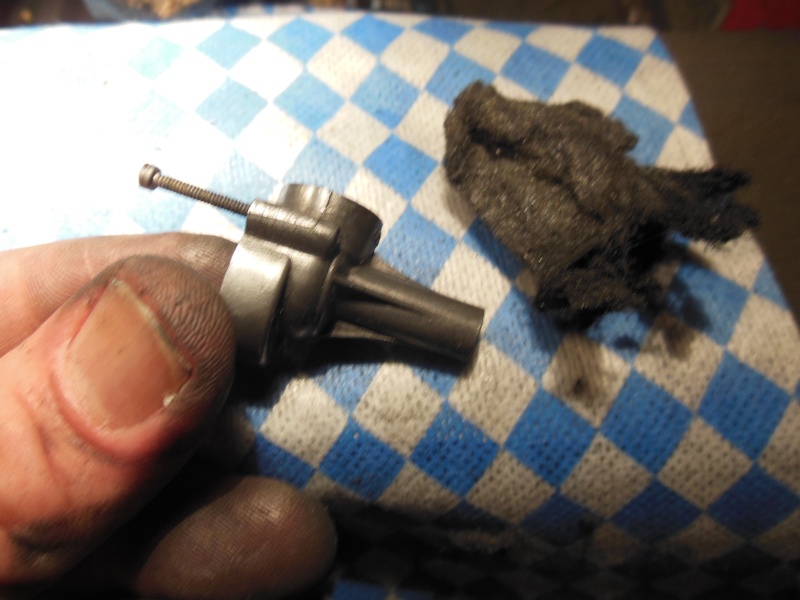
Note dirty fingers.
This although clean wasn,t shiny enough for me and so a few seconds with a polishing bob on a dremel.
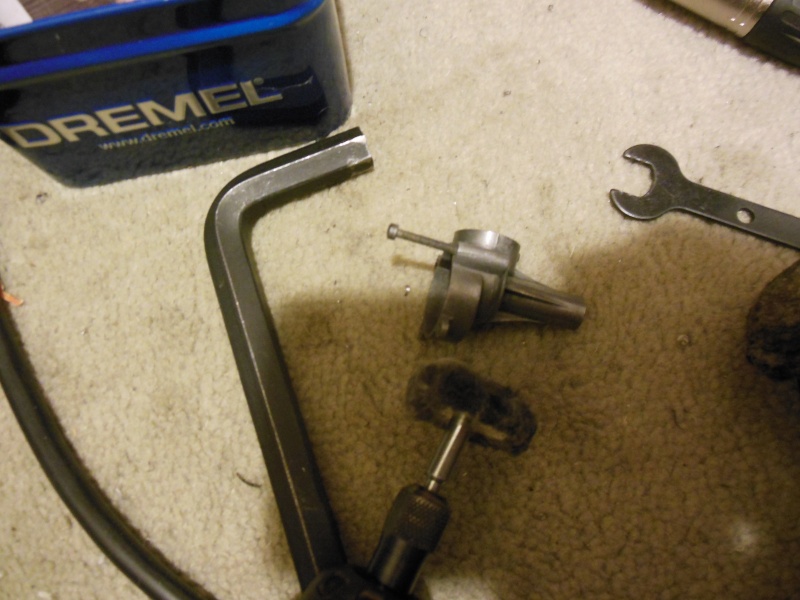
Then wipe over with a cloth and :-
Some of the polish needs removing with cotton buds but the whole start to finish was less than 10 minutes, including a cigarette break. Not using machinery would only add a few more minutes and allow more control over the level of shine.
Please remember that following any of this has risk and I am not recommending it. Even steel wool can be embedded in fingers and eyes! Always be carefull and do not attempt anything without taking precautions to protect yourself.
Firstly, my techniques are not for the faint hearted. I have no concept of health and safety and believe that everyone learns from their mistakes but caution is advised as these procedures can be dangerous if care and protection is not taken. You could also ruin what was to be your pride and joy and so I would recommend practise on less valuable engines.
This is what I started off with (earlier this afternoon) and selected a grotty crankcase from a bug and a tank from a bee. No fuel tubes to keep it simple.
Both beset with corrosion.
This is not always easy to remove with abrasives as some areas are more corroded than others and the corrosion runs deeper. Using abrasives can result in too much material being removed and so I embark on chemical warfare from the very start.
Firstly, tie the offending objects using a plastic coated wire. The reddish liquid you see is sodium hydroxide - started off clear but has been used on many metals and adopted a reddish hue- this liquid will strip skin, blind and during the process gives off nasty and very unhealthy fumes.
Within a few seconds bubbles appear and this accelerates.
We are talking seconds not minutes! Leave it too long and the parts will dissolve. All gum, varnish and oil will be removed in seconds together with the corrosion.
Then the parts are taken out and rinsed in water.
Then the second phase of chemical warfare - desmutting! This is nitric acid - again, very user unfriendly, corrosive and the process gives off even worse fumes.
Followed by another rinse.
This whole process took less than 40 seconds. Not enough time for a cigarette!
Then all that needs doing is a quick wipe with paper towel and the application of some fine steel wool. I use "0000" grade. This can be manual or:-
How long depends on the finish you like - a quick skirmish with just the fine steel wool gives a very clean finish - on the lathe we are again talking seconds. If you want a shiny finish then use polish with the steel wool.
The polish for the tank was completed in two minutes whuch included the chuck change. Please also be aware the fingers near spinning lumps of metal in a lathe is also not considered a good idea but I do it!
It is not necessary to use machinery and in the example of the crankcase I just gave it a quick rub over with the steel wool and polish. About a minute.
Note dirty fingers.
This although clean wasn,t shiny enough for me and so a few seconds with a polishing bob on a dremel.
Then wipe over with a cloth and :-
Some of the polish needs removing with cotton buds but the whole start to finish was less than 10 minutes, including a cigarette break. Not using machinery would only add a few more minutes and allow more control over the level of shine.
Please remember that following any of this has risk and I am not recommending it. Even steel wool can be embedded in fingers and eyes! Always be carefull and do not attempt anything without taking precautions to protect yourself.

ian1954- Diamond Member

- Posts : 2688
Join date : 2011-11-16
Age : 69
Location : England
Re: Restoring Cox Engines in general
![]() John Goddard Sat Jan 12, 2013 1:29 pm
John Goddard Sat Jan 12, 2013 1:29 pm
Excellent Ian.
My kinda fix.
Your LaB...where do you get the juice from?
My kinda fix.
Your LaB...where do you get the juice from?

John Goddard- Diamond Member
- Posts : 2447
Join date : 2011-11-24
Age : 59
Location : Leyton North East London
Re: Restoring Cox Engines in general
![]() ian1954 Sat Jan 12, 2013 1:42 pm
ian1954 Sat Jan 12, 2013 1:42 pm
John Goddard wrote:Excellent Ian.
My kinda fix.
Your LaB...where do you get the juice from?
Gateros Plating
www.gaterosplating.co.uk
ian1954- Diamond Member
- Posts : 2688
Join date : 2011-11-16
Age : 69
Location : England
Re: Restoring Cox Engines in general
![]() Cribbs74 Sat Jan 12, 2013 2:41 pm
Cribbs74 Sat Jan 12, 2013 2:41 pm
Impressive!
Now I know where to send that crusty .09 case that John Boy gave me.
Edit: Where do you guys store your engines over there? My guess is the downspout!
Now I know where to send that crusty .09 case that John Boy gave me.
Edit: Where do you guys store your engines over there? My guess is the downspout!

Cribbs74- Moderator


Posts : 11899
Join date : 2011-10-24
Age : 50
Location : Tuttle, OK
Re: Restoring Cox Engines in general
![]() ian1954 Sat Jan 12, 2013 3:01 pm
ian1954 Sat Jan 12, 2013 3:01 pm
cribbs74 wrote:Impressive!
Now I know where to send that crusty .09 case that John Boy gave me.
Edit: Where do you guys store your engines over there? My guess is the downspout!
No. The safest place in the house. Under the soap!
ian1954- Diamond Member
- Posts : 2688
Join date : 2011-11-16
Age : 69
Location : England
Re: Restoring Cox Engines in general
![]() WingingIt74 Sat Jan 12, 2013 8:31 pm
WingingIt74 Sat Jan 12, 2013 8:31 pm
What is that hamburger meat looking mop thing your setting the engines on?

WingingIt74- Top Poster

- Posts : 3189
Join date : 2011-08-11
Age : 49
Location : Waterloo, IL -

Re: Restoring Cox Engines in general
![]() coxaddicted Sun Jan 13, 2013 5:39 am
coxaddicted Sun Jan 13, 2013 5:39 am
WingingIt74 wrote:What is that hamburger meat looking mop thing your setting the engines on?
Looks like a flokati carpet.

coxaddicted- Gold Member

- Posts : 492
Join date : 2012-07-11
Age : 44
Location : North-Rhine Westphalia, Germany
Re: Restoring Cox Engines in general
![]() ian1954 Sun Jan 13, 2013 7:16 am
ian1954 Sun Jan 13, 2013 7:16 am
coxaddicted wrote:WingingIt74 wrote:What is that hamburger meat looking mop thing your setting the engines on?
Looks like a flokati carpet.
it is the dogs bed cover!
ian1954- Diamond Member
- Posts : 2688
Join date : 2011-11-16
Age : 69
Location : England
Re: Restoring Cox Engines in general
![]() andrew Sun Jan 13, 2013 9:17 am
andrew Sun Jan 13, 2013 9:17 am
Ian --
It looks like Kim may have some competition on who can find and restore the nastiest engine.
What do you do with the steel components? Does your chemical warfare destroy the glow element or can the head be treated in the same manner?
andrew
It looks like Kim may have some competition on who can find and restore the nastiest engine.
What do you do with the steel components? Does your chemical warfare destroy the glow element or can the head be treated in the same manner?
andrew

andrew- Diamond Member
- Posts : 1814
Join date : 2011-08-11
Age : 76
Location : Western Kentucky -
Re: Restoring Cox Engines in general
![]() ian1954 Sun Jan 13, 2013 10:07 am
ian1954 Sun Jan 13, 2013 10:07 am
andrew wrote:Ian --
It looks like Kim may have some competition on who can find and restore the nastiest engine.
What do you do with the steel components? Does your chemical warfare destroy the glow element or can the head be treated in the same manner?
andrew
I cover the element with melted candle wax - removed by dipping in boiling water when finished.
Steel is not affected by the sodium hydroxide - it is used for degreasing and descaling steel and iron after tempering or brazing.
The desmut (nitric acid) will affect the steel if dipped too long. I tend to use plastic tubing (old biro refill), softened (a little heat) and pushed over the plug top.
Remember though, after fizzing and bubbling starts - only leave immersed for seconds and rinse thoroughly.
ian1954- Diamond Member
- Posts : 2688
Join date : 2011-11-16
Age : 69
Location : England
Re: Restoring Cox Engines in general
![]() pkrankow Sun Jan 13, 2013 3:44 pm
pkrankow Sun Jan 13, 2013 3:44 pm
I thought the element was platinum or platinum plated.
Phil
Phil

pkrankow- Top Poster
- Posts : 3025
Join date : 2012-10-02
Location : Ohio
Re: Restoring Cox Engines in general
![]() ian1954 Sun Jan 13, 2013 6:52 pm
ian1954 Sun Jan 13, 2013 6:52 pm
pkrankow wrote:I thought the element was platinum or platinum plated.
Phil
It is almost certainly platinum but the spot where it is attached to the aluminium of the head looks rather delicate and could be easily dissolved or weakened.
ian1954- Diamond Member
- Posts : 2688
Join date : 2011-11-16
Age : 69
Location : England
» Cox Sure Start Engines~General Help With Them!
» A Few Tips I have learned on Restoring the 19 to 40 Red/Blue Head McCoy Engines
» General Golden Bee Engine Health
» Just finished rebuilding and restoring Cox 190-8 engine
» General TD 049 Assembly
» A Few Tips I have learned on Restoring the 19 to 40 Red/Blue Head McCoy Engines
» General Golden Bee Engine Health
» Just finished rebuilding and restoring Cox 190-8 engine
» General TD 049 Assembly
Page 1 of 1
Permissions in this forum:
You cannot reply to topics in this forum