

 Rules
Rules
Log in
Search
Latest topics
» Cox water wizard by roddie Today at 9:35 am
» Speed plane - Crispy but not too crispy
by GallopingGhostler Today at 8:35 am
» Tired of it all…
by Coxfledgling Today at 7:23 am
» PT-19 Mayhem at Buder Park...a Decade Ago!!!!
by getback Today at 6:29 am
» Jim Walkers FireBee - This is going to be fun
by MauricioB Yesterday at 11:53 pm
» Project Cox .049 r/c & Citabrian Champion
by MauricioB Yesterday at 11:36 pm
» Roddie's flat-bottomed boat..
by 1/2A Nut Yesterday at 10:51 pm
» Three -- sold out (making two more) Cox .010 Carburetors with wrench
by balogh Yesterday at 12:34 am
» Joe Wagners Sioux
by GallopingGhostler Sat Apr 27, 2024 9:03 pm
» Happy Anzac Day!
by GallopingGhostler Sat Apr 27, 2024 4:16 pm
» Revivng Some Childhood Classics
by getback Sat Apr 27, 2024 7:31 am
» Fox .35 Modifications
by Ken Cook Sat Apr 27, 2024 3:16 am
Cox Engine of The Month


CEF Traveling Engine


Win This Engine!

Live on Patrol


Winging it
Page 2 of 2
Page 2 of 2 •  1, 2
1, 2
Winging it
![]() VUgearhead Thu Feb 11, 2016 2:33 pm
VUgearhead Thu Feb 11, 2016 2:33 pm
Why don't you just make the LO guide removable with a couple of screws? (
Assuming you aren't running the LO's inside the wing)
Unscrew the LO guide, wing is ready to depart!
Assuming you aren't running the LO's inside the wing)
Unscrew the LO guide, wing is ready to depart!

VUgearhead- Gold Member

- Posts : 155
Join date : 2013-07-02
Age : 56
Location : Boynton Beach, FL
Re: Winging it
![]() pkrankow Thu Feb 11, 2016 3:03 pm
pkrankow Thu Feb 11, 2016 3:03 pm
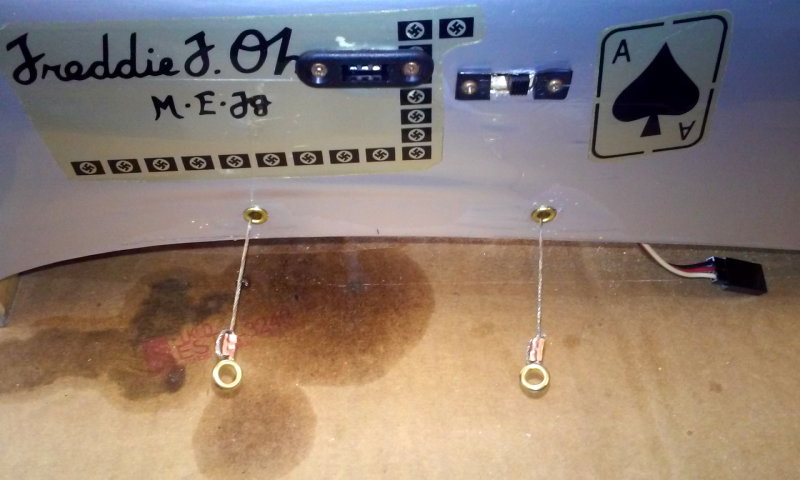
Here's one version of the second idea much better DONE than I could probably draw.rsv1cox wrote:I think I can visulaize your meaning Phil, but a picture is worth a thousand words.
It seems like I still would have wires sticking out of the fuselage. I'm thinking a couple of 2/56 clevises similar to the one I used (first picture above) for the elevator control then just unscrewing and removing the rods when I'm finished flying. But I'm worried about the rods unscrewing in flight.
Bob
http://stunthanger.com/smf/building-techniques/build-cartoon-scale-mooney-mite/msg435630/#msg435630
Here's a slightly different version of my first idea.
http://stunthanger.com/smf/scale-models/leadout-guide-how-to/
Phil
pkrankow- Top Poster

- Posts : 3025
Join date : 2012-10-02
Location : Ohio
Re: Winging it
![]() rsv1cox Thu Feb 11, 2016 3:36 pm
rsv1cox Thu Feb 11, 2016 3:36 pm
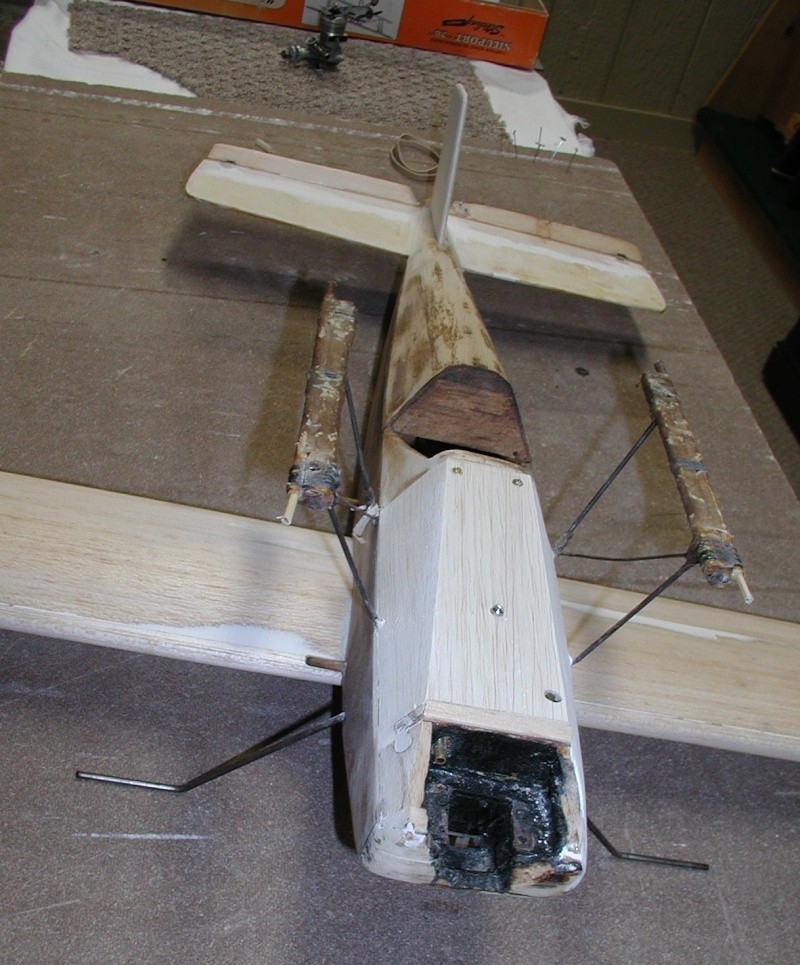
Thanks Phil, I like it. Makes the lower wing detachable and leaves just a couple of short lead-outs. I robbed his picture.
My idea is to use threaded 2/56 rods and cleavis's then just unscrew and remove the rods and the wing when I'm finished flying. But they would be heavy and create even more drag on this already draggy model. I haven't glued in the wing tip guide yet, or located the eyelets on the fuselage.


Bob
My idea is to use threaded 2/56 rods and cleavis's then just unscrew and remove the rods and the wing when I'm finished flying. But they would be heavy and create even more drag on this already draggy model. I haven't glued in the wing tip guide yet, or located the eyelets on the fuselage.
Bob

rsv1cox- Top Poster


Posts : 10558
Join date : 2014-08-18
Location : West Virginia
Re: Winging it
![]() getback Fri Feb 12, 2016 9:34 am
getback Fri Feb 12, 2016 9:34 am
Bob its looking good , rebuilding can be challenging for sure I got an ole Shoestring I need to do something with sometime or put It upstairs so I cant see it as often :lol Are you going to leave the control on the BC in that outer hole ? I think that's were I had mine on the Reed speed and was for Max throw? Did you give up on trying to find a pulse system/ I know you were looking at one time , they are $$ when ya find a good one !! Eric 

getback- Top Poster
-
Posts : 10123
Join date : 2013-01-18
Age : 66
Location : julian , NC
Re: Winging it
![]() rsv1cox Sat Feb 13, 2016 7:24 am
rsv1cox Sat Feb 13, 2016 7:24 am
getback wrote:Bob its looking good , rebuilding can be challenging for sure I got an ole Shoestring I need to do something with sometime or put It upstairs so I cant see it as often :lol Are you going to leave the control on the BC in that outer hole ? I think that's were I had mine on the Reed speed and was for Max throw? Did you give up on trying to find a pulse system/ I know you were looking at one time , they are $$ when ya find a good one !! Eric
Challenging and fun Eric. I'm enjoying bringing this old timer back to life. I figure someone built it aound the time you were just a pup.
I finally sanded the front cover to shape. I made it detachable so I can get to the front half of the bell crank if needed.
I have the clevis in the outer hole until I see how well it flys. I figure I may need a good deal of throw at first until I find the balance point. I will be happy if it just goes round and round.
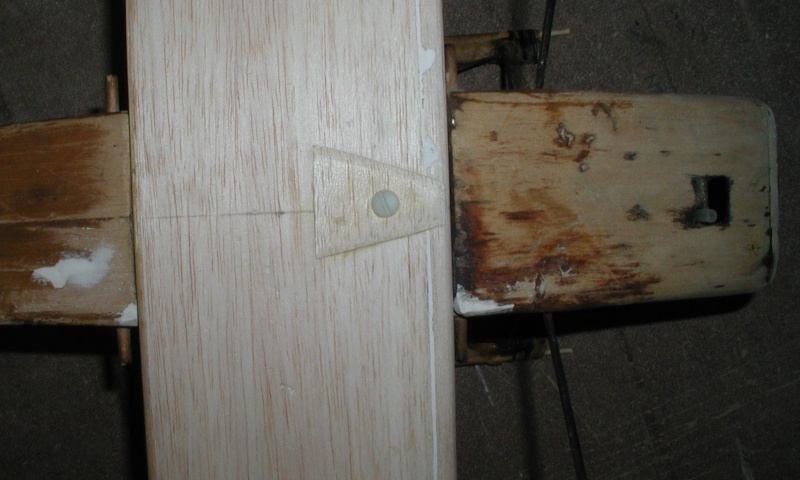
Hopefully fixing the lower wing to the fuselage using a nylon bolt will keep the wing from shifting laterally inside the rubber bands. But I may eliminate the bands by pinning the back of the wing.
If I'm screwing something up here I hope someone will point it out.....
Bob
rsv1cox- Top Poster
-
Posts : 10558
Join date : 2014-08-18
Location : West Virginia
Re: Winging it
![]() rsv1cox Tue Feb 16, 2016 10:05 am
rsv1cox Tue Feb 16, 2016 10:05 am
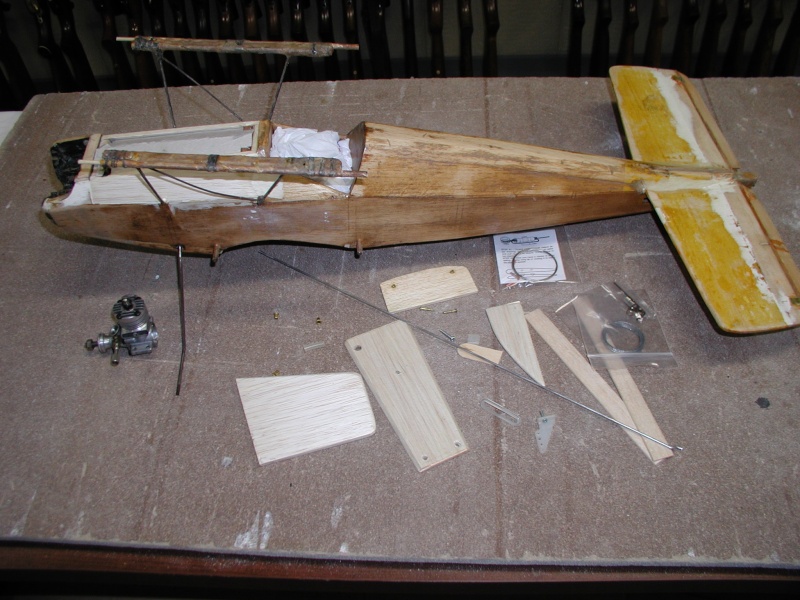
Final of three coats of sanding sealer thinned 60/40, last coat sanded this morning w/150 grit. Now I just have add all of this stuff and spray on a coat of primer, then color/decals and hope for a nice day. Thinking 52' steel lines and enough space to get it airborne. 
Already looking at another project using the tail section of the plane that I used to make the wings on the Aircrate.

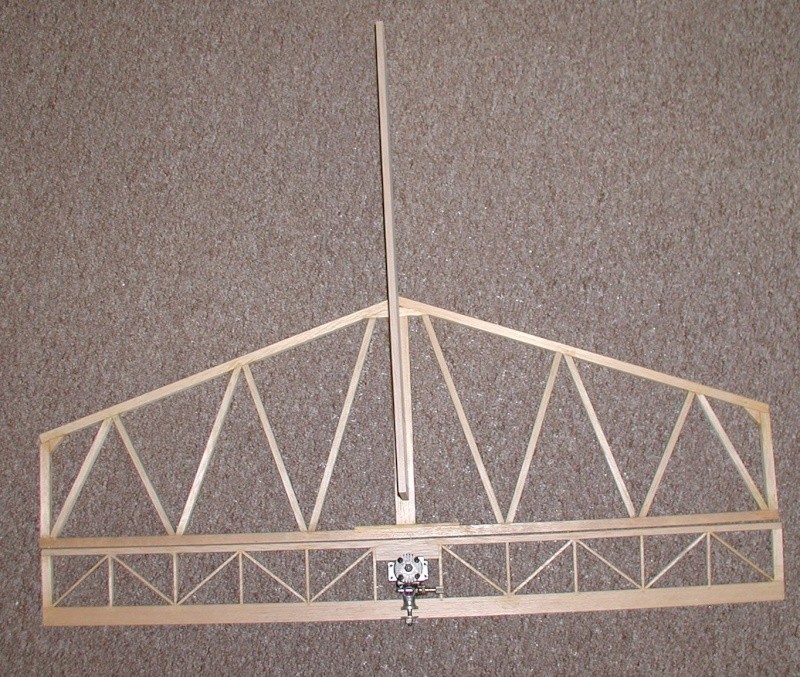
How about vectored thrust???? Kidding. I will split the elevator and mount the engine between the two halfs. But...will it fly??? Sorta flat wings work on a hollow log, but on this? No camber on this R/C model tail section whats-so-ever it's totally flat. A long nose moment will be required.
Bob
Already looking at another project using the tail section of the plane that I used to make the wings on the Aircrate.
How about vectored thrust???? Kidding. I will split the elevator and mount the engine between the two halfs. But...will it fly??? Sorta flat wings work on a hollow log, but on this? No camber on this R/C model tail section whats-so-ever it's totally flat. A long nose moment will be required.
Bob
rsv1cox- Top Poster
-
Posts : 10558
Join date : 2014-08-18
Location : West Virginia
Page 2 of 2 • 1, 2
Page 2 of 2
Permissions in this forum:
You cannot reply to topics in this forum