

 Rules
Rules
by Admin Today at 10:31 am
» Revivng Some Childhood Classics
by GTO455 Today at 8:11 am
» My Cox .049 Marine inboard engine
by rsv1cox Today at 7:41 am
» Jim Walkers FireBee - This is going to be fun
by rsv1cox Today at 7:29 am
» Help Pee Wee tank cap .020
by MauricioB Yesterday at 10:11 pm
» Post your Older books
by rsv1cox Yesterday at 7:51 pm
» EXTREMELY RARE COX THIMBLE DROME PROTOTYPE "BLACK WIDOW" GAS MODEL AIRPLANE
by rsv1cox Yesterday at 6:58 pm
» I brake for Turtles....
by rsv1cox Yesterday at 6:38 pm
» Ball - Socket Joints
by Ken Cook Yesterday at 3:06 pm
» A little nostalgia…
by MauricioB Yesterday at 2:32 pm
» A new useful transport vehicle
by davidll1984 Yesterday at 10:32 am
» TAPLIN TWIN 7ccm
by grant.symes Yesterday at 3:29 am


Qtee scratch build
Page 1 of 2 • 1, 2 ![]()

Qtee scratch build
![]() nico010 Fri Feb 21, 2020 8:31 pm
nico010 Fri Feb 21, 2020 8:31 pm
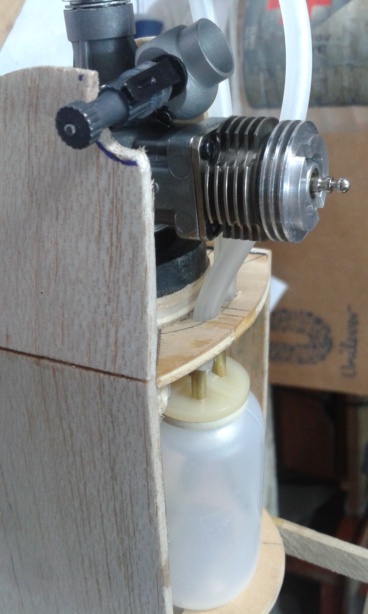
Back in 2005, I bought an AP .061 engine because I liked small engines, and this one that had gas control seemed great to me.
This engine remained in a drawer of my workshop until a year ago when the idea of putting the engine in a model to enjoy it came to mind.
After much searching I decided to build the Qtee of Lee Renaud but with a couple of modifications to give more rigidity to the airplane structure.
these modifications are made mainly in the wing.
My idea here is to gradually post the construction of the model and on the last part to share how I finished it, what results I obtained and other details that were appearing with the passage of time.
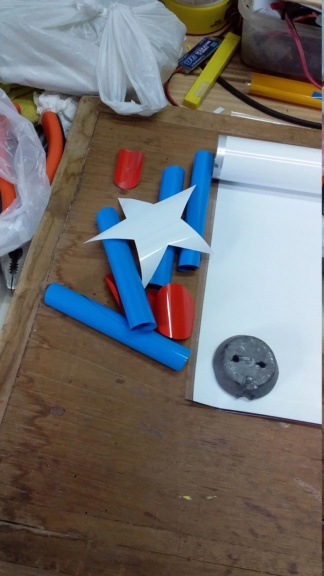
let's start then .... the first thing I built was the ruder and the elevator, these I built with 3mm balsa wood.


nico010- Bronze Member

- Posts : 53
Join date : 2019-04-15
Re: Qtee scratch build
![]() nico010 Fri Feb 21, 2020 8:41 pm
nico010 Fri Feb 21, 2020 8:41 pm
thanks
nico010- Bronze Member
- Posts : 53
Join date : 2019-04-15
Re: Qtee scratch build
![]() nico010 Fri Feb 21, 2020 8:44 pm
nico010 Fri Feb 21, 2020 8:44 pm

nico010- Bronze Member
- Posts : 53
Join date : 2019-04-15
Re: Qtee scratch build
![]() nico010 Fri Feb 21, 2020 8:53 pm
nico010 Fri Feb 21, 2020 8:53 pm
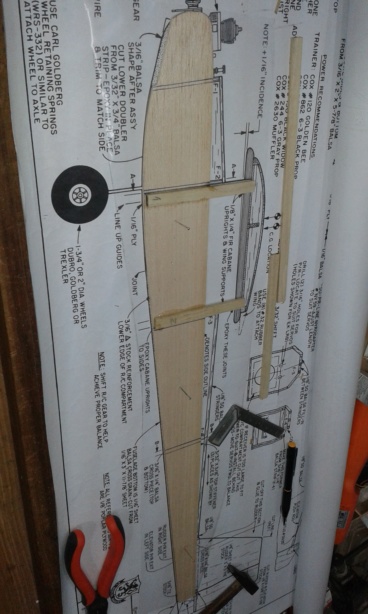
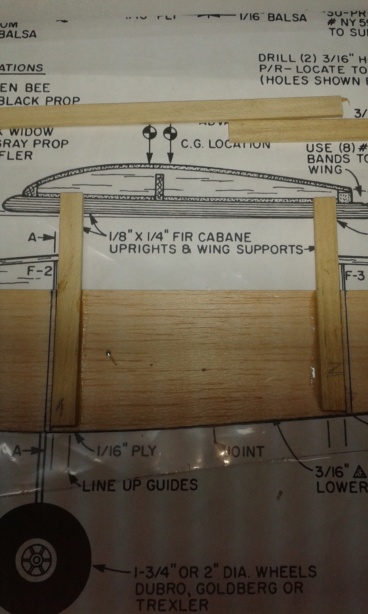
With the wing supports glued in place it is time to put the two sides of the fuselage together, for this I take all measures to ensure that they are as well aligned as possible. At this point I usually use aliphatic glue since it gives me time to correct any misalignment errors.
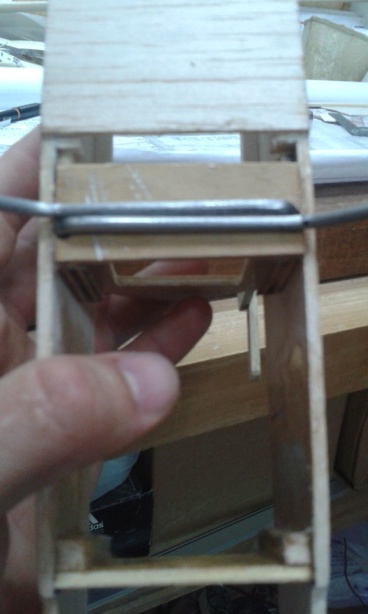
after that. I glued the landing gear support, this is another modification that I make since this system gives me more security than sewing the wire as the plane suggests.

nico010- Bronze Member
- Posts : 53
Join date : 2019-04-15
Re: Qtee scratch build
![]() nico010 Fri Feb 21, 2020 9:03 pm
nico010 Fri Feb 21, 2020 9:03 pm
271/5000
Continuing with the construction and with some pieces already finished it is time to put everything together so that it starts to look like an airplane ...
Regarding the subject of the landing gear, it is built with 3mm piano string.
So far nothing complicated at the moment.


nico010- Bronze Member
- Posts : 53
Join date : 2019-04-15
Re: Qtee scratch build
![]() nico010 Fri Feb 21, 2020 9:07 pm
nico010 Fri Feb 21, 2020 9:07 pm


nico010- Bronze Member
- Posts : 53
Join date : 2019-04-15
Re: Qtee scratch build
![]() Mike1484 Fri Feb 21, 2020 9:47 pm
Mike1484 Fri Feb 21, 2020 9:47 pm
Mike1484
Mike1484- Gold Member

- Posts : 296
Join date : 2011-10-28
Age : 75
Location : Northern Ohio
Re: Qtee scratch build
![]() Dave P. Fri Feb 21, 2020 10:46 pm
Dave P. Fri Feb 21, 2020 10:46 pm
Dave P.- Gold Member
- Posts : 477
Join date : 2017-07-31
Age : 66
Location : Durham, NC
Re: Qtee scratch build
![]() balogh Sat Feb 22, 2020 12:50 am
balogh Sat Feb 22, 2020 12:50 am
.
Keep posting, I also like your build
Andras
balogh- Top Poster


Posts : 4751
Join date : 2011-11-06
Age : 65
Location : Budapest Hungary
Re: Qtee scratch build
![]() ian1954 Sat Feb 22, 2020 4:33 am
ian1954 Sat Feb 22, 2020 4:33 am
Interesting though - I see that you are a fuselage first builder - I almost always start wing first, followed be tailplane and have these covered before moving on to the fuselage.
These builds are inspirations and this is a very nice one.

ian1954- Diamond Member

- Posts : 2688
Join date : 2011-11-16
Age : 69
Location : England
Re: Qtee scratch build
![]() nico010 Sat Feb 22, 2020 5:35 am
nico010 Sat Feb 22, 2020 5:35 am
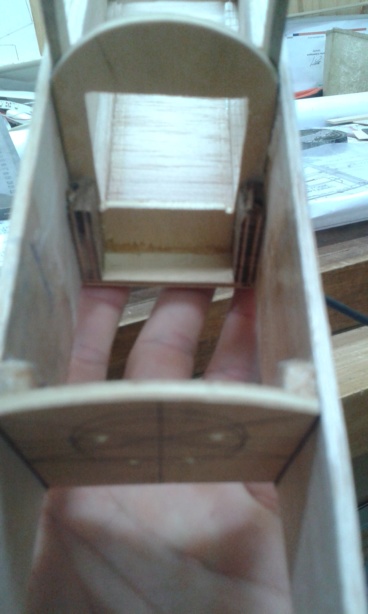
You are right in what you tell me about double the firewall. What I forget to tell is once the firewall is attached to the sides of the fuselage I have put fiberglass cloth with epoxy resin. This gives an incredible resistance while not adding weight to the structure.
Over time this model was sold to an enthusiast who saw me fly it in an RC aircraft event. He liked it so much that he accept the price that I asked him for and he paid it to me immediately (obviously without the engine, fuel tank and electronics, just the fuse structure and the wing), this man asked me to install a cox shure start rc he had. When I installed it, I put a more wooden reinforcement to the F1, which I leave it made of a wood- epoxy- wood sandwich.
With regard to the issue of blind nuts, where I live it is extremely difficult to get accessories for the assembly of the models. This often leads us to have to use the imagination to find solutions to problems with the things we have available. (Ask Mauricio if this is true ...
In this case, use common nuts which are then glued with epoxy to the f1.
later I continue uploading photographs of the construction process.
If someone can tell me how to upload more than 3 pictures at the same time I would appreciate it.
Cheers
nico010- Bronze Member
- Posts : 53
Join date : 2019-04-15
Re: Qtee scratch build
![]() balogh Sat Feb 22, 2020 5:44 am
balogh Sat Feb 22, 2020 5:44 am
For posting pictures click on the blue icon that looks like a floppy disc, select the files from your computer one by one, click on Send all, then click on Insert all and you are done...good luck.
balogh- Top Poster
-
Posts : 4751
Join date : 2011-11-06
Age : 65
Location : Budapest Hungary
Re: Qtee scratch build
![]() nico010 Sat Feb 22, 2020 6:50 am
nico010 Sat Feb 22, 2020 6:50 am
I do this by preparing two-part of 30 min epoxy and diluting this mixture with alcohol until it is liquid. This allows me to paint all the areas with this mixture
and for being liquid, the wood absorbs everything. when everything dries, the wood is not only fuellproof but also super strong


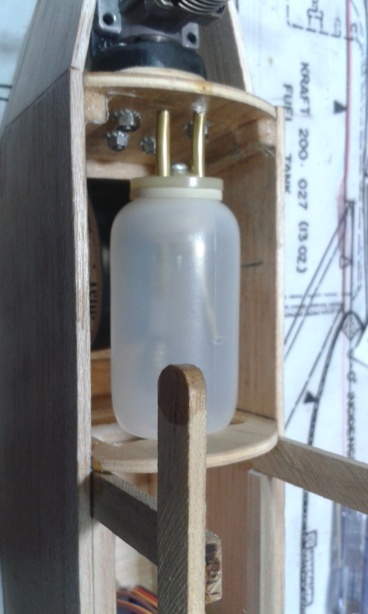
.in the images you can see the fiberglass fabric. the nuts is the last thing I glue before installing the front front top sheet
nico010- Bronze Member
- Posts : 53
Join date : 2019-04-15
Re: Qtee scratch build
![]() nico010 Sat Feb 22, 2020 7:04 am
nico010 Sat Feb 22, 2020 7:04 am
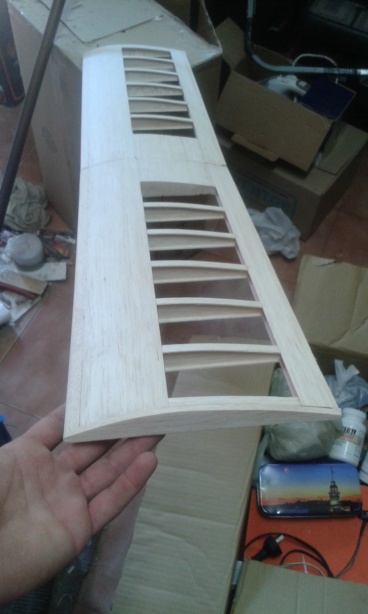
Another thing is that I didn't have wood to carve the leading edge , so with all this I decided to build it the same way I do it on my other models.
The first thing was to cut the ribs, for which I always make a couple of hardwood templates, then assemble a sandwich with all the woods and pass it through the sander. Finally, with a thin file I make the holes where the main spars are placed.


nico010- Bronze Member
- Posts : 53
Join date : 2019-04-15
Re: Qtee scratch build
![]() nico010 Sat Feb 22, 2020 7:23 am
nico010 Sat Feb 22, 2020 7:23 am
over the plane covered with a transparent film I install the leading edge, the bottom frontal sheeting and the trailing edge bottom sheeting. With this located in its place, the lower central main spar and the ribs are placed. I like to fix everything with CA so everything is fixed in place and then glue everything with aliphatic glue.


A detail of the previous image. In the center of the wing there is a filling with balsa. I did it to cut the center according to the plan.
nico010- Bronze Member
- Posts : 53
Join date : 2019-04-15
Re: Qtee scratch build
![]() getback Sat Feb 22, 2020 7:31 am
getback Sat Feb 22, 2020 7:31 am


getback- Top Poster
-
Posts : 10138
Join date : 2013-01-18
Age : 66
Location : julian , NC
Re: Qtee scratch build
![]() ian1954 Sat Feb 22, 2020 7:35 am
ian1954 Sat Feb 22, 2020 7:35 am
Works for me - used to be able to do six at a time but now three seems to be the limit for each “session”
ian1954- Diamond Member
- Posts : 2688
Join date : 2011-11-16
Age : 69
Location : England
Re: Qtee scratch build
![]() nico010 Sat Feb 22, 2020 7:39 am
nico010 Sat Feb 22, 2020 7:39 am
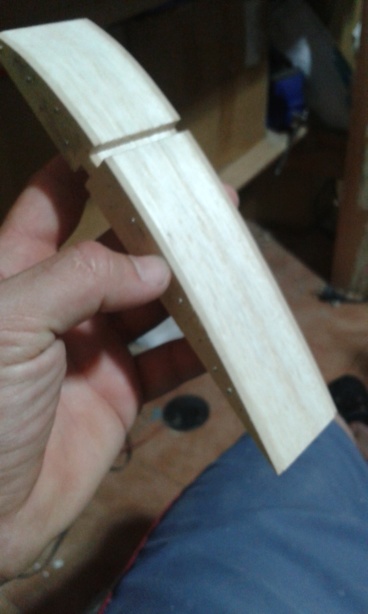
For this I have as a custom to make a pair of hardwood reinforcements, which I stick with aliphatic glue. after that I fill everything with filler paste and give it a final sanding so that everything is smooth.
finally place the fiberglass reinforcement in the center of the wing


nico010- Bronze Member
- Posts : 53
Join date : 2019-04-15
Re: Qtee scratch build
![]() nico010 Sat Feb 22, 2020 7:49 am
nico010 Sat Feb 22, 2020 7:49 am
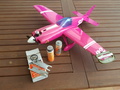
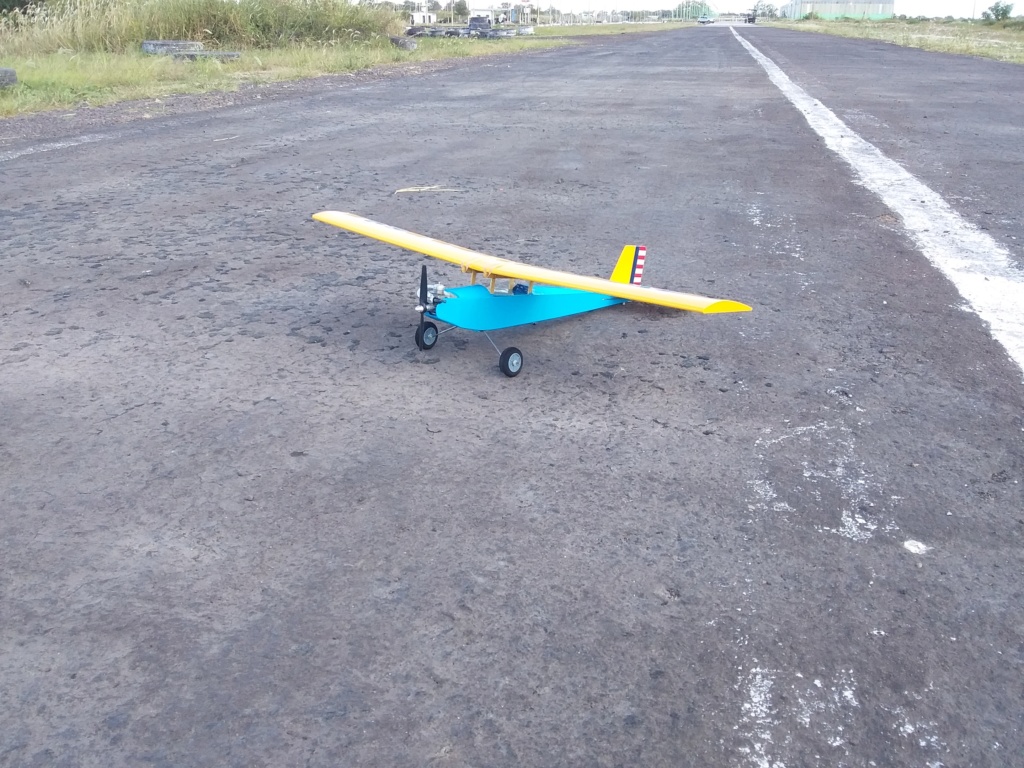
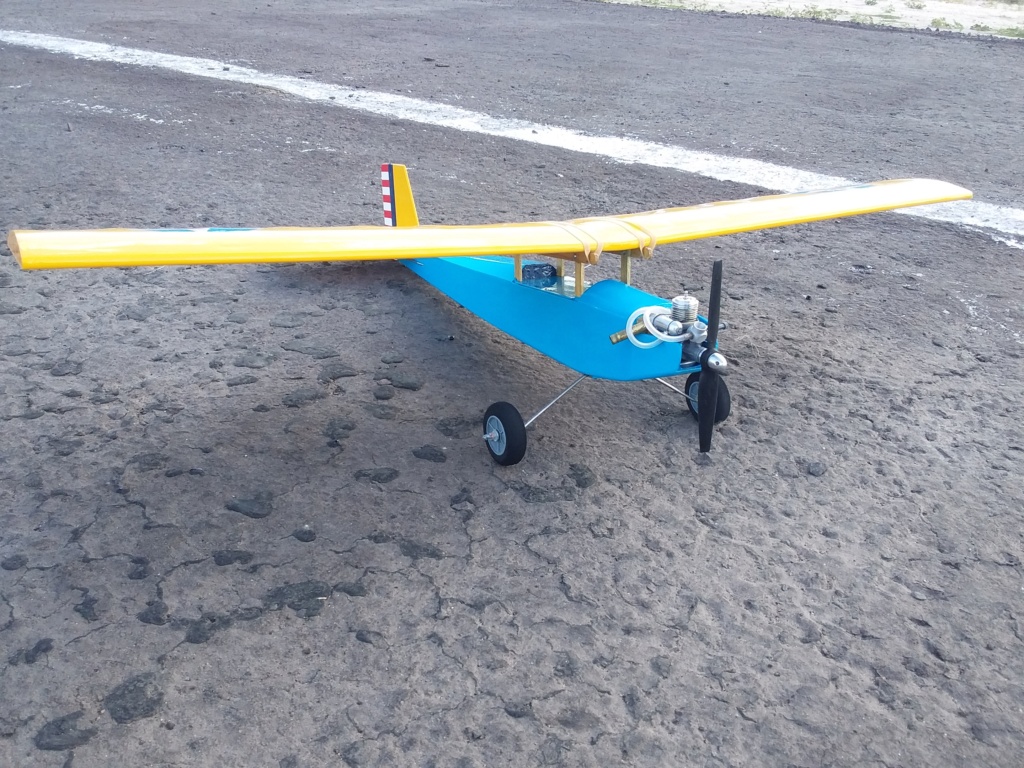
For this I always use top flite monokote. I chose the color scheme according to pt19 since I always liked this one.
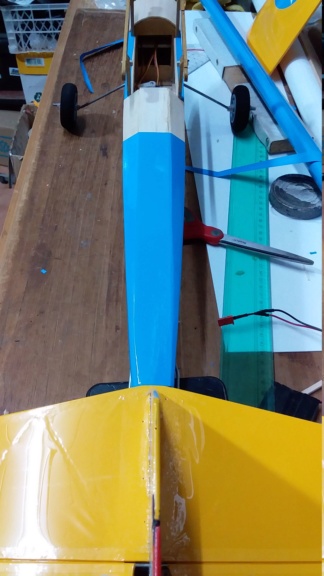
I have the custom to finally put the top cover of the fuselage when I have all the control rods installed and tested, so everything moves smoothly and without interference.
I made the pushrods with wooden rods and piano string.


nico010- Bronze Member
- Posts : 53
Join date : 2019-04-15
Re: Qtee scratch build
![]() nico010 Sat Feb 22, 2020 7:55 am
nico010 Sat Feb 22, 2020 7:55 am
Another detail ... one thing that has given me excellent results is to make the hinges with monokote. This has two advantages.
1- do not deal with the installation of nylon hinges
2- there is no place for fuel to enter.


With this installed it is time to finish the upper back and the front of the fuselage and aply monokote to everything

nico010- Bronze Member
- Posts : 53
Join date : 2019-04-15
Re: Qtee scratch build
![]() nico010 Sat Feb 22, 2020 8:07 am
nico010 Sat Feb 22, 2020 8:07 am
A couple of things I learned with this model, which applies to the following is that it is built to withstand the blows that a beginner can give it. so the structure is quite over reinforced and on the other hand the wooden and piano rope pushrods are negative for this type of models since it significantly increases the weight of the back of the model which leads to having to add more lead to get a correct CG. In later constructions I improved these details without losing rigidity and managed to substantially lower the final weight of the plane without the need to add lead to make it perfect for the flight.

nico010- Bronze Member
- Posts : 53
Join date : 2019-04-15
Re: Qtee scratch build
![]() balogh Sat Feb 22, 2020 8:24 am
balogh Sat Feb 22, 2020 8:24 am
Nico try to position the battery towards the front instead of adding ballast. Or bend the landing gear forward to have the weight of wheels and gear more in the front.
21 ounce is not bad but will impact the flying characteristics. Adding shimming plates made from light plastic under the engine mount top for a down thrust, or some down-trimming of the elevator to balance the CG is still better in my opinion than adding lead to the payload. I would at least try.
balogh- Top Poster
-
Posts : 4751
Join date : 2011-11-06
Age : 65
Location : Budapest Hungary
Re: Qtee scratch build
![]() nico010 Sat Feb 22, 2020 10:22 am
nico010 Sat Feb 22, 2020 10:22 am
I don't have the plane with me anymore, I sold it a while ago. the battery (which was 4 AAA Ni-MH) had them located as far as possible (almost in contact with F1), so and everything was necessary lead. With respect to the incidence of the engine, fortunately it was well estimated, since the model had no tendency to raise the nose when the engine rpm increased. and when the engine ran out of fuel it was a delight to glide ... almost all the time, hand off except when there was a turn.
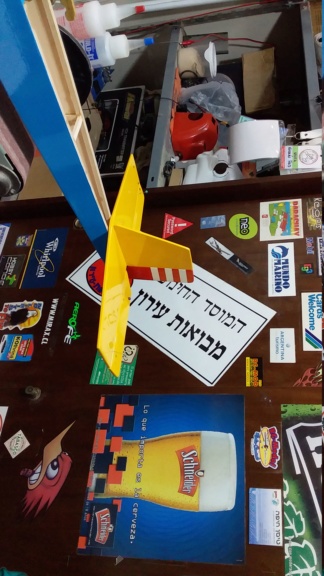
I share some of the photos of the plane (many send them to the outerzone site for publication). At some point I will try to share a couple of videos that I have.


nico010- Bronze Member
- Posts : 53
Join date : 2019-04-15
Re: Qtee scratch build
![]() nico010 Sat Feb 22, 2020 12:51 pm
nico010 Sat Feb 22, 2020 12:51 pm
Despite the abrupt end, the model did not happen nothing at all.
Cheers
nico010- Bronze Member
- Posts : 53
Join date : 2019-04-15
balogh- Top Poster
-
Posts : 4751
Join date : 2011-11-06
Age : 65
Location : Budapest Hungary
Page 1 of 2 • 1, 2 ![]()
» Scratch-Build 2021
» La Stick Scratch Build for Cox Pee Wee .020
» New P-38 profile scratch build log
» My Latest Scratch build Cox powered car