

 Rules
Rules
Log in
Search
Latest topics
» Irvine Mills .75 replicaby ffkiwi Today at 4:43 am
» COX .020 RC PROJECT
by 1/2A Nut Today at 4:32 am
» **VOTE-ON-THE-NEXT-COX-ENGINE-OF-THE-MONTH** (October 2024)
by Admin Today at 1:33 am
» Happy Birthday Robert ( Rsv1cox )
by balogh Today at 1:06 am
» Carburetor Sprinkler Rod Peak Tee Dee .049 / .051
by MauricioB Yesterday at 11:02 pm
» OS MAX-D
by Ken Cook Yesterday at 3:38 pm
» The Cabin.........A carpenters nightmare.
by getback Yesterday at 3:22 pm
» Cox .020 PeeWee/TeeDee prop-screw
by getback Yesterday at 7:55 am
» Wanted peewee 20 fuel tank
by GallopingGhostler Yesterday at 2:05 am
» Fox .35 Modifications
by Ken Cook Fri Oct 04, 2024 7:40 pm
» *Cox Engine of The Month* Submit your pictures! -October 2024-
by Admin Fri Oct 04, 2024 7:33 pm
» Off topic - Tonka dump truck restoration. 10:27
by rsv1cox Fri Oct 04, 2024 6:32 pm
Cox Engine of The Month


CEF Traveling Engine


Win This Engine!

Live on Patrol


New guy - restoring two .020 models
Page 1 of 1

 New guy - restoring two .020 models
![]() braggs Thu Jan 11, 2018 9:20 pm
braggs Thu Jan 11, 2018 9:20 pm
Hey guys,
I'm new to the forum! I have two .020 PeeWee engines that I got from my boss while I restored model airplanes. Neither of them have ran in probably a few decades.
I've ordered some parts from Cox international to rebuild them, fuel is on order. I've been in the RC world for about 10 years, though all I have flown are electrics. This is my first engine!
Is there anything I should know before starting this adventure? I've disassembled one, and is soaking in alcohol for a bit. Both still turn well, but some things crumbled off of the one I took apart. Pictures are most helpful!
I have some questions too.... How does the fuel get from the tank to the top of the piston? I see it goes from the tank through a hole in the center, through a copper/brass reed. Does this reed need an adhesive? Or is the spring enough? But then I don't know how it gets from this reed to on top of the piston to be compressed and ignite. Again, pictures are great, but anything helps!

braggs- New Member

- Posts : 3
Join date : 2018-01-11
Age : 28
Location : Prescott Valley, AZ
Re: New guy - restoring two .020 models
![]() Cribbs74 Thu Jan 11, 2018 10:04 pm
Cribbs74 Thu Jan 11, 2018 10:04 pm
Welcome to the forum.
This is antiquated, but still relevant
This is antiquated, but still relevant

Cribbs74- Moderator


Posts : 11906
Join date : 2011-10-24
Age : 50
Location : Tuttle, OK
Re: New guy - restoring two .020 models
![]() Jason_WI Thu Jan 11, 2018 10:05 pm
Jason_WI Thu Jan 11, 2018 10:05 pm
Welcome to the forum.
The Pee Wee is just like it’s bigger brother the babe bee. The fuel is drawn through the fuel tube from the tank. It’s metered by the needle valve then mixed with air through the venturi in the center of the tank. It reaches the reed valve and is drawn though the reed valve on the upward stroke of the piston. On the downward stroke of the engine the exhaust is expelled through the exhaust ports. At the same time the reed valve closes and the fuel air mixture is compressed. Once the piston drops below both bypass ports milled in the cylinder the fuel air mixture rushes into the cylinder. On the upward stroke of the piston the fuel air mixture is compressed and ignited by the glow plug. The whole cycle then starts over.
The reed should float behind the circlip. It may seem glued by old castor oil but it should be free to rotate.
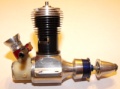
Here is an expanded view of the pee wee.

The Pee Wee is just like it’s bigger brother the babe bee. The fuel is drawn through the fuel tube from the tank. It’s metered by the needle valve then mixed with air through the venturi in the center of the tank. It reaches the reed valve and is drawn though the reed valve on the upward stroke of the piston. On the downward stroke of the engine the exhaust is expelled through the exhaust ports. At the same time the reed valve closes and the fuel air mixture is compressed. Once the piston drops below both bypass ports milled in the cylinder the fuel air mixture rushes into the cylinder. On the upward stroke of the piston the fuel air mixture is compressed and ignited by the glow plug. The whole cycle then starts over.
The reed should float behind the circlip. It may seem glued by old castor oil but it should be free to rotate.
Here is an expanded view of the pee wee.

Jason_WI- Top Poster

-
Posts : 3123
Join date : 2011-10-09
Age : 49
Location : Neenah, WI
Re: New guy - restoring two .020 models
![]() Admin Thu Jan 11, 2018 10:21 pm
Admin Thu Jan 11, 2018 10:21 pm
 to the forum!
The guys above covered it pretty well. These engines are fairly simple. The parts that fell apart on you were probably the crankcase gasket and maybe the venturi gasket. It's a good idea to replace those anyway.
For the fuel, you want to use a fuel with no less than 20% oil (with no less than 10% of that castor oil). Using a fuel with a nitro content between 15-25% will make for easier needle adjusting. Running them on higher than 25% is not necessary unless you're in a speed contest, the life of the glow head can be shortened. They will run on fuels with lower and even no nitro content, but starting and needling can be tricky.

It also helps to read through the original instruction manual. You can download that here: https://www.coxengineforum.com/h24-instruction-sheets
Also check out Bernie's fuel guide: https://coxengines.ca/files/FG.pdf


Admin- Administrator
- Posts : 6544
Join date : 2010-07-27
Location : Roseville, Minnesota -

Re: New guy - restoring two .020 models
![]() getback Fri Jan 12, 2018 7:25 am
getback Fri Jan 12, 2018 7:25 am
Welcome to the Forum braggs ! I do believe that should get you stated in the I/C engine adventure , these little engines can bee as much fun as they can sometimes bee aggravating  Keep us posted as you go and any help is just a click away !

getback- Top Poster
-
Posts : 10381
Join date : 2013-01-18
Age : 67
Location : julian , NC
Re: New guy - restoring two .020 models
![]() Kim Fri Jan 12, 2018 7:46 am
Kim Fri Jan 12, 2018 7:46 am
WELCOME TO CEF !!!
It's great that you've gotten yourself two of the cutest Cox engines to to restore !!!
Kim
It's great that you've gotten yourself two of the cutest Cox engines to to restore !!!
Kim

Kim- Top Poster
-
Posts : 8608
Join date : 2011-09-06
Location : South East Missouri


MauricioB- Top Poster
- Posts : 3672
Join date : 2016-02-16
Age : 53
Location : ARG
Re: New guy - restoring two .020 models
![]() rsv1cox Fri Jan 12, 2018 9:38 am
rsv1cox Fri Jan 12, 2018 9:38 am
The guys have got you well covered regarding Cox engine operation.
Welcome to the forum. Post pictures when you can.
Bob
Welcome to the forum. Post pictures when you can.
Bob

rsv1cox- Top Poster
-
Posts : 11070
Join date : 2014-08-18
Location : West Virginia
» Restoring a rusty engine
» Just finished rebuilding and restoring Cox 190-8 engine
» Restoring Cox Engines in general
» Restoring the Jr Satan
» Properly restoring a Strato Bug
» Just finished rebuilding and restoring Cox 190-8 engine
» Restoring Cox Engines in general
» Restoring the Jr Satan
» Properly restoring a Strato Bug
Page 1 of 1
Permissions in this forum:
You cannot reply to topics in this forum