Log in
Search
Latest topics
» Dodge Viper - What a waste but brilliant marketingby roddie Today at 6:46 pm
» COX .020 POWERED SPEEDSTER
by TD ABUSER Today at 6:32 pm
» **VOTE-ON-THE-NEXT-COX-ENGINE-OF-THE-MONTH** (November 2024)
by roddie Today at 6:13 pm
» Brushless motors?
by rsv1cox Today at 4:53 pm
» Free Flight Radio Assist
by rdw777 Today at 4:28 pm
» Cox 020 PeeWee rebuild questions
by balogh Today at 4:15 pm
» L4 Grasshopper
by latole Today at 3:43 pm
» PAW 80 and possible use
by fit90 Today at 8:36 am
» Music-wire bending tools (DIY video)
by 1975 control line guy Today at 8:32 am
» Ultrasonic Cleaners??
by sosam117 Yesterday at 11:26 am
» My CA or CyA (super glue) allergy
by rsv1cox Yesterday at 9:52 am
» My Pseudo killerbee.
by rsv1cox Yesterday at 7:04 am
Stuntman 23
Page 2 of 4
Page 2 of 4 •  1, 2, 3, 4
 Re: Stuntman 23
Super COOL Robert!!!!!!! 
 I had (have
  ) the Goldberg model... BUT war scars often come from airplanes that fly well enough.. to tempt you to fly their wings off.
I love to experiment with wood when it comes to model airframes. Oftentimes; you're able to re-balance a model that was designed for a much different lay-out.. just by altering the construction of key-areas. It's always possible to balance the model throughout the building process.
I flew mine with the Cox Golden Bee .049 engine running 20-25% nitro glow-fuel using a Cox 6 x 3 grey/competition 2-blade propeller.. on 26-27 ft. lines; MUCH SHORTER than what you'd want. My side-yard dictated the line-length.
My Stuntman was an R.O.G./stooge-launched C/L model. If your engine is "fresh".. and your running good hot fuel, you'll be airborne in the length of a card-table..

 I had (have
 I love to experiment with wood when it comes to model airframes. Oftentimes; you're able to re-balance a model that was designed for a much different lay-out.. just by altering the construction of key-areas. It's always possible to balance the model throughout the building process.
I flew mine with the Cox Golden Bee .049 engine running 20-25% nitro glow-fuel using a Cox 6 x 3 grey/competition 2-blade propeller.. on 26-27 ft. lines; MUCH SHORTER than what you'd want. My side-yard dictated the line-length.
My Stuntman was an R.O.G./stooge-launched C/L model. If your engine is "fresh".. and your running good hot fuel, you'll be airborne in the length of a card-table..
 Re: Stuntman 23
Thanks Andrew!! I like that Honker in your avatar! I’ve got the print for it… Maybe someday 
Thanks Roddie!! I plan on this one being a worker bee so it may get a few scars as well!! The Goldberg plans say that any damage can be fixed with a tube of cement…. I’m sure I’ll take advantage of that!!!
I have gone thru many of the past threads and have enjoyed your builds, Thank you… Quite artistic and inspiring ….I am away from home and shop during them week for work…. But I was exited enough about the project to box it it up and few tools so I can work on it in the evenings….

A little work on the fuse, stabilizer, and wing…..I wiped a very dry coat of polyurethane on the wing then sandwiched with wax paper and a heavy sheet of glass on top ….Hopefully it will dry and stay flat for further coats…. Best
Robert
Thanks Roddie!! I plan on this one being a worker bee so it may get a few scars as well!! The Goldberg plans say that any damage can be fixed with a tube of cement…. I’m sure I’ll take advantage of that!!!
I have gone thru many of the past threads and have enjoyed your builds, Thank you… Quite artistic and inspiring

A little work on the fuse, stabilizer, and wing…..I wiped a very dry coat of polyurethane on the wing then sandwiched with wax paper and a heavy sheet of glass on top ….Hopefully it will dry and stay flat for further coats…. Best
Robert

rdw777- Diamond Member


Posts : 1672
Join date : 2021-03-11
Location : West Texas
 Re: Stuntman 23
That has Ron Cribbs all over it he use to do the same thing , before some of ya'lls time here , sanding and gluing in the motel carrying his 1/2 built models around with him SOoo Cool Did you jag ur wing edges or just straight cut for putting together ?But I was exited enough about the project to box it it up and few tools so I can work on it in the evenings…. wrote:

getback- Top Poster


Posts : 10415
Join date : 2013-01-18
Age : 67
Location : julian , NC
 Re: Stuntman 23
Well that’s cool! Thanks for sharing that  ….I rent a room from a co- worker so was able to set a little desk for working on….. I covered it with a sheet of drywall so straight pins can be placed anywhere…. The kite I posted in Roddie’s kite thread was built on that desk….. I usually bring a small RC to fly some evenings but left it at home this time to work on SM 23….I fired up one of my engines in my landlord’s front yard a few weeks ago and half the neighborhood came over to see what the ruckus was LOL….
I didn’t jag the joint in the wing, It’s just a straight butt joint…. Good afternoon thought though….Chord-wise it’s OK….Span-wise it wants to move a little…. If I weight it flat overnight it wants to lift the tips a little the next day, About 3/32 each tip…. If I flip it over for same procedure it does the exact opposite….If I can’t get it stabilized I may cut a couple of channels for some “spars”….I’ve got an endless supply of thin, stiff bamboo….. Open to suggestions as well….
I didn’t jag the joint in the wing, It’s just a straight butt joint…. Good afternoon thought though….Chord-wise it’s OK….Span-wise it wants to move a little…. If I weight it flat overnight it wants to lift the tips a little the next day, About 3/32 each tip…. If I flip it over for same procedure it does the exact opposite….If I can’t get it stabilized I may cut a couple of channels for some “spars”….I’ve got an endless supply of thin, stiff bamboo….. Open to suggestions as well….

rdw777- Diamond Member


Posts : 1672
Join date : 2021-03-11
Location : West Texas
 Re: Stuntman 23
Recently, I've been experimenting and building with foam board, both with and without the paper backing. Without the backing, it's pretty flimsy so I needed a strong, but lightweight material to add strength in certain locations. I've settled on fiberglass window screen -- it's light, flexible and incredibly strong, plus CHEAP. After wiping down with acetone (there may be release agents on it, maybe not), I stick it on like fiberglass using Elmer's ProBond Advanced glue. The glue choice is probably not too important, but I don't think CA would be the best bet. It should work great for reinforcing the butt joint in a wing. I have also laminated it between sheets -- adds a lot of stiffness.
The downside is that it is not very smooth, but at the speeds we fly, I doubt parasitic drag is a big player.
Waiting for more progress and pics.
The downside is that it is not very smooth, but at the speeds we fly, I doubt parasitic drag is a big player.
Waiting for more progress and pics.
Last edited by andrew on Wed Aug 25, 2021 4:43 pm; edited 2 times in total
 Re: Stuntman 23
Please,oh please, you tease. I have nothing to mark or measure with, except for the screen.
How tall, wide, and long is this piece?
How much does it weigh?
Have you tested it for bending/breaking mid-span?
How does it gold up to twisting?
Will you build this into your next wing?
Thanks in advance
How tall, wide, and long is this piece?
How much does it weigh?
Have you tested it for bending/breaking mid-span?
How does it gold up to twisting?
Will you build this into your next wing?
Thanks in advance
_________________
Never enough time to build them all...always enough time to smash them all!
944_Jim- Diamond Member


Posts : 2021
Join date : 2017-02-08
Age : 59
Location : NE MS
 Re: Stuntman 23
Since I don't want to hijack rdw777's thread, I'll start another thread on playing with foam.
 Re: Stuntman 23
Welcome here friend….. Will be following your foam tests….
Robert
Robert

rdw777- Diamond Member


Posts : 1672
Join date : 2021-03-11
Location : West Texas
 Re: Stuntman 23
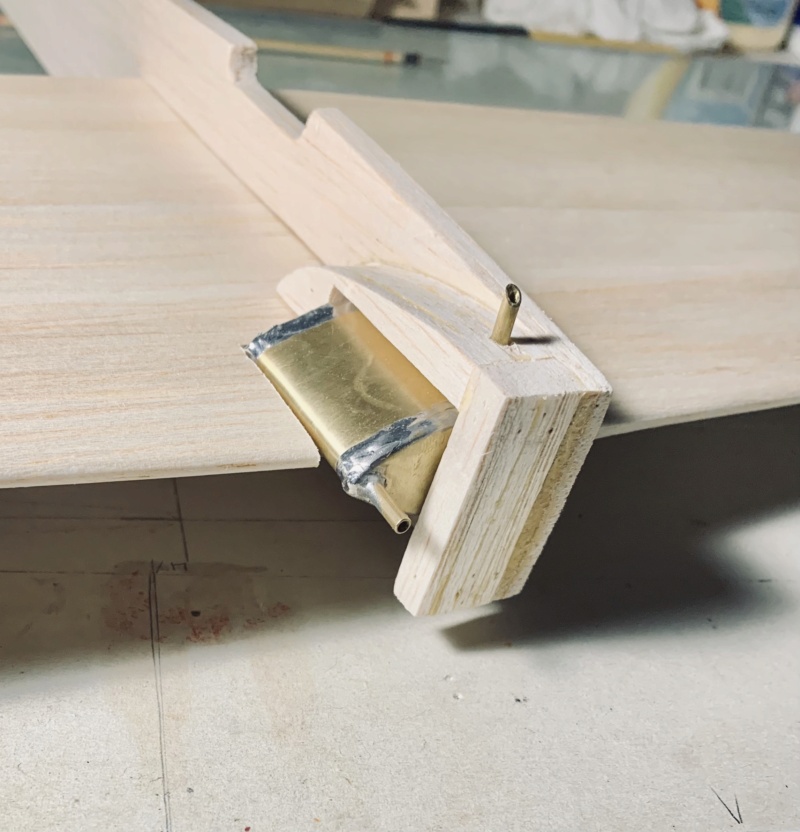
A little progress on the front end….I stole duane’s tank mount idea, Thanks!..I plan on adding a couple of hooks to secure the tank on with a rubber band….Will be able to drop out the bottom for any maintenance ( or crash repairs  )….Left a little room for some foam padding against the fuse…still have install the cheek blocks on the other side…


rdw777- Diamond Member


Posts : 1672
Join date : 2021-03-11
Location : West Texas
 Re: Stuntman 23
Looking Good Robert , about the wing is it cupping or the wing warping from the core ? Reason i ask is I have seen people and need to do this on mine us lite ply across grain at the tips to stop cupping and use as lead outs also . Mine oldest one has this problem and I need to address it before try fling again . 

getback- Top Poster


Posts : 10415
Join date : 2013-01-18
Age : 67
Location : julian , NC
 Re: Stuntman 23
It’s OK from from leading edge to trailing edge… Where it is warping is from the center toward the wing tips…. About equal both ways…. Center would be raised about 1/8” with tips resting on the flat table …..I think I’m going to have to add some kind of “spar”…. I think I have some really hard stiff balsa in the shop…. I’ll check this weekend….
Something that will be coming up soon is where to put the bell crank….. Also leadout rake (if any)….The original instructions have some hints but a bit vague….I’m sure the kit had locations punched…. I know these will play into balance as well….. Any insight into these would be appreciated …,
Robert


rdw777- Diamond Member


Posts : 1672
Join date : 2021-03-11
Location : West Texas
 Stuntman pushrod
Oh, but this thread brings back memories! It was 60 years ago that I built my Stuntman. I must have screwed up the pushrod because I ended up using 0.020 piano wire that my father had in his garage. End result of that substitution was that there was virtually no "up" elevator as the wire simply bowed against the fuselage. I never did get the plane to fly more than 1/4 lap and would really like to build another to see if I could do better with a lifetime of experience that I never had as an 11 year old kid.

706jim- Gold Member

- Posts : 470
Join date : 2013-11-29
 Re: Stuntman 23
On my 1/2a plank wing planes, I have incorporated a 1/8" spruce spar at the leading edge, and on my last few builds, another in the center as well. This was for two reasons. The one on the leading edge was for leading edge strength and to also help in the wing staying straight, and the center spar did also help in keeping the wing straight. Also just to note that I build these with wood glue, so I have time to align, and sand smooth and flat afterwards.

NEW222- Top Poster

- Posts : 3896
Join date : 2011-08-13
Age : 46
Location : oakbank, mb
 Re: Stuntman 23
rdw777 wrote:It’s OK from from leading edge to trailing edge… Where it is warping is from the center toward the wing tips…. About equal both ways…. Center would be raised about 1/8” with tips resting on the flat table …
You'll be fine for as long as the model lives. Next plank model, flip the wing over to take advantage of your "planned dihedral."
For the weight of the model, wait until you are closer to finished to determine your line rake. The bellcrank position isn't overly critical. Take some masking tape, and tape a loop of line to the inboard wing tip to see how the model hangs from the lines. It should hand a smidge nose down. That's where you'll install your lead out guides.
_________________
Never enough time to build them all...always enough time to smash them all!

944_Jim- Diamond Member


Posts : 2021
Join date : 2017-02-08
Age : 59
Location : NE MS
 Re: Stuntman 23
rdw777 wrote:
Something that will be coming up soon is where to put the bell crank….. Also leadout rake (if any)….The original instructions have some hints but a bit vague….I’m sure the kit had locations punched…. I know these will play into balance as well….. Any insight into these would be appreciated …
http://flyinglines.org/orin.basiccl.html
I think there is a better one in their site...and I think I've linked to it here before. I'll try to find it later.
_________________
Never enough time to build them all...always enough time to smash them all!

944_Jim- Diamond Member


Posts : 2021
Join date : 2017-02-08
Age : 59
Location : NE MS
 Re: Stuntman 23
Thanks Jim, New,
I know there is a certain method to trimming CL…. Just not familiar with it…..I weighed all the components so far …. 115 grams or about four oz…. That is lacking firewall, push rod, and finish … Which leads to next question…. I’m thinking tissue trim applied with thinned white glue then oil base finish Minwax polyurethane top coating….No paint…. Think the tissue will be protected under they varnish? I Usually work with Sig Lite Coat but want to experiment with something different with keeping it lite in mind…
Robert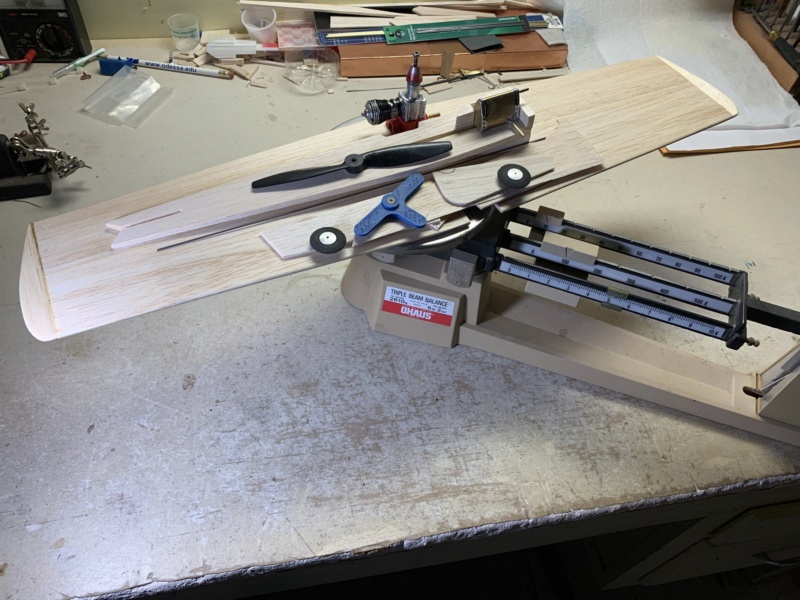


rdw777- Diamond Member


Posts : 1672
Join date : 2021-03-11
Location : West Texas
 Re: Stuntman 23
Robert -
I have tried the Minwax polyurethanes, with varying results. The oil based tended to be slightly yellow - I was looking for a way to layup 0.5 oz fiberglass cloth over foam wings, mostly to leave a smoother and harder finish. The water based was clear, but less durable. It's been some time back and I confess I cannot remember which gave some problems. With exposure to raw fuel, it became sticky and gummy. Others have had good luck with the Poly-U's and I'm sure my results were due to my lack of patience, i.e., I didn't allow enough time for it to cure sufficiently. Had I waited long enough for it to completely harden, I think my results would have been better. You might try some test pieces before going whole hog. Just a thought.
I have also applied tissue over mylar using thinned white glue, again with less than perfect results. I take the blame here, too. First, the tissue was fade and bleed resistant (although cheap), but when I applied the thinned glue, it wrinkled badly and did not completely smooth out when dry. Had I taken more time to lay down the tissue, attaching only along the edges and pulling more tightly, I think it would have turned out better.
DO NOT take my experience as a deterrent -- I chalk the results up to the application, not the components. However, you may, as before, want to try some test pieces first to hone your technique.
BTW, that's a very nice triple beam scale!!!
andrew
 Re: Stuntman 23
If you have Sig Lite Coat, I would use it. It's the clearest of clear whereas poly is going to offer a amber tint to it which will continue to darken. Lite Coat also strengthens the wood due to it soaking into it opposed to laying on top of it. Even with multiple coats, dope is lighter than poly, whatever is sprayed on is the weight, no solvents are evaporating. I also believe you would have a better chance at less warps using dope opposed to thinned white glue. Repairs using dope is a extremely easy and can be done just within the damage. Using enamels and poly can be a lot more problematic. I used the thinned white glue and silkspan/tissue method for years. While most were .35 sized profiles, I would tissue the stabs and fuse. After a while, I got so efficient using nitrate as a basecoat, I cut out the tissue part as I found it to be totally unnecessary.

Ken Cook- Top Poster

- Posts : 5627
Join date : 2012-03-27
Location : pennsylvania
 Re: Stuntman 23
Jim, I had a chance to read over the page you sent in leadout guide placement….. Makes good sense…. Will go about it that way, Thanks!!!….. I should still build in a little right rudder and add tip weight too right?…. I plan to add a little engine right thrust for sure….
Andrew, Thanks for sharing those experiences…. Noted!!
Ken, Thanks for stopping by……I’m saving what Lite Coat I have left for next project…. I really do like working with it though…. I’m kinna half way started with the oil base poly route…. I have two thin coats on the wing, They were initially applied to stop the wood from moving and had helped some….. Still working on that…. Also as a bit of base to lessen the impact of the thinned white glue to aggravate the issue…. I’m OK with the yellowing of the poly….. May kind of go with the ‘59 vibe …. Just looking for alternate methods and to learn something new and to try and avoid pitfalls…. Will not be using any paint….. Appreciated
Robert

rdw777- Diamond Member


Posts : 1672
Join date : 2021-03-11
Location : West Texas
 Re: Stuntman 23
https://m.youtube.com/watch?v=VUeZQqyW-NI&feature=youtu.be
My very favorite 1/2 A CL video….. Nice slow lap times….. Well tuned engine to pull it over the top easily….. If I could get mine to fly like that I’d be happy….. I’m guessing the plane is pretty light and was probably a calm day…..
My very favorite 1/2 A CL video….. Nice slow lap times….. Well tuned engine to pull it over the top easily….. If I could get mine to fly like that I’d be happy….. I’m guessing the plane is pretty light and was probably a calm day…..

rdw777- Diamond Member


Posts : 1672
Join date : 2021-03-11
Location : West Texas
 Re: Stuntman 23
rdw777 wrote:
Thanks Roddie!! I plan on this one being a worker bee so it may get a few scars as well!! The Goldberg plans say that any damage can be fixed with a tube of cement…. I’m sure I’ll take advantage of that!!!
I have gone thru many of the past threads and have enjoyed your builds, Thank you… Quite artistic and inspiring….I am away from home and shop during them week for work…. But I was exited enough about the project to box it it up and few tools so I can work on it in the evenings….
Robert
Hi Robert, I'm flattered that you've enjoyed reading some of my threads.
 Great to be building "on the road". That's enthusiasm.. and I think it's great. Did you mention what you're using for adhesives/cements? I have used CA and epoxies almost exclusively over the last several years.
CA is terrific but one must ensure fresh air circulation/venting when using it. I developed a sensitivity to CA because of over-exposure without proper ventilation. It was decades ago.. but still affects my respiratory (sinus) system for several days, even if the exposure is minimal.
I enjoyed the video that you linked. That little Wen-Mac sounded good!
 Re: Stuntman 23
Yes sir, those are nice builds! I especially like Rare Bear ….. Very well thought out and great craftsmanship  …..
…..
It will go with me again this week, The rascal is getting into my RC flying time LOL…..Yes, anxious to get it in the air…..It’s mostly built with yellow Titebond…. That’s one of the reasons I don’t mind covering with polyurethane that may amber a bit…..I glued the firewall on with 60 min Loctite epoxy this morning and will probably give a light coat of the epoxy around the nose area….. After I tap the wood screws for the engine mount will harden with CA and re-tap….. I seem to be getting more sensitive to CA…. Burning eyes and etc…..
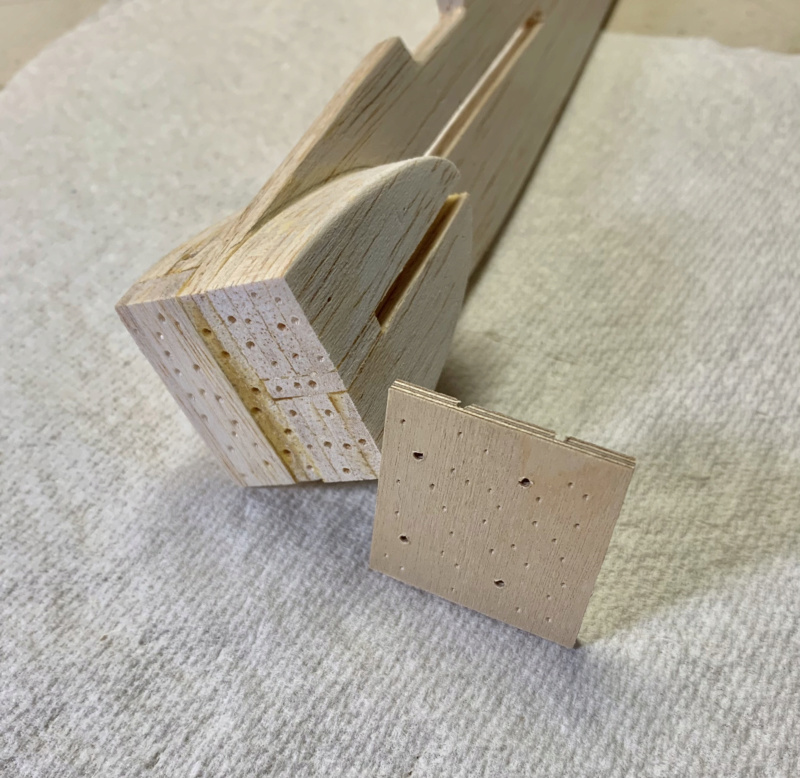
Firewall was glued on with just a bit of right thrust…
Wished I knew a few more details on that Firebaby…. Weight, line length etc…. I blew up the three view on the plan and had it printed…. I have a Cub .039 that might like to go there….Best
It will go with me again this week, The rascal is getting into my RC flying time LOL…..Yes, anxious to get it in the air…..It’s mostly built with yellow Titebond…. That’s one of the reasons I don’t mind covering with polyurethane that may amber a bit…..I glued the firewall on with 60 min Loctite epoxy this morning and will probably give a light coat of the epoxy around the nose area….. After I tap the wood screws for the engine mount will harden with CA and re-tap….. I seem to be getting more sensitive to CA…. Burning eyes and etc…..
Firewall was glued on with just a bit of right thrust…


Wished I knew a few more details on that Firebaby…. Weight, line length etc…. I blew up the three view on the plan and had it printed…. I have a Cub .039 that might like to go there….Best

rdw777- Diamond Member


Posts : 1672
Join date : 2021-03-11
Location : West Texas
 Re: Stuntman 23
rdw777 wrote:Yes sir, those are nice builds! I especially like Rare Bear ….. Very well thought out and great craftsmanship…..
It will go with me again this week, The rascal is getting into my RC flying time LOL…..Yes, anxious to get it in the air…..It’s mostly built with yellow Titebond…. That’s one of the reasons I don’t mind covering with polyurethane that may amber a bit…..I glued the firewall on with 60 min Loctite epoxy this morning and will probably give a light coat of the epoxy around the nose area….. After I tap the wood screws for the engine mount will harden with CA and re-tap….. I seem to be getting more sensitive to CA…. Burning eyes and etc…..
Firewall was glued on with just a bit of right thrust…
Wished I knew a few more details on that Firebaby…. Weight, line length etc…. I blew up the three view on the plan and had it printed…. I have a Cub .039 that might like to go there….Best
The CEF Speed Contest models were just plane fun to build! None of us had any plans to work from. It was CEF member jpvelo (Jim Roselle) who originally introduced the contest idea back in 2013/14. Jim's been on hiatus from CEF.. and I miss him.
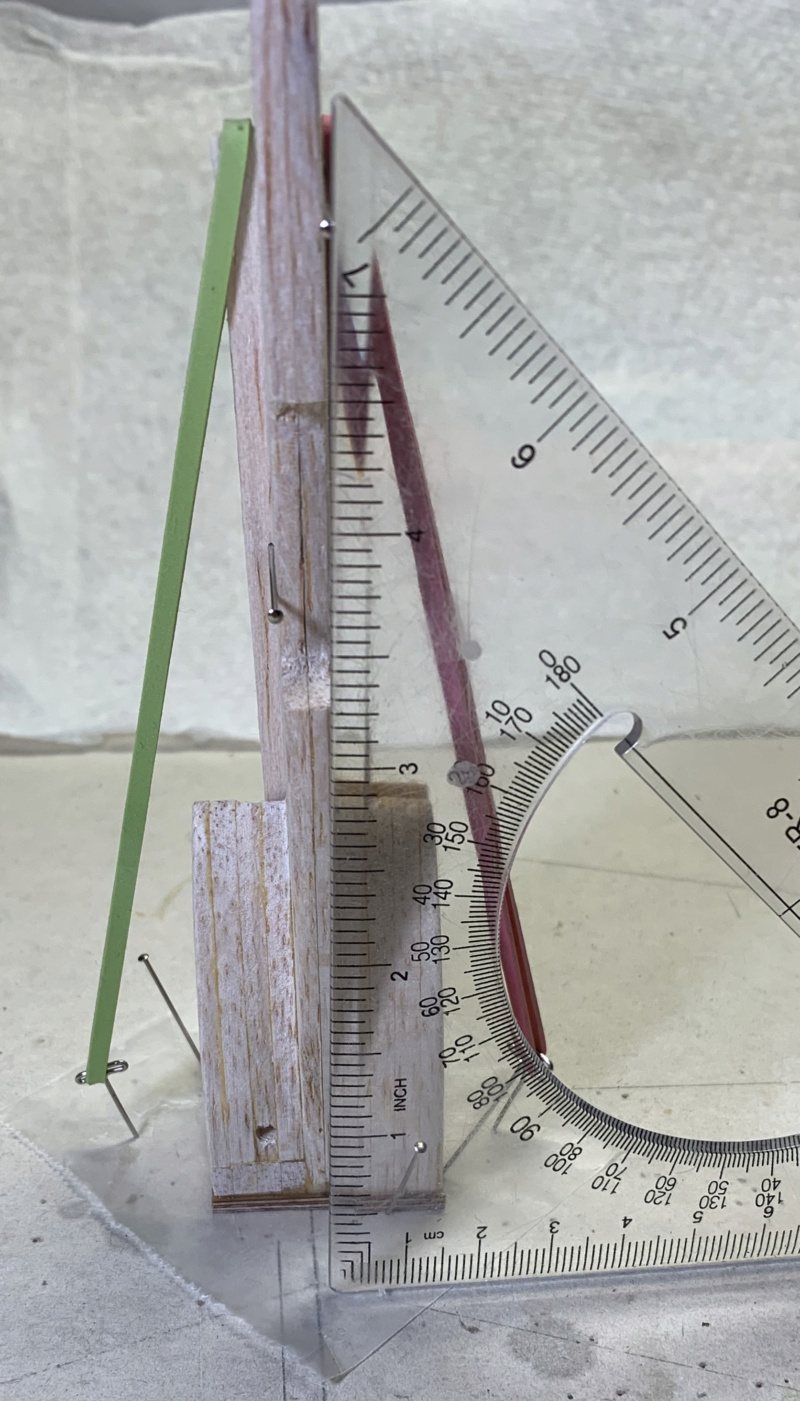
Regarding the Firebaby in that vid... the lines look to me; to be 30ft. or less. I certainly could be wrong.. but that's what I see. The airframe.. well..
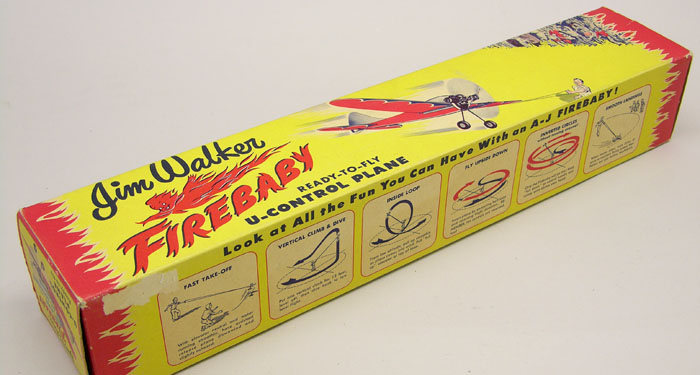
(below photo-credits; CEF/rsv1cox)
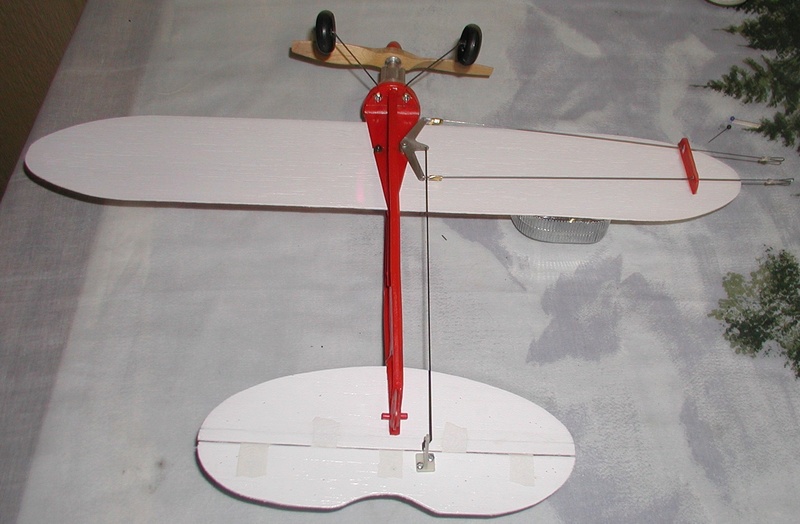

... there's not too much weight there.. and it's all pre-finished. I'd like to borrow from that design; particularly the bellcrank mounting off the fuse. Breaking a wing doesn't destroy your control-linkage/tail-plane.
 Re: Stuntman 23
I like the way you've constructed the nose. The laminated cheeks.. and the perforations for aiding glue adhesion for the plywood firewall. 

It's been so long since I've built a "kit"................. ....... I haven't used balsa cheeks. The firewalls on my 1/2A profile airplanes are utilitarian. I use 3/8" square hardwood blocks vertically; behind a plywood firewall. It's overkill. You mentioned "hardening" your wood-screw bore-threads with CA. I like that idea.
Best of luck on her maiden.. which I'm sure will be soon..


It's been so long since I've built a "kit".................
Best of luck on her maiden.. which I'm sure will be soon..
Page 2 of 4 •  1, 2, 3, 4
 Similar topics
» any suggestions for a big slow plane1/2a or bigger
» Building some Stuntman 23s
» Stunt Man 23
» Hope everyone caught this site
» cardboard wing on baby ringmaster
» Building some Stuntman 23s
» Stunt Man 23
» Hope everyone caught this site
» cardboard wing on baby ringmaster
Page 2 of 4
Permissions in this forum:
You cannot reply to topics in this forum

 Rules
Rules


