

 Rules
Rules
Log in
Search
Latest topics
» Stealth SB-Xby Admin Yesterday at 8:28 pm
» ST .35 STUNT / VOODOO / ZERO POINT ZERO NITRO
by TD ABUSER Yesterday at 7:45 pm
» SUPERTIGER .15 PROJECT
by TD ABUSER Yesterday at 7:42 pm
» For sale -- Cox Custom Carburetors for Tee Dee engines
by sosam117 Yesterday at 5:23 pm
» WHERE ARE YOU BUYING YOUR FUEL AND GLOW PLUGS...?
by TD ABUSER Yesterday at 4:35 pm
» Waiting for Engines from Ken Enya
by sosam117 Yesterday at 4:33 pm
» Unusual Cox 049 cylinder - Need help identifying
by anm2 Yesterday at 4:12 pm
» Jim Walker Bonanza etc.
by rsv1cox Yesterday at 2:57 pm
» What's the Best Reed for Cox Reed Valve Engines.
by roddie Yesterday at 1:37 pm
» Fuel choice
by 1975 control line guy Fri Aug 30, 2024 4:01 pm
» "Fall S.M.A.L.L." Video 3.
by GallopingGhostler Fri Aug 30, 2024 2:37 pm
» Gifted Fox
by Ken Cook Fri Aug 30, 2024 11:12 am
Cox Engine of The Month
August-2024
balogh's

"Cox TD09 R/C Beast of Burden featuring Kamtechnik head and DIY metallic fuel nipple"

PAST WINNERS
balogh's
"Cox TD09 R/C Beast of Burden featuring Kamtechnik head and DIY metallic fuel nipple"
PAST WINNERS
CEF Traveling Engine


Win This Engine!

Live on Patrol


Repairing a Gilbert .11 mount using JB Weld
Page 1 of 1

Repairing a Gilbert .11 mount using JB Weld
![]() rsv1cox Wed Feb 16, 2022 5:13 pm
rsv1cox Wed Feb 16, 2022 5:13 pm
Some things just don't go the way you want them to.
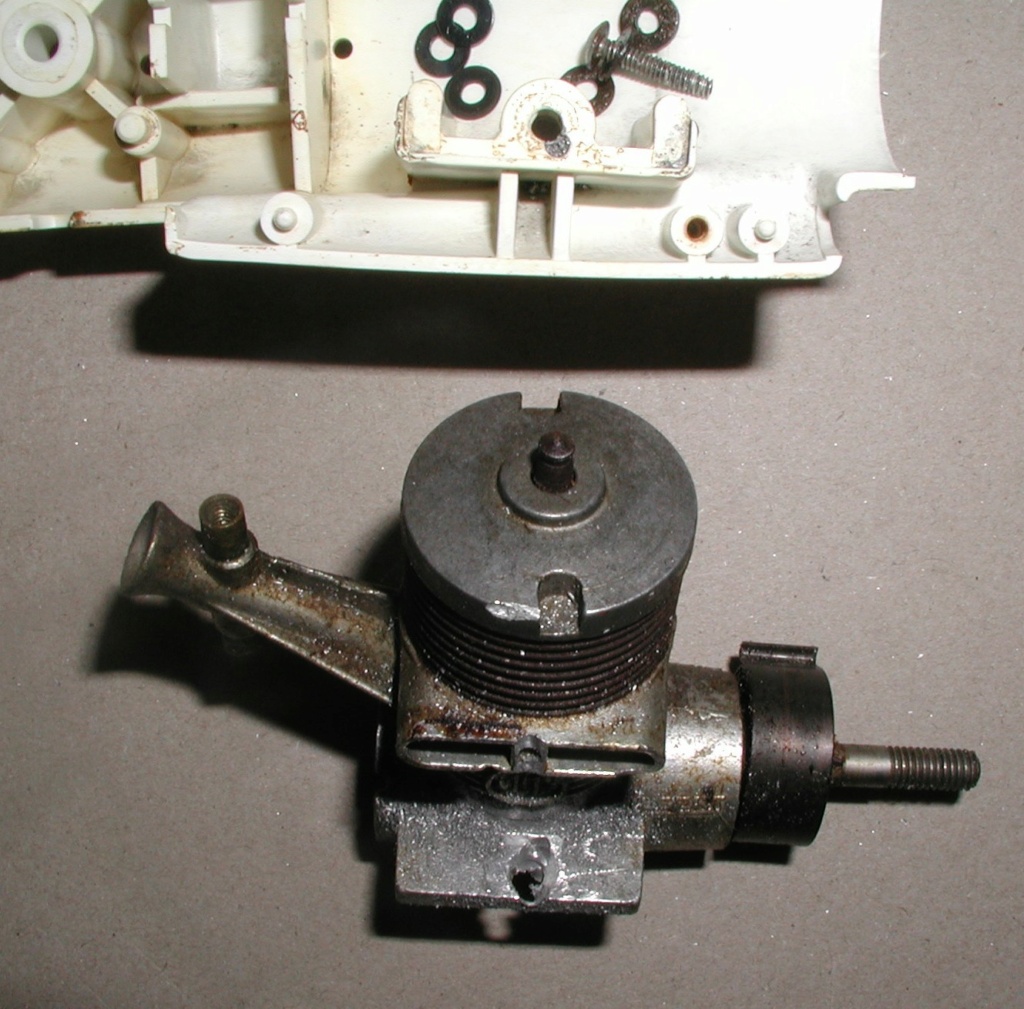
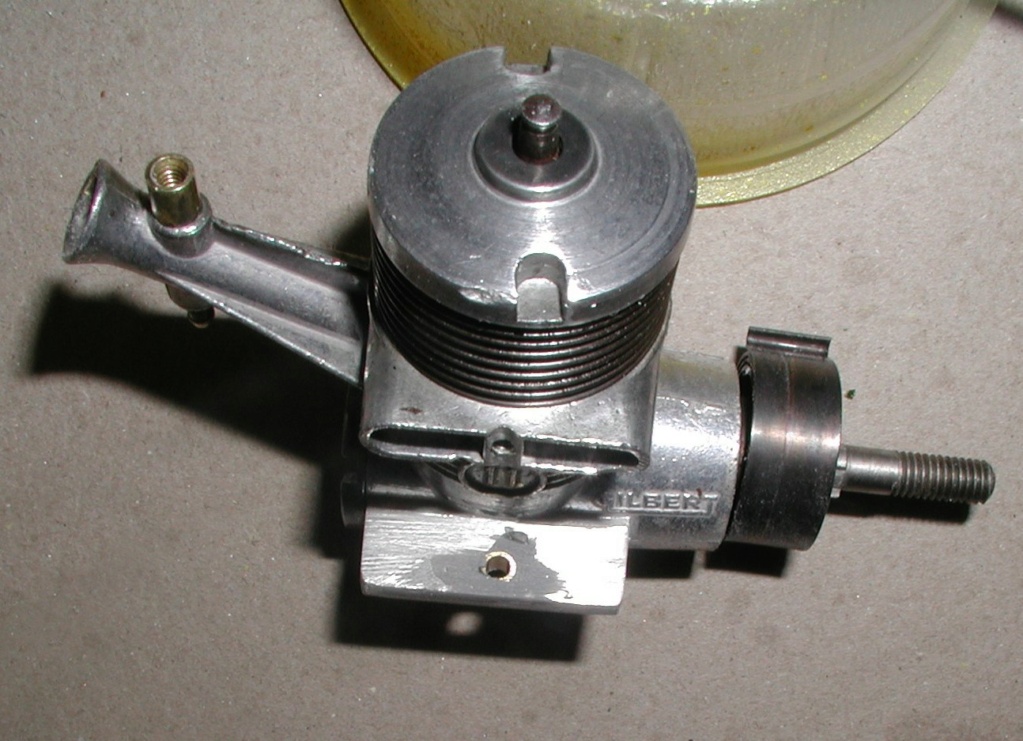
Trying to remove the engine from this Gilbert C/L airplane I stripped the shallow cut straight slot machine screws head which was imbedded deep into the under fuselage. So, I ground off the bitter (other) end flat with the mount and tried to drill it out. (mount is threaded) No way I could center punch it and the bit walked drilling off center.
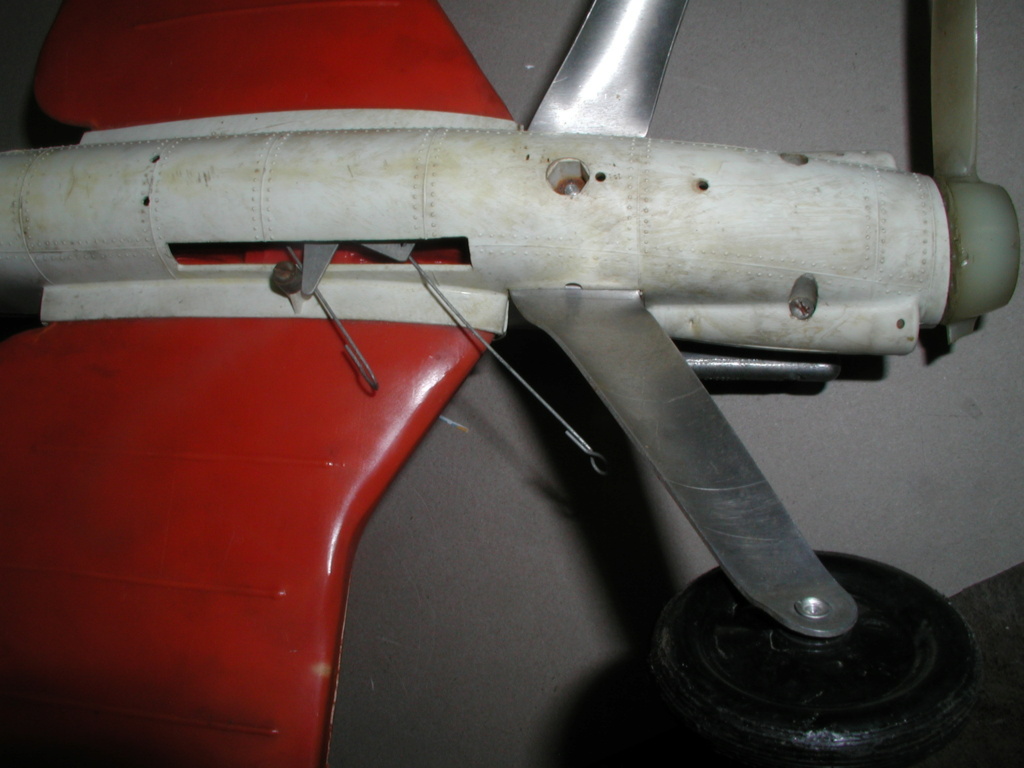

One thing led to another and before long I had a mess. Well, I have several Gilbert .11 engines but only one airframe so I opted to save it rather than the engine and just drilled the thing. But instead of tossing the engine I thought of JB Weld. Old JB has saved me many times on different projects. So, I bushed it with brass tubing and applied the JB.
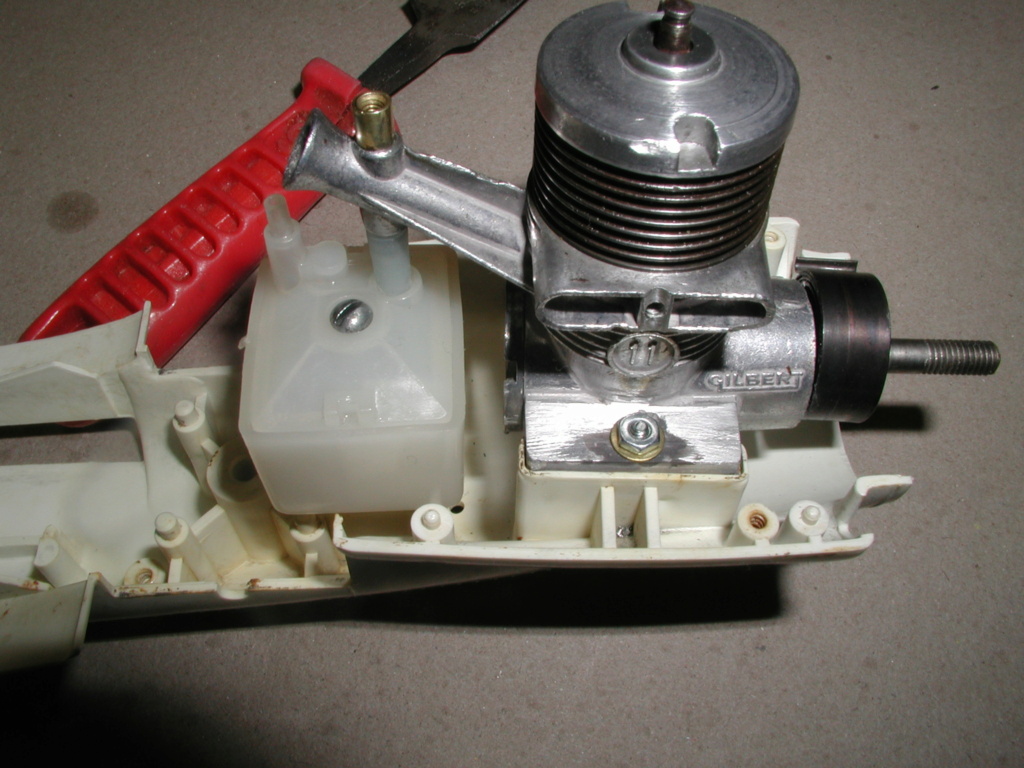
Not threaded like the other side, but still very secure sitting in the cradle designed into the model.
Fuel tank is interesting. Held tight by guides molded into the fuselage sections. The fuel pickup though is some sort of ferrous metal that just rusted away. I replaced with Dubro tubing that actually works better.


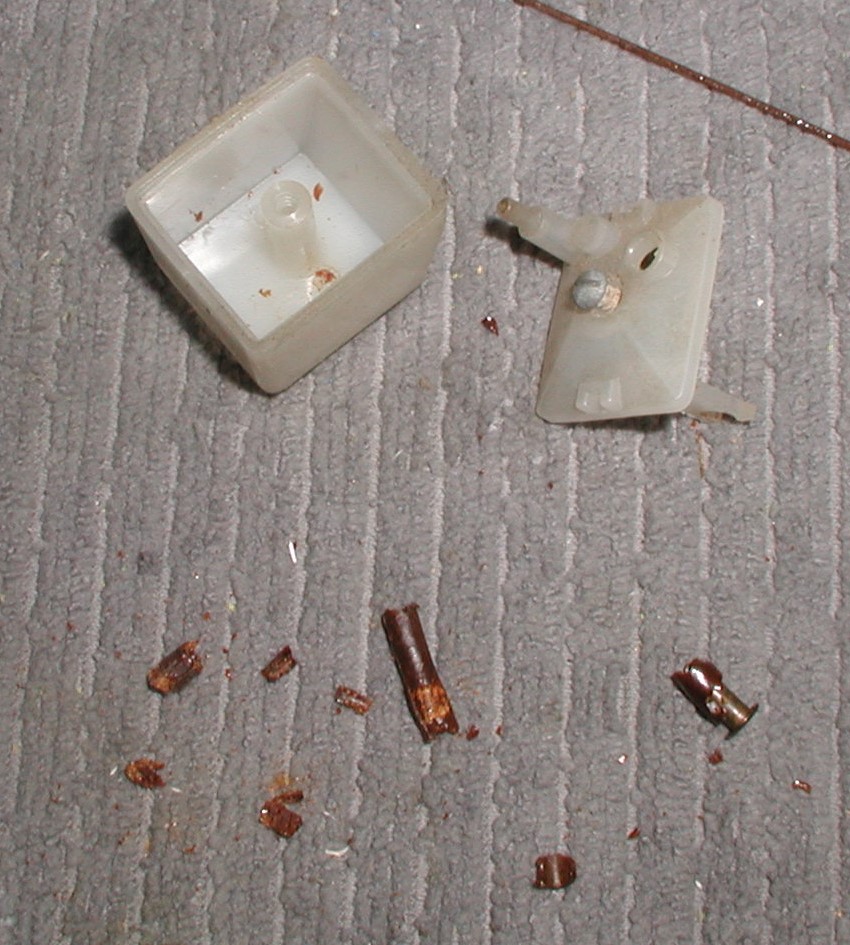
Trying to remove the engine from this Gilbert C/L airplane I stripped the shallow cut straight slot machine screws head which was imbedded deep into the under fuselage. So, I ground off the bitter (other) end flat with the mount and tried to drill it out. (mount is threaded) No way I could center punch it and the bit walked drilling off center.


One thing led to another and before long I had a mess. Well, I have several Gilbert .11 engines but only one airframe so I opted to save it rather than the engine and just drilled the thing. But instead of tossing the engine I thought of JB Weld. Old JB has saved me many times on different projects. So, I bushed it with brass tubing and applied the JB.


Not threaded like the other side, but still very secure sitting in the cradle designed into the model.
Fuel tank is interesting. Held tight by guides molded into the fuselage sections. The fuel pickup though is some sort of ferrous metal that just rusted away. I replaced with Dubro tubing that actually works better.


rsv1cox- Top Poster


Posts : 10928
Join date : 2014-08-18
Location : West Virginia
Re: Repairing a Gilbert .11 mount using JB Weld
![]() NEW222 Thu Feb 17, 2022 4:39 pm
NEW222 Thu Feb 17, 2022 4:39 pm
I like the repaired engine. The repair looks great, and the thought of how you did it is amazing, and something I never would have thought of.

NEW222- Top Poster
- Posts : 3895
Join date : 2011-08-13
Age : 45
Location : oakbank, mb
Re: Repairing a Gilbert .11 mount using JB Weld
![]() rsv1cox Thu Feb 17, 2022 4:59 pm
rsv1cox Thu Feb 17, 2022 4:59 pm
NEW222 wrote:I like the repaired engine. The repair looks great, and the thought of how you did it is amazing, and something I never would have thought of.
Yeah but, I sure mangled that one. I could not use one of my better bits, had to use the longer hex headed bit to clear the cylinder. Set it up on the drill press, aligned everything and the long bit just travelled. So, I got out the hand drill and................
That's the offending machine screw in the engine compartment just above the cylinder head. (Picture above) Used my best screwdriver and it still destroyed the shallow slot.
rsv1cox- Top Poster
-
Posts : 10928
Join date : 2014-08-18
Location : West Virginia
Re: Repairing a Gilbert .11 mount using JB Weld
![]() rsv1cox Fri Feb 18, 2022 10:09 am
rsv1cox Fri Feb 18, 2022 10:09 am
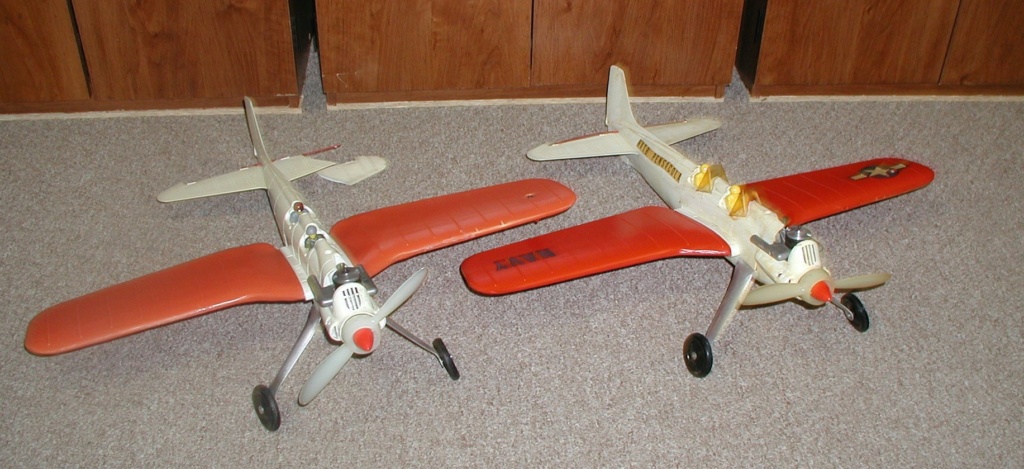
I put the second Gilbert "SkyFlash" together this morning. Still have to adjust the landing gear, secure the "Pilots", and wait for the Testors cement to dry. Something tells me I should have washed the broken pieces at the same time as I did the fuselage. Later. This one shows more sun damage than the first. Howard's wax will bring out more of the red.
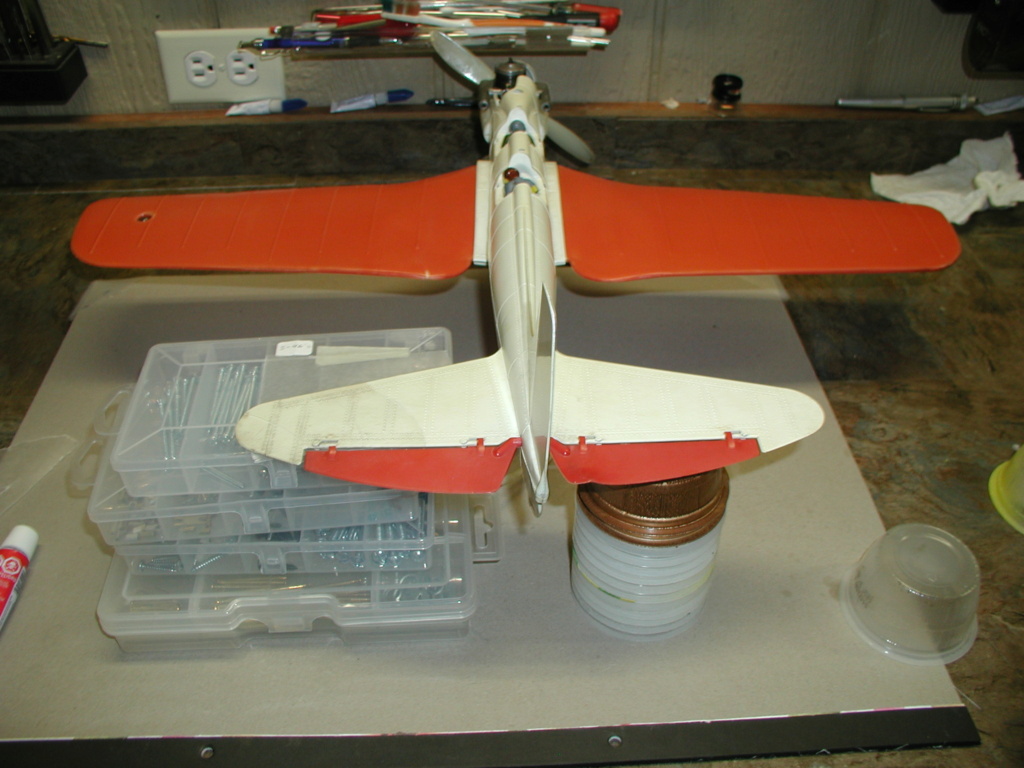
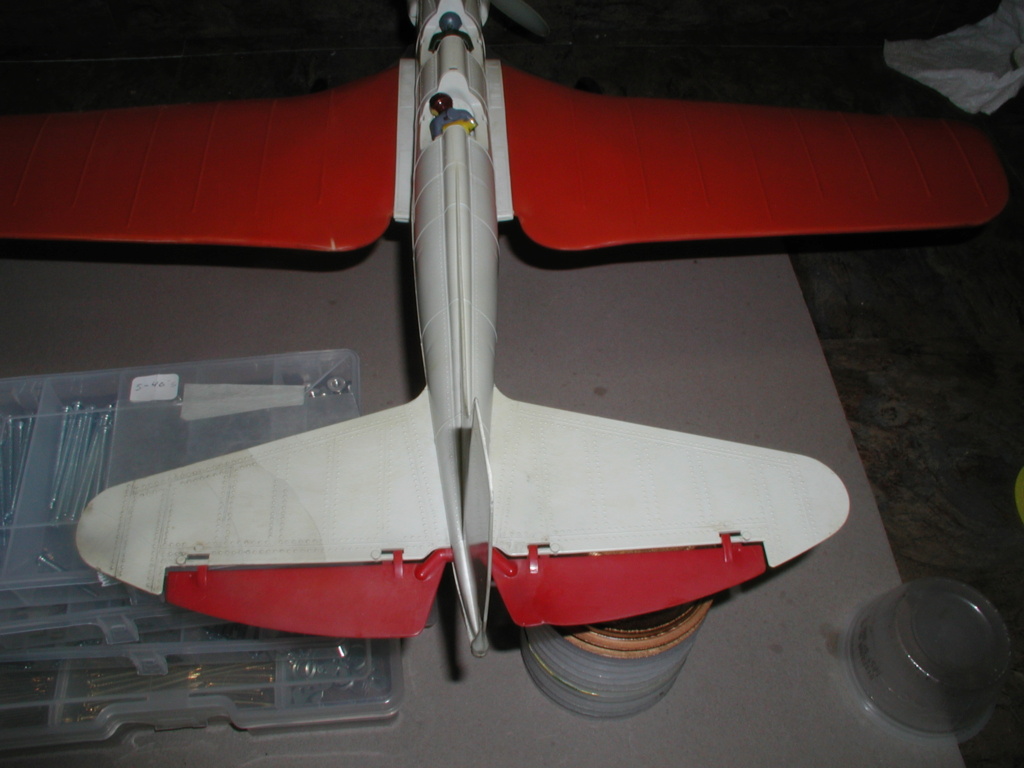
The outside elevator hinge is broken. Got to figure out a fix for that.
The outside elevator hinge is broken. Got to figure out a fix for that.


rsv1cox- Top Poster
-
Posts : 10928
Join date : 2014-08-18
Location : West Virginia
Re: Repairing a Gilbert .11 mount using JB Weld
![]() Marleysky Sat Feb 19, 2022 10:46 pm
Marleysky Sat Feb 19, 2022 10:46 pm
rsv1cox wrote:I put the second Gilbert "SkyFlash" together this morning. Still have to adjust the landing gear, secure the "Pilots", and wait for the Testors cement to dry. Howard's wax will bring out more of the red.
HEy Bob, can you share your "Howard's Wax" Method? your second set of pictures really made the Red Pop!! Thanks

Marleysky- Top Poster
-
Posts : 3618
Join date : 2014-09-28
Age : 71
Location : Grand Rapids, MI
Re: Repairing a Gilbert .11 mount using JB Weld
![]() rsv1cox Sun Feb 20, 2022 8:14 am
rsv1cox Sun Feb 20, 2022 8:14 am
Marleysky wrote:rsv1cox wrote:I put the second Gilbert "SkyFlash" together this morning. Still have to adjust the landing gear, secure the "Pilots", and wait for the Testors cement to dry. Howard's wax will bring out more of the red.
HEy Bob, can you share your "Howard's Wax" Method? your second set of pictures really made the Red Pop!! Thanks
I have used it for years, mostly on gun stocks. Like model airplanes and engines, I bought the worst examples I could find. You would not believe the condition of the Commission rifles that came out of Columbia, or the Ishapore #1's than came from India. Nasty, moldy stocks that had been improperly stored for years.
Vintage collectors like "Patina." An application of Howard wax followed immediately by wiping would remove most if not all of the crud leaving the effect that collectors like. A second application left on for 20 minutes then wiped off finished the job.
Same for model airplanes. Works well on both plastic models and planked wood models. Doesn't work a darn on tissue though.

Used it years ago on this vintage planked T-28 that was a mess when I got it. Took off the crud and left the patina. Not happy with the 9 and Navy decals. They just peel off. Still looking for something more authentic.

On wood I follow directions. Leave on for 20 minutes then wipe off and polish.
For plastic I leave on for around ten minutes then wipe and polish.
Edit add:
BTW I'm all caught up on projects and looking for something to do (it's ten degrees outside) I thought of this:

A little beyond the Howard wax fix I think.
rsv1cox- Top Poster
-
Posts : 10928
Join date : 2014-08-18
Location : West Virginia
Re: Repairing a Gilbert .11 mount using JB Weld
![]() Marleysky Sun Feb 20, 2022 1:28 pm
Marleysky Sun Feb 20, 2022 1:28 pm
yeah...that one looks like a overnight soak in brake fluid in a plastic bag. Thanks for the info on Howards, I'll find some and give it a try.
Another one of your "Rags to Riches" restorations...look here recently SOLD:
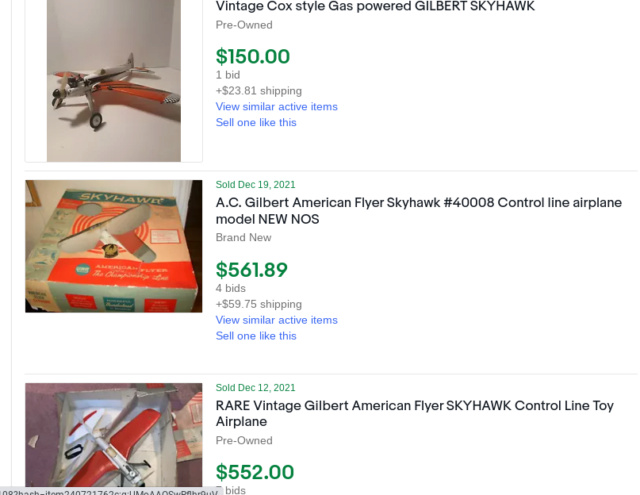
Another one of your "Rags to Riches" restorations...look here recently SOLD:

Marleysky- Top Poster
-
Posts : 3618
Join date : 2014-09-28
Age : 71
Location : Grand Rapids, MI
» The Caron Bee'm mount for Cox radial mount engines
» Carb body repair
» J.B. Weld - The quicker fixer-upper
» Repairing Cylinders
» Repairing other Cox parts
» Carb body repair
» J.B. Weld - The quicker fixer-upper
» Repairing Cylinders
» Repairing other Cox parts
Page 1 of 1
Permissions in this forum:
You cannot reply to topics in this forum