

 Rules
Rules
Log in
Search
Latest topics
» Stealth SB-Xby Admin Yesterday at 8:28 pm
» ST .35 STUNT / VOODOO / ZERO POINT ZERO NITRO
by TD ABUSER Yesterday at 7:45 pm
» SUPERTIGER .15 PROJECT
by TD ABUSER Yesterday at 7:42 pm
» For sale -- Cox Custom Carburetors for Tee Dee engines
by sosam117 Yesterday at 5:23 pm
» WHERE ARE YOU BUYING YOUR FUEL AND GLOW PLUGS...?
by TD ABUSER Yesterday at 4:35 pm
» Waiting for Engines from Ken Enya
by sosam117 Yesterday at 4:33 pm
» Unusual Cox 049 cylinder - Need help identifying
by anm2 Yesterday at 4:12 pm
» Jim Walker Bonanza etc.
by rsv1cox Yesterday at 2:57 pm
» What's the Best Reed for Cox Reed Valve Engines.
by roddie Yesterday at 1:37 pm
» Fuel choice
by 1975 control line guy Fri Aug 30, 2024 4:01 pm
» "Fall S.M.A.L.L." Video 3.
by GallopingGhostler Fri Aug 30, 2024 2:37 pm
» Gifted Fox
by Ken Cook Fri Aug 30, 2024 11:12 am
Cox Engine of The Month
August-2024
balogh's

"Cox TD09 R/C Beast of Burden featuring Kamtechnik head and DIY metallic fuel nipple"

PAST WINNERS
balogh's
"Cox TD09 R/C Beast of Burden featuring Kamtechnik head and DIY metallic fuel nipple"
PAST WINNERS
CEF Traveling Engine


Win This Engine!

Live on Patrol


Wildcat build
Page 1 of 1

 Wildcat build
![]() TDbandit Mon Dec 15, 2014 12:06 pm
TDbandit Mon Dec 15, 2014 12:06 pm
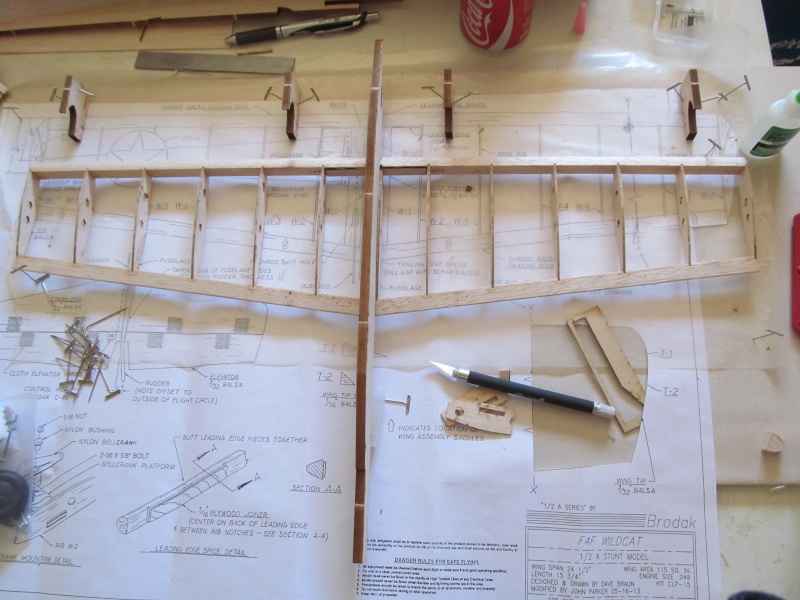
Hi all, as promised, here's the first few pics of my Brodak Wildcat build and so far it's been an easy kit.

Laying the ribs out to check length.

LE and TE in jigs and dry fitting ribs the fit has been nice so far. One word for those who might want to build this kit, The slots on th both the LE and TE don't exactly line up to the plans. the W2 rib slots therefore must line up. if you get the W2 slots lined up everything will be fine.

All the ribs have been added then glued as well as the LE joiner.
Test fitting the fuselage top half.

Another view of the top half of the fuselage. This has to be a lightly snug fit.
More pics to come as the build progresses.
Laying the ribs out to check length.
LE and TE in jigs and dry fitting ribs the fit has been nice so far. One word for those who might want to build this kit, The slots on th both the LE and TE don't exactly line up to the plans. the W2 rib slots therefore must line up. if you get the W2 slots lined up everything will be fine.
All the ribs have been added then glued as well as the LE joiner.
Test fitting the fuselage top half.
Another view of the top half of the fuselage. This has to be a lightly snug fit.
More pics to come as the build progresses.
Last edited by TDbandit on Tue Dec 16, 2014 7:56 pm; edited 3 times in total (Reason for editing : corrected title)

TDbandit- Platinum Member

- Posts : 897
Join date : 2014-12-01
Age : 52
Location : Riverdale Georgia
Re: Wildcat build
![]() Mark Boesen Mon Dec 15, 2014 12:28 pm
Mark Boesen Mon Dec 15, 2014 12:28 pm
nice wing area, a tee dee should make that a nice flier.

Mark Boesen- Top Poster

- Posts : 3978
Join date : 2011-09-01
Age : 66
Location : Rockford, Il -

Re: Wildcat build
![]() TDbandit Mon Dec 15, 2014 1:11 pm
TDbandit Mon Dec 15, 2014 1:11 pm
Yup that's what I'm looking forward too. This is going to be the new home for my TD .051  (Bandit)
TDbandit- Platinum Member
- Posts : 897
Join date : 2014-12-01
Age : 52
Location : Riverdale Georgia
Re: Wildcat build
![]() JPvelo Mon Dec 15, 2014 3:52 pm
JPvelo Mon Dec 15, 2014 3:52 pm
I think Ron mentioned that looks like a baby ringmaster wing and I agree. I had a baby ring with a TeeDee and it was a blast to fly.
Jim
Jim

JPvelo- Diamond Member

- Posts : 1972
Join date : 2011-12-02
Age : 56
Location : Colorado
Re: Wildcat build
![]() TDbandit Mon Dec 15, 2014 5:04 pm
TDbandit Mon Dec 15, 2014 5:04 pm
I was told that too which makes me want to build one infact I think I'll make a baby ring my next projectJPvelo wrote:I think Ron mentioned that looks like a baby ringmaster wing and I agree. I had a baby ring with a TeeDee and it was a blast to fly.
Jim
TDbandit- Platinum Member
- Posts : 897
Join date : 2014-12-01
Age : 52
Location : Riverdale Georgia
Re: Wildcat build
![]() Mark Boesen Mon Dec 15, 2014 11:13 pm
Mark Boesen Mon Dec 15, 2014 11:13 pm
I don't know for sure, but it looks like a bigger wing area then a Baby Ringmaster (which is good) more like the Brodak Clown?
Mark Boesen- Top Poster
- Posts : 3978
Join date : 2011-09-01
Age : 66
Location : Rockford, Il -
Re: Wildcat build
![]() TDbandit Tue Dec 16, 2014 7:26 pm
TDbandit Tue Dec 16, 2014 7:26 pm
More construction pics of my wildcat.

Wing with the tips installed and the bell-crank mount installed. So far very little sanding has been needed to get the parts to fit properly.
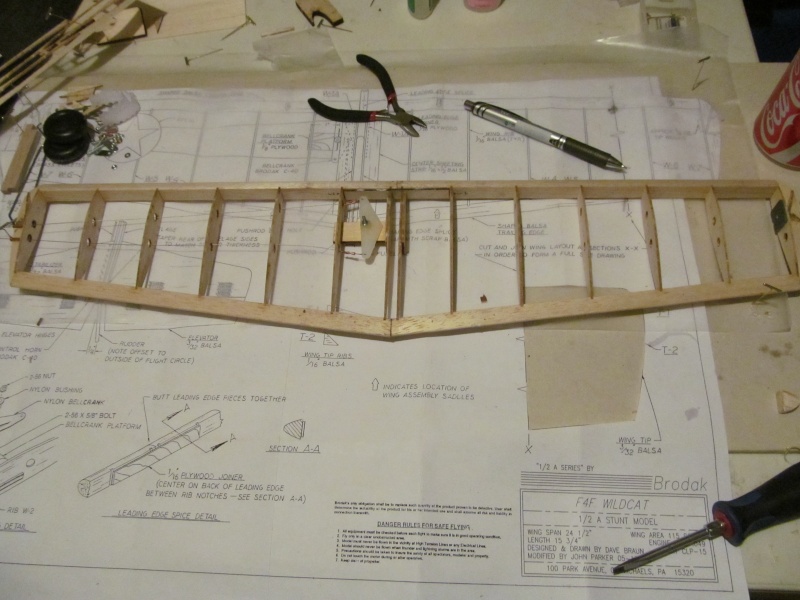
Bell-crank and lead-out wires trial fitted.

Fuselage top half with canopy glued in place and awaiting sanding
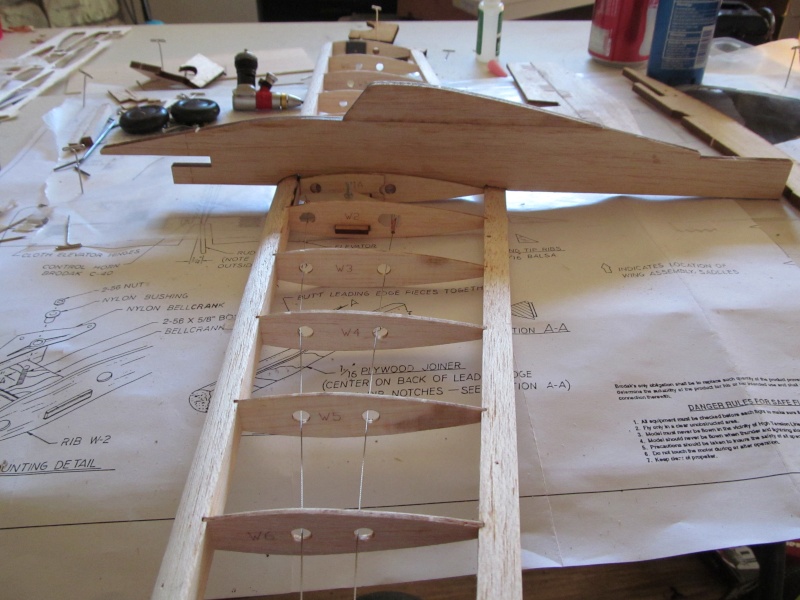
Top half of fuselage glued into place. I had to trim the LE and TE saddles lightly on both sides to get the fuselage to sit properly in the wing

Now with the lower half of fuselage installed.

Better view of the fuselage.

Shot of the motor mount complete with doublers
More pics to come...
Wing with the tips installed and the bell-crank mount installed. So far very little sanding has been needed to get the parts to fit properly.
Bell-crank and lead-out wires trial fitted.
Fuselage top half with canopy glued in place and awaiting sanding
Top half of fuselage glued into place. I had to trim the LE and TE saddles lightly on both sides to get the fuselage to sit properly in the wing
Now with the lower half of fuselage installed.
Better view of the fuselage.
Shot of the motor mount complete with doublers
More pics to come...
TDbandit- Platinum Member
- Posts : 897
Join date : 2014-12-01
Age : 52
Location : Riverdale Georgia
» Looking at this Wildcat what ya'll think?
» Brodak F4F Wildcat CL Kit
» Brodak F4F Wildcat
» Guillows Cessna 150 build circa 1970 (Build Log)
» Brodak 1/2A F4F Wildcat almost complete!!
» Brodak F4F Wildcat CL Kit
» Brodak F4F Wildcat
» Guillows Cessna 150 build circa 1970 (Build Log)
» Brodak 1/2A F4F Wildcat almost complete!!
Page 1 of 1
Permissions in this forum:
You cannot reply to topics in this forum