

 Rules
Rules
by rsv1cox Today at 12:27 pm
» Three -- sold out (making two more) Cox .010 Carburetors with wrench
by balogh Today at 11:51 am
» Roddie's flat-bottomed boat..
by roddie Today at 10:11 am
» Project Cox .049 r/c & Citabrian Champion
by rdw777 Today at 8:14 am
» Revivng Some Childhood Classics
by getback Today at 7:31 am
» Fox .35 Modifications
by Ken Cook Today at 3:16 am
» Happy Anzac Day!
by Boats13 Yesterday at 11:03 pm
» Introducing our Cox .049 TD Engines
by getback Yesterday at 6:20 am
» Cox powered jet-pump for model Sprint Boat
by roddie Thu Apr 25, 2024 10:25 pm
» Micro Draco Gets to Fly on a Beautiful Morning.
by rdw777 Thu Apr 25, 2024 8:15 pm
» Jim Walker Firebaby
by rdw777 Thu Apr 25, 2024 8:06 pm
» Hydro-bat by Vic Smeed: engine probs
by GallopingGhostler Thu Apr 25, 2024 5:12 pm


Stuka Restoration
Page 1 of 2 • 1, 2 ![]()

Stuka Restoration
![]() bottomgun Thu Feb 18, 2016 7:03 pm
bottomgun Thu Feb 18, 2016 7:03 pm

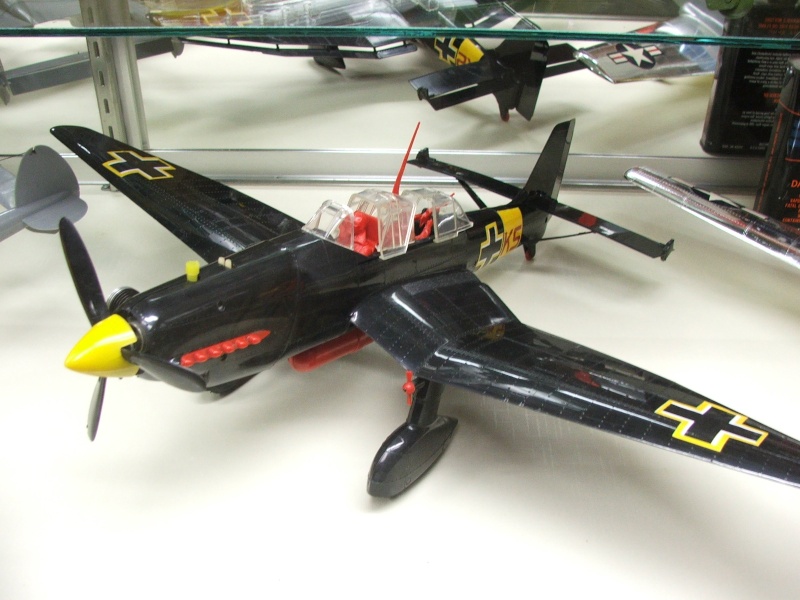
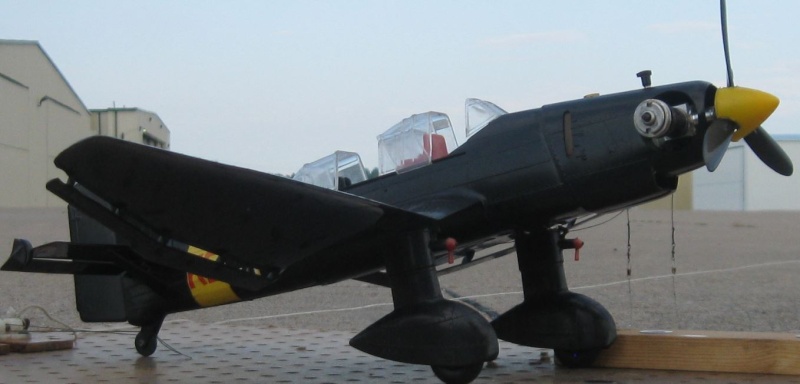
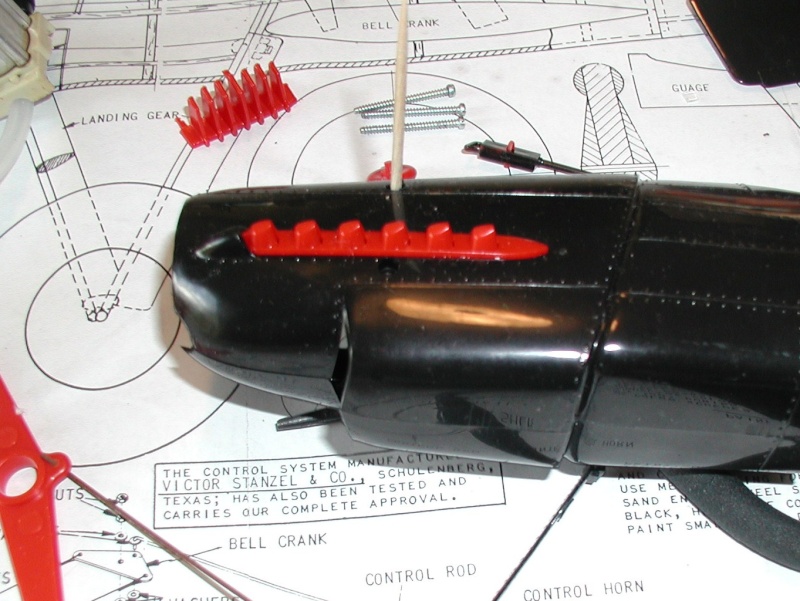
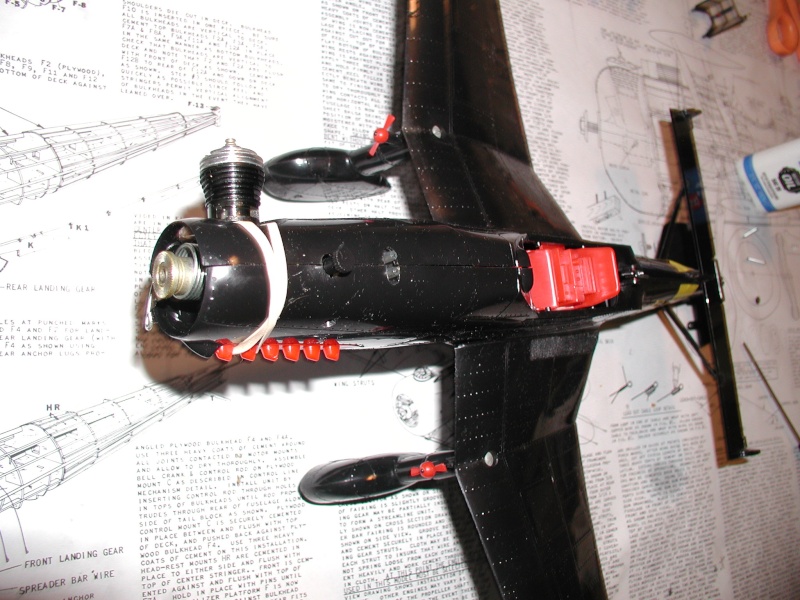
Everything is there except the wing rotors and the antenna. I started disassembling it before this shot so that's why it looks like it's missing a few things. I cleaned up all the plastic in dish soap and warm water first and then went through everything.
First, the little fix-its. The tail wheel had a chip in it and was no longer round. I mixed up some 30 minute epoxy and talcum powder to make a thick mixture. I dabbed it on and let it dry 24 hours before sanding it down to shape. At the same time I worked on a repro bomb that's been advertised on E-bay. It's okay but there were gaps in the glue joints and the color had a pinkish hue to it that definitely did not match any of the other red parts, so I used the same batch of epoxy to do some gap filling and sanding. The lighting in the photos make the bomb appear to be redder than it really is.


After prepping the plastic, I mixed up half a bottle of Testors red with three drops of orange to knock down the brightness a little to match the other plastics. One part paint to one part Strip-Ease Lacquer Thinner and I was ready to go. Sprayed it on with my Paasche Airbrush and it turned out the way I wanted. I'll let it dry two days and then I'll wet sand and gently buff the finish to give it that sheen that you see on molded plastics.


The next item addressed was that the right wing prop post was broken off at some time. I sanded it flat to the base of the post and then used a pin vise to hand drill a small hole through the center about a 1/4 inch deep. I widened it out to 1/16th of an inch. I fashioned a new post out of some scrap wire. I used a square jeweler's file to file the small ball end to shape using the left post as a guide. It was epoxied into the hole and dried overnight. A little Pactra Race Car finish in black and it's ready to accept a new wing prop.


This takes care of anything that was in need of repair. I'll try to find original props and an antenna before going the repop route if I'm lucky enough to find them.

bottomgun- Gold Member

- Posts : 131
Join date : 2012-12-27
Age : 66
Location : Southern California
Re: Stuka Restoration
![]() Cribbs74 Thu Feb 18, 2016 7:51 pm
Cribbs74 Thu Feb 18, 2016 7:51 pm
It's been said they are really poor flyers, yet I saw one fly and it did quite well. I hope it's not going to be a shelf queen and you can get out and fly it.
I'll attach a video for inspiration when I find it.
Wingovers that are not planned are usually do to loss of line tension and a gust of wind...
Ron
https://www.coxengineforum.com/t7333-they-do-fly?highlight=Stuka

Cribbs74- Moderator


Posts : 11895
Join date : 2011-10-24
Age : 50
Location : Tuttle, OK
Re: Stuka Restoration
![]() Mark Boesen Thu Feb 18, 2016 11:30 pm
Mark Boesen Thu Feb 18, 2016 11:30 pm
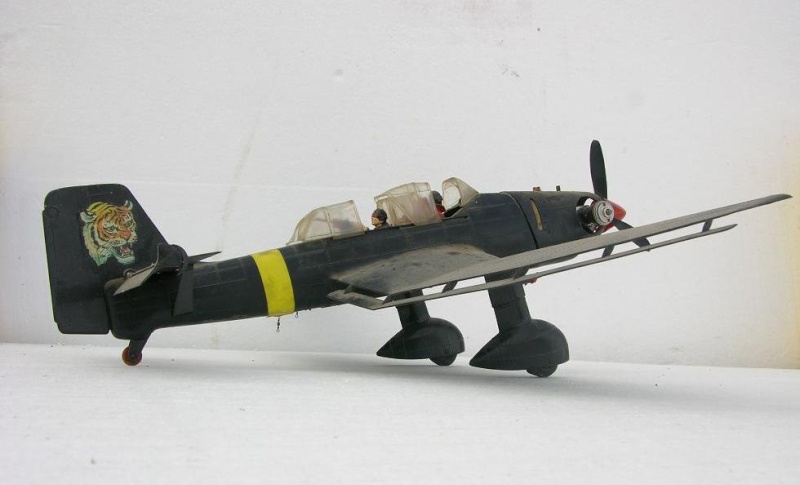
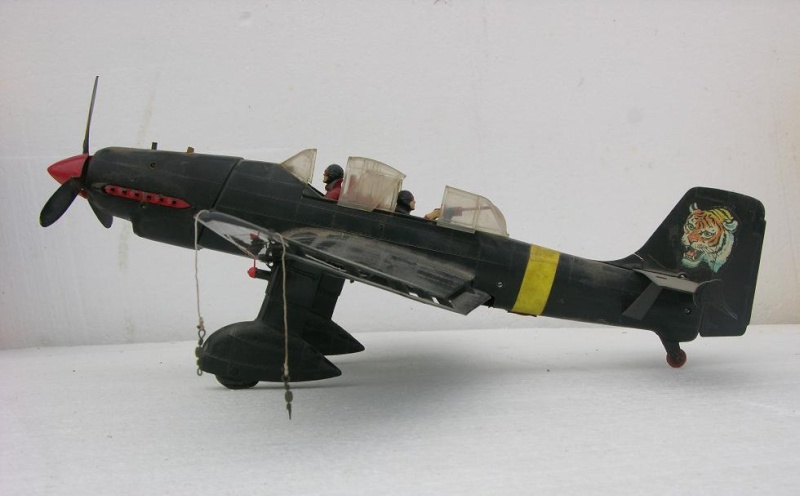
Here's my Stuka from several years back, i was lucky to find a donor plane that had all the parts i needed and busted parts i didn't.

Mark Boesen- Top Poster

- Posts : 3976
Join date : 2011-09-01
Age : 65
Location : Rockford, Il -

Re: Stuka Restoration
![]() ian1954 Fri Feb 19, 2016 5:25 am
ian1954 Fri Feb 19, 2016 5:25 am
How many hours did you have to put in to that?

ian1954- Diamond Member

- Posts : 2688
Join date : 2011-11-16
Age : 69
Location : England
Re: Stuka Restoration
![]() Kim Fri Feb 19, 2016 8:32 am
Kim Fri Feb 19, 2016 8:32 am
I've got a new wing for mine and intend to fly it again, the original had steel wire gear that were bent backwards and caused it to be very prone to nose-over. One of the new lineguys at the airport has a Stuka he wants to get going, so we'll be having a dedicated Cox/Wen Mac day down at the airport ramp...if the we're not seen as a threat to security !
Good luck with the resto!
Uncle Wayne's original Stuka:
Mine before the new wing:

Kim- Top Poster
-
Posts : 8528
Join date : 2011-09-06
Location : South East Missouri
Re: Stuka Restoration
![]() getback Fri Feb 19, 2016 9:24 am
getback Fri Feb 19, 2016 9:24 am


getback- Top Poster
-
Posts : 10116
Join date : 2013-01-18
Age : 66
Location : julian , NC
Re: Stuka Restoration
![]() Mark Boesen Fri Feb 19, 2016 10:15 am
Mark Boesen Fri Feb 19, 2016 10:15 am
Mark Boesen- Top Poster
- Posts : 3976
Join date : 2011-09-01
Age : 65
Location : Rockford, Il -
Re: Stuka Restoration
![]() crankbndr Fri Feb 19, 2016 11:34 am
crankbndr Fri Feb 19, 2016 11:34 am
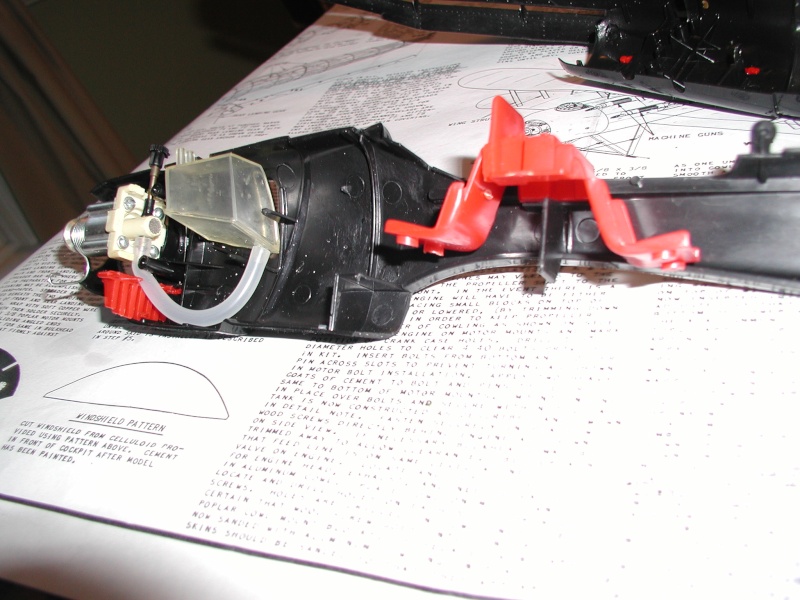
Your meticulous work on your models is very impressive, nice work. These are my parts ready for assembly, start from the front with rubber bands and work rearward is the way I found best.
Still looking for black bomb.
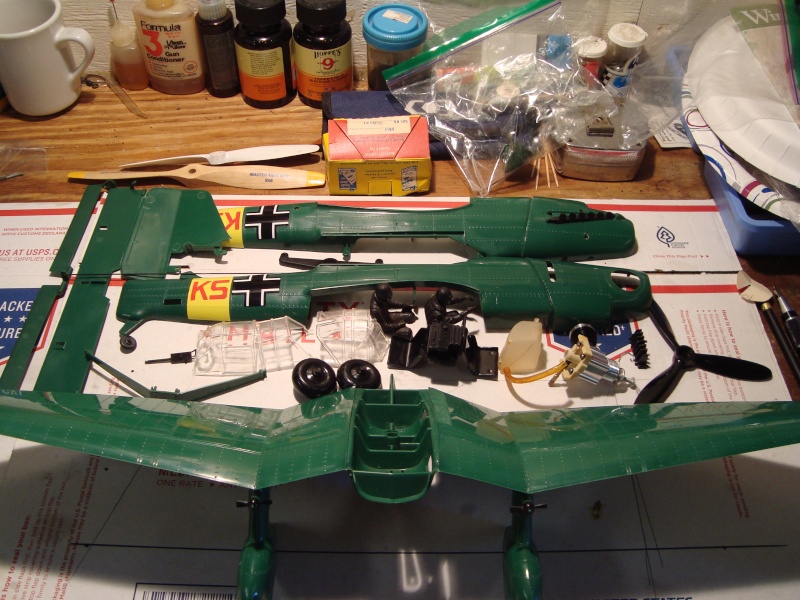
I auctioned my used windscreen on eBay and it went for 54$ with many flaws!!


crankbndr- Top Poster
- Posts : 3067
Join date : 2011-12-10
Location : Homestead FL
Re: Stuka Restoration
![]() bottomgun Sat Feb 20, 2016 12:24 am
bottomgun Sat Feb 20, 2016 12:24 am
bottomgun- Gold Member
- Posts : 131
Join date : 2012-12-27
Age : 66
Location : Southern California
Re: Stuka Restoration
![]() rsv1cox Sat Feb 20, 2016 7:13 am
rsv1cox Sat Feb 20, 2016 7:13 am
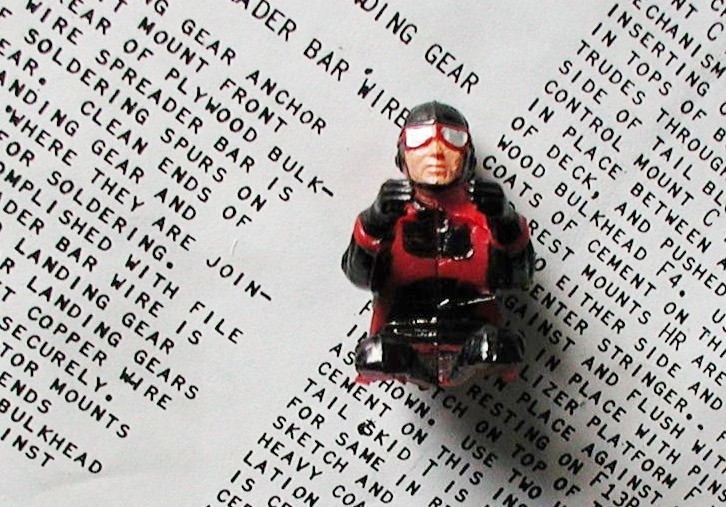
Mine was missing the pilot and the front part of the canopy but was otherwise complete. The previous owner did a nice job on painting the gunner though.
Some aids made reassembly easier.
I was able to find the front part of the canopy, but i still have to paint the frame to match.

I believe these came with a couple of different style fuel tanks, mine is the squarish type,but I think others were round with different fillers.
Bob

rsv1cox- Top Poster
-
Posts : 10555
Join date : 2014-08-18
Location : West Virginia
Re: Stuka Restoration
![]() crankbndr Sat Feb 20, 2016 7:40 am
crankbndr Sat Feb 20, 2016 7:40 am
crankbndr- Top Poster
- Posts : 3067
Join date : 2011-12-10
Location : Homestead FL
Re: Stuka Restoration
![]() bottomgun Sat Feb 20, 2016 8:50 pm
bottomgun Sat Feb 20, 2016 8:50 pm
bottomgun- Gold Member
- Posts : 131
Join date : 2012-12-27
Age : 66
Location : Southern California
Re: Stuka Restoration
![]() anm2 Sun Feb 21, 2016 6:18 am
anm2 Sun Feb 21, 2016 6:18 am
Cribbs74 wrote:It's a worthy restoration project for sure.
It's been said they are really poor flyers, yet I saw one fly and it did quite well. I hope it's not going to be a shelf queen and you can get out and fly it.
I'll attach a video for inspiration when I find it.
Wingovers that are not planned are usually do to loss of line tension and a gust of wind...
Ron
https://www.coxengineforum.com/t7333-they-do-fly?highlight=Stuka
Thanks for sharing this video. Pretty neat to see how happy that guy was after the flight. Something about CL, that brings people back. It is just great, clean fun. Andy

anm2- Gold Member
- Posts : 292
Join date : 2013-03-30
Re: Stuka Restoration
![]() rsv1cox Sun Feb 21, 2016 7:04 am
rsv1cox Sun Feb 21, 2016 7:04 am
Fast little critter that Stuka. I have never flown one, but it did glide well. I would think that it would have fallen like a rock.
Bob
rsv1cox- Top Poster
-
Posts : 10555
Join date : 2014-08-18
Location : West Virginia
Re: Stuka Restoration
![]() bottomgun Sun Feb 21, 2016 10:16 pm
bottomgun Sun Feb 21, 2016 10:16 pm


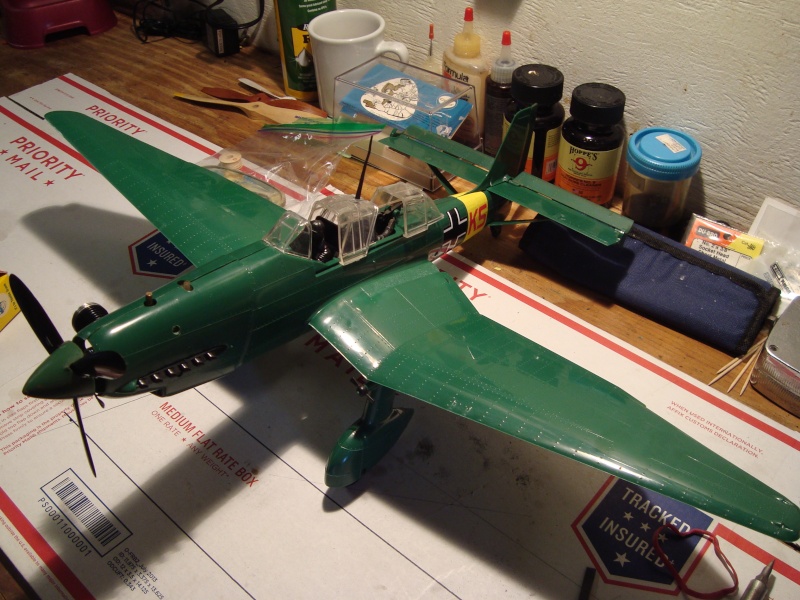
I'm using Tamiya acrylic paints and thinner this time. As a rule, even though you'll get hints on the internet about using substitute thinners that will work and cost less, I use the brand name thinner that goes with the paint as a system. It saves me any grief I may have with compatibility. The Flat White laid down very well. We've been having temps in the 80's with very low humidity so the paint sets up quick.


I was able to pull the masks after about twenty minutes, and now they will sit for close to 24 hours before I lay out my yellow masks for the emblems and the wide rear fuse color bar. Turned out well but for now it looks like a medical transport.


I had some slight bleed through using the frisket paper. I don't think it burnishes down as well as Scotch painter's tape but it did make masking easier. I'll cleanup the edges with thinner tomorrow and they will be covered with the yellow when I lay that down.
bottomgun- Gold Member
- Posts : 131
Join date : 2012-12-27
Age : 66
Location : Southern California
Re: Stuka Restoration
![]() rsv1cox Mon Feb 22, 2016 6:18 am
rsv1cox Mon Feb 22, 2016 6:18 am
Bob
rsv1cox- Top Poster
-
Posts : 10555
Join date : 2014-08-18
Location : West Virginia
Re: Stuka Restoration
![]() Mudhen Mon Feb 22, 2016 8:48 am
Mudhen Mon Feb 22, 2016 8:48 am
Last edited by Mudhen on Mon Nov 15, 2021 6:31 pm; edited 1 time in total

Mudhen- Gold Member
- Posts : 489
Join date : 2011-09-19
More emblem work
![]() bottomgun Tue Feb 23, 2016 2:44 pm
bottomgun Tue Feb 23, 2016 2:44 pm


I'll spray the yellow bar on tomorrow morning.
bottomgun- Gold Member
- Posts : 131
Join date : 2012-12-27
Age : 66
Location : Southern California
Re: Stuka Restoration
![]() bottomgun Tue Feb 23, 2016 2:49 pm
bottomgun Tue Feb 23, 2016 2:49 pm
bottomgun- Gold Member
- Posts : 131
Join date : 2012-12-27
Age : 66
Location : Southern California
Re: Stuka Restoration
![]() ARUP Tue Feb 23, 2016 7:48 pm
ARUP Tue Feb 23, 2016 7:48 pm
ARUP- Gold Member
- Posts : 179
Join date : 2015-09-13
Location : Kentucky
Re: Stuka Restoration
![]() stuntflyr Wed Feb 24, 2016 1:24 am
stuntflyr Wed Feb 24, 2016 1:24 am
Chris...
Last edited by stuntflyr on Thu Feb 25, 2016 4:04 pm; edited 1 time in total

stuntflyr- Gold Member
- Posts : 266
Join date : 2012-01-18
Age : 65
Location : Tucson, Arizona
Re: Stuka Restoration
![]() bottomgun Wed Feb 24, 2016 9:37 pm
bottomgun Wed Feb 24, 2016 9:37 pm


bottomgun- Gold Member
- Posts : 131
Join date : 2012-12-27
Age : 66
Location : Southern California
akjgardner- Diamond Member
-
Posts : 1469
Join date : 2014-12-28
Age : 64
Location : Greensberg Indiana
repro wing props and antenna
![]() bottomgun Thu Feb 25, 2016 11:48 am
bottomgun Thu Feb 25, 2016 11:48 am
I wish I could say the same for the props. The styrene mold used around the blade area is so thin that with some bare nudges against the blades, I had them break off on both props. They are much weaker than the originals and there is no room for even the slightest accidental bump. They also need to be drilled which is a little trickier then it seems. You have a wider base hole at the rear of the hub while the front end has a smaller one to enable the prop to snap onto the stud and retain itself while still being able to spin around the larger main portion of the stud. I was in the process of drilling the first one when the blade broke. I was fitting the second one when that one broke. The photo below is after the first one broke.


To compound the problem, I just noticed that the left side ball end retainer on the wing prop post had broken off at some time, I don't know when. I can fix that also but I'm thinking, for now, of doing a "technically" correct blank fairing which they did on most Stukas starting at about mid-war before they phased out the wing sirens altogether. A good excuse for just waiting till some originals, or better repros are available.

I can put a dab of thickened epoxy on each tip and sand it round and paint it black for now. I'm still contemplating this so we'll see. Personally, I never liked the wing props but flawed or not, it was an original item on the Cox model.
bottomgun- Gold Member
- Posts : 131
Join date : 2012-12-27
Age : 66
Location : Southern California
Re: Stuka Restoration
![]() fredvon4 Thu Feb 25, 2016 1:25 pm
fredvon4 Thu Feb 25, 2016 1:25 pm
If I were that dedicated in these total restorations I would have most all the casting tools and bits from Micro Mark
There are several ways to mold those hard to find bits...from silicone or casting resin to zink and the mold making process is fairly easy from what I have read and seen
considering what some of those reproductions or original small parts cost the start up cost is not that daunting
I doubt there is a good clean and low cost way to do many of the complicated canopies in clear without a perfect set and vacuum forming over a perfect plug
I am much impressed with this Stuka resurrection...also one of my child hood favorites.... that flew OK for how little I knew about proper car and feeding the engine....sometimes my brother would run half way round the circle before slinging it as hard as he could while I back peddled and whipped as hard as possible to get it flying....good times and we mostly fell down laughing after a spectacular crash


fredvon4- Top Poster
-
Posts : 4001
Join date : 2011-08-26
Age : 68
Location : Lampasas Texas
Page 1 of 2 • 1, 2 ![]()
» box restoration
» Bob V’s Next car restoration
» Babe Bee Restoration
» Cox Chopper V1 restoration