

 Rules
Rules
Log in
Search
Latest topics
» **VOTE-ON-THE-NEXT-COX-ENGINE-OF-THE-MONTH** (May 2024)by 1/2A Nut Today at 3:23 am
» A prototype Cox Reed-valve marine engine
by F4D Phantom II Today at 12:00 am
» World's largest weathervane
by Cox International Yesterday at 10:51 pm
» Jim Walkers FireBee - This is going to be fun
by rsv1cox Yesterday at 10:27 pm
» Here we go again... another Lawn-Boy
by rsv1cox Yesterday at 11:50 am
» Norvel Needle Needed
by Greenman38633 Yesterday at 9:02 am
» My Cox .049 Marine inboard engine
by 1/2A Nut Yesterday at 4:41 am
» Jim Walker Firebaby
by rsv1cox Yesterday at 12:26 am
» Roddie-Rigger.. a 2005 original design
by roddie Yesterday at 12:04 am
» music vids.. some of your favorites
by HalfaDave Wed May 08, 2024 11:55 pm
» Help Pee Wee tank cap .020
by rdw777 Wed May 08, 2024 6:30 pm
» Revivng Some Childhood Classics
by getback Wed May 08, 2024 1:21 pm
Cox Engine of The Month


CEF Traveling Engine


Win This Engine!

Live on Patrol


I couldn’t wait anymore.
Page 1 of 1

I couldn’t wait anymore.
![]() batjac Sat Aug 06, 2016 11:04 pm
batjac Sat Aug 06, 2016 11:04 pm
We’ve been talking about the Dale Kirn 1/2A Proto design 290 Special (Here) for a couple of years, so I decided I’d go ahead and build one. I’d gotten to the point where I was painting it when Kari did his thread on his 190 “Kinda Special” conversion of a postage stamp engine (Here), so I figured I’d just sit on mine and see if he was going to post a build thread on a 290 Special. His conversion of his postage stamp is much nicer than mine, as I was just looking for a quick and dirty conversion. Since he’s not posted on it in a month, and since I’m an impatient sort, I went ahead and finished mine off. Here's the build:
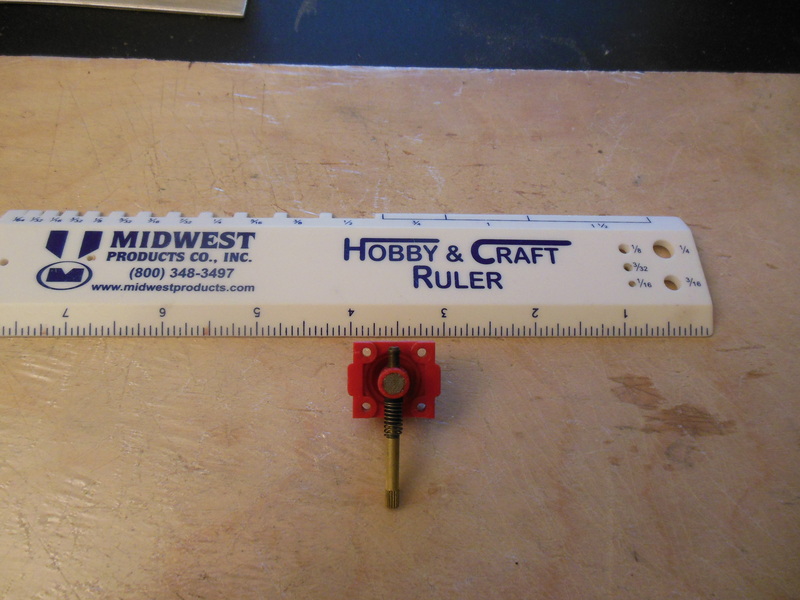
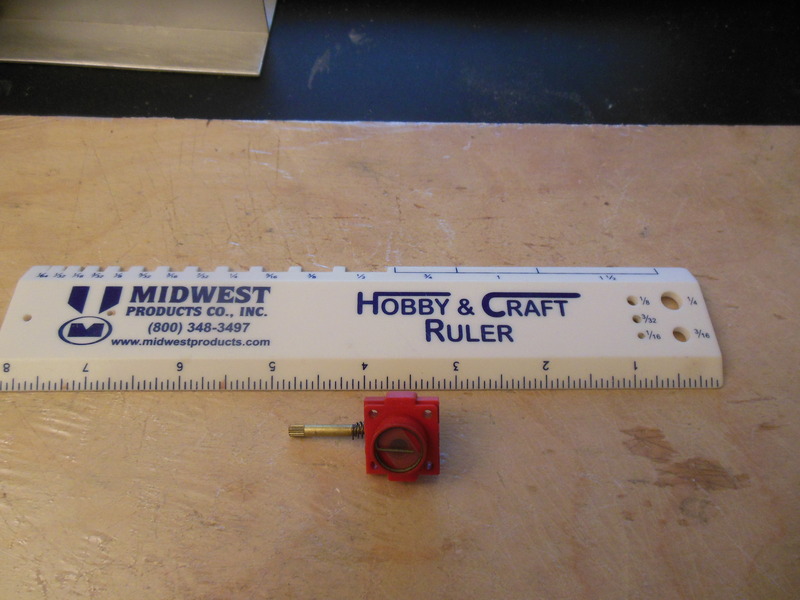
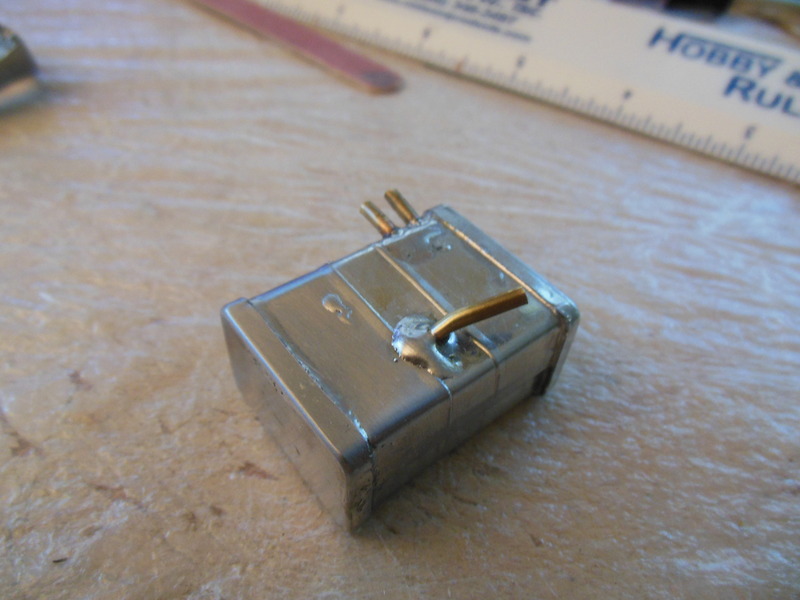
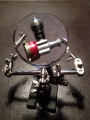
I took a razor saw and sawed off the ears of a postage stamp engine, then used an X-Acto knife to scrape the rough edges smooth. The resulting backplate is ¾” square. As you can see, I left the screen in place. It’ll rob a couple hundred RPM, but I’m not going to compete with this thing, so no biggie.
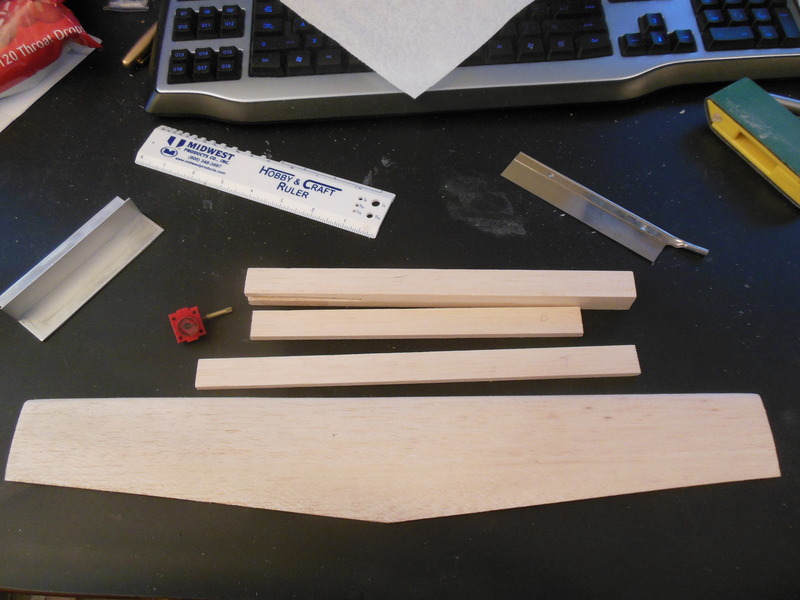
Here’s the basic kit I put together. I used SIG 3” airfoiled stock for the wing, trimmed and sanded down to shape.
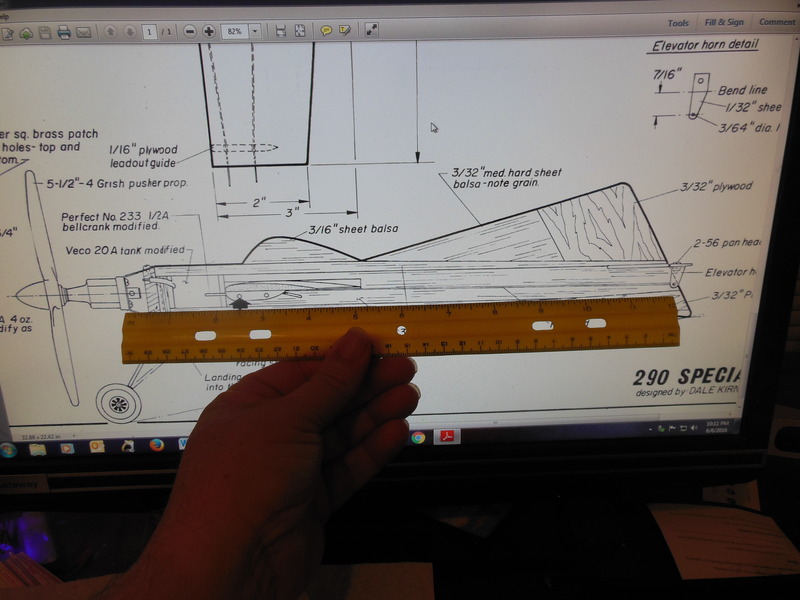
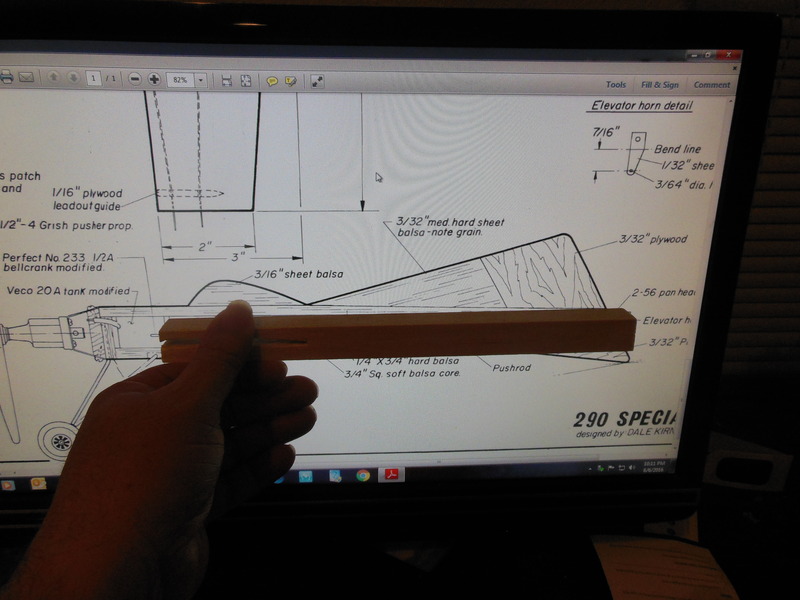
Normally, I print out a set of plans to build off of, but since this is such a simple model I just sized the .pdf on my screen to scale and then used that to cut and shape the parts, holding them against the screen as I went.
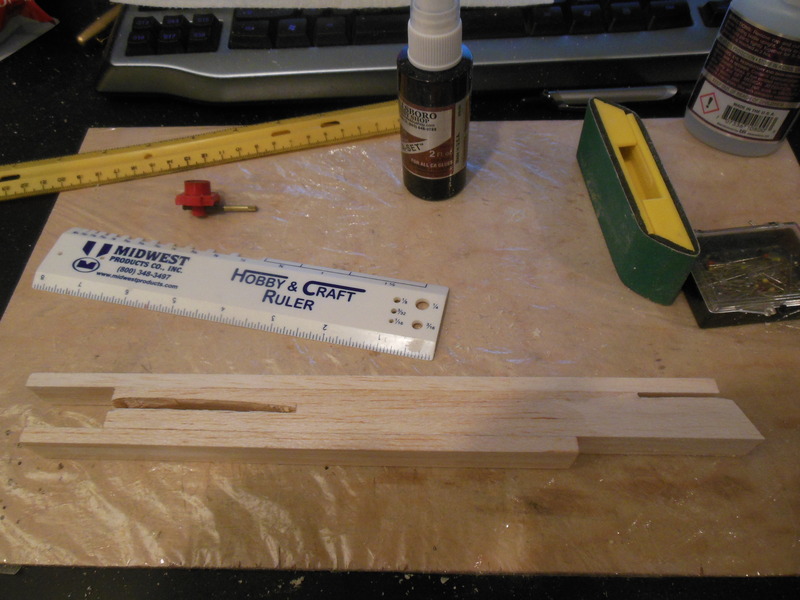
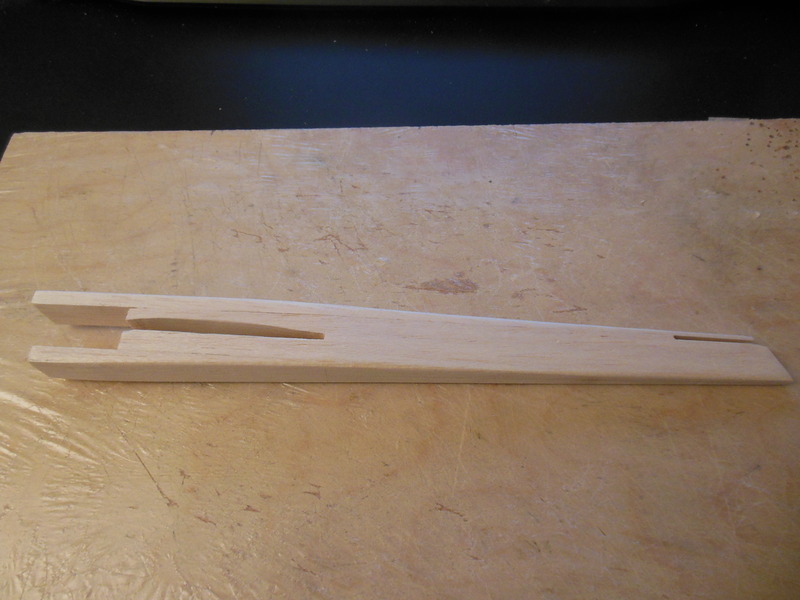
Here’re the three ¾” layers laminated together for the fuselage with the wing and stab cutouts.
In the plans, the plane calls for a ¼” slot cut for the wing and just gluing the wing in place, leaving the open space open. I decided to deviate by cutting a slot to airfoil shape for the wing. Then I cut the upper and lower slopes to the fuselage.

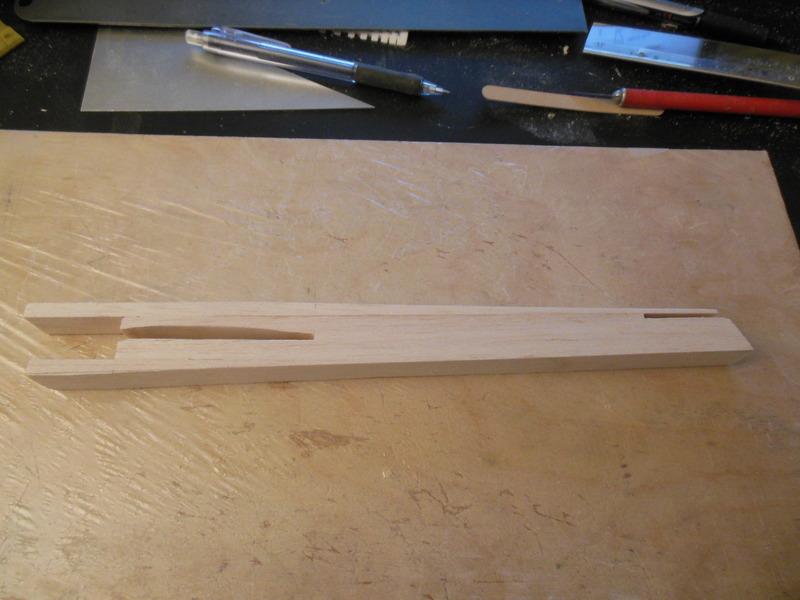
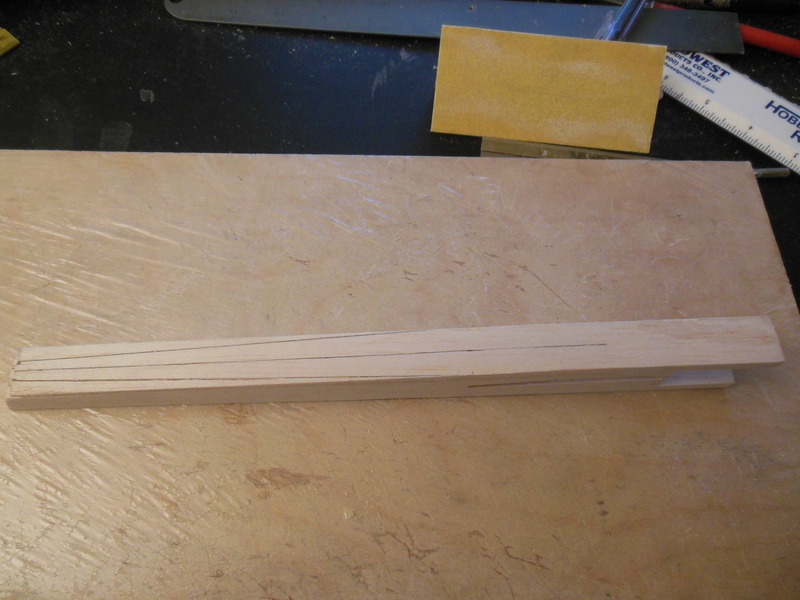
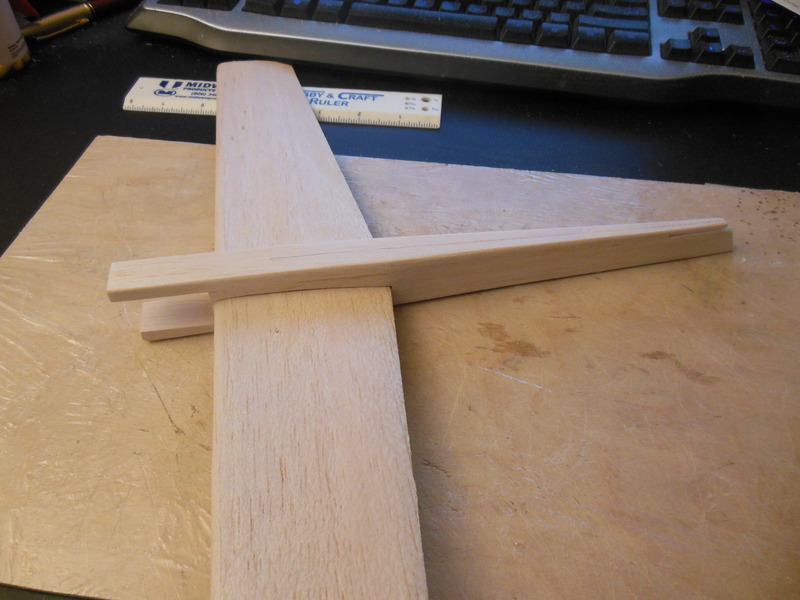
Once the side profile was cut, I tapered the left and right sides and rounded the edges.

Test fitting the wing.
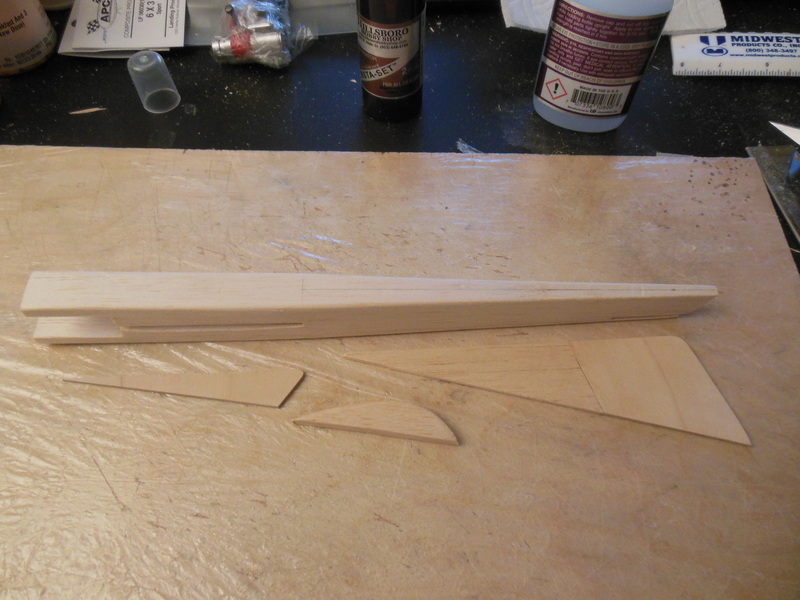
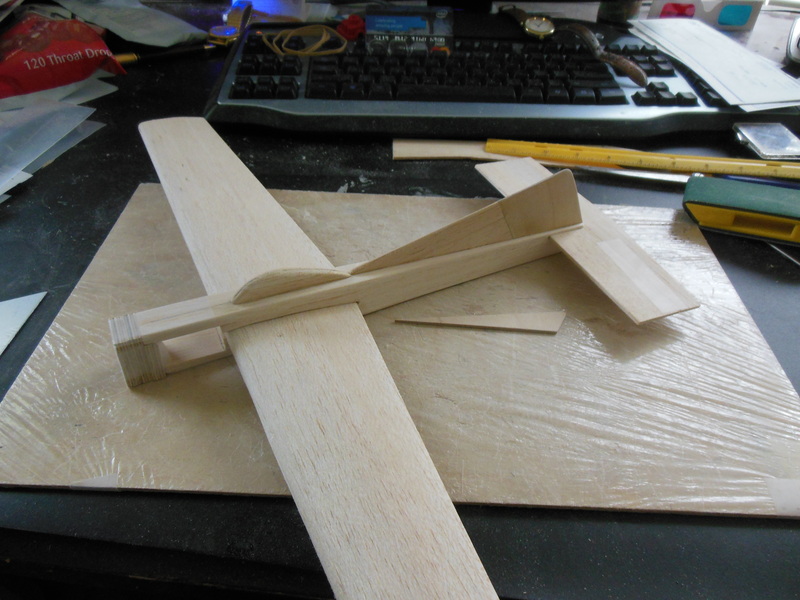
The fin, subfin, and canopy cut to shape, and then fin and canopy glued in place.

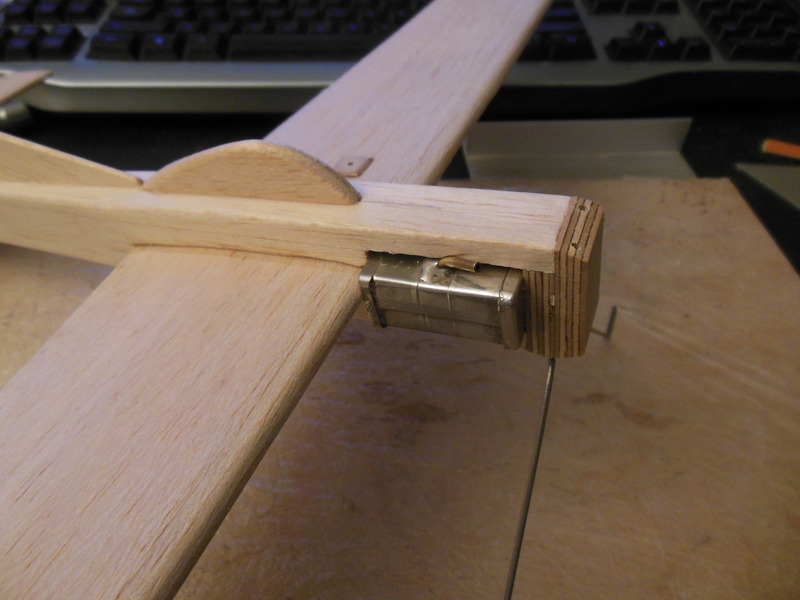
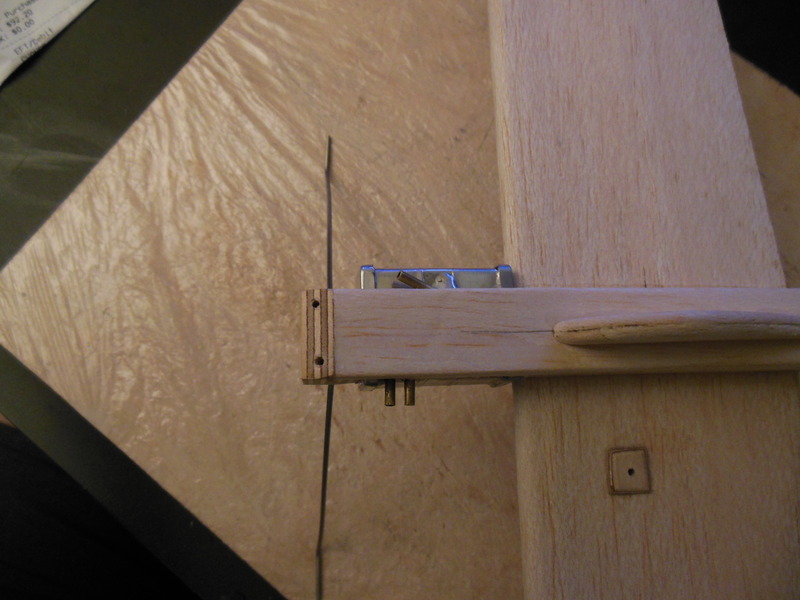
The plans call for basswood or hardwood for the firewall, but I didn’t have any, so I used ¼” ply for the firewall. Here it is taped in place for test fitting along with the stab being aligned and test fit.

I didn’t have any .032” steel for the engine mounts. All I had in .032” was brass, so I made the mounts out of that.
The plans also call for a modified Veco tank, but I have no idea how to get one, so I modified a Perfect tank for the plane. Since it’s a proto speed plane and not an aerobatic plane, the rectangular tank should be okay for roundy-roundy.
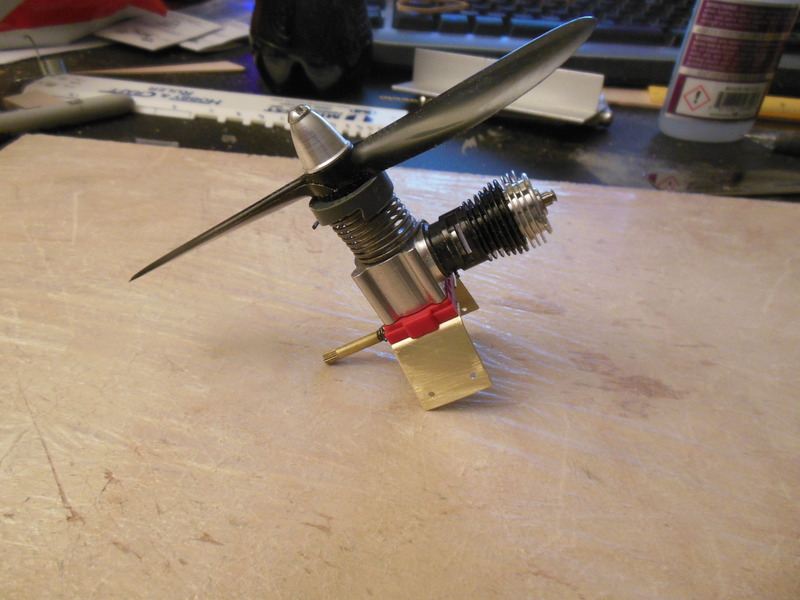
I looked to see what paint cans I had on the shelf, and found a couple of near-empty white cans and near empty blue cans. So blue and white it is. All painted up and ready to go:
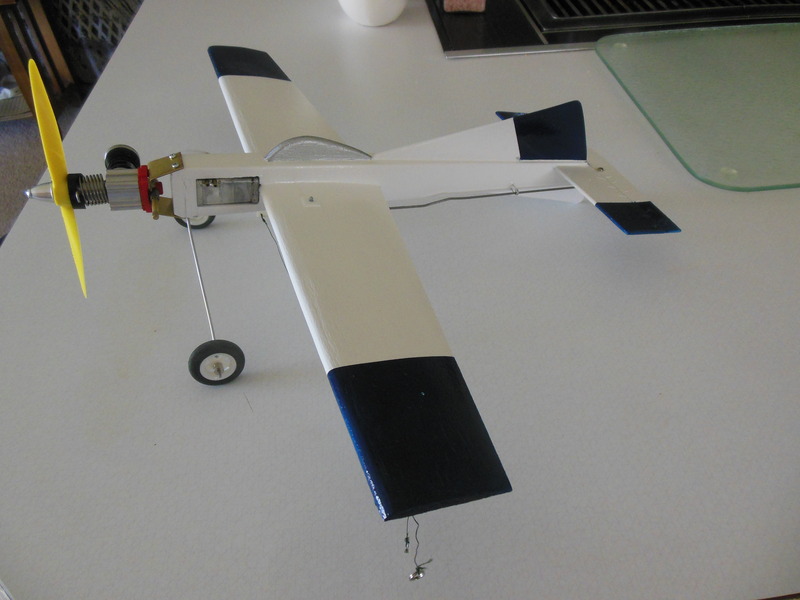
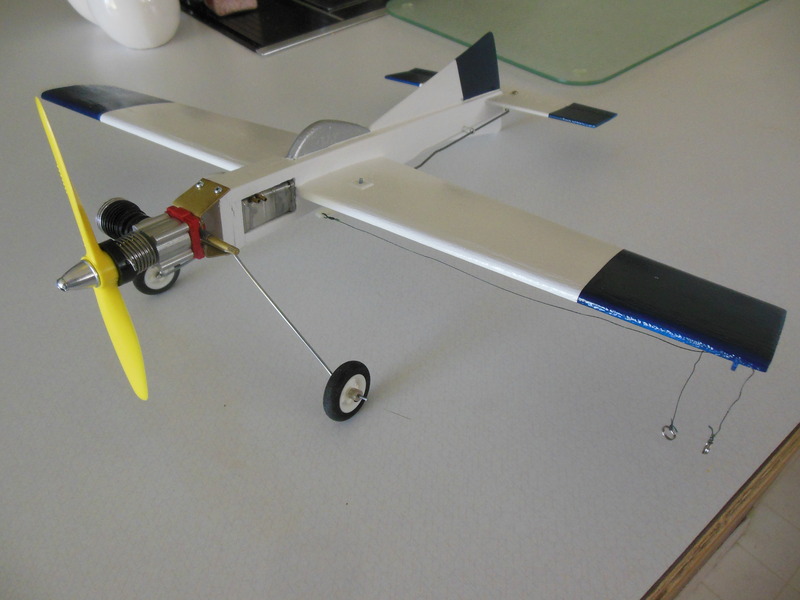
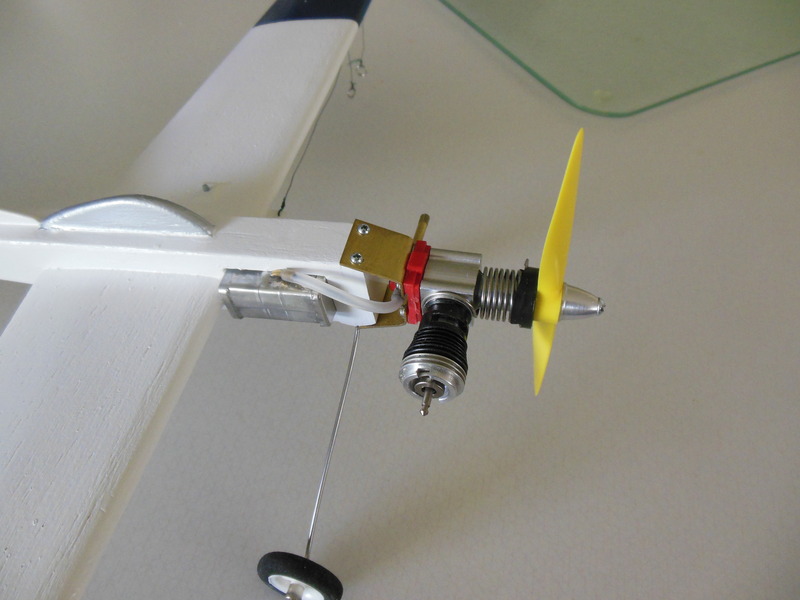
Looking at the side view, I didn’t do the mount bends so well and have a slight down thrust. I’ll use a couple of washers and correct that before I test fly it. I was originally going to use a Cox 6x3 prop, but pulled out a Tornado 5½ x4 left handed prop to try. I’m using the left handed snap starter spring for the hex drive which’ll no doubt rob another 400 RPM or so. As I said before, no biggie.
When my wife walked by, I called her over to show her the finished plane, telling her the plans were published in Model Airplane News the month after she was born. She was a kinda tickled. But when I mentioned that it only weighed 5.35 ounces, she didn’t believe it was that little. And she got me to wondering. So, I pulled out my other scale to check what it said. Still 5.35 ounces. Sometimes she makes me doubt myself… It’s heavier than I would have liked, but with all that ply instead of balsa, and the brass mounts, I guess I get what I get.
The Doubting Thoma… errr… Mark
I took a razor saw and sawed off the ears of a postage stamp engine, then used an X-Acto knife to scrape the rough edges smooth. The resulting backplate is ¾” square. As you can see, I left the screen in place. It’ll rob a couple hundred RPM, but I’m not going to compete with this thing, so no biggie.


Here’s the basic kit I put together. I used SIG 3” airfoiled stock for the wing, trimmed and sanded down to shape.

Normally, I print out a set of plans to build off of, but since this is such a simple model I just sized the .pdf on my screen to scale and then used that to cut and shape the parts, holding them against the screen as I went.


Here’re the three ¾” layers laminated together for the fuselage with the wing and stab cutouts.

In the plans, the plane calls for a ¼” slot cut for the wing and just gluing the wing in place, leaving the open space open. I decided to deviate by cutting a slot to airfoil shape for the wing. Then I cut the upper and lower slopes to the fuselage.


Once the side profile was cut, I tapered the left and right sides and rounded the edges.


Test fitting the wing.

The fin, subfin, and canopy cut to shape, and then fin and canopy glued in place.


The plans call for basswood or hardwood for the firewall, but I didn’t have any, so I used ¼” ply for the firewall. Here it is taped in place for test fitting along with the stab being aligned and test fit.


I didn’t have any .032” steel for the engine mounts. All I had in .032” was brass, so I made the mounts out of that.

The plans also call for a modified Veco tank, but I have no idea how to get one, so I modified a Perfect tank for the plane. Since it’s a proto speed plane and not an aerobatic plane, the rectangular tank should be okay for roundy-roundy.


I looked to see what paint cans I had on the shelf, and found a couple of near-empty white cans and near empty blue cans. So blue and white it is. All painted up and ready to go:


Looking at the side view, I didn’t do the mount bends so well and have a slight down thrust. I’ll use a couple of washers and correct that before I test fly it. I was originally going to use a Cox 6x3 prop, but pulled out a Tornado 5½ x4 left handed prop to try. I’m using the left handed snap starter spring for the hex drive which’ll no doubt rob another 400 RPM or so. As I said before, no biggie.
When my wife walked by, I called her over to show her the finished plane, telling her the plans were published in Model Airplane News the month after she was born. She was a kinda tickled. But when I mentioned that it only weighed 5.35 ounces, she didn’t believe it was that little. And she got me to wondering. So, I pulled out my other scale to check what it said. Still 5.35 ounces. Sometimes she makes me doubt myself… It’s heavier than I would have liked, but with all that ply instead of balsa, and the brass mounts, I guess I get what I get.
The Doubting Thoma… errr… Mark

batjac- Diamond Member


Posts : 2337
Join date : 2013-05-22
Age : 61
Location : Broken Arrow, OK, USA
Re: I couldn’t wait anymore.
![]() Marleysky Sun Aug 07, 2016 12:34 am
Marleysky Sun Aug 07, 2016 12:34 am
You are fast and good! Or is it just time lapse photography? Either way you've got a great plane in short order. I like it a lot.

Marleysky- Top Poster

-
Posts : 3618
Join date : 2014-09-29
Age : 71
Location : Grand Rapids, MI
Re: I couldn’t wait anymore.
![]() KariFS Sun Aug 07, 2016 8:06 am
KariFS Sun Aug 07, 2016 8:06 am
Hey Mark, there was no need to hold back, glad you posted this! I knew you were also thinking about this plane, and possibly Roddie too. Maybe after I get mine done we can do a "postal" contest 
That is a very nice build, you make it look simple and easy, and the end result looks great. I like the "birthday connection" between the model and your wife, how about naming the plane after her
By the way, the entire article is now available on outerzone.com, have you seen it?
In the latest bunch of engines I got a couple more 290's, one of them is a narrow neck, thin-cylinder (#1) engine with a LH starter spring and a silver rubber spinner. I think I'll clean this one up, install the modified backplate on it and use it for my 290 Special. The already polished and prepped engine will be used for something else, maybe it'll get a drilled-venturi tank on its butt or something.
Other than that, I have only bought the necessary balsa materials and some brass plate for the tank.
The Flight Report Waiting Kari
KariFS- Diamond Member
- Posts : 2004
Join date : 2014-10-10
Age : 52
Re: I couldn’t wait anymore.
![]() roddie Sun Aug 07, 2016 6:30 pm
roddie Sun Aug 07, 2016 6:30 pm
Great job Mark!  What mod(s) did you do to the tank? Is that a 1/3oz. size? I'm also curious about the lead-out material and terminations. Is that "Spectra" braid? Are the rings solid.. or are they split like key-rings? I saw some small split-rings in the craft-jewelry dept. at Walmart earlier today.
Nice work on the firewall beveling. I wouldn't worry about your substituting plywood. The forces on the screws are on a shear-plane as opposed to tension. If you have a small rat-tail file.. you could try slotting the holes on the top mount-plate and tweak-bending the bottom-plate "up" slightly to re-adjust your thrust-angle. Maybe roughen-up the underside of the top plate (L to R) with 40 grit sandpaper where it bears on the plywood, to help keep it from creeping. Placing washers between the back-plate and lower mount-plate might work.. but it depends on how many degrees of up-thrust is required. Be mindful of the length of the case-screws.. and cut new longer ones if needed. I believe that the postage-stamp uses a 3/8" thread-length on the case-screws. Personally.. I'd try the slotting of the top bracket. Placing washers in-between the back-plate and bottom bracket will lessen the area of contact on the bottom.. and possibly set-up a harmonic vibration that would rob you of some power. Those mounts are like spring-boards in themselves. Then again.. with a horizontal stroke.. it might be a non-issue. If you have some leftover brass-sheet.. you could make-up 2 or 3 spreader plates and use them instead of washers.. and file a radius for the venturi protrusion (same as the mount-plates)
What mod(s) did you do to the tank? Is that a 1/3oz. size? I'm also curious about the lead-out material and terminations. Is that "Spectra" braid? Are the rings solid.. or are they split like key-rings? I saw some small split-rings in the craft-jewelry dept. at Walmart earlier today. Nice work on the firewall beveling. I wouldn't worry about your substituting plywood. The forces on the screws are on a shear-plane as opposed to tension. If you have a small rat-tail file.. you could try slotting the holes on the top mount-plate and tweak-bending the bottom-plate "up" slightly to re-adjust your thrust-angle. Maybe roughen-up the underside of the top plate (L to R) with 40 grit sandpaper where it bears on the plywood, to help keep it from creeping. Placing washers between the back-plate and lower mount-plate might work.. but it depends on how many degrees of up-thrust is required. Be mindful of the length of the case-screws.. and cut new longer ones if needed. I believe that the postage-stamp uses a 3/8" thread-length on the case-screws. Personally.. I'd try the slotting of the top bracket. Placing washers in-between the back-plate and bottom bracket will lessen the area of contact on the bottom.. and possibly set-up a harmonic vibration that would rob you of some power. Those mounts are like spring-boards in themselves. Then again.. with a horizontal stroke.. it might be a non-issue. If you have some leftover brass-sheet.. you could make-up 2 or 3 spreader plates and use them instead of washers.. and file a radius for the venturi protrusion (same as the mount-plates)

roddie- Top Poster
- Posts : 8301
Join date : 2013-07-18
Age : 64
Location : N. Smithfield, Rhode Island -

Re: I couldn’t wait anymore.
![]() batjac Sun Aug 07, 2016 10:51 pm
batjac Sun Aug 07, 2016 10:51 pm
Marleysky wrote:You are fast and good! Or is it just time lapse photography? Either way you've got a great plane in short order. I like it a lot.
This is about 10-12 hours total. Maybe 6 or 7 hours actual work, the rest just thinking and looking at the building board.
KariFS wrote:Hey Mark, there was no need to hold back, glad you posted this! I knew you were also thinking about this plane, and possibly Roddie too. Maybe after I get mine done we can do a "postal" contest.
That is a very nice build, you make it look simple and easy, and the end result looks great. I like the "birthday connection" between the model and your wife, how about naming the plane after her.
By the way, the entire article is now available on outerzone.com, have you seen it?
The Flight Report Waiting Kari
Sure. I’ll post video of the flight and you can see how little work you two’d need to beat me.
If I named the plane after her, I’d have to keep it clean and polished, and hung in a place of honor. Instead of calling it “Anna”, I think I’ll just call it “done”.
Yup, I saw the updated article. That’s why I went ahead and used the Tornado 5½ x 4 left handed prop.
roddie wrote:Great job Mark! What mod(s) did you do to the tank? Is that a 1/3oz. size? I'm also curious about the lead-out material and terminations. Is that "Spectra" braid? Are the rings solid.. or are they split like key-rings? I saw some small split-rings in the craft-jewelry dept. at Walmart earlier today.
Roddie, the tank is the ½ ounce tank from Bernie (here). The fill/vent tubes originally came up at about a 30 degree angle, and the fuel outlet tube was an S-shaped tube with the suction end at the bottom outer corner of the tank inside and the outlet pointing to the center towards the engine. I de-soldered the end cap at the back of the tank, and de-soldered the tubes. I then re-soldered the fill/vent tubes horizontal so they were below the top of the tank, and I bent the outlet tube so the suction stayed at the back corner of the tank, but the outlet was pointing slightly outboard . The soldering job on that tube is kinda ugly, but the job I did soldering the end cap back on makes up for it.
The leadouts are 20# Spectra line. I initially made up solid wire leadouts, but I didn’t like the weight they added, so I clipped them off and re-did the leadouts with Spectra. The split rings are just ordinary small fishing line split rings from the fishing aisle at Wal-Mart. The package says they’re good for 10 pounds each, so they are overkill for this application. I bought some in bulk, and use them on all my 1/2A planes with Spectra lines now.
Hmmm… Looking at the plane, and knowing that it weighs so much, I’m thinking that the fuselage weighs about three times as much as it should. Even though I vowed to myself that after this, I’m not going to start any new projects, just finish off the ones I’ve already started, I just have to add one more. It seems that I could build this with no ply other than the firewall, just balsa, and just use a ¼” balsa profile fuselage. I’d still use a 290 engine, just not cutting it up, and using the Carl Goldberg plastic 290 mount with the balloon tank. I have a couple of those mounts in my parts box. I bet I could get it down to just over 4 ounces.
Like Dale Kirn said in his article, I’m surprised these 290 engines didn’t become more popular, especially after Goldberg came out with their mount. Seems that a couple of articles in the modelling magazines, followed by package deals with the engine and mount pushed at the local hobby shop and mail order houses might have made them pretty popular for some of the 1/2A planes back then. Come to think of it, if Goldberg had pushed the mount in their kits, the engine probably would have had a larger sell. Ah, well. That thought is 40 years too late. At lease *I* get to take advantage of them myself.
The Dieting Mark
batjac- Diamond Member
-
Posts : 2337
Join date : 2013-05-22
Age : 61
Location : Broken Arrow, OK, USA
Re: I couldn’t wait anymore.
![]() roddie Mon Aug 08, 2016 10:34 am
roddie Mon Aug 08, 2016 10:34 am
Thanks for the info! It's great to see this model all built. I'll bet it flies really well. Good luck with it!
roddie- Top Poster
- Posts : 8301
Join date : 2013-07-18
Age : 64
Location : N. Smithfield, Rhode Island -
Re: I couldn’t wait anymore.
![]() Ken Cook Mon Aug 08, 2016 10:49 am
Ken Cook Mon Aug 08, 2016 10:49 am
While weight is a big concern on a stunter, that's really not the situation with a plane of this nature. In fact, it can be quite beneficial if it has some weight to it. While your not using the plane for any competitive type use, the heavier planes generally fair better when coming in for a pit stop. They also tend to do better speed wise and don't get floaty. The planes themselves also whip easier to get it to the pitman. Any speed type plane has to be built around durability, flip over incidents, catching, etc. The gear wire is usually has a bit more ummph behind it as well and stay braces are soldered across to resist deflection as these are generally flown over asphalt. I see this design is no different from other Kirn designs aka Torquey. This can really add weight over a conventional design 1/2A stunter. He usually provided a 1/2" maple block continuously under the bottom of the fuse to incorporate the gear which was inches long. Your plywood choice has probably added little weight to even be concerned with.
Looking at your tank plumbing, and this is just from my experience. If yours works fine from launch to end of tank terrific. It appears that your feed is S shaped exiting the top and going into the rear corner. It can be beneficial if the feed exited straight out the lower corner of the tank. It not only gets rid of the S bend, it provides the additional exterior fuel tubing to be straight, short and direct to the spraybar. The fuel isn't traveling uphill and then downhill and back up again. While this isn't generally an issue with a full tank, it can suffer midway through the run. While making a tank sounds very simple for a speed related plane, I found it to be the most complicated of them all. A square tank has been very successful for myself in speed of all engine types. On launch, the determining factor is whether or not the engine goes over lean or starts sagging somewhere through the flight.Lending a ear to make certain the engine run is consistent from start to finish is important. In certain instances I have had to unsolder the feed pipe and pull it forward slightly and the need to raise it up making sure it feeds correctly from start to finish. This was mainly due to the fuel being pinned in the corner from centrifugal force.
In the event the tank does prove to be problematic, I wouldn't hesitate to add a uniflow pipe to this tank. It would probably offer the most successful run over a standard vent setup. Essentially by the looks of what I see on the side view, it appears that's the modification that Dale has made is just that. He shows the uniflow pipe into the wind on the inboard side of the fuse.
The name of the game is streamlining. Your metal tank is far superior drag wise to any balloon tank hanging out on the side of the fuse or wing. I personally wouldn't deviate from that. You could make it more streamlined by placing rounded fairing blocks glued directly in front of the tank for better aerodynamics. The split rings can also be omitted by either using a button bellcrank or using a nylon bellcrank and cutting to slits into it down to the hole. This is how we attach the lines in 1/2A combat. Spectra works good for a short while at least until the lines become oil saturated and then the drag increases equally.
I had the liberty to fly with a well known speed flyer whom has since retired from the hobby as of last year due to health reasons. I would bring similar models and he would offer his opinions. While I was always open to his suggestions, he would get pretty hot headed that I never documented my times, prop choices, and changes. I think your model is sensational . I like the choices you made as substitutions. I can also add that I see some hidden mph in the plane. Ken

Ken Cook- Top Poster
- Posts : 5478
Join date : 2012-03-28
Location : pennsylvania
Re: I couldn’t wait anymore.
![]() getback Mon Aug 08, 2016 1:08 pm
getback Mon Aug 08, 2016 1:08 pm
Mark the 290 special looks GOOD ! I got some of those split rings and was wounding if the line would get in the split and come out but , I guess if you check them as you should they would probably be OK . Do you not clear dope your planes before painting ? Be looking for the flight report , Eric 

getback- Top Poster
-
Posts : 10143
Join date : 2013-01-18
Age : 66
Location : julian , NC
» Just couldn’t sleep.
» The Official "International Cox PT-19 Fly It If You Got It Day!" Thread
» As if it couldn't get any better
» But Wait! There's MORE!
» Sanye AP 09 RC
» The Official "International Cox PT-19 Fly It If You Got It Day!" Thread
» As if it couldn't get any better
» But Wait! There's MORE!
» Sanye AP 09 RC
Page 1 of 1
Permissions in this forum:
You cannot reply to topics in this forum