

 Rules
Rules
Log in
Search
Latest topics
» Golden Bee basic running problemby roddie Yesterday at 10:51 pm
» Simple Gliders
by rdw777 Yesterday at 6:25 pm
» Foam hand kids glider converted to 0.049 CL
by rdw777 Yesterday at 6:11 pm
» Weird search for a single comic from an old Mad Magazine
by Kim Yesterday at 1:44 pm
» Scientific "Zipper" Build...Zipper Flys!.
by getback Yesterday at 7:27 am
» Cox .049 Tee Dee engines back in stock (limited availablility)
by GallopingGhostler Yesterday at 1:05 am
» Very off-topic.........Time passes and not always for the best......
by rsv1cox Thu Jul 25, 2024 2:47 pm
» Roddie-Rigger.. a 2005 original design
by roddie Wed Jul 24, 2024 11:48 pm
» Jim Walker Bonanza etc.
by rsv1cox Wed Jul 24, 2024 6:30 pm
» Throttles for Cox Tee Dee .049 / .020 / .010 engines --- videos
by sosam117 Wed Jul 24, 2024 8:54 am
» Introducing our Cox .049 TD Engines
by Admin Tue Jul 23, 2024 2:00 am
» Project Cox .049 r/c & Citabrian Champion
by getback Mon Jul 22, 2024 4:14 pm
Cox Engine of The Month
July-2024
robot797's
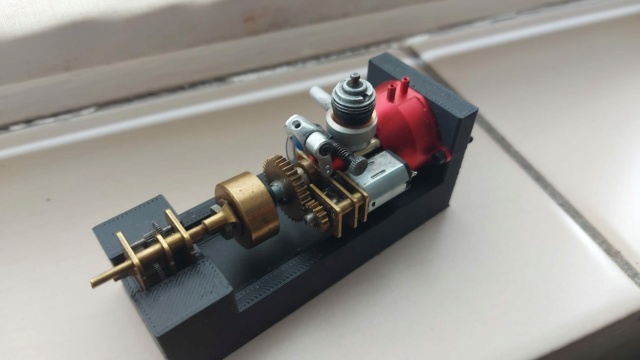
"ULTIMITE COX 010: it has a clutch, E starter, throttle, exhaust, aluminum tank, aluminum venturi, gearbox with forward and reverse, and now its on a custom drawn and printed stand"

PAST WINNERS
robot797's
"ULTIMITE COX 010: it has a clutch, E starter, throttle, exhaust, aluminum tank, aluminum venturi, gearbox with forward and reverse, and now its on a custom drawn and printed stand"
PAST WINNERS
CEF Traveling Engine


Win This Engine!

Live on Patrol


Cox Engine Test Stand
Page 1 of 1

Cox Engine Test Stand
![]() Dstradt Sun Oct 01, 2017 3:49 pm
Dstradt Sun Oct 01, 2017 3:49 pm
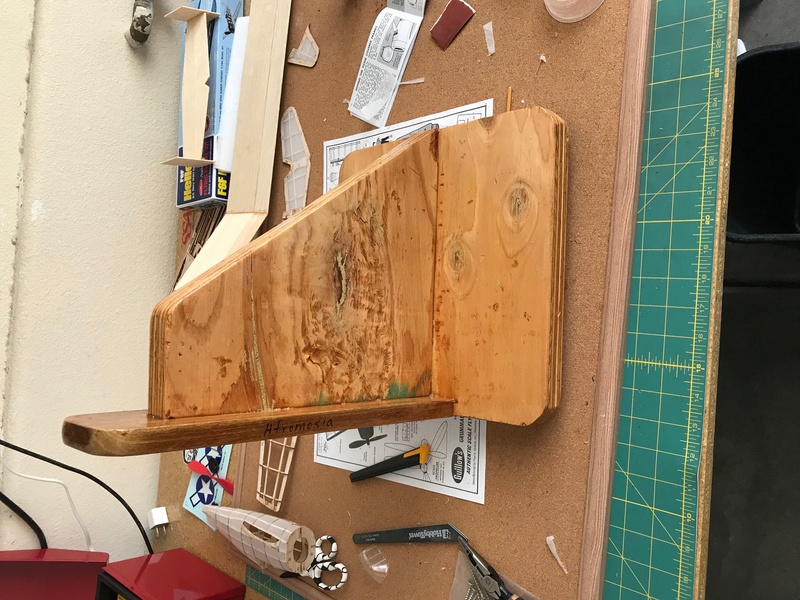
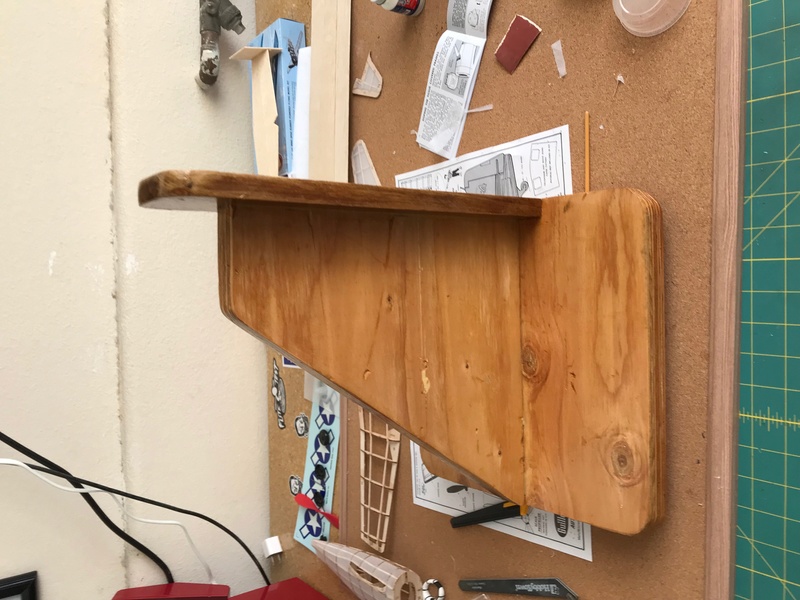
Hi, I have this stand I made myself, it has been sanded, sealed, and has been covored with a thick coat of lacquer to make it hot fuel proof. My only issue now is that I cannot figure out how to mount my cox .49 and .20. I want to be able to remove the engines often and be able to put them back on. So I would not want to drill one hole because after a few uses the wood will get boared out. Any ideas?


Dstradt- Moderate Poster

- Posts : 12
Join date : 2017-09-01
Age : 25
Location : Henderson, Nevada
Re: Cox Engine Test Stand
![]() Marleysky Sun Oct 01, 2017 4:29 pm
Marleysky Sun Oct 01, 2017 4:29 pm
Here's a 5 second recap of the last 30 minutes of my typing and loosing all of it cause I touched the wrong button.
http://www3.towerhobbies.com/cgi-bin/wti0001p?&I=LXD966&P=7
Later that evening:
Thanks guys, for the reminder to "save" my work. I should know better.
Anyway my response was to use Brass Threaded inserts where each engine mounting hole would be. Than I found those steel blind nuts, which could be installed from the rear of the motor mount, and would not strip out like bare wood would after repeated used.
If you are only going to use the stand for 049 and 020 tank mounted motors you would only need to drill eight holes, seal with epoxy or CA and use the blind nuts.
Last edited by Marleysky on Sun Oct 01, 2017 10:17 pm; edited 1 time in total (Reason for editing : Recap lost response.)

Marleysky- Top Poster


Posts : 3618
Join date : 2014-09-28
Age : 71
Location : Grand Rapids, MI
Re: Cox Engine Test Stand
![]() Admin Sun Oct 01, 2017 5:31 pm
Admin Sun Oct 01, 2017 5:31 pm
Marleysky wrote:Here's a 5 second recap of the last 30 minutes of my typing and loosing all of it cause I touched the wrong button.
http://www3.towerhobbies.com/cgi-bin/wti0001p?&I=LXD966&P=7
If you're going to type something big, do it in a word processor or highlight and copy your text every so often.


Admin- Administrator
- Posts : 6490
Join date : 2010-07-27
Location : Roseville, Minnesota -

Re: Cox Engine Test Stand
![]() NEW222 Sun Oct 01, 2017 5:54 pm
NEW222 Sun Oct 01, 2017 5:54 pm
Marleysky wrote:Here's a 5 second recap of the last 30 minutes of my typing and loosing all of it cause I touched the wrong button.
http://www3.towerhobbies.com/cgi-bin/wti0001p?&I=LXD966&P=7
Well, at least I am not the only one with this problem....

NEW222- Top Poster
- Posts : 3895
Join date : 2011-08-13
Age : 45
Location : oakbank, mb
Re: Cox Engine Test Stand
![]() Kim Sun Oct 01, 2017 6:45 pm
Kim Sun Oct 01, 2017 6:45 pm
Testify Brother.....
..........................Lost to the Ether Kim
..........................Lost to the Ether Kim

Kim- Top Poster
-

Posts : 8590
Join date : 2011-09-06
Location : South East Missouri
Re: Cox Engine Test Stand
![]() roddie Sun Oct 01, 2017 8:17 pm
roddie Sun Oct 01, 2017 8:17 pm
There's a couple of different ways to approach this. It's best to have dedicated mounts for each engine size and type. Some engines mount "radially" to a firewall.. and some mount on "beams".
Let's say that you have Cox "reed-valve" engines with integral fuel-tanks. The "Bee"/.049's mounting-pattern is slightly larger than the "Pee Wee" .020's. I would personally make separate mounts. You can choose to mount the engines with machine-screws with captive "blind-nuts" installed behind the firewall to accept them. This would be a good method.. and would handle "repeated" mountings and dis-mountings.
Using small wood-screws is also an option.. but as you mentioned; they will strip-out with repeated mountings/dis-mountings. You can extend the service-life of the mount by sticking wooden toothpicks (cut-short) in the mounting-holes with a drop of super-glue. This will give the wood-screws "new-wood" to bite-into. I've done this with small (1/2A size) airplanes having a radial firewall.. and it holds the engine tight.

roddie- Top Poster
-
Posts : 8459
Join date : 2013-07-17
Age : 64
Location : N. Smithfield, Rhode Island -
Re: Cox Engine Test Stand
![]() Kim Mon Oct 02, 2017 5:09 am
Kim Mon Oct 02, 2017 5:09 am
Not sure how thick the main board is, but you can get 2-56 blind nuts and long 2-56 machine screws from Micro Fasteners.
https://www.microfasteners.com/
You might also a square of hardwood on each side of the vertical support to take some long #2 socket head wood screws, also sold by Micro Fasteners. I use blocks of hardwood---got them for free from a local cabinet shop---with the test stands that Matt and Bernie offer, and have yet to wear out any.

Kim- Top Poster
-
Posts : 8590
Join date : 2011-09-06
Location : South East Missouri
Re: Cox Engine Test Stand
![]() KariFS Mon Oct 02, 2017 8:39 am
KariFS Mon Oct 02, 2017 8:39 am
Maybe you could mount a "sacrificial" strip of wood on the front surface, and replace it when it wears out and/or gets soaked? It would be the most flexible solution, you could install engine mounts with different patterns and would not need to worry about extra holes.
Something like this:

If you are going to run only 2-3 different engines on the mount, then it might be easiest to use blind nuts as Marleysky suggests.
Something like this:

If you are going to run only 2-3 different engines on the mount, then it might be easiest to use blind nuts as Marleysky suggests.

KariFS- Diamond Member

- Posts : 2019
Join date : 2014-10-10
Age : 52
» Ran the first engine of the year!
» My new test stand
» Wanted: Plier marked TD drive plates
» Reedy test stand
» Wen Mac MK-III on the Test Stand
» My new test stand
» Wanted: Plier marked TD drive plates
» Reedy test stand
» Wen Mac MK-III on the Test Stand
Page 1 of 1
Permissions in this forum:
You cannot reply to topics in this forum