

 Rules
Rules
Log in
Search
Latest topics
» Fox .35 Modifications by Onelife Today at 8:12 pm
» Jim Walkers FireBee - This is going to be fun
by roddie Today at 6:51 pm
» *Cox Engine of The Month* Submit your pictures! -May 2024-
by Admin Today at 6:46 pm
» Post your Older ignition books
by lla Today at 6:34 pm
» S1 Ringmaster
by Onelife Today at 8:40 am
» Speed plane - Crispy but not too crispy
by rsv1cox Today at 7:54 am
» O&R 23 & Brown Jr
by getback Today at 7:47 am
» Introducing our Cox .049 TD Engines
by MauricioB Today at 2:31 am
» Jim Walker Firebaby
by rdw777 Yesterday at 4:16 pm
» Hemostat clamp/smooth-jaws
by roddie Yesterday at 3:48 pm
» Black Widow Run time
by Ken Cook Yesterday at 3:44 pm
» 1:64 scale Diecast (Hot Wheels)
by roddie Yesterday at 3:33 pm
Cox Engine of The Month


CEF Traveling Engine


Win This Engine!

Live on Patrol


Jerobee electric to glow conversion nr 2
Page 2 of 2
Page 2 of 2 •  1, 2
1, 2
Re: Jerobee electric to glow conversion nr 2
![]() OVERLORD Thu Sep 21, 2023 9:46 am
OVERLORD Thu Sep 21, 2023 9:46 am
No, not standard, I'll have to buy some in the US with ebay 

OVERLORD- Diamond Member

- Posts : 1789
Join date : 2013-03-19
Age : 57
Location : Normandy, France
Re: Jerobee electric to glow conversion nr 2
![]() OVERLORD Sun Sep 24, 2023 2:05 am
OVERLORD Sun Sep 24, 2023 2:05 am
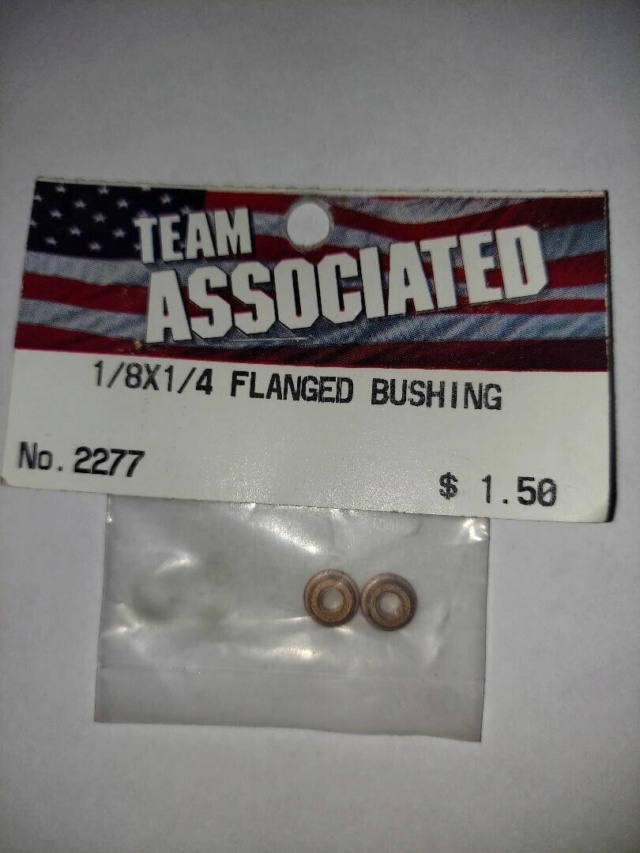
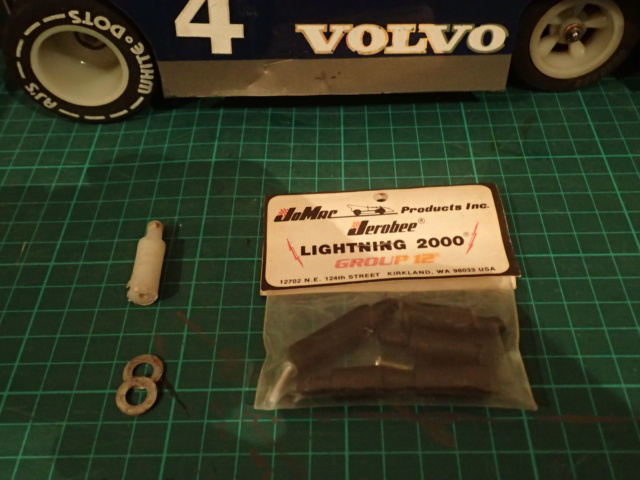
I ordered 2 packages of these Team Associated bushings nr 2277. They are flanged and maybe I will have to file the flange off to make them to the right size.
Last edited by OVERLORD on Sat Sep 30, 2023 11:10 am; edited 1 time in total
OVERLORD- Diamond Member
- Posts : 1789
Join date : 2013-03-19
Age : 57
Location : Normandy, France
Re: Jerobee electric to glow conversion nr 2
![]() OVERLORD Sat Sep 30, 2023 11:08 am
OVERLORD Sat Sep 30, 2023 11:08 am
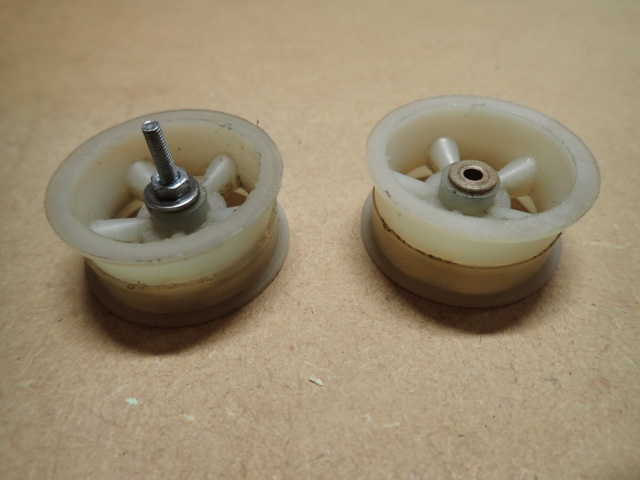
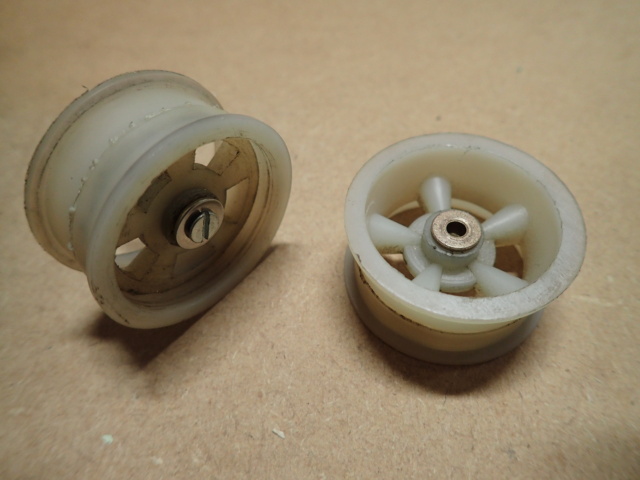
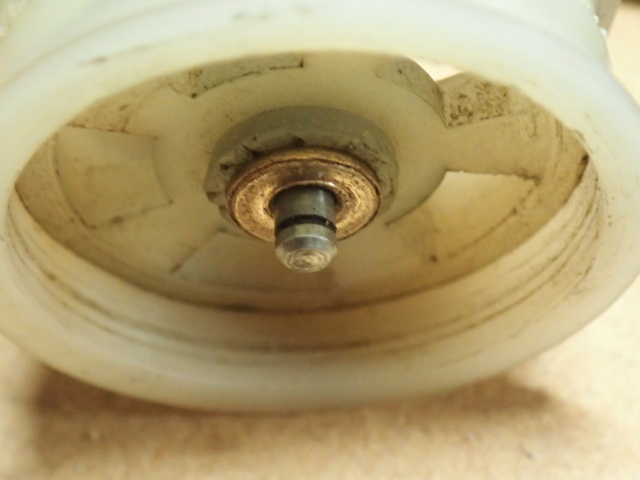
I received the bushigs this week. They came all the way from Finland. It was impossible to push in the bushings by hand. I mounted a 3mm bolt with nut and washers to push them gently into place by screwing the nut. When the nut was fully tight, I removed the bolt and tried the wheel on the stub axle. It fits perfectly and the wheel turns freely. This indicates the great precision that the wheels were made with. I was afraid that 2 separated bushings wouldn't line up but they did! Although the flanges make the hub wider, there is still enough room left to mount some filler washers.
OVERLORD- Diamond Member
- Posts : 1789
Join date : 2013-03-19
Age : 57
Location : Normandy, France
Re: Jerobee electric to glow conversion nr 2
![]() OVERLORD Sun Oct 01, 2023 11:36 am
OVERLORD Sun Oct 01, 2023 11:36 am
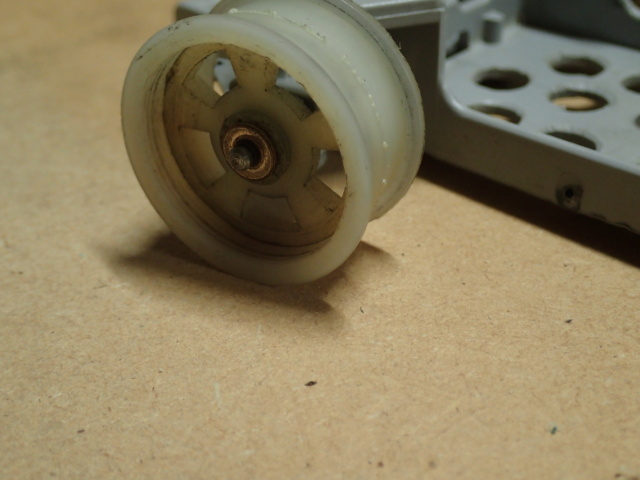
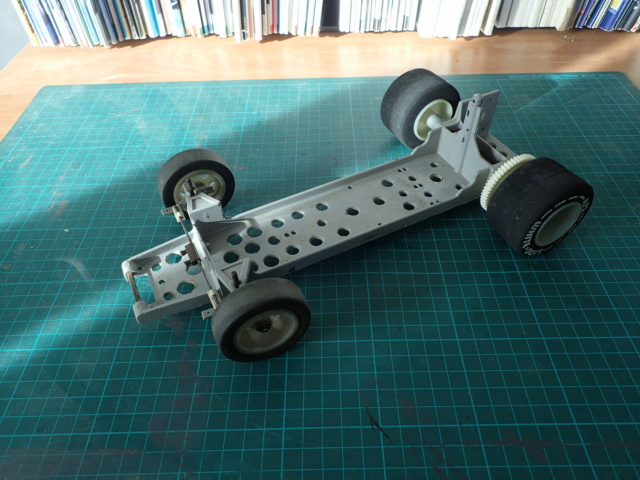
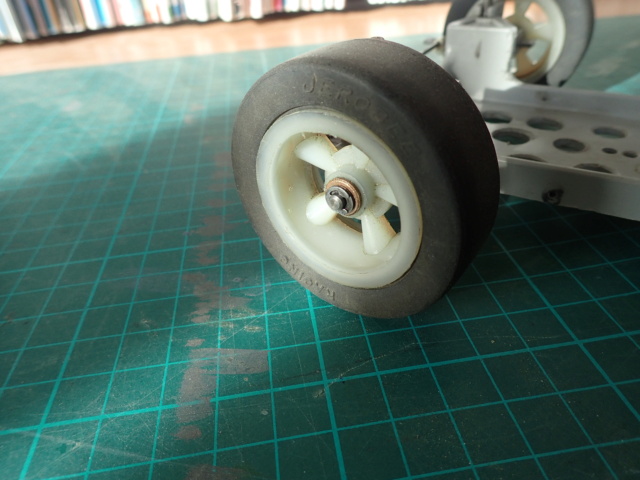
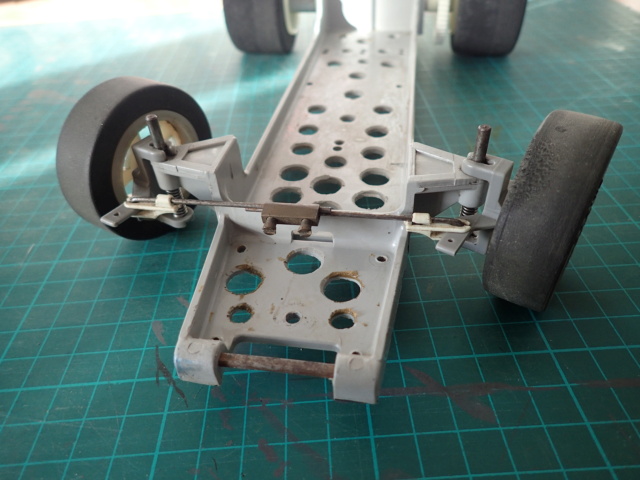
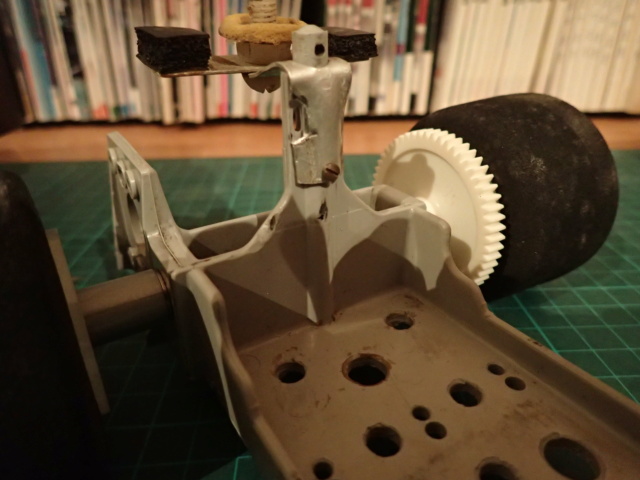
I completed the chassis today. Before mounting the front wheels, I put some oil into the bearings and had them soaked all day. 2 3mm washers were needed per side for the end play. I fitted the standard rubber Jerobee tyres and made sure the inscription "Jerobee Racing" was on the outside. The track rod I used is the one that was on the car. This track rod is split and gives immediately the right toe in. I have an original Jerobee track rod but the is one piece of piano wire.
I assembled the back axle with a 56 teeth gear that Ron sent me ages ago. When mounting the gear, better mount it with the text on the inside then at least, it remains visible.

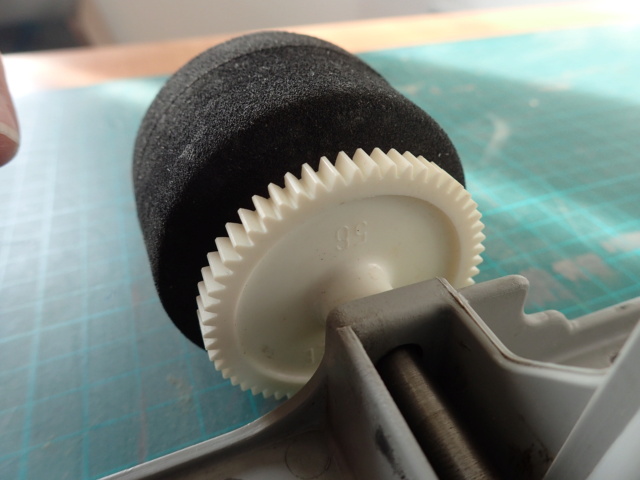
I assembled the back axle with a 56 teeth gear that Ron sent me ages ago. When mounting the gear, better mount it with the text on the inside then at least, it remains visible.
OVERLORD- Diamond Member
- Posts : 1789
Join date : 2013-03-19
Age : 57
Location : Normandy, France
Re: Jerobee electric to glow conversion nr 2
![]() OVERLORD Tue Oct 17, 2023 12:11 am
OVERLORD Tue Oct 17, 2023 12:11 am
The front body post was not so fresh anymore. The top is bent and the mounting hole became bigger and bigger as different screws were used. Washers were inserted to get the right height. I found locally an assortiment of body posts with screws as a replacement. I'm sure one will fit.
OVERLORD- Diamond Member
- Posts : 1789
Join date : 2013-03-19
Age : 57
Location : Normandy, France
Re: Jerobee electric to glow conversion nr 2
![]() OVERLORD Wed Oct 18, 2023 3:52 pm
OVERLORD Wed Oct 18, 2023 3:52 pm
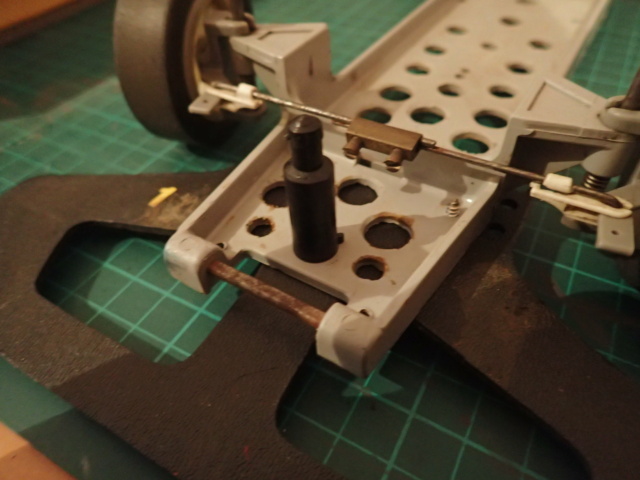
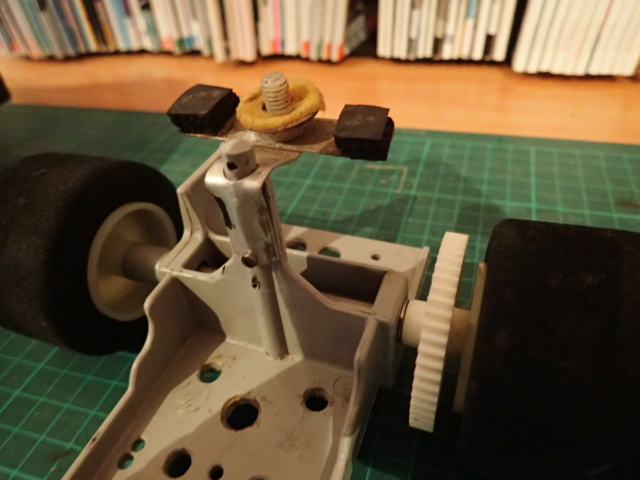
I installed the new front body post. The back post had to be more towards the rear to clear for the head rest extension. The previous owner made a simple piece of aluminium with a nylon bolt and foam pads for the body to sit. As the aluminium covered the oblong hole for the throttle rod, I had to cut away some material in order to use the hole again.
OVERLORD- Diamond Member
- Posts : 1789
Join date : 2013-03-19
Age : 57
Location : Normandy, France
Re: Jerobee electric to glow conversion nr 2
![]() getback Thu Oct 19, 2023 9:49 am
getback Thu Oct 19, 2023 9:49 am
Looking Good , comes together a little at a time and not to much modifying  Can't believe you found replacement stands for the body to sit on .
Can't believe you found replacement stands for the body to sit on . 
getback- Top Poster


Posts : 10127
Join date : 2013-01-18
Age : 66
Location : julian , NC
Re: Jerobee electric to glow conversion nr 2
![]() OVERLORD Sat Dec 02, 2023 12:27 pm
OVERLORD Sat Dec 02, 2023 12:27 pm
The car with the engine mounted. For the moment, it's for free running only. I still have to drill a 1,5mm hole in the circlips for the throttle rod.
I need to modify the homemade rear body support. One side is right above the red pull starter handle.


I need to modify the homemade rear body support. One side is right above the red pull starter handle.
OVERLORD- Diamond Member
- Posts : 1789
Join date : 2013-03-19
Age : 57
Location : Normandy, France
Re: Jerobee electric to glow conversion nr 2
![]() rsv1cox Sat Dec 02, 2023 12:55 pm
rsv1cox Sat Dec 02, 2023 12:55 pm
What radio Lieven? Steering only? Looking great so far. Where would you run it?
Bob
Bob

rsv1cox- Top Poster
-
Posts : 10575
Join date : 2014-08-18
Location : West Virginia
Re: Jerobee electric to glow conversion nr 2
![]() OVERLORD Sat Dec 02, 2023 1:34 pm
OVERLORD Sat Dec 02, 2023 1:34 pm
No. Not steering only. That's why I need to drill that hole in the circlip. I'd like to recreate the rc control of the Bandero where 1 servo controls throttle and steering, but I haven't figured that out yet.


OVERLORD- Diamond Member
- Posts : 1789
Join date : 2013-03-19
Age : 57
Location : Normandy, France
Re: Jerobee electric to glow conversion nr 2
![]() rsv1cox Sat Dec 02, 2023 3:50 pm
rsv1cox Sat Dec 02, 2023 3:50 pm
Good trick if you can do it Lieven. I don't see how but I'm sure that you will find a way. Bob
rsv1cox- Top Poster
-
Posts : 10575
Join date : 2014-08-18
Location : West Virginia
Re: Jerobee electric to glow conversion nr 2
![]() OVERLORD Sun Dec 03, 2023 4:50 am
OVERLORD Sun Dec 03, 2023 4:50 am
This is what the Jerobee brochure says, but we knew that already

OVERLORD- Diamond Member
- Posts : 1789
Join date : 2013-03-19
Age : 57
Location : Normandy, France
Page 2 of 2 • 1, 2
» JEROBEE electric to TeeDee conversion
» Electric to Glow conversion
» Hobby King Mini-Stick 580mm "Electric to Cox" Conversion
» Cox Sky Cruisers Viper RC conversion build
» Nitro to Electric conversion
» Electric to Glow conversion
» Hobby King Mini-Stick 580mm "Electric to Cox" Conversion
» Cox Sky Cruisers Viper RC conversion build
» Nitro to Electric conversion
Page 2 of 2
Permissions in this forum:
You cannot reply to topics in this forum