Log in
Search
Latest topics
» Cox 020 PeeWee rebuild questions by roddie Today at 8:21 pm
» Dodge Viper - What a waste but brilliant marketing
by roddie Today at 6:46 pm
» COX .020 POWERED SPEEDSTER
by TD ABUSER Today at 6:32 pm
» **VOTE-ON-THE-NEXT-COX-ENGINE-OF-THE-MONTH** (November 2024)
by roddie Today at 6:13 pm
» Brushless motors?
by rsv1cox Today at 4:53 pm
» Free Flight Radio Assist
by rdw777 Today at 4:28 pm
» L4 Grasshopper
by latole Today at 3:43 pm
» PAW 80 and possible use
by fit90 Today at 8:36 am
» Music-wire bending tools (DIY video)
by 1975 control line guy Today at 8:32 am
» Ultrasonic Cleaners??
by sosam117 Yesterday at 11:26 am
» My CA or CyA (super glue) allergy
by rsv1cox Yesterday at 9:52 am
» My Pseudo killerbee.
by rsv1cox Yesterday at 7:04 am
I built a kit!
Page 1 of 1
 I built a kit!
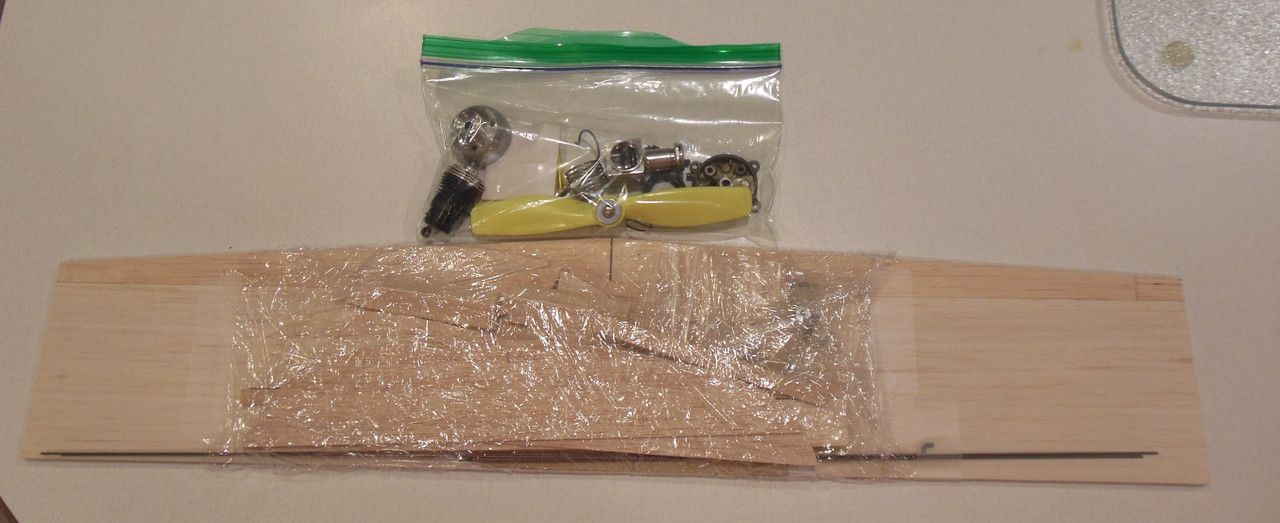
At the flying field last week, a father and son came over to watch the guys flying control line at Delta Park. They had just crashed the RTF RC plane that the son had received and were kind of disappointed. They asked a lot of questions. Or, rather, the father asked a lot of questions. None of us old timers were wearing masks outside, and the son stayed planted on the other side of his father, looking scared for his life. Don’t know if he was shy, or the media has him scared to death of old guys without masks…. Anyway, I gave the father my phone number and told him to call if they were interested in flying control line and I would help them get started. I figured I’d never hear from them again, as is usually the case. But the father called a couple of days later and we set up a time for me to go over and help them build their first CL plane. I said I would bring everything necessary to build the plane, but might give them a list of things they could have ready. Well, the son kept pestering his father a couple/three times a day to see if I’d emailed him the list of things to get ready. Unfortunately, my internet was out so he had to wait a couple of days. But they seem at least initially excited. So I made them up a kit.
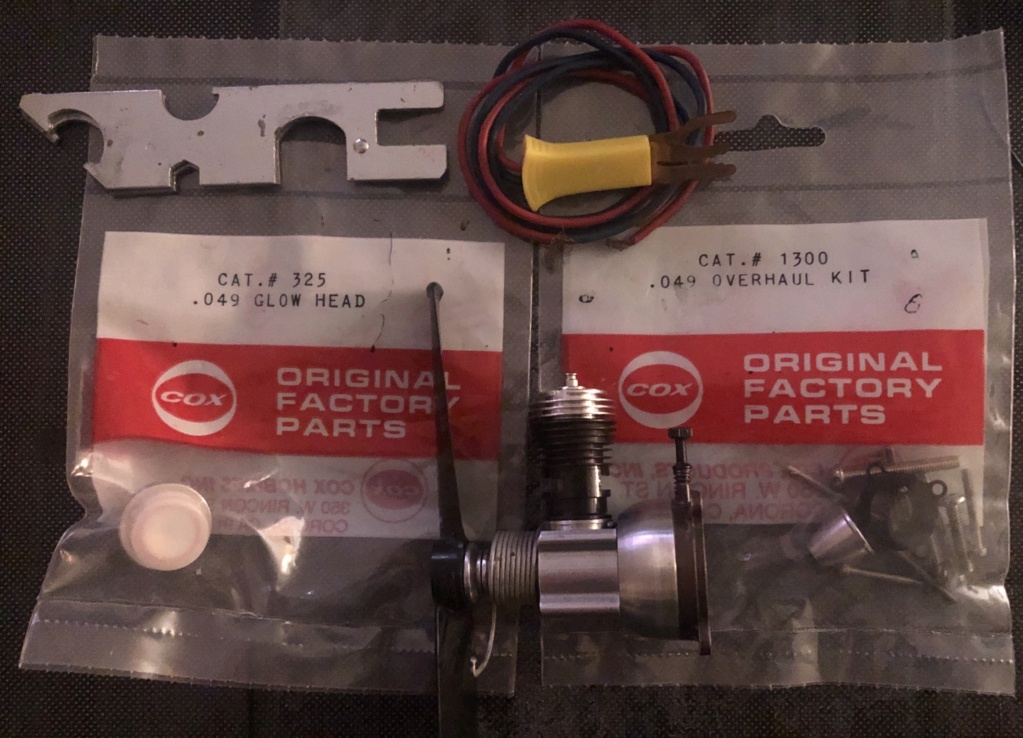
I looked in my “engines to rebuild” box and found most of a Babe Bee engine. It was just missing a glow head, a good gas tank, and a starter spring. So I dug out a 5cc tank, spring assembly, and a used but good glow head. Then I completely tore the engine down and rebuilt it with new gaskets and o-ring. After re-assembly I ran four tanks of fuel through it to make sure everything was working. Ran like a top. Then I disassembled it completely so the son could rebuild it on Thursday afternoon, and we can run it to see if he follows directions well.
Then I printed out the plans for a Beginner’s Ringmaster. I slightly deviated from the drawings I had, as the drawing of the Sterling BRM has a lot of positive wing incidence. I raided my scrap wood to cut the kit with a fuselage using a top balsa piece, a bottom balsa piece, and a stick of ¼” square spruce going down the middle from firewall to tail, and cut the upper fuselage portion for the wing and tail to be 0-0-0 incidence with the engine. Then I cut the rest of the kit from scrap wood also. Digging around in my leftovers brought out everything else I needed to complete a flying BRM except covering. I told the father to get some water based polyurethane so they can finish it clear. With all the smoke and coming rain, they should have about a week to let it dry before a good flying day comes up.
The kit:
The Manufacturer Mark
I looked in my “engines to rebuild” box and found most of a Babe Bee engine. It was just missing a glow head, a good gas tank, and a starter spring. So I dug out a 5cc tank, spring assembly, and a used but good glow head. Then I completely tore the engine down and rebuilt it with new gaskets and o-ring. After re-assembly I ran four tanks of fuel through it to make sure everything was working. Ran like a top. Then I disassembled it completely so the son could rebuild it on Thursday afternoon, and we can run it to see if he follows directions well.
Then I printed out the plans for a Beginner’s Ringmaster. I slightly deviated from the drawings I had, as the drawing of the Sterling BRM has a lot of positive wing incidence. I raided my scrap wood to cut the kit with a fuselage using a top balsa piece, a bottom balsa piece, and a stick of ¼” square spruce going down the middle from firewall to tail, and cut the upper fuselage portion for the wing and tail to be 0-0-0 incidence with the engine. Then I cut the rest of the kit from scrap wood also. Digging around in my leftovers brought out everything else I needed to complete a flying BRM except covering. I told the father to get some water based polyurethane so they can finish it clear. With all the smoke and coming rain, they should have about a week to let it dry before a good flying day comes up.
The kit:

The Manufacturer Mark
batjac- Diamond Member


Posts : 2371
Join date : 2013-05-22
Age : 61
Location : Broken Arrow, OK, USA
 Re: I built a kit!
That's cool and very caring of you to put forth the effort in the engine and plane to get them started in C/L  You got lines and handle too
  Hope the smoke clears soon
 You got lines and handle too
  Hope the smoke clears soon

getback- Top Poster


Posts : 10415
Join date : 2013-01-18
Age : 67
Location : julian , NC
 Re: I built a kit!
Great story! Keep it alive and going.

Tee Bee- Platinum Member

- Posts : 764
Join date : 2011-08-25
Location : Angleton, TX
 Re: I built a kit!
Great story Mark and excellent educational opportunity for the kid to assemble the Bee too, and experience it come to life...

balogh- Top Poster


Posts : 4940
Join date : 2011-11-06
Age : 66
Location : Budapest Hungary

Jason_WI- Top Poster


Posts : 3123
Join date : 2011-10-09
Age : 49
Location : Neenah, WI
 Re: I built a kit!
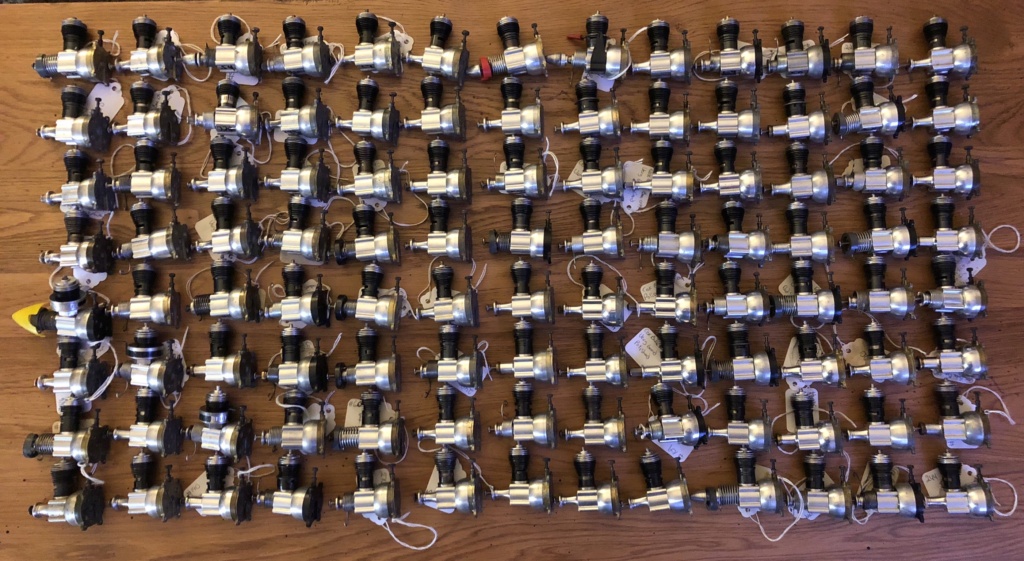
Jason, I'll take the one six down and eleven across....
Just kidding. I'm going to give them a set of plans for the BRM, and also direct them to Outerzone so they can look at other 1/2A drawings. If they came out to the field and flew a couple of times, I was going to dig up a second engine and give it to them so they could have a father/son thing. I'll let you know if I am in need of a second engine. Thanks for the offer.
The Picky Mark

batjac- Diamond Member


Posts : 2371
Join date : 2013-05-22
Age : 61
Location : Broken Arrow, OK, USA

dckrsn- Diamond Member

- Posts : 2750
Join date : 2010-10-21
Age : 71
Location : Long Island, New York

batjac- Diamond Member


Posts : 2371
Join date : 2013-05-22
Age : 61
Location : Broken Arrow, OK, USA
 Re: I built a kit!
If you look carefully the top engine in the pic has the correct original spring as it comes almost to the windup starter. The bottom one is one I made from a regular old starter spring. It has 2 less turns on the spring hence the gap. Still works though. You guys either have eagle eyes or glasses like bubbles.


Jason_WI- Top Poster


Posts : 3123
Join date : 2011-10-09
Age : 49
Location : Neenah, WI
 Re: I built a kit!
Looks, like Mr. Babe Bee Bob has taken a shine to one of those beauties!

Cribbs74- Moderator


Posts : 11907
Join date : 2011-10-24
Age : 50
Location : Tuttle, OK
 Re: I built a kit!
Jason_WI wrote:
If you look carefully the top engine in the pic has the correct original spring as it comes almost to the windup starter. The bottom one is one I made from a regular old starter spring. It has 2 less turns on the spring hence the gap. Still works though.
I tried bending a stock spring, but it just wouldn't stay in the spring hole. How did you do it?
The Unsuccessful Mark

batjac- Diamond Member


Posts : 2371
Join date : 2013-05-22
Age : 61
Location : Broken Arrow, OK, USA
 Re: I built a kit!
[/quote]
I tried bending a stock spring, but it just wouldn't stay in the spring hole. How did you do it?
The Unsuccessful Mark[/quote]
I'm headed down that road soon, Mark.
I have some springs/victims on hand, and
plenty of ways to fail.
Going to give the "snap start" spring a try
first. I've had good luck shaping
springs so they work, and don't look wonky.
Bob

dckrsn- Diamond Member

- Posts : 2750
Join date : 2010-10-21
Age : 71
Location : Long Island, New York
 Re: I built a kit!
I like shiny things, but I got my faves. I'll haveCribbs74 wrote:Looks, like Mr. Babe Bee Bob has taken a shine to one of those beauties!
to take a head count some time.


dckrsn- Diamond Member

- Posts : 2750
Join date : 2010-10-21
Age : 71
Location : Long Island, New York

Jason_WI- Top Poster


Posts : 3123
Join date : 2011-10-09
Age : 49
Location : Neenah, WI
 Re: I built a kit!
Jason,
Thanks for the offer. If they continue like the father says they will, I'll take you up on the offer. It's raining now, but hopefully by the weekend I can get together and get them in the air.
The Mentor Mark
Thanks for the offer. If they continue like the father says they will, I'll take you up on the offer. It's raining now, but hopefully by the weekend I can get together and get them in the air.
The Mentor Mark

batjac- Diamond Member


Posts : 2371
Join date : 2013-05-22
Age : 61
Location : Broken Arrow, OK, USA
 Similar topics
» Did anyone built and run the Cox Venom Clone from http://sites.google.com/site/coxenginecollection?
» Looking for a P-40 built up kit for .46 CL
» My first planes I built
» New P-38 profile scratch build log
» Sturdi Built?
» Looking for a P-40 built up kit for .46 CL
» My first planes I built
» New P-38 profile scratch build log
» Sturdi Built?
Page 1 of 1
Permissions in this forum:
You cannot reply to topics in this forum

 Rules
Rules


