Log in
Search
Latest topics
» Joe Wagners Siouxby Ken Cook Today at 7:35 pm
» Roddie's flat-bottomed boat..
by rsv1cox Today at 6:26 pm
» Happy Anzac Day!
by GallopingGhostler Today at 4:16 pm
» Three -- sold out (making two more) Cox .010 Carburetors with wrench
by MauricioB Today at 3:43 pm
» Jim Walkers FireBee - This is going to be fun
by rsv1cox Today at 12:27 pm
» Project Cox .049 r/c & Citabrian Champion
by rdw777 Today at 8:14 am
» Revivng Some Childhood Classics
by getback Today at 7:31 am
» Fox .35 Modifications
by Ken Cook Today at 3:16 am
» Introducing our Cox .049 TD Engines
by getback Yesterday at 6:20 am
» Cox powered jet-pump for model Sprint Boat
by roddie Thu Apr 25, 2024 10:25 pm
» Micro Draco Gets to Fly on a Beautiful Morning.
by rdw777 Thu Apr 25, 2024 8:15 pm
» Jim Walker Firebaby
by rdw777 Thu Apr 25, 2024 8:06 pm
Cox Engine of The Month
New P-38 profile scratch build log
Page 1 of 5
Page 1 of 5 • 1, 2, 3, 4, 5 
 New P-38 profile scratch build log
My original with the long title with trains etc. began to suffer with topic drift (mostly me) so I'm starting a new more directed log.
Beveled the the wing root to accept a gestimate dihedral and cemented with CA with 1/4" dowels 1 1/2 inches in. Not even close to scale but we are talking C/L here not R/C. Scale wing, solid not built up like my original which I planked with well sanded 1/16". Thin and easily depressed with a finger.
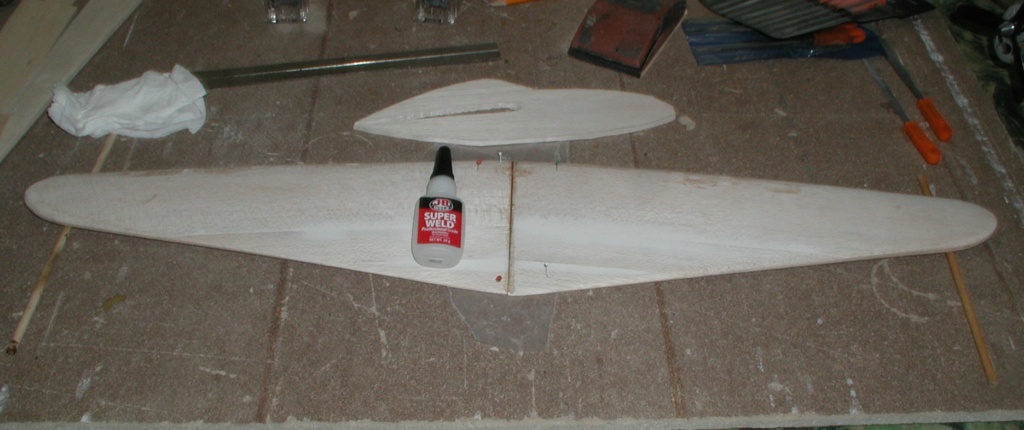
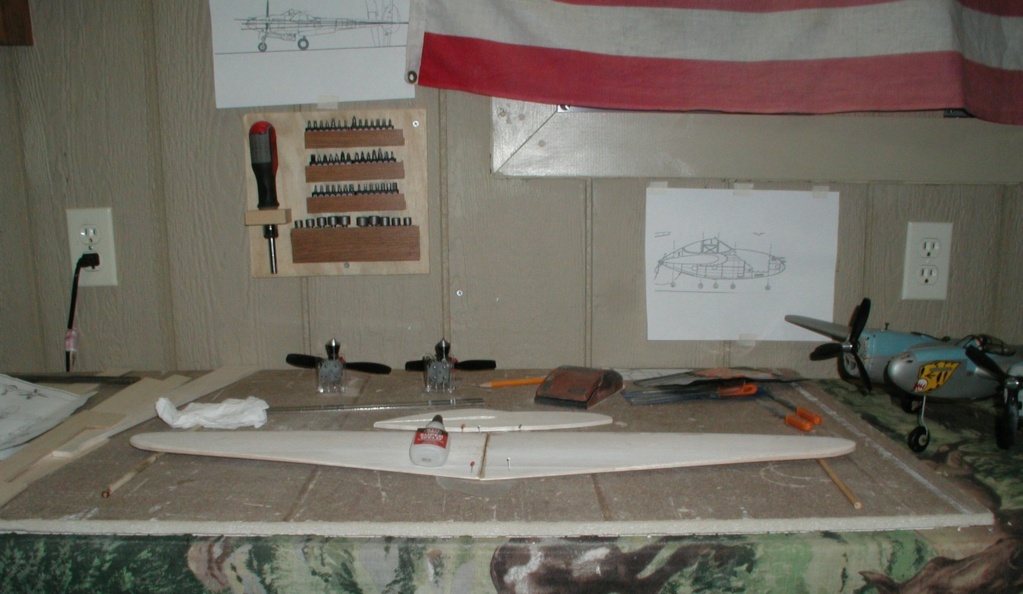
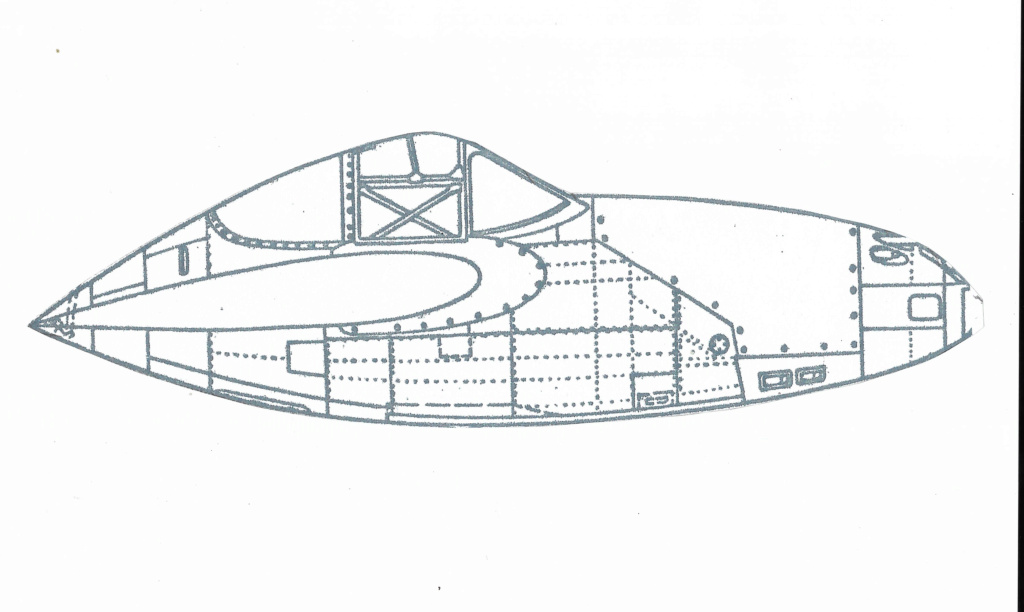
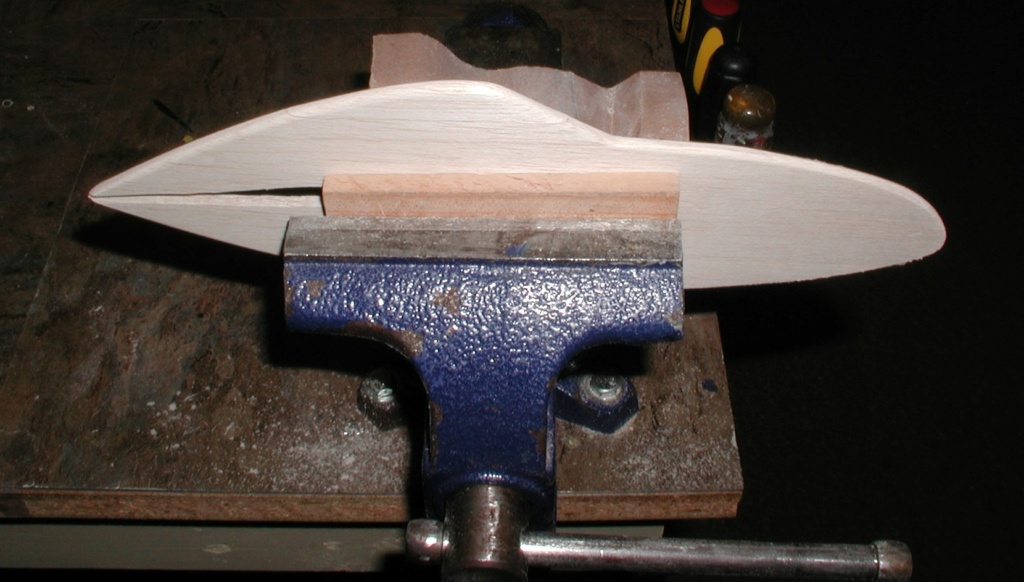
Cut the opening with a band saw using the same built-in scale angle of the original. Rounded the edges of the pilots pod. A couple of coats of sanding sealer on both the pod and the wing and epoxy in place.
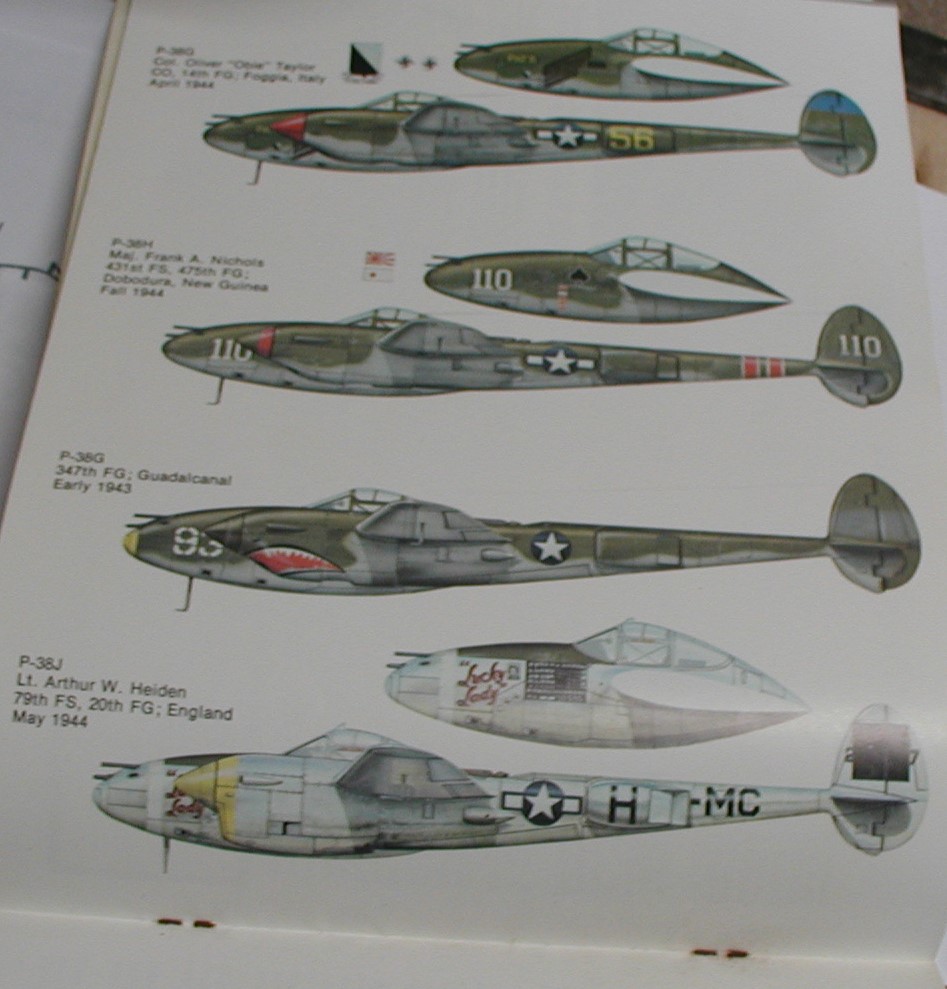
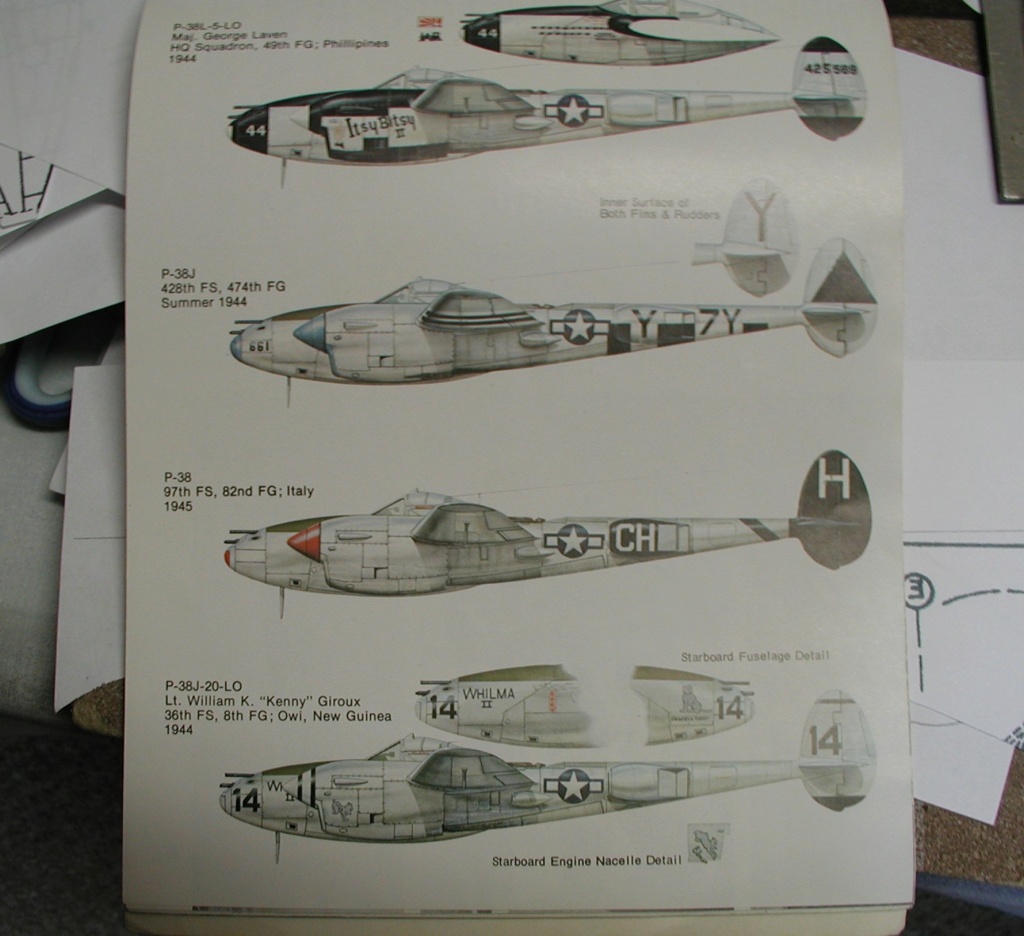
Lot's of color choices. Notice the difference between the G and J models engine pods. Originally a nice smooth transition gave way to a blunt fore-end. From the P-38 in Action Book - "The major external change to the lightning came with the introduction of the P-38J. The carburetor air intercoolers were moved from the leading edge of the wing to the forward part of the engine narcelles - giving the plane the characteristic chin seen on subsiquent aircraft."
Not trying for a contest winner here, or even a wing-over queen. I will be happy if it get's off the ground and does a circle.
Beveled the the wing root to accept a gestimate dihedral and cemented with CA with 1/4" dowels 1 1/2 inches in. Not even close to scale but we are talking C/L here not R/C. Scale wing, solid not built up like my original which I planked with well sanded 1/16". Thin and easily depressed with a finger.


Cut the opening with a band saw using the same built-in scale angle of the original. Rounded the edges of the pilots pod. A couple of coats of sanding sealer on both the pod and the wing and epoxy in place.

Lot's of color choices. Notice the difference between the G and J models engine pods. Originally a nice smooth transition gave way to a blunt fore-end. From the P-38 in Action Book - "The major external change to the lightning came with the introduction of the P-38J. The carburetor air intercoolers were moved from the leading edge of the wing to the forward part of the engine narcelles - giving the plane the characteristic chin seen on subsiquent aircraft."


Not trying for a contest winner here, or even a wing-over queen. I will be happy if it get's off the ground and does a circle.

rsv1cox- Top Poster


Posts : 10556
Join date : 2014-08-18
Location : West Virginia
 Re: New P-38 profile scratch build log
Looking great allready  Well on the way. Keen to read and follow your build log and hopefully you can get video of it flying. But I must admit I have never posted video of any of my flights as it seems too complicated to fly and take video. Flying the plane is more than enough for me to do.
  So completely understand if you cannot video, but keen to hear the flight report
Great start! Like the dihedral.
And I just thought/realised its twin engine of course. You have got fun times ahead setting the twin engines up and getting them to run at the same time
 Well on the way. Keen to read and follow your build log and hopefully you can get video of it flying. But I must admit I have never posted video of any of my flights as it seems too complicated to fly and take video. Flying the plane is more than enough for me to do.
  So completely understand if you cannot video, but keen to hear the flight report
 Great start! Like the dihedral.
And I just thought/realised its twin engine of course. You have got fun times ahead setting the twin engines up and getting them to run at the same time

Yabby- Platinum Member


Posts : 702
Join date : 2021-06-08
Location : Yorke Peninsula South Australia
 Re: New P-38 profile scratch build log
Nervous energy and rainy days kicking in , Good start Bob witch style did you decide to go with , I am not good at this but looks like maybe the P-38G ?? 

getback- Top Poster


Posts : 10116
Join date : 2013-01-18
Age : 66
Location : julian , NC
 Re: New P-38 profile scratch build log
Thanks Yabby, I have videos that my son has taken (Cox Mercedes etc.) but I have no medium like Youtube to post them. Probably just pictures until something better shows up.
And Eric, yes. Nervious energy, got lot's of that with no more cut down tree left to burn it up with.
And yes, big debate with myself G or J. I like the smoothness of the G but the J looks tougher. With the side mount engines (Thanks Duane) I can do either if I mount the engines upright. With my original I could mount them inverted with the head exposed and enough cylinder cooling from the inlet. Never had a cooling problem with it. 5cc engines all enclosed for a more natural look.
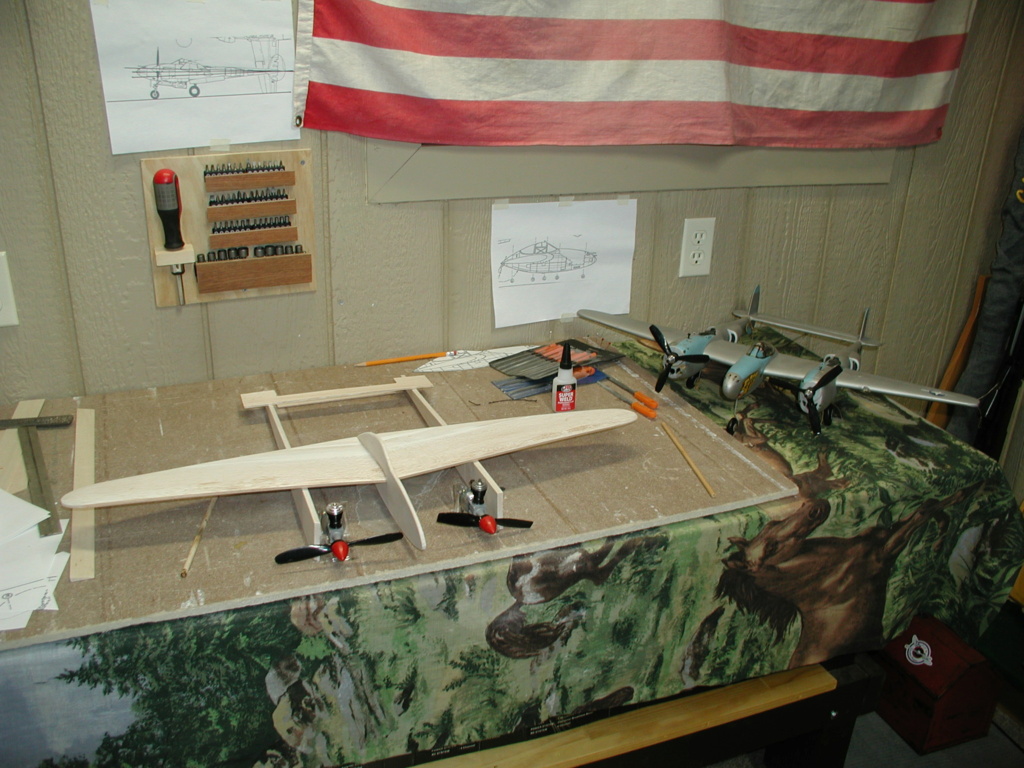
The wing will sit down in the fuselage booms, I have to cut the saddles for that. With a scratch build it's always a worry getting the thrust line right. (Illustration above the screwdriver.) Not like building from a kit where all the angles are built in. The wing is actually two SIG airfoils cemented together.


rsv1cox- Top Poster


Posts : 10556
Join date : 2014-08-18
Location : West Virginia
 Re: New P-38 profile scratch build log
Looking good Bob… The rounded corners of the pod look great!!….. Good you added the dihedral, A more scalish effect  ….. Cool to see the original nearby for reference and inspiration…. Good memories from it too…. I do similar on some of mine….Coloring and decorating will be the fun part
  ….. Even better a little sky under its wings….
 ….. Cool to see the original nearby for reference and inspiration…. Good memories from it too…. I do similar on some of mine….Coloring and decorating will be the fun part
rdw777- Diamond Member


Posts : 1280
Join date : 2021-03-11
Location : West Texas
 Re: New P-38 profile scratch build log
Looking good Bob , have you decided on a paint scheme yet?

akjgardner- Diamond Member


Posts : 1469
Join date : 2014-12-28
Age : 64
Location : Greensberg Indiana

Levent Suberk- Diamond Member

- Posts : 2204
Join date : 2017-12-24
Location : Türkiye
 Re: New P-38 profile scratch build log
I'm keeping this one simple Levent, just some elevator/aileron stock and some stand-off balsa pieces sanded to shape.
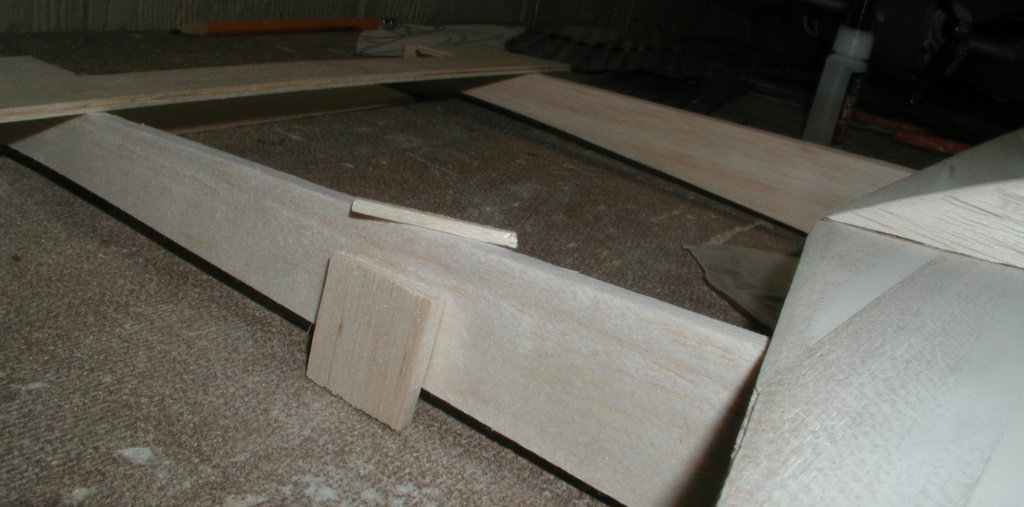
On the original, I made a buck for consistency among the four and pulled some wet 1/32" balsa over it. Probably Ambroid but may have been epoxy, if it had been invented yet. I never did add the shutters, thought they would just blow off. The super-chargers - foam, brass tubing, string and bottle caps. This one will probably be just dowels.
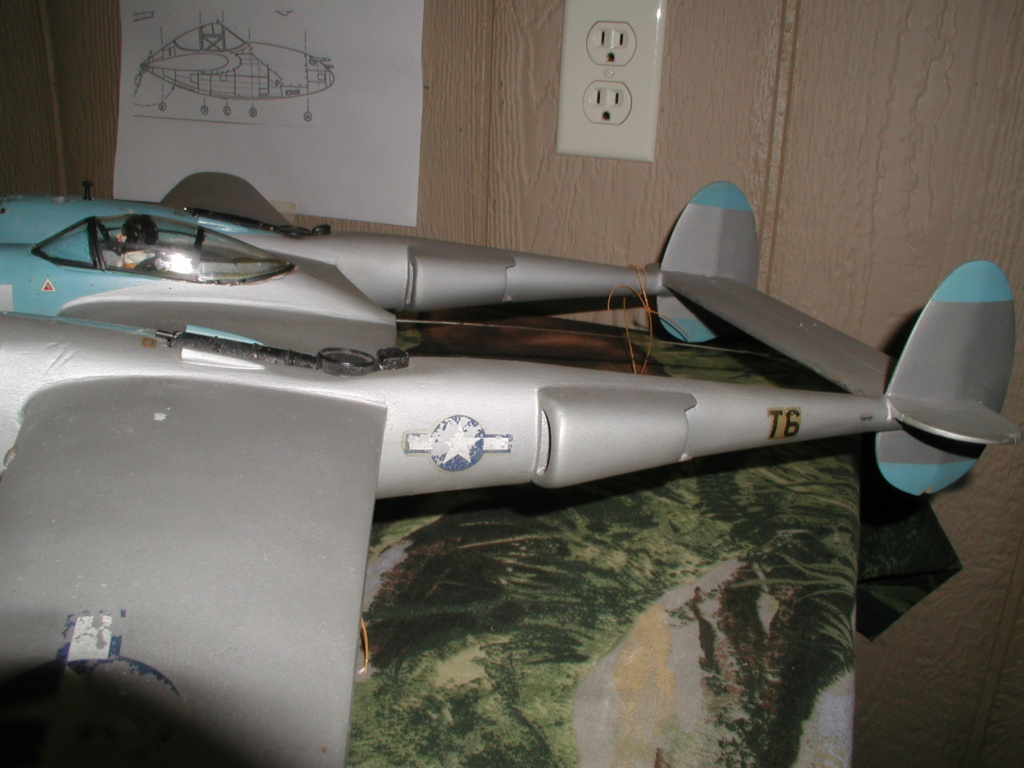
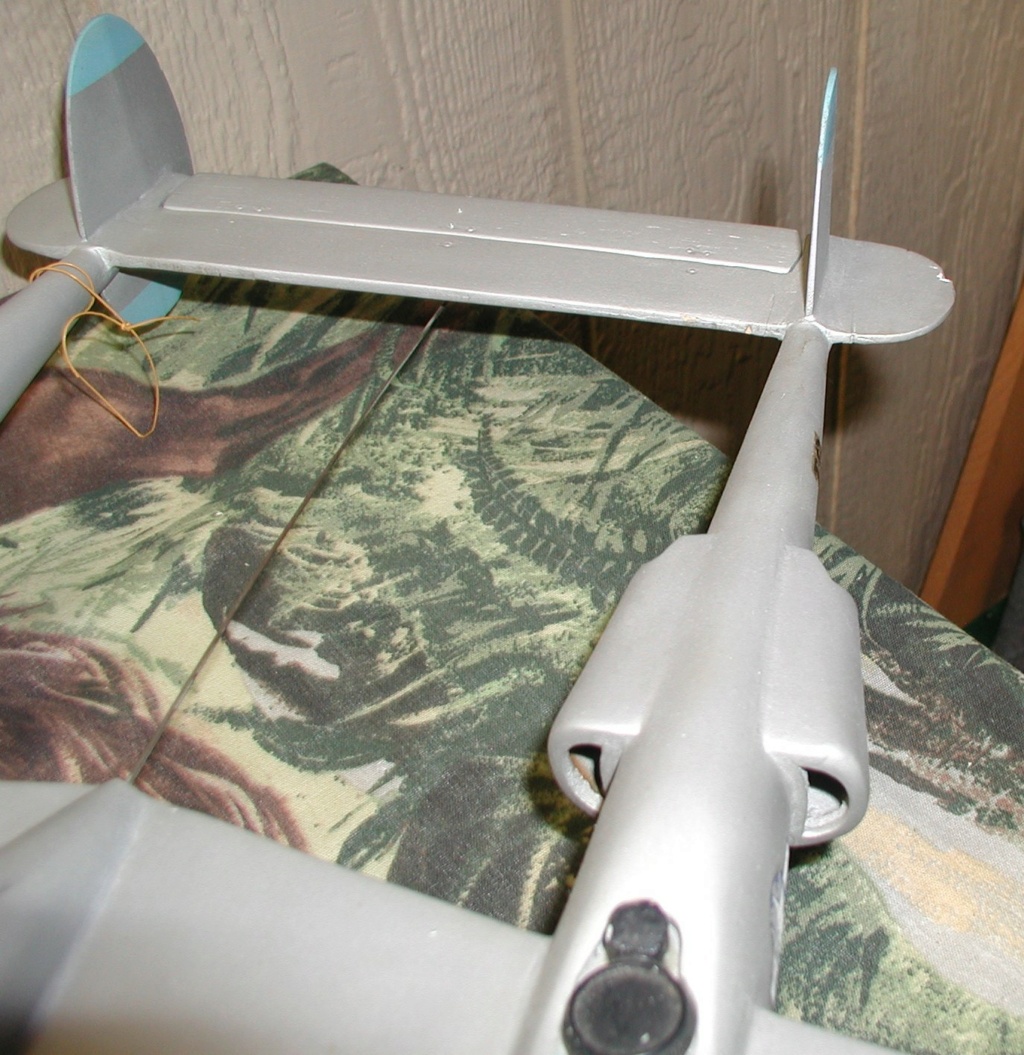
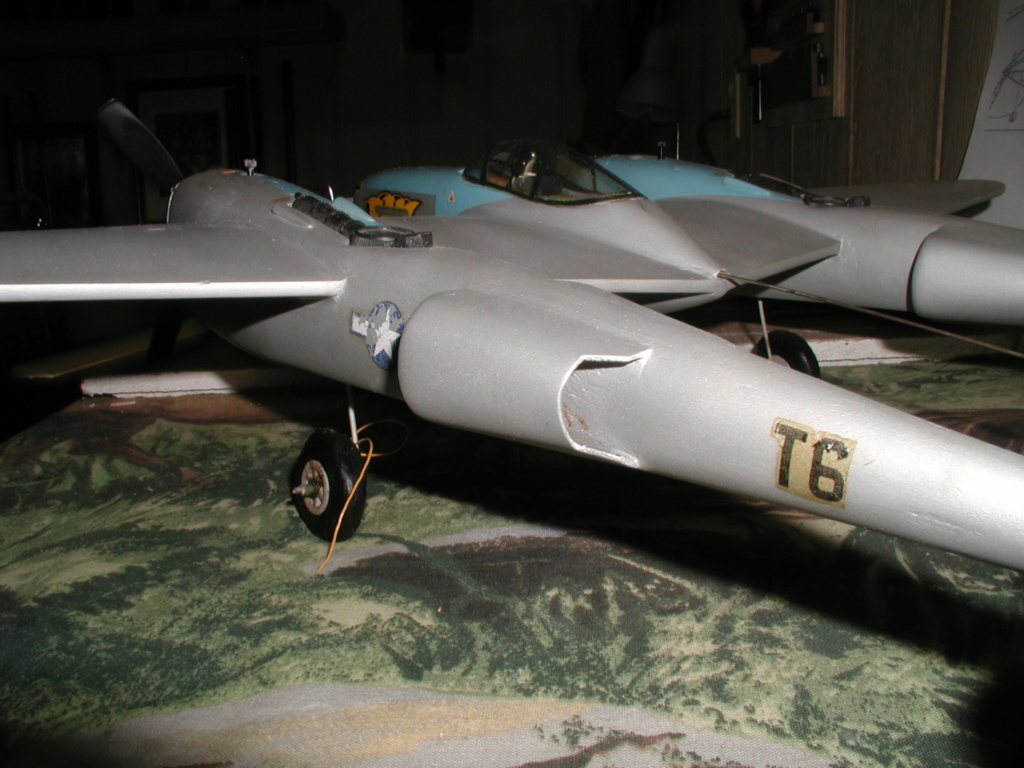
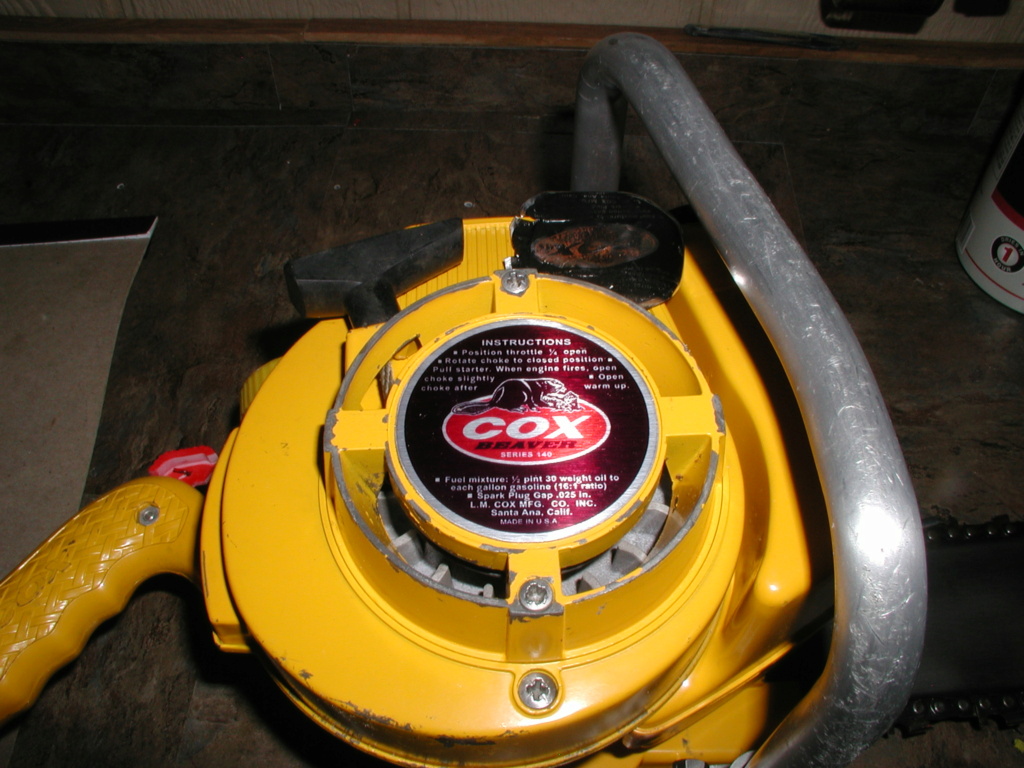
Doing the Beaver labels. Heat gun and a pick easily removes the old ones.
I'm always open to suggestions for improvement. The old "gray matter" isn't what it used to be.

On the original, I made a buck for consistency among the four and pulled some wet 1/32" balsa over it. Probably Ambroid but may have been epoxy, if it had been invented yet.


Doing the Beaver labels. Heat gun and a pick easily removes the old ones.

I'm always open to suggestions for improvement. The old "gray matter" isn't what it used to be.

rsv1cox- Top Poster


Posts : 10556
Join date : 2014-08-18
Location : West Virginia
 Re: New P-38 profile scratch build log
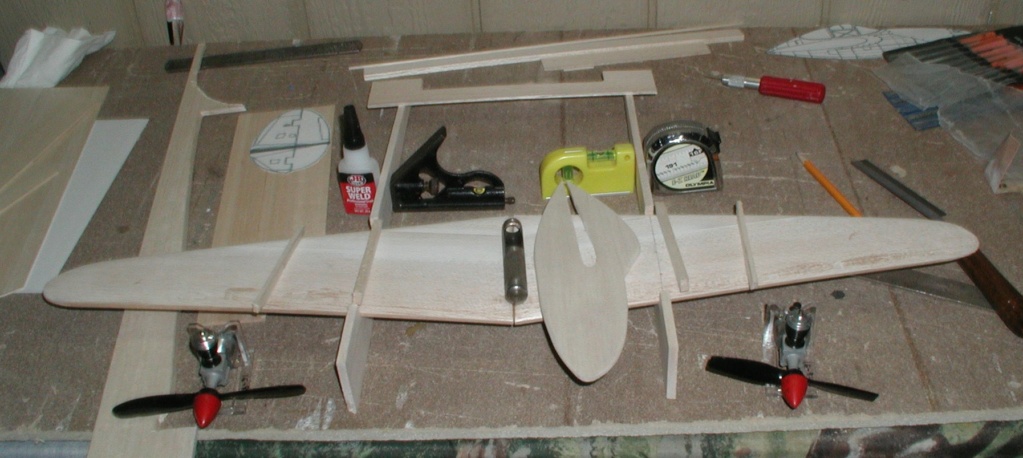
I'm at that "That looks about right" stage.
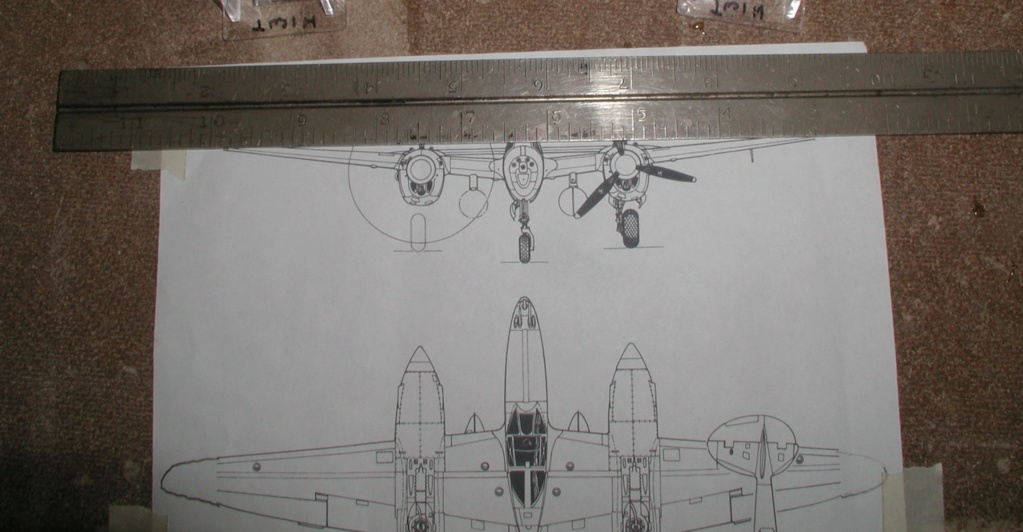
45 years ago I got close to scale, very close. Today I don't have a clue but I press on. I finally got the vertical stab/rudder's size about right. I have to copy, size, and print from book sized plans because I can't draw. Laying the fins out on 1/8" and sand to shape or until I'm happy.
Cut-out the wing saddles. Guessed, looks close. Over-wing piece will be airfoiled and somehow become the supercharger. Still thinking about G or J styles.
Still fun after all these years!
Somehow I got the wing at 29 1/2 inches, original is 26". Don't ask me how! I think I meant to cut it to size, I built the wing a couple of years ago. Hundreds of thousands of brain cells have died since then. I could cut it and do it now. Not going to, more wing is better right!......
I think I have the last Army piece that Cox offered. A tank on a flatcar. Not sure, just know it's not a Sherman. Abhrams maybe. Not period correct with the rest.
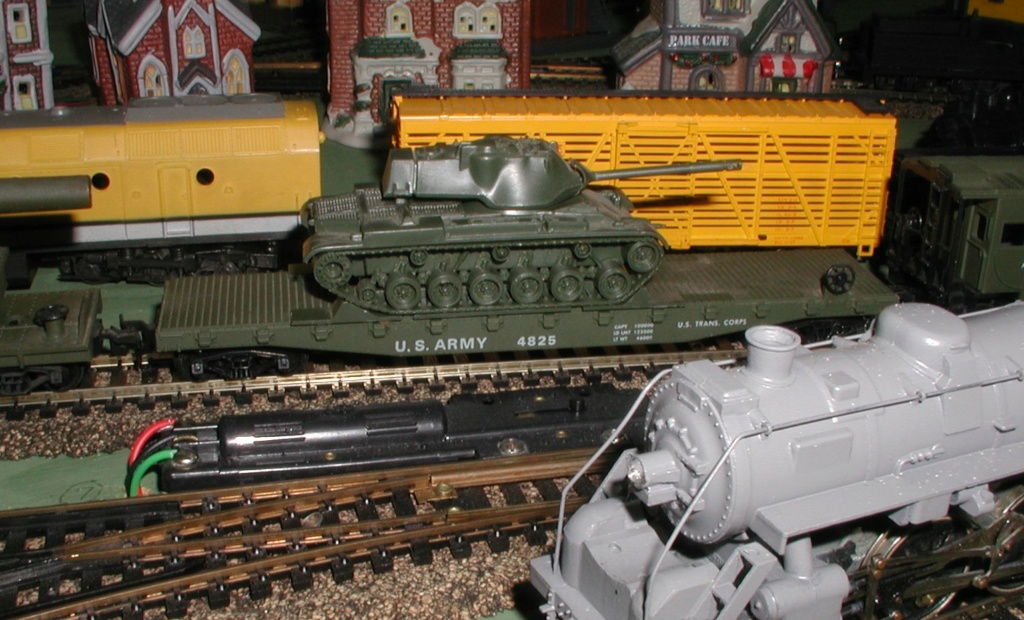
Edit: Nope, not an Abhrams, no side armor. M-7 maybe.
45 years ago I got close to scale, very close. Today I don't have a clue but I press on. I finally got the vertical stab/rudder's size about right. I have to copy, size, and print from book sized plans because I can't draw. Laying the fins out on 1/8" and sand to shape or until I'm happy.
Cut-out the wing saddles. Guessed, looks close. Over-wing piece will be airfoiled and somehow become the supercharger. Still thinking about G or J styles.
Still fun after all these years!
Somehow I got the wing at 29 1/2 inches, original is 26". Don't ask me how! I think I meant to cut it to size, I built the wing a couple of years ago. Hundreds of thousands of brain cells have died since then. I could cut it and do it now. Not going to, more wing is better right!......

I think I have the last Army piece that Cox offered. A tank on a flatcar. Not sure, just know it's not a Sherman. Abhrams maybe. Not period correct with the rest.

Edit: Nope, not an Abhrams, no side armor. M-7 maybe.

rsv1cox- Top Poster


Posts : 10556
Join date : 2014-08-18
Location : West Virginia

Levent Suberk- Diamond Member

- Posts : 2204
Join date : 2017-12-24
Location : Türkiye
 Re: New P-38 profile scratch build log
I think that your right Levent. Thanks - that's a great picture.

rsv1cox- Top Poster


Posts : 10556
Join date : 2014-08-18
Location : West Virginia
 Re: New P-38 profile scratch build log
rsv1cox wrote:
I'm always open to suggestions for improvement. The old "gray matter" isn't what it used to be.
I can only hope I have as much later on in my life Robert..
 Re: New P-38 profile scratch build log
roddie wrote:rsv1cox wrote:
I'm always open to suggestions for improvement. The old "gray matter" isn't what it used to be.
I can only hope I have as much later on in my life Robert..
Senior Moments roddie. I have no idea! It is supposed to be the same length and I never noticed it until yesterday. Oh well.
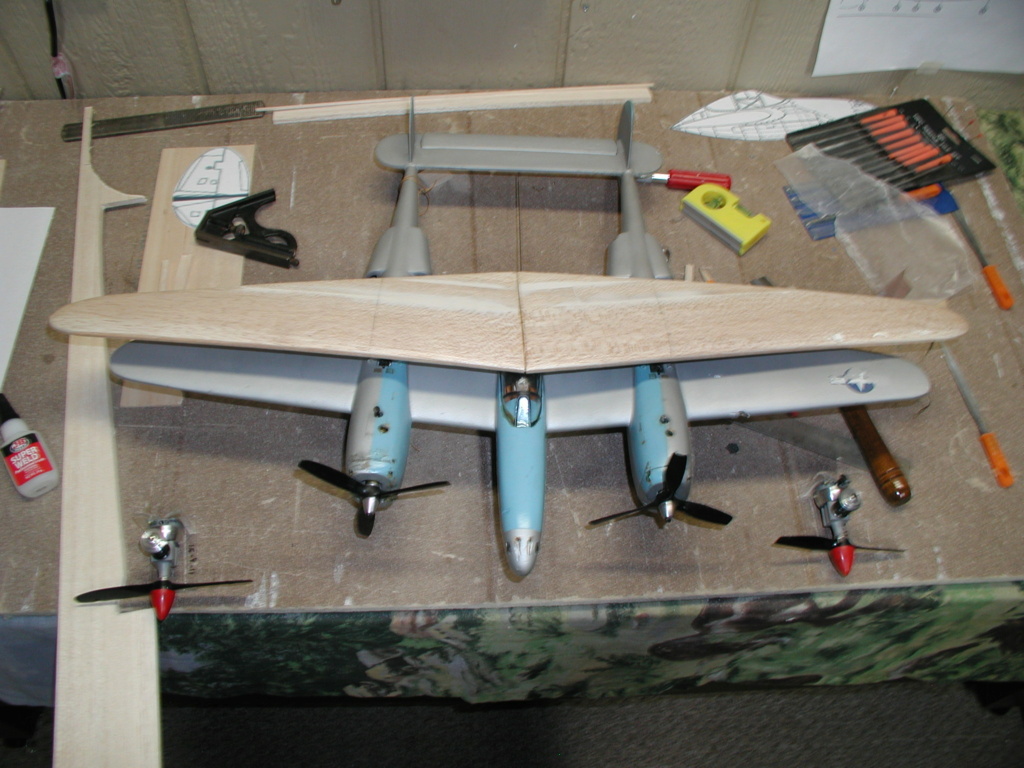
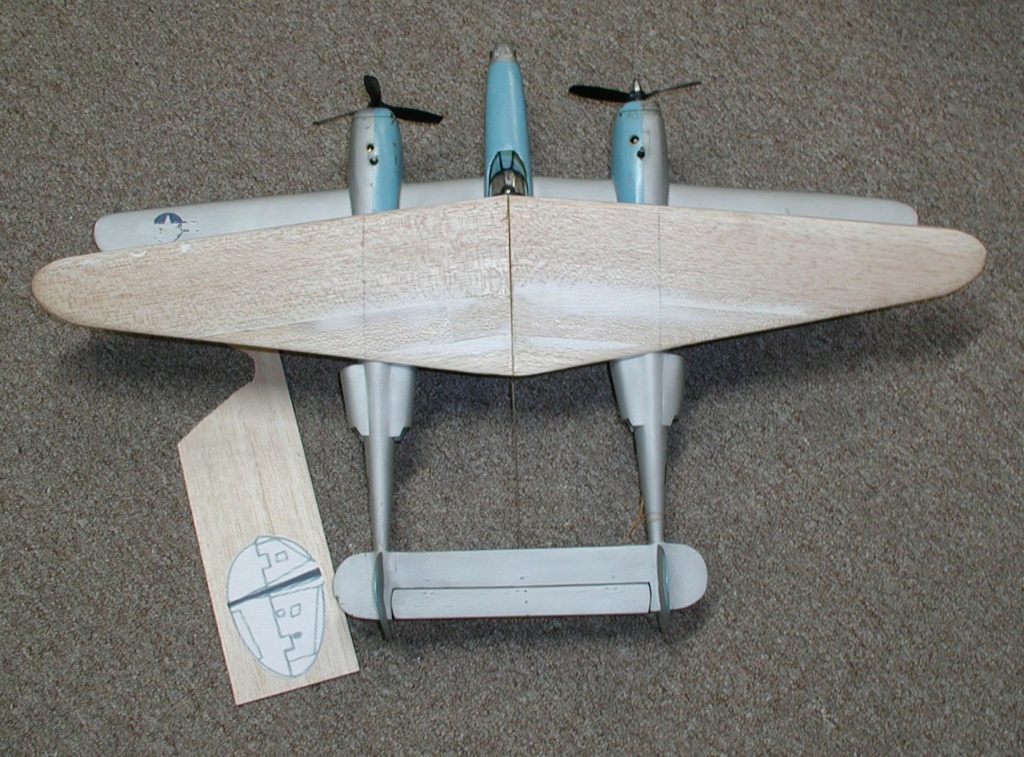
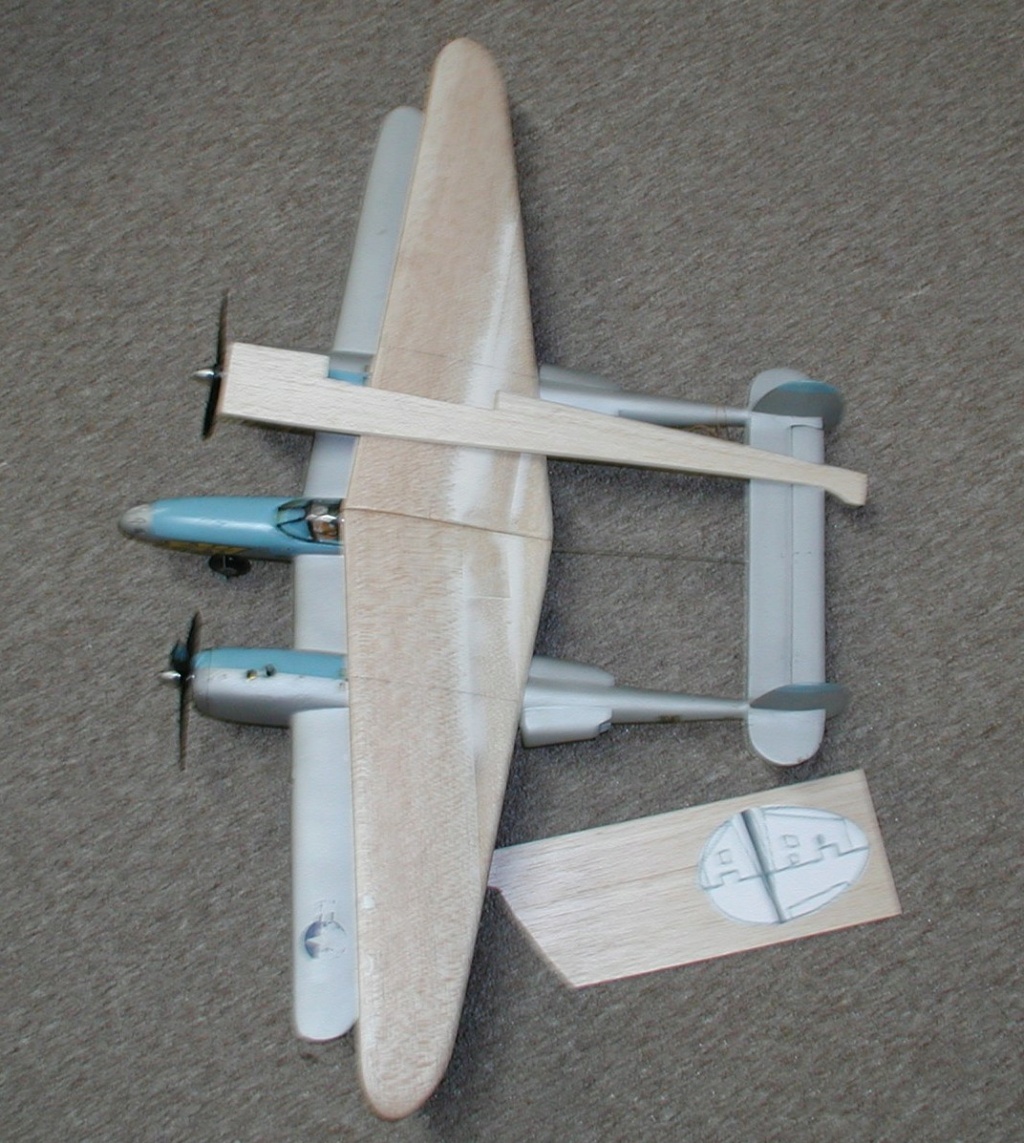
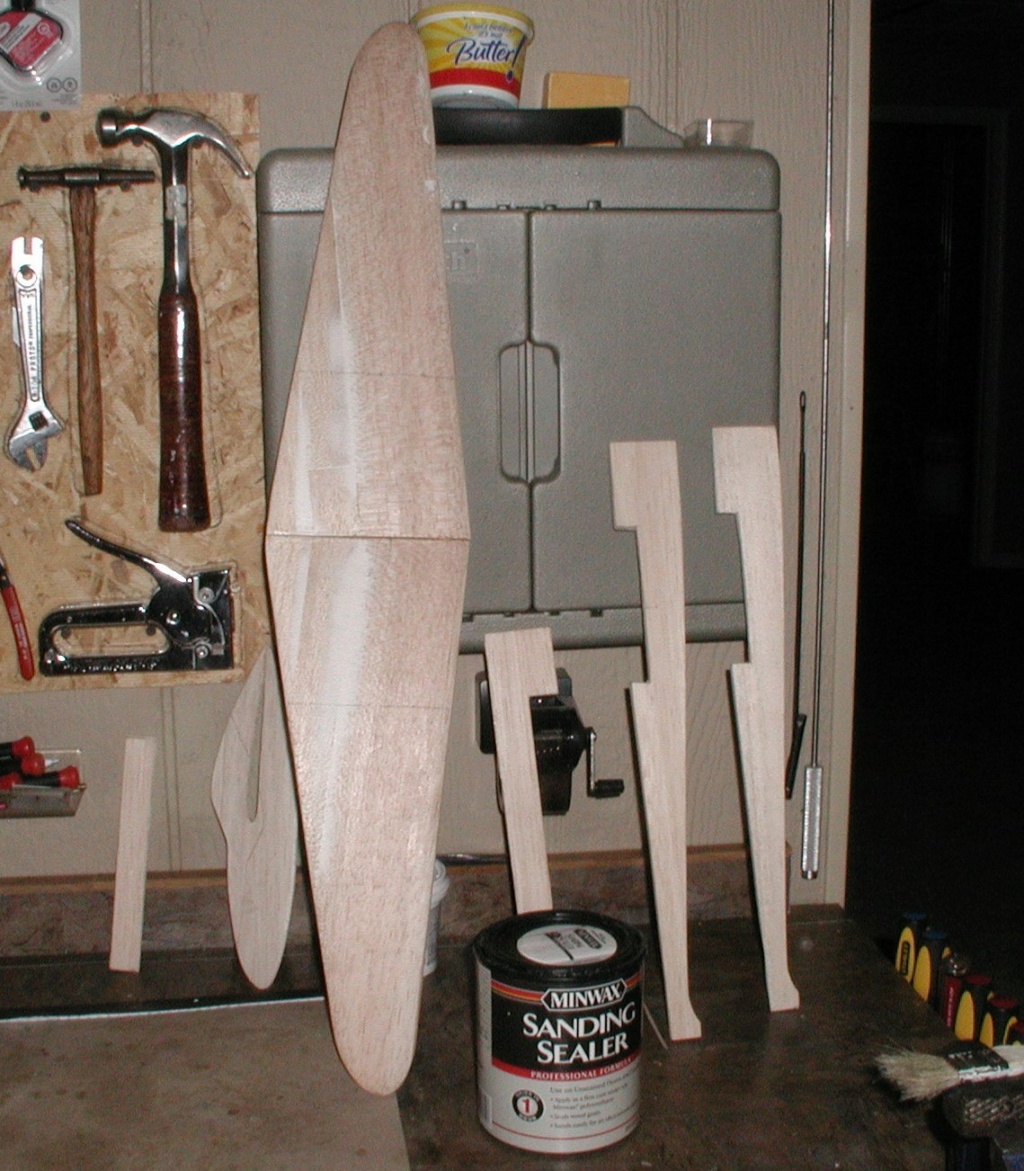
As luck would have it, I cut the booms long thinking I could cut them to size later. Looks like I have the fins too large also. "Stand-off" scale, way stand off!
First application of sanding sealer, most will be sanded off then a second coat applied which makes a big difference.

rsv1cox- Top Poster


Posts : 10556
Join date : 2014-08-18
Location : West Virginia
 Re: New P-38 profile scratch build log
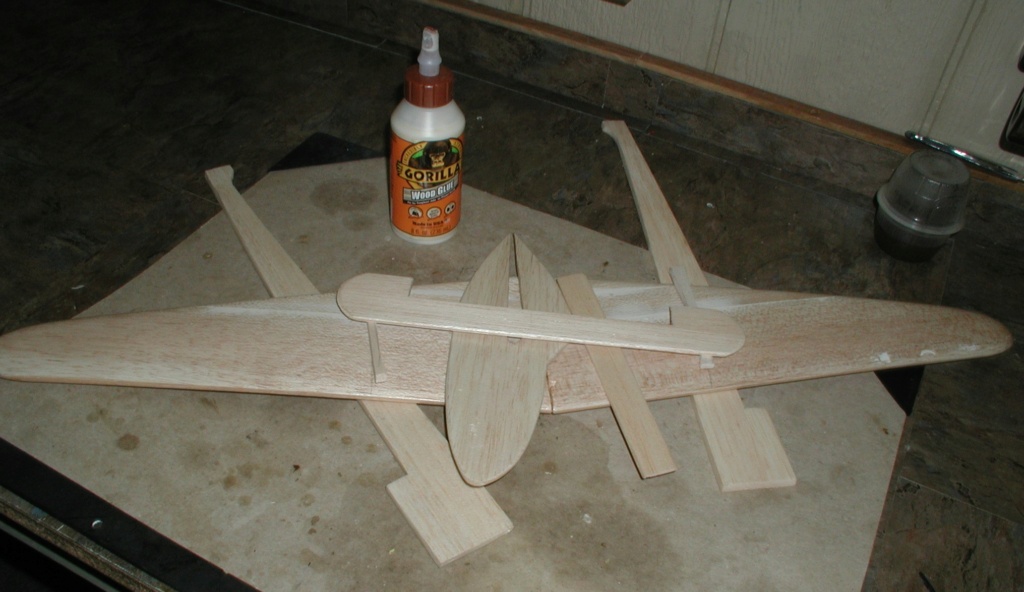
Still at it. A little at a time fitting it in around other things.
Crash landing.........actually just gathering for final sanding bfore assembly
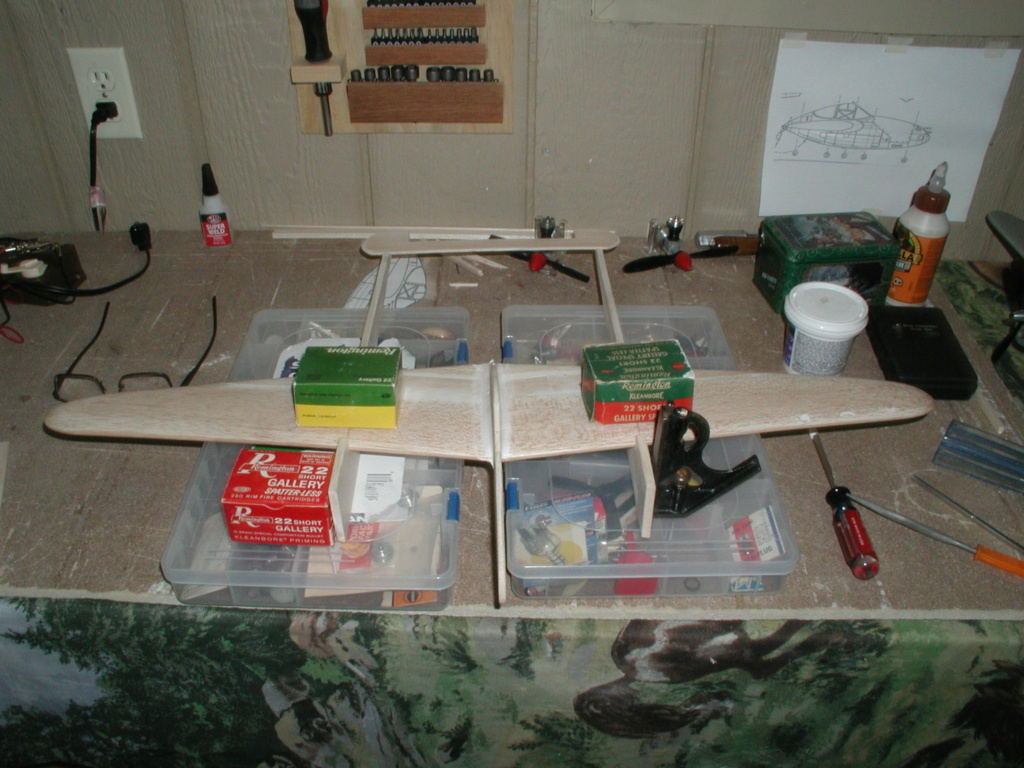
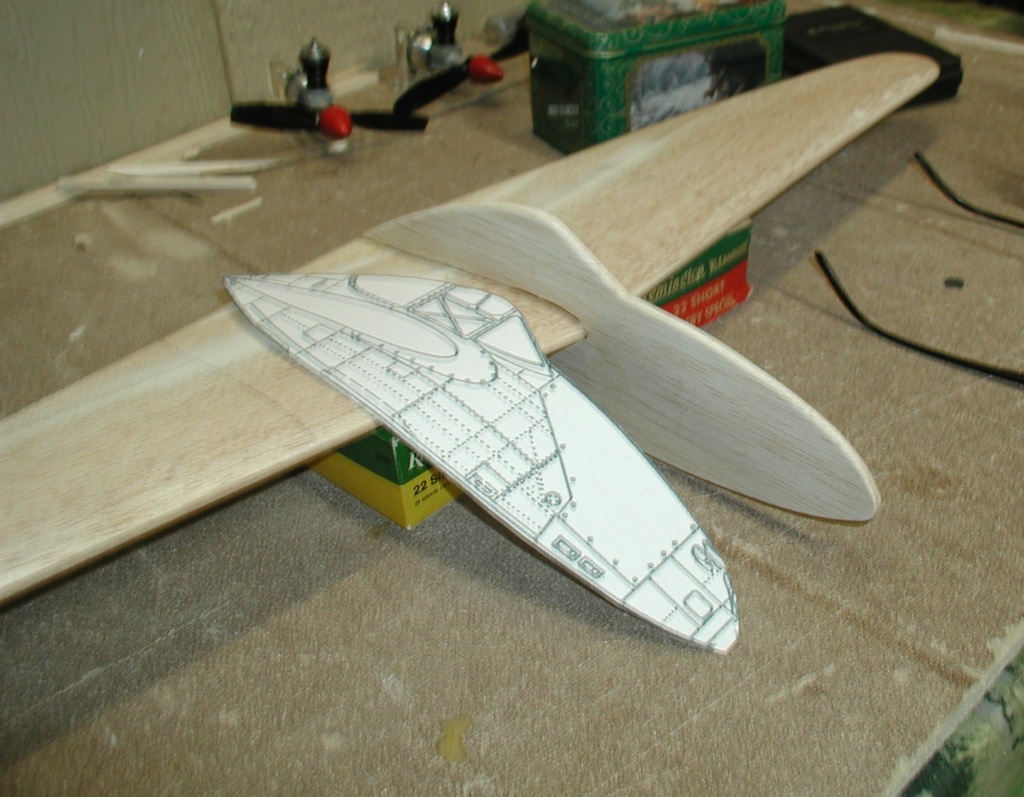
I'm not a detail guy, I can hardly draw a line to outine/paint the greenhouse. But, I can cut out this cockpit and glue it on then protect with clear.........maybe? It's the same template that I used to cut-out the pilots pod. Black line on top, silver for the windshield on the balsa.
Crash landing.........actually just gathering for final sanding bfore assembly


I'm not a detail guy, I can hardly draw a line to outine/paint the greenhouse. But, I can cut out this cockpit and glue it on then protect with clear.........maybe? It's the same template that I used to cut-out the pilots pod. Black line on top, silver for the windshield on the balsa.


rsv1cox- Top Poster


Posts : 10556
Join date : 2014-08-18
Location : West Virginia
 Re: New P-38 profile scratch build log
I like that idea on the canopy Bob, Maybe shade it a little with a blue high lighter before you add clear over it?…. Only thing is you’ll need both a right and a left if you don’t already have it….. If you need it mirrored I bet Levent could work some magic on it….

rdw777- Diamond Member


Posts : 1280
Join date : 2021-03-11
Location : West Texas
 Re: New P-38 profile scratch build log
rdw777 wrote:I like that idea on the canopy Bob, Maybe shade it a little with a blue high lighter before you add clear over it?…. Only thing is you’ll need both a right and a left if you don’t already have it….. If you need it mirrored I bet Levent could work some magic on it….
That's my concern Robert trying to figure out how to reverse an image on my computer/printer. I'm a computer illiterate.
I talked to my son, he says he will do it. Does it all the time with print media. I sent him a scan.
Glued it this morning, for better or worse. Fins, landing gear, bell-crank, elevator to go. Fun stuff.


rsv1cox- Top Poster


Posts : 10556
Join date : 2014-08-18
Location : West Virginia
 Re: New P-38 profile scratch build log
The Lightning is looking great, Bob!
For a mirror image copy, try a print shop.
Many copiers now have a mirror image print capability.
For a mirror image copy, try a print shop.
Many copiers now have a mirror image print capability.

duaneh- Gold Member

- Posts : 199
Join date : 2019-04-06

rsv1cox- Top Poster


Posts : 10556
Join date : 2014-08-18
Location : West Virginia
 Re: New P-38 profile scratch build log
thats a beautiful paint scheme
if ya bored? here is another
http://www.warbird.com/lefty.html
white lightning. was brilliant. now a red bull plane
if ya bored? here is another
http://www.warbird.com/lefty.html
white lightning. was brilliant. now a red bull plane
cstatman- Platinum Member


Posts : 534
Join date : 2021-02-17
Age : 59
Location : San Jose, CA

Levent Suberk- Diamond Member

- Posts : 2204
Join date : 2017-12-24
Location : Türkiye

rsv1cox- Top Poster


Posts : 10556
Join date : 2014-08-18
Location : West Virginia
 Re: New P-38 profile scratch build log
I'm going to make it and will send A4 page here. It is best to print decals on clear vinyl A4 sheet because no need to cut all lettering one by one. If you also have chrome adhesive back decal sheet it will be good for a more realistic canopy. I also make a blue grey shade canopy decals on one A4 page if you don't have chrome sheet.
If you don't have clear vinyl sheet or chrome sheet, then please let me know, I can print and send decals to your address at no cost but need to wait about ten days by airmail
If you don't have clear vinyl sheet or chrome sheet, then please let me know, I can print and send decals to your address at no cost but need to wait about ten days by airmail

Levent Suberk- Diamond Member

- Posts : 2204
Join date : 2017-12-24
Location : Türkiye
 Re: New P-38 profile scratch build log
Levent Suberk wrote:I'm going to make it and will send A4 page here. It is best to print decals on clear vinyl A4 sheet because no need to cut all lettering one by one. If you also have chrome adhesive back decal sheet it will be good for a more realistic canopy. I also make a blue grey shade canopy decals on one A4 page if you don't have chrome sheet.
If you don't have clear vinyl sheet or chrome sheet, then please let me know, I can print and send decals to your address at no cost but need to wait about ten days by airmail
Thanks Levent. PM sent.
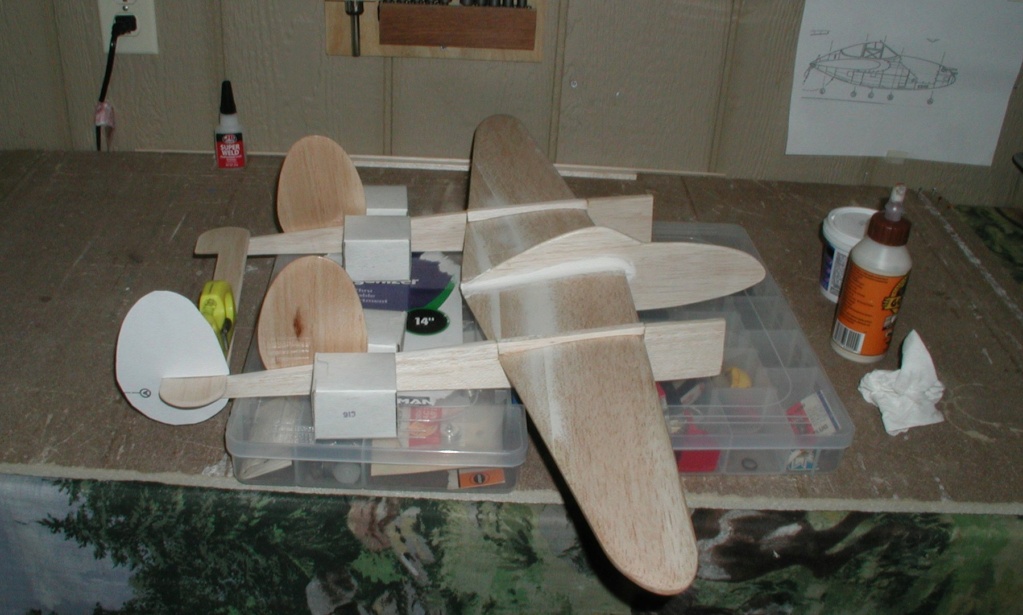
I finally got around to doing the vertical stab/rudders. Thinking going Ken's route and not putting in any deflection. I didn't put hardly any in the original and it hung out on the lines pretty good. A couple of shims on the outside of each engine ought to do the job.
Bob

rsv1cox- Top Poster


Posts : 10556
Join date : 2014-08-18
Location : West Virginia
 Re: New P-38 profile scratch build log
It's looking good Bob , with the decals Levent are making for you will really bring out the glory in the P-38 ! Want be far from doing the engines , should bee fun .

getback- Top Poster


Posts : 10116
Join date : 2013-01-18
Age : 66
Location : julian , NC
 Re: New P-38 profile scratch build log
Hey Robert! You know I'm liking this build! I wouldn't be too concerned about the wingspan difference. Mine's the same (26") as your 1st model.. but you're only talking 1.5" more/panel on this one.. and with a scale-like taper out to the tips.. I'm thinking that it's gonna' be more stable overall. A pair of healthy "Black Widow's" would give some extra oomph.. as compared to the Golden Bee's. That's always a plus.
I'm going to PM you with some other comments.
I'm going to PM you with some other comments.
Page 1 of 5 • 1, 2, 3, 4, 5 
 Similar topics
» Hybrid-Profile Flite Streak/Cox Hyper Viper scratch build
» cowled fuse-kits for 1/2A profile scratch-building
» My Latest Scratch build Cox powered car
» Scratch build BRM - a first
» La Stick Scratch Build for Cox Pee Wee .020
» cowled fuse-kits for 1/2A profile scratch-building
» My Latest Scratch build Cox powered car
» Scratch build BRM - a first
» La Stick Scratch Build for Cox Pee Wee .020
Page 1 of 5
Permissions in this forum:
You cannot reply to topics in this forum

 Rules
Rules