Log in
Search
Latest topics
» WenMac 049 - Glow Plug & Head Gasket replacements?by Ken Cook Today at 7:50 pm
» 12 string guitar suggestions
by akjgardner Today at 7:08 pm
» audio-tach anyone?
by roddie Today at 2:58 pm
» A choke-tube with velocity-stack configured Bee
by roddie Today at 2:54 pm
» Jim Walkers FireBee - This is going to be fun
by rsv1cox Today at 2:43 pm
» Nostalgia alert, my 1959 Corvette revisited
by Admin Today at 1:11 pm
» Hawk had breakfast and then took a bath
by rsv1cox Today at 10:26 am
» Prop Rod - resto to a runner
by rsv1cox Today at 7:32 am
» Jim Walker Firebaby
by rdw777 Yesterday at 4:58 pm
» Prayers for my Wife Please
by akjgardner Yesterday at 10:28 am
» Cox prop rod
by Wiggy Fri May 17, 2024 4:30 pm
» "Red Neck" .049 elec. starter
by getback Fri May 17, 2024 7:19 am
Let's see where this goes...
Page 2 of 2
Page 2 of 2 •  1, 2
1, 2
 Re: Let's see where this goes...
batjac wrote:The next portion showing pulling it into Designscape should go faster.
Software change?

I did find out I'll need to swing the svg through two other programs to get G-code for the CNC cutter. However, the cutter has such a small table it may not be worth the effort...sigh. Still watching an learning.
Keep up the great work. WooHoo, Mark!
_________________
Never enough time to build them all...always enough time to smash them all!

944_Jim- Diamond Member


Posts : 1964
Join date : 2017-02-08
Age : 59
Location : NE MS
 Re: Let's see where this goes...
Jim,
You need two programs to use the Cricut machines for this. Any software that will output a .svg file, and the Cricut Designspace software that is specific to Cricut machines. I think there may be a third party software to run the Cricut machines, but I don't know what it is. I do know that a year or two ago there was a third party program that was popular, but Cricut, or whoever the mother company is, sued them and successfully got them to stop making their software available to hobbyists. So now we have to use the proprietary Cricut software. I chose Inkscape as the program I'm going to use for creating the .svg files.
As for the video, I have to go back and do some editing. I realized last night I was making something way too complicated and I have to make a quick video addendum.
The Abstruse Mark

batjac- Diamond Member


Posts : 2340
Join date : 2013-05-22
Age : 61
Location : Broken Arrow, OK, USA
 Re: Let's see where this goes...
Make the cut was the 3rd party SW and Cricut sued the pants off them. I have a copy on my old laptop. It works in demo mode. It puts a big X cut as the final cut but if you power off the machine just as the last cut is made it prevents the X from being cut through it. I have an old cartridge cricut. It was probably 10 years ago the lawsuit happened.

Jason_WI- Top Poster


Posts : 3123
Join date : 2011-10-09
Age : 48
Location : Neenah, WI
 Re: Let's see where this goes...
Jason_WI wrote:Make the cut was the 3rd party SW and Cricut sued the pants off them. I have a copy on my old laptop. It works in demo mode. It puts a big X cut as the final cut but if you power off the machine just as the last cut is made it prevents the X from being cut through it. I have an old cartridge cricut. It was probably 10 years ago the lawsuit happened.
I have a older cartridge type Cricut (my wife's) It only runs programs off their cartridges, so it is limited in what I would use it for. We bought a Brother "Scan N Cut" which I played with long enough to scan and cut the ribs for Ken Willards Poolboy. I had heard about the fight between Cricut and Make the Cut. Cricut has since updated/redesigned newer machines and software that is not backwardly compatible with the older cartridge style unit.s, (sorta like 2.4g to my 72Hmz Radios! ) SO, now we have a a fairly expensive Boat anchor! I've seen similar machines on CraigsList for $15-$20.
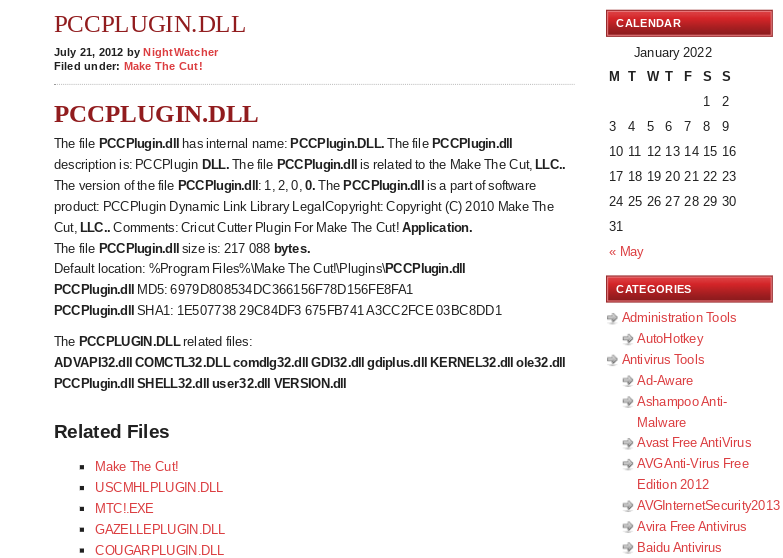
I'm not sure if the NEW version of Make the Cut software would even run on Windows10 , and IF it did, would the download and install if the PCCplugin,dll file make it usable??


Marleysky- Top Poster


Posts : 3618
Join date : 2014-09-28
Age : 71
Location : Grand Rapids, MI
 Re: Let's see where this goes...
It was cold out today. When I took the trash out to the dumpster I got chilled to the bone. So I jumped in the shower to warm up. I do some of my best thinking in the shower. I thought up a couple of new things I can do with my Cricut Maker.
Something I figured out you can do with the Cricut machine for building wings. You can make jig ribs. You trace the root rib, the tip rib, and a rib somewhere in the center. Mark the leading edge, in this case a ¼” balsa stick. Mark upper and lower spars, here 3/16” sticks. Then you make a center line through the ribs. Measure a certain distance above and below the center line and make parallel lines. Box it in and you have your jig ribs. Note that these jib rigs also are cut back for the 1”x1/16” T.E. sheeting. This is especially good for tapered or swept wings as well as straight wings.
Cut the jig ribs out on the Cricut and slide the ¼” L.E. and the spars through the square holes cut out in the jig ribs. Arrange them over the wing plan and then place the remaining ribs in place. Glue the ribs to the spars and L.E. Then glue the upper and lower T.E. sheeting in place. Next your bellcrank mount, bellcrank, leadouots, and pushrod. Follow up with the center sheeting. Voila! A straight, twist-free wing! Note the dashed lines. These dashed lines will be cut out by the Cricut machine, so when you are ready you just complete the cuts and the ribs will stay in place with the jig pieces coming away.

I may have to start a Cricut Tips thread.
The Dancing Mark
Something I figured out you can do with the Cricut machine for building wings. You can make jig ribs. You trace the root rib, the tip rib, and a rib somewhere in the center. Mark the leading edge, in this case a ¼” balsa stick. Mark upper and lower spars, here 3/16” sticks. Then you make a center line through the ribs. Measure a certain distance above and below the center line and make parallel lines. Box it in and you have your jig ribs. Note that these jib rigs also are cut back for the 1”x1/16” T.E. sheeting. This is especially good for tapered or swept wings as well as straight wings.
Cut the jig ribs out on the Cricut and slide the ¼” L.E. and the spars through the square holes cut out in the jig ribs. Arrange them over the wing plan and then place the remaining ribs in place. Glue the ribs to the spars and L.E. Then glue the upper and lower T.E. sheeting in place. Next your bellcrank mount, bellcrank, leadouots, and pushrod. Follow up with the center sheeting. Voila! A straight, twist-free wing! Note the dashed lines. These dashed lines will be cut out by the Cricut machine, so when you are ready you just complete the cuts and the ribs will stay in place with the jig pieces coming away.

I may have to start a Cricut Tips thread.
The Dancing Mark

batjac- Diamond Member


Posts : 2340
Join date : 2013-05-22
Age : 61
Location : Broken Arrow, OK, USA
 Re: Let's see where this goes...
Hey Mark, I just caught-up since my first post here.. and am marveling at the parts-sheets that you've cut! Would it be possible to butt-joint (CA glue) X3 2-inch width soft balsa sheets.. to make a 6" width panel? I know it is.. but do you think the machine might get hung-up on a CA-glued joint?
Also; have you (or can you..) cut thicker than the 3/32" balsa? Was the 3/32" cut in X3-passes?
Regarding partial cut-through of a sheet; you can always block-sand the backside to release the captive parts/pieces..
There's a "Time-Saver" (sanding machine) where I work.. and I processed some rough-cut balsa through it a while back. I need to do a production-run and I'll have enough.. so that I don't need to buy any from anywhere.. unless I need contest-grade for something.
 Re: Let's see where this goes...
OH YEA.... now I remember a candidate hobby application for the cricut....... "Gaskets"!!!........ Head-gaskets for those old steel-fin stoves! Maybe that's how "Chellie" produced the McCoy gasket-kits?
 Re: Let's see where this goes...
Okay, I uploaded the first two videos on how I did the above cuts on the FF model Aeronca Champ. I really hate the video editing program that comes with Windows 10, so I finally dug out my old computer that has Windows 7 and Windows Movie Maker on it. I found the install file for Movie Maker and transferred it to my Windows 10 laptop. Unfortunately, I couldn’t make Movie Maker work on Win10. So I moved the movie files to the old computer and finished up the editing. Then when I tried uploading the videos, I had some unknown errors loading them. I finally got that working, and now the videos are up for your education and edification.
Part 1:
Part 2:
I learned a lot doing the videos, and had a couple more ideas since then, so I’m going to make a third video that incorporates some time saving steps and things to make the cuts more accurate.
The Charmed Mark
Part 1:
Part 2:
I learned a lot doing the videos, and had a couple more ideas since then, so I’m going to make a third video that incorporates some time saving steps and things to make the cuts more accurate.
The Charmed Mark

batjac- Diamond Member


Posts : 2340
Join date : 2013-05-22
Age : 61
Location : Broken Arrow, OK, USA
Page 2 of 2 •  1, 2
1, 2
 Similar topics
» Cleaning engines crock pot style
» And the guess whats hiding in there winner is..................................
» Lets all take a walk down NOSTALGIA Lane
» i have an ohlsson&rice tether car motor and it needs help
» Lets talk screwdrivers and Golden Bees
» And the guess whats hiding in there winner is..................................
» Lets all take a walk down NOSTALGIA Lane
» i have an ohlsson&rice tether car motor and it needs help
» Lets talk screwdrivers and Golden Bees
Page 2 of 2
Permissions in this forum:
You cannot reply to topics in this forum

 Rules
Rules


