

 Rules
Rules
by Mark Boesen Today at 9:10 am
» Speed plane - Crispy but not too crispy
by GallopingGhostler Today at 8:35 am
» Tired of it all…
by Coxfledgling Today at 7:23 am
» PT-19 Mayhem at Buder Park...a Decade Ago!!!!
by getback Today at 6:29 am
» Jim Walkers FireBee - This is going to be fun
by MauricioB Yesterday at 11:53 pm
» Project Cox .049 r/c & Citabrian Champion
by MauricioB Yesterday at 11:36 pm
» Roddie's flat-bottomed boat..
by 1/2A Nut Yesterday at 10:51 pm
» Three -- sold out (making two more) Cox .010 Carburetors with wrench
by balogh Yesterday at 12:34 am
» Joe Wagners Sioux
by GallopingGhostler Sat Apr 27, 2024 9:03 pm
» Happy Anzac Day!
by GallopingGhostler Sat Apr 27, 2024 4:16 pm
» Revivng Some Childhood Classics
by getback Sat Apr 27, 2024 7:31 am
» Fox .35 Modifications
by Ken Cook Sat Apr 27, 2024 3:16 am


Guillow's P40 Warhawk build, photos of the finished model
Page 2 of 5 •  1, 2, 3, 4, 5
 ![]()
Re: Guillow's P40 Warhawk build, photos of the finished model
![]() OVERLORD Mon Jun 02, 2014 10:08 am
OVERLORD Mon Jun 02, 2014 10:08 am
Lieven
OVERLORD- Diamond Member

- Posts : 1789
Join date : 2013-03-19
Age : 57
Location : Normandy, France
Re: Guillow's P40 Warhawk build, photos of the finished model
![]() OVERLORD Sat Jun 07, 2014 1:05 am
OVERLORD Sat Jun 07, 2014 1:05 am
OVERLORD- Diamond Member
- Posts : 1789
Join date : 2013-03-19
Age : 57
Location : Normandy, France
Re: Guillow's P40 Warhawk build, photos of the finished model
![]() RknRusty Sat Jun 07, 2014 1:55 am
RknRusty Sat Jun 07, 2014 1:55 am
Rusty
_________________
...and never Ever think about how good you are at something...
while you're doing it!
My Hot Rock & Blues Playlist

RknRusty- Rest In Peace

- Posts : 10869
Join date : 2011-08-10
Age : 68
Location : South Carolina, USA
Re: Guillow's P40 Warhawk build, photos of the finished model
![]() ian1954 Sat Jun 07, 2014 4:48 am
ian1954 Sat Jun 07, 2014 4:48 am
I can see that you have started colouring. What are you using?
This is another neat and tidy build. I am watching progress as I am flipping from the "quick" iron on finishes back to the traditional doped finishing.
I have found though that what I used to use 50 years ago isn't made any more! Neither is the range of modelling tissues, nylons and silks.
Thanks
Ian

ian1954- Diamond Member
- Posts : 2688
Join date : 2011-11-16
Age : 69
Location : England
Re: Guillow's P40 Warhawk build, photos of the finished model
![]() OVERLORD Sat Jun 07, 2014 5:56 am
OVERLORD Sat Jun 07, 2014 5:56 am
It thought the simple way: after using dope, you clean your brush with cellulose thinner. Also after having painted your Airfix model with Humbrol, you clean your brush with cellulose thinner. So I mixed dope and Humbrol enamel. It works but the result is not that great. You keep on seeing lighter and darker areas. Also, you have to mix constantly because the paint sinks to the bottom of the jar.

I put 2 coats on. I going to try to do the upper part the similar way, but with a darker colour.
Lieven
OVERLORD- Diamond Member
- Posts : 1789
Join date : 2013-03-19
Age : 57
Location : Normandy, France
Re: Guillow's P40 Warhawk build, photos of the finished model
![]() OVERLORD Sat Jun 07, 2014 2:03 pm
OVERLORD Sat Jun 07, 2014 2:03 pm
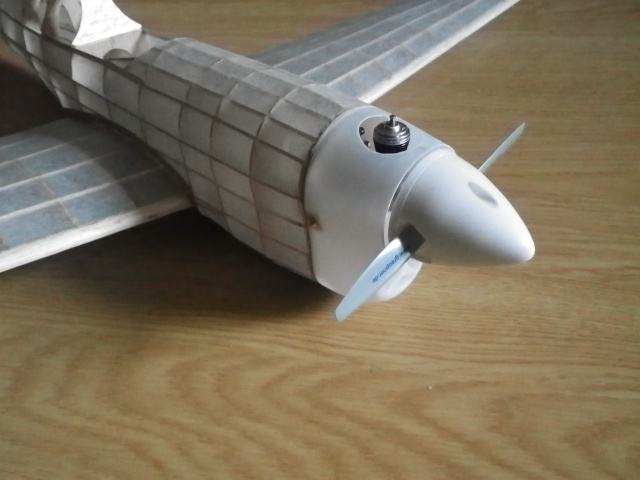
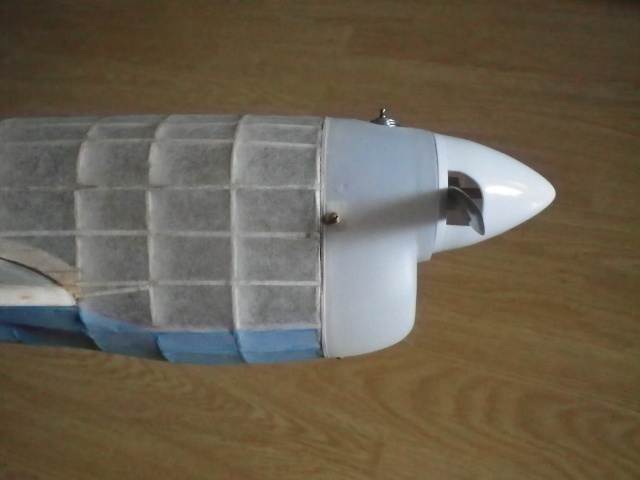
This is how it looks now. The dope covers ok but it's not perfect.


I took it out while there was no wind. It glides straight and quite level. I don't think it needs changing anything. I will do a final test when the wing is coloured and the canopy is on.
Videos are uploading now of me running after my plane like a little kid.
After testing, I noticed that I'll need to fix the engine better. Also, the dope doesn't seem to stick well on the Guillow's plastic parts.
Lieven
OVERLORD- Diamond Member
- Posts : 1789
Join date : 2013-03-19
Age : 57
Location : Normandy, France
Re: Guillow's P40 Warhawk build, photos of the finished model
![]() OVERLORD Sat Jun 07, 2014 4:02 pm
OVERLORD Sat Jun 07, 2014 4:02 pm
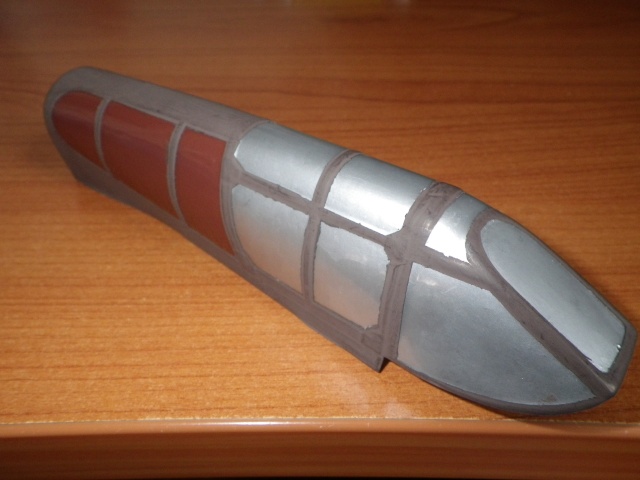
And from another angle
OVERLORD- Diamond Member
- Posts : 1789
Join date : 2013-03-19
Age : 57
Location : Normandy, France
Re: Guillow's P40 Warhawk build, photos of the finished model
![]() Kim Sat Jun 07, 2014 4:21 pm
Kim Sat Jun 07, 2014 4:21 pm
You probably already did it, but the paint might stick better if your roughened the plastic with sandpaper.

Kim- Top Poster


Posts : 8531
Join date : 2011-09-06
Location : South East Missouri
Re: Guillow's P40 Warhawk build, photos of the finished model
![]() RknRusty Sat Jun 07, 2014 7:46 pm
RknRusty Sat Jun 07, 2014 7:46 pm
Rusty
_________________
...and never Ever think about how good you are at something...
while you're doing it!
My Hot Rock & Blues Playlist
RknRusty- Rest In Peace
- Posts : 10869
Join date : 2011-08-10
Age : 68
Location : South Carolina, USA
Re: Guillow's P40 Warhawk build, photos of the finished model
![]() OVERLORD Sun Jun 08, 2014 5:24 am
OVERLORD Sun Jun 08, 2014 5:24 am
After painting, the canopy became a lot softer and changed shape a bit.
Lieven
OVERLORD- Diamond Member
- Posts : 1789
Join date : 2013-03-19
Age : 57
Location : Normandy, France
Re: Guillow's P40 Warhawk build, photos of the finished model
![]() getback Sun Jun 08, 2014 11:19 am
getback Sun Jun 08, 2014 11:19 am
 Getback
getback- Top Poster
-
Posts : 10123
Join date : 2013-01-18
Age : 66
Location : julian , NC
Re: Guillow's P40 Warhawk build, photos of the finished model
![]() roddie Sun Jun 08, 2014 12:12 pm
roddie Sun Jun 08, 2014 12:12 pm
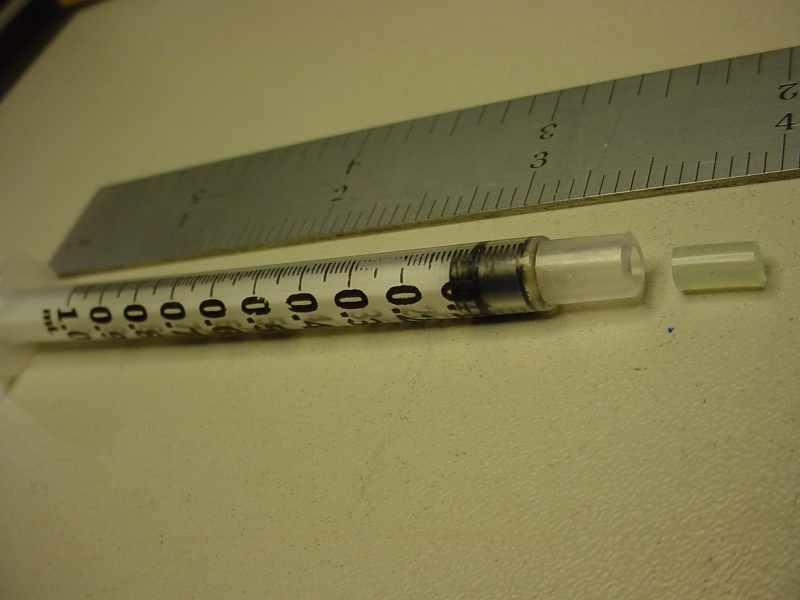
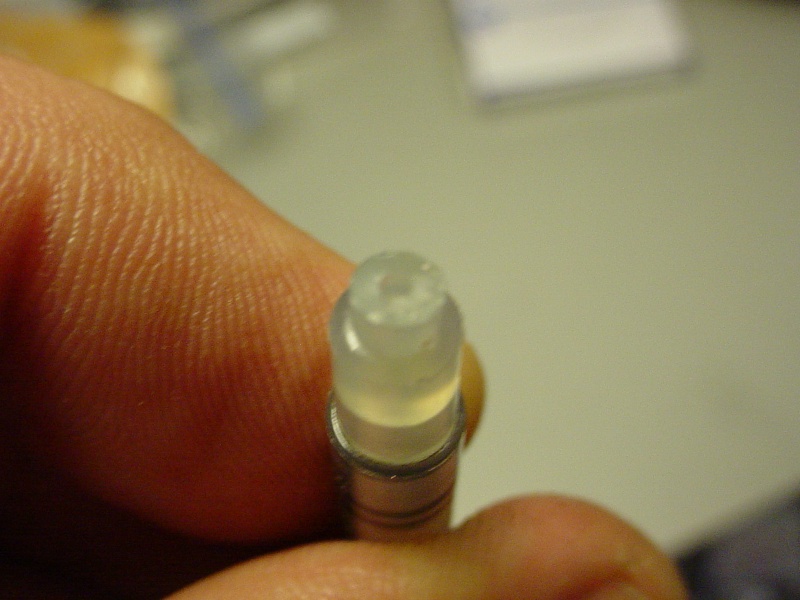
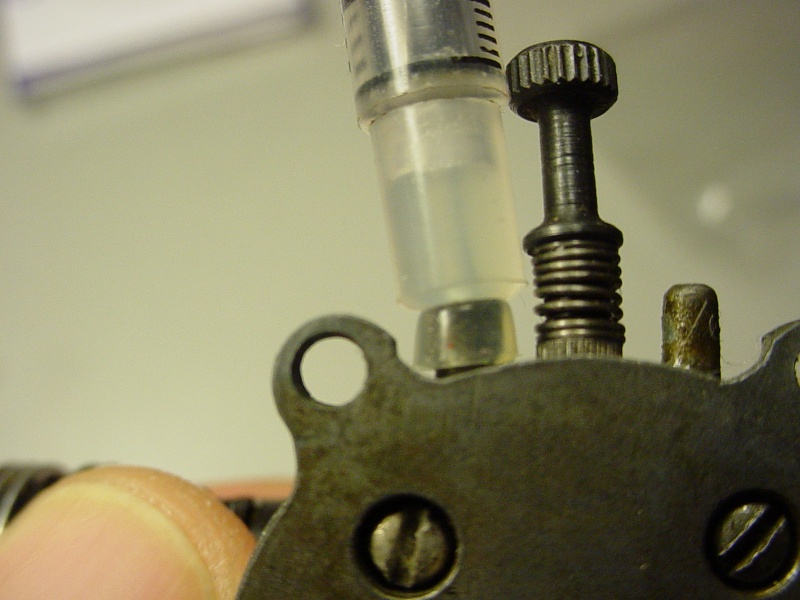
Here's something I just thought of, that would make it real easy to put a precise amount of fuel in your Pee Wee's little tank. It's a syringe that they'll probably give you at the pharmacy counter if you don't already have one. This one has a tip opening, that small-size silicone fuel tubing fits tightly inside by "twisting" it in. Cut a piece about 5/16" long.. and you can just press the syringe onto the backplate's nipple easily.

roddie- Top Poster
- Posts : 8274
Join date : 2013-07-17
Age : 64
Location : N. Smithfield, Rhode Island -

Re: Guillow's P40 Warhawk build, photos of the finished model
![]() OVERLORD Mon Jun 09, 2014 1:56 pm
OVERLORD Mon Jun 09, 2014 1:56 pm
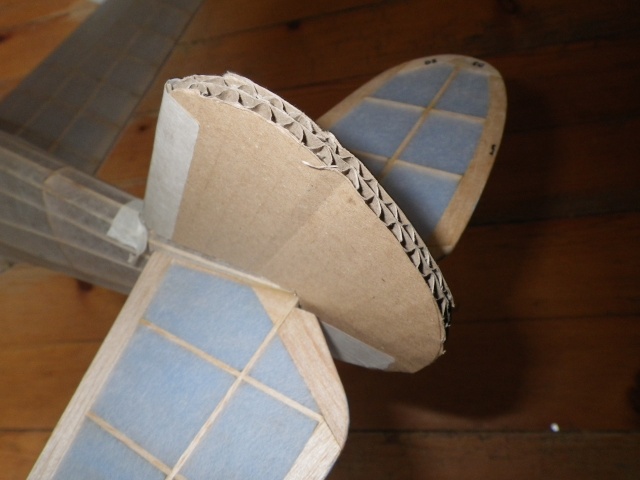
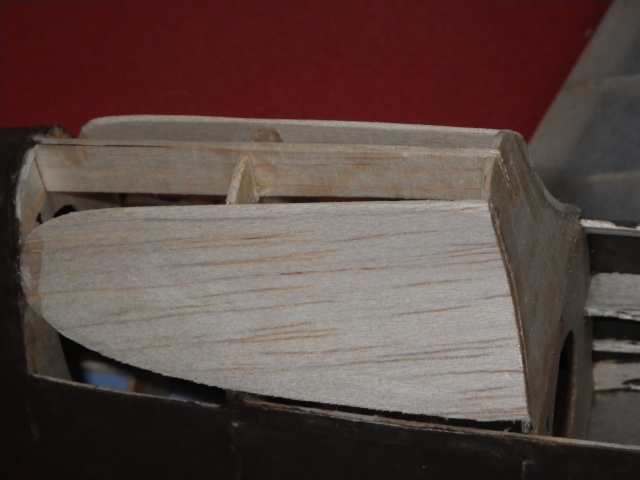
My painted canopy bothers me. Today, it looks like a gutter. You need at least 7 hands to get that in 1 go onto the fuse with glue on. That sounds like it's going to become a mess. Also, the rear part of the canopy is in fact fuselage with those windows you can't see through. What was in fact the purpose of having glass over a bulkhead?
What I will do is cut that aft part off the canopy and continue to finish the fuse with balsa for the concave bulkhead and tissue around it.
Lieven
OVERLORD- Diamond Member
- Posts : 1789
Join date : 2013-03-19
Age : 57
Location : Normandy, France
Re: Guillow's P40 Warhawk build, photos of the finished model
![]() OVERLORD Fri Jun 13, 2014 6:35 am
OVERLORD Fri Jun 13, 2014 6:35 am
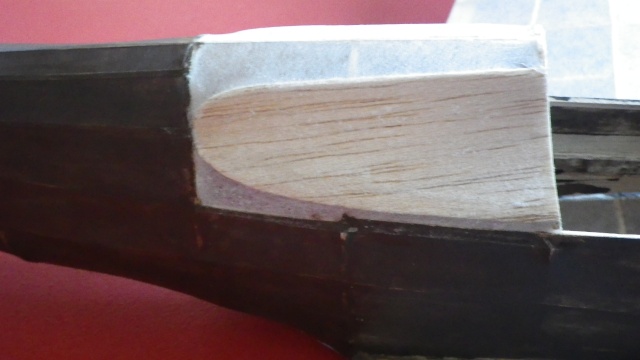
What I want to do now is glue a piece of stiff plastic on the fuse in way of both bulkheads. I only don't know what is the best way to do this without making glueing marks. Or should I tape it to the fuse?
What are your suggestions?
Lieven
OVERLORD- Diamond Member
- Posts : 1789
Join date : 2013-03-19
Age : 57
Location : Normandy, France
Re: Guillow's P40 Warhawk build, photos of the finished model
![]() roddie Fri Jun 13, 2014 5:30 pm
roddie Fri Jun 13, 2014 5:30 pm
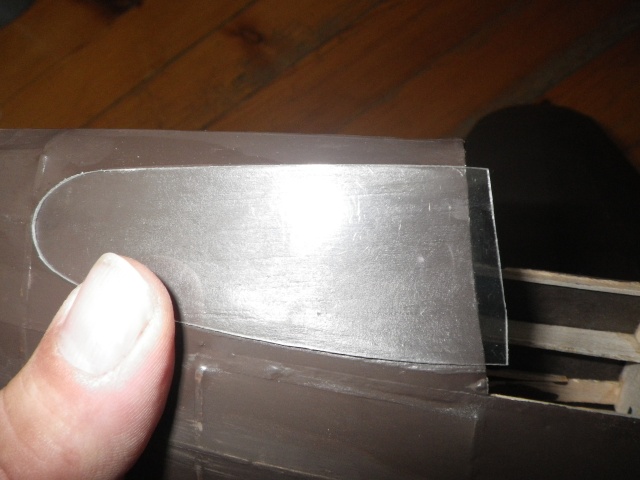
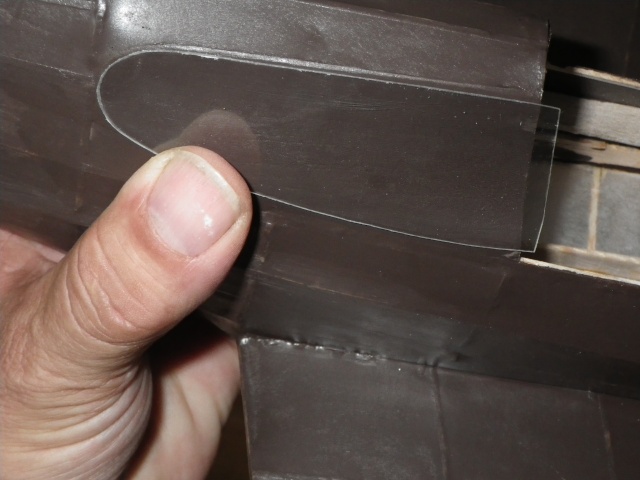
If you can fit your index finger all the way behind that balsa backer-panel.. you could "pinch" along the clear-panel with your thumb to get a good bond without stressing the framework. If you test a pc. on painted scrap, you'll probably find that light-reflection will offset any reduction in clarity from using the film. I have a remnant roll from a previous graphics job. (I used this to stick .005" sheet-brass tip-weights on my speed model)
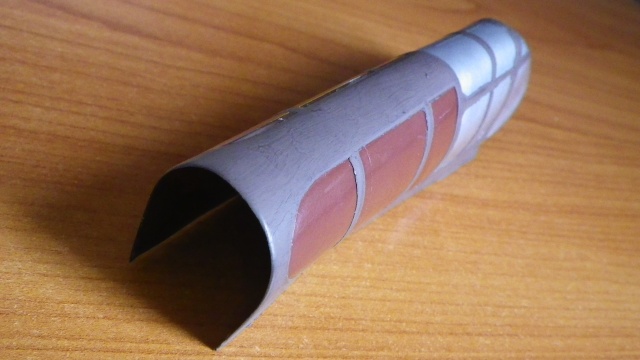
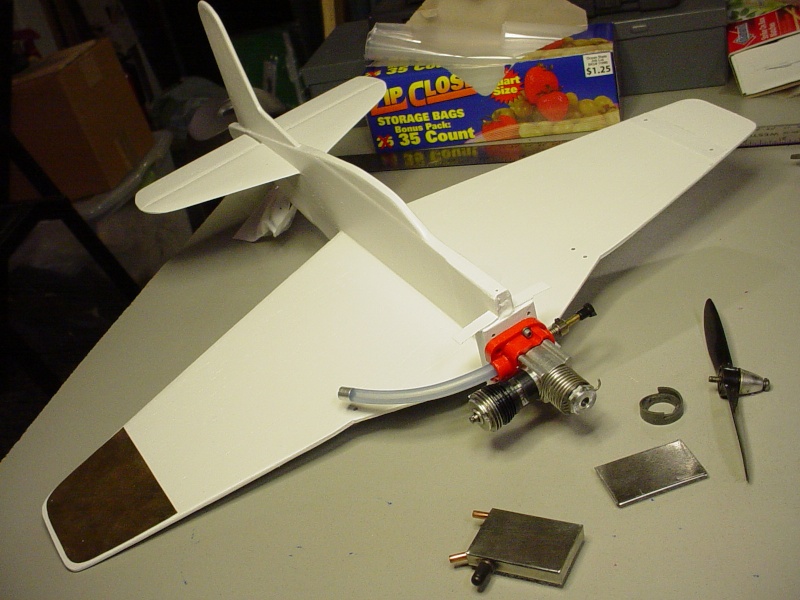
Here's a few photos of the product I have, and what you can expect it to look like when used with your clear panel piece.
My remnant roll's ordering info.

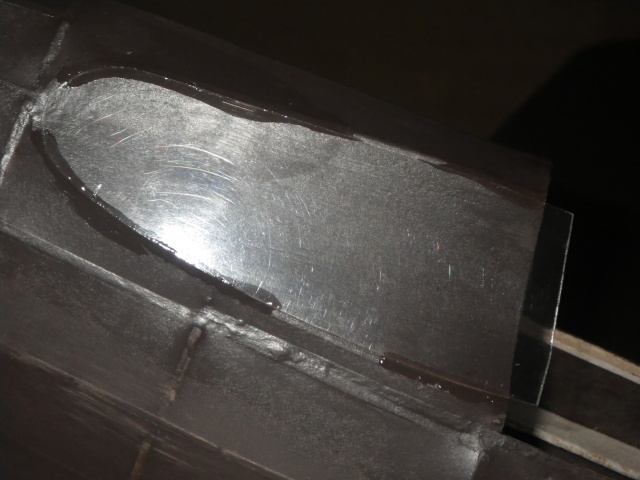
a small cut piece of the film with it's liner; adhered to a pc. of thin clear plastic scrap
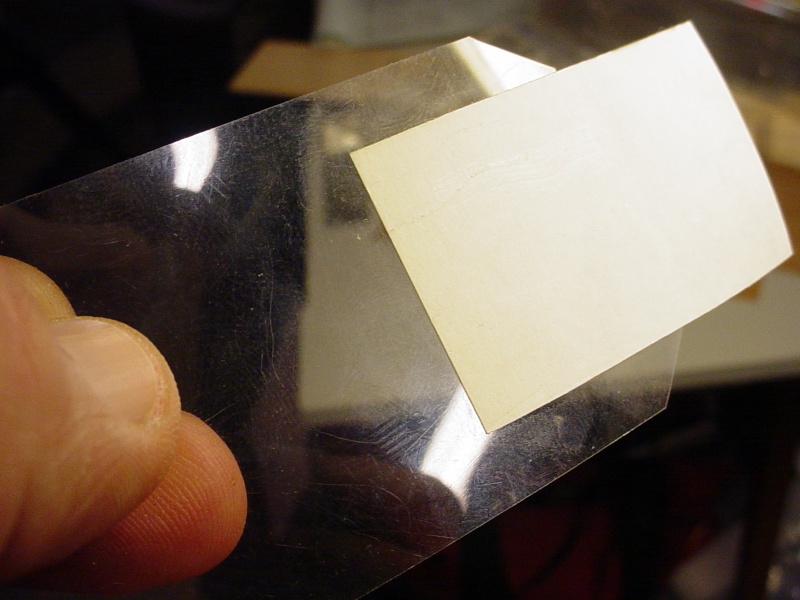
with liner removed..
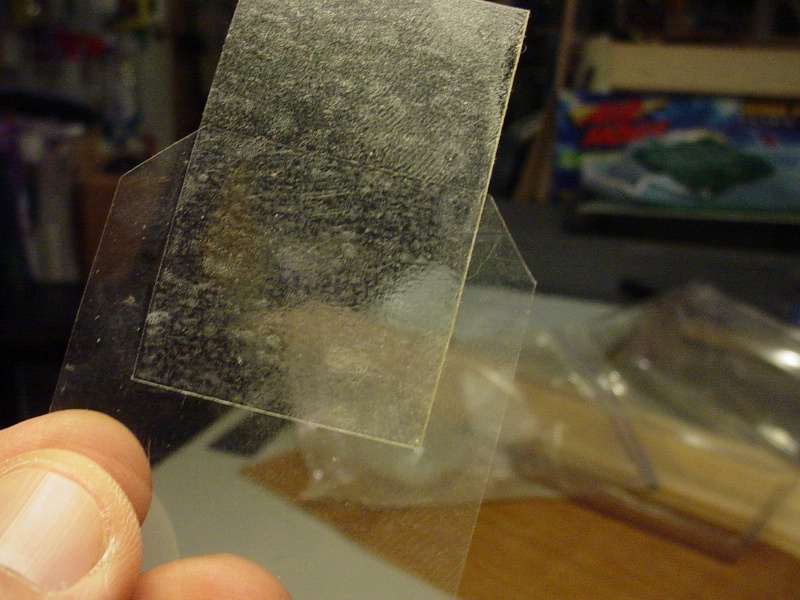
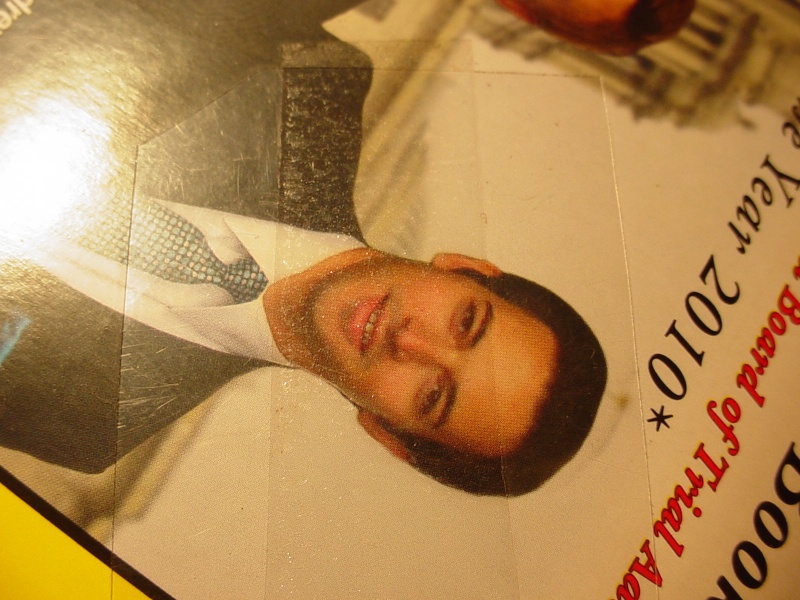
This shows a strip of the clear film running through a print of a man's face between his neck and forehead for a comparison in clarity when mounted to the clear plastic panel.
Here's a pic showing how I used the product to secure my wingtip weights (top/bottom).. but they were clamped under pressure to assure a good bond, and edges sealed later with primer/paint.

roddie- Top Poster
- Posts : 8274
Join date : 2013-07-17
Age : 64
Location : N. Smithfield, Rhode Island -
Re: Guillow's P40 Warhawk build, photos of the finished model
![]() OVERLORD Sat Jun 14, 2014 6:33 am
OVERLORD Sat Jun 14, 2014 6:33 am
Lieven
OVERLORD- Diamond Member
- Posts : 1789
Join date : 2013-03-19
Age : 57
Location : Normandy, France
Re: Guillow's P40 Warhawk build, photos of the finished model
![]() RknRusty Sat Jun 14, 2014 7:51 am
RknRusty Sat Jun 14, 2014 7:51 am
That sounds like a good idea, and at worst, they'll look like rivets.OVERLORD wrote:....Maybe I could use cloth pins that so through the plastic near the edge andglue them into the balsa.
Lieven
Rusty
_________________
...and never Ever think about how good you are at something...
while you're doing it!
My Hot Rock & Blues Playlist
RknRusty- Rest In Peace
- Posts : 10869
Join date : 2011-08-10
Age : 68
Location : South Carolina, USA
Re: Guillow's P40 Warhawk build, photos of the finished model
![]() roddie Sat Jun 14, 2014 7:52 am
roddie Sat Jun 14, 2014 7:52 am
OVERLORD wrote:Thanks Roddie for that illustrated explanation. This tape is very transparant. The thing is, for the Warhawk the plastic screen doesn't follow the hollow curve of the bulkhead. I should have said that in my previous post. The plastic remains straight so can only glue on the edges Maybe I could use cloth pins that so through the plastic near the edge andglue them into the balsa.
Lieven
Yes.. I see your dilemma. You may find some useful info here.. http://balsamodels.com/phpBB/viewtopic.php?t=1534
roddie- Top Poster
- Posts : 8274
Join date : 2013-07-17
Age : 64
Location : N. Smithfield, Rhode Island -
Re: Guillow's P40 Warhawk build, photos of the finished model
![]() Ken Cook Sat Jun 14, 2014 9:41 am
Ken Cook Sat Jun 14, 2014 9:41 am

Ken Cook- Top Poster
- Posts : 5455
Join date : 2012-03-27
Location : pennsylvania
Re: Guillow's P40 Warhawk build, photos of the finished model
![]() OVERLORD Sat Jun 14, 2014 12:48 pm
OVERLORD Sat Jun 14, 2014 12:48 pm
Lieven
OVERLORD- Diamond Member
- Posts : 1789
Join date : 2013-03-19
Age : 57
Location : Normandy, France
Re: Guillow's P40 Warhawk build, photos of the finished model
![]() OVERLORD Sun Jun 15, 2014 1:53 pm
OVERLORD Sun Jun 15, 2014 1:53 pm
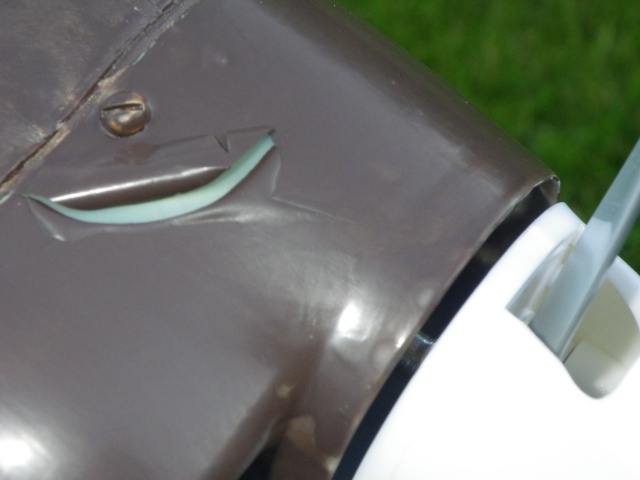
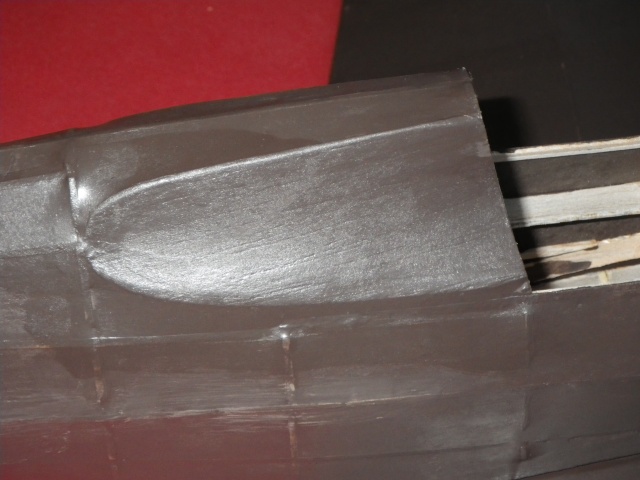
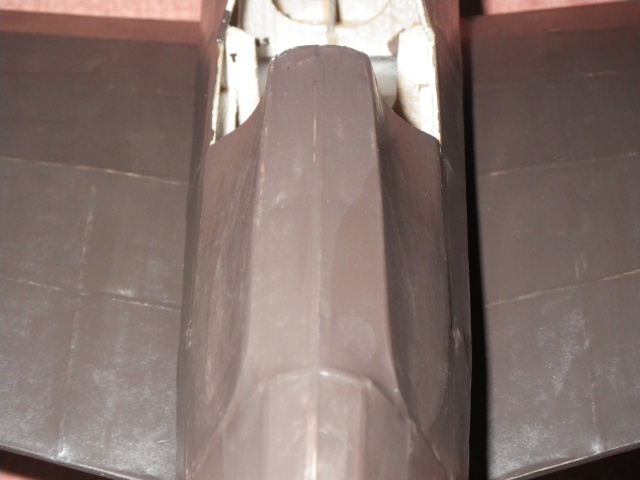
The areas without glue were covered by sticky tape to hold the screen in place.
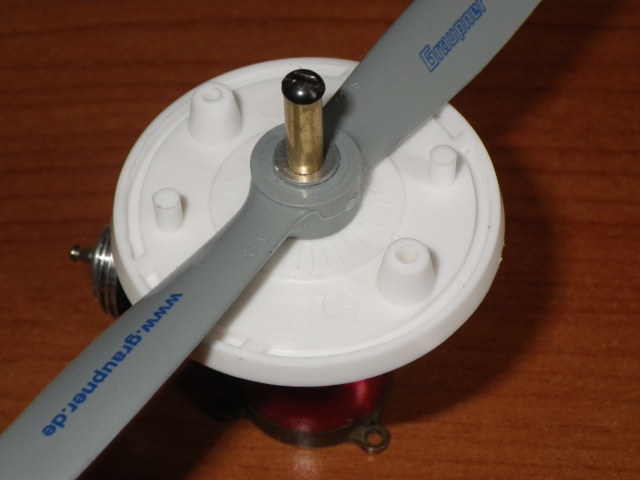
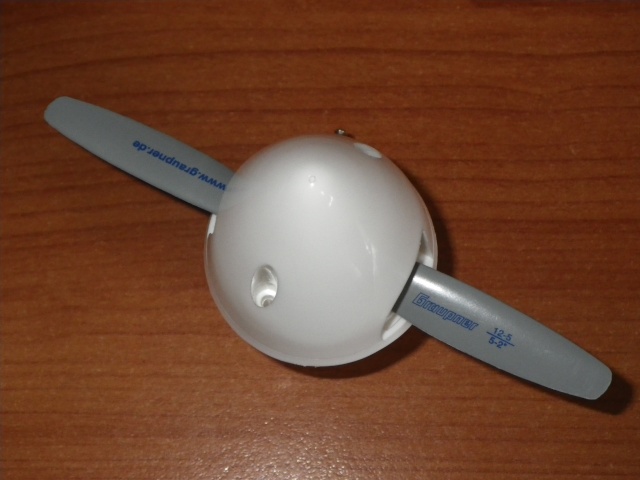
This afternoon, it was so silent outside, I felt an engine test coming up. I gave the Pee Wee engine a spin with the 5x2 prop and the 1 3/4" spinner.
I ran the engine 4 or 5 times. Each time, for the last minute or so, it start running very irregular. If that remains like that, it will be impossible to fill the tank up to achieve only f.i. 10 seconds of running time. Is this irregular running caused by
- the spring in the plastic fuel tube?
- vibrations?
- the plastic fuel tube end being cut at an angle?
- the engine that has not been ran in enough?
Lieven
OVERLORD- Diamond Member
- Posts : 1789
Join date : 2013-03-19
Age : 57
Location : Normandy, France
Re: Guillow's P40 Warhawk build, photos of the finished model
![]() Ken Cook Sun Jun 15, 2014 2:00 pm
Ken Cook Sun Jun 15, 2014 2:00 pm
Ken Cook- Top Poster
- Posts : 5455
Join date : 2012-03-27
Location : pennsylvania
Re: Guillow's P40 Warhawk build, photos of the finished model
![]() Cribbs74 Sun Jun 15, 2014 3:28 pm
Cribbs74 Sun Jun 15, 2014 3:28 pm
I haven't written anything about this build, but I have been following.
Perhaps you answered this already, but why did you go with a Pee Wee? Do the instructions call for it? I can't remember if the 400 series do or not.
Anyway, have you considered an .049? Seems to me if you used a 5cc Texaco or similar you can swing a larger prop a little slower and tailor your run time. It would alleviate the spinner and prop issue for sure.
Some tail weight may be in order, but I think the benefit would outweigh the disadvantages.
Just a thought, either way you are doing a great job.
Ron

Cribbs74- Moderator
-
Posts : 11895
Join date : 2011-10-24
Age : 50
Location : Tuttle, OK
Re: Guillow's P40 Warhawk build, photos of the finished model
![]() roddie Sun Jun 15, 2014 7:25 pm
roddie Sun Jun 15, 2014 7:25 pm

roddie- Top Poster
- Posts : 8274
Join date : 2013-07-17
Age : 64
Location : N. Smithfield, Rhode Island -
Re: Guillow's P40 Warhawk build, photos of the finished model
![]() dirk gently Tue Jun 17, 2014 9:13 am
dirk gently Tue Jun 17, 2014 9:13 am
I was having the same problem with my PeeWee, and it was due to a loose needle. If the engine behaves the same on a 4.5x2 prop without the spinner, you could try placing a piece of fuel tube over the needle to steady it down.

dirk gently- Gold Member

- Posts : 429
Join date : 2012-02-03
Age : 41
Location : Poznań
Page 2 of 5 • 1, 2, 3, 4, 5 ![]()
» Guillows Cessna 150 build circa 1970 (Build Log)
» Another Li'l Satan build (Finished)
» Guillows Spitfire park flyer FINISHED!!!!!!!!!!!!
» Guillows Cessna build advice needed