Log in
Search
Latest topics
» Stealth SB-Xby Admin Today at 8:28 pm
» ST .35 STUNT / VOODOO / ZERO POINT ZERO NITRO
by TD ABUSER Today at 7:45 pm
» SUPERTIGER .15 PROJECT
by TD ABUSER Today at 7:42 pm
» For sale -- Cox Custom Carburetors for Tee Dee engines
by sosam117 Today at 5:23 pm
» WHERE ARE YOU BUYING YOUR FUEL AND GLOW PLUGS...?
by TD ABUSER Today at 4:35 pm
» Waiting for Engines from Ken Enya
by sosam117 Today at 4:33 pm
» Unusual Cox 049 cylinder - Need help identifying
by anm2 Today at 4:12 pm
» Jim Walker Bonanza etc.
by rsv1cox Today at 2:57 pm
» What's the Best Reed for Cox Reed Valve Engines.
by roddie Today at 1:37 pm
» Fuel choice
by 1975 control line guy Yesterday at 4:01 pm
» "Fall S.M.A.L.L." Video 3.
by GallopingGhostler Yesterday at 2:37 pm
» Gifted Fox
by Ken Cook Yesterday at 11:12 am
Cox Engine of The Month
August-2024
balogh's

"Cox TD09 R/C Beast of Burden featuring Kamtechnik head and DIY metallic fuel nipple"

PAST WINNERS
balogh's

"Cox TD09 R/C Beast of Burden featuring Kamtechnik head and DIY metallic fuel nipple"

PAST WINNERS
Ordered a 1/2A Skyray kit
Page 4 of 6
Page 4 of 6 •  1, 2, 3, 4, 5, 6
 Skyray went on a weight loss program
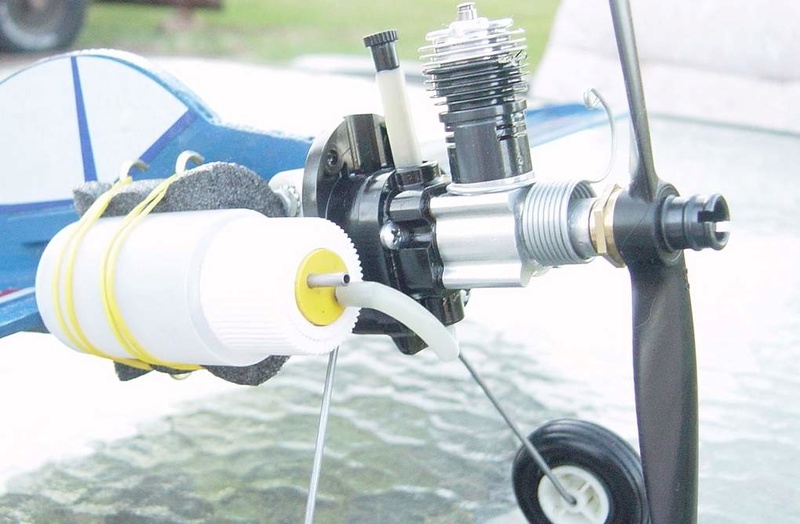
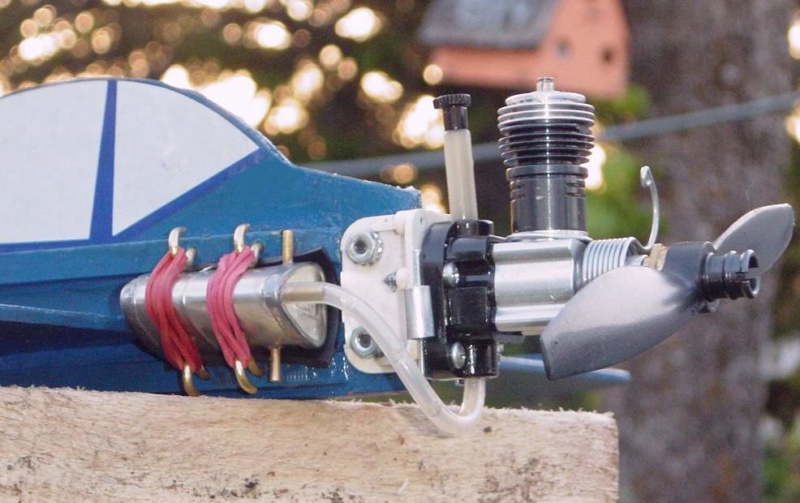
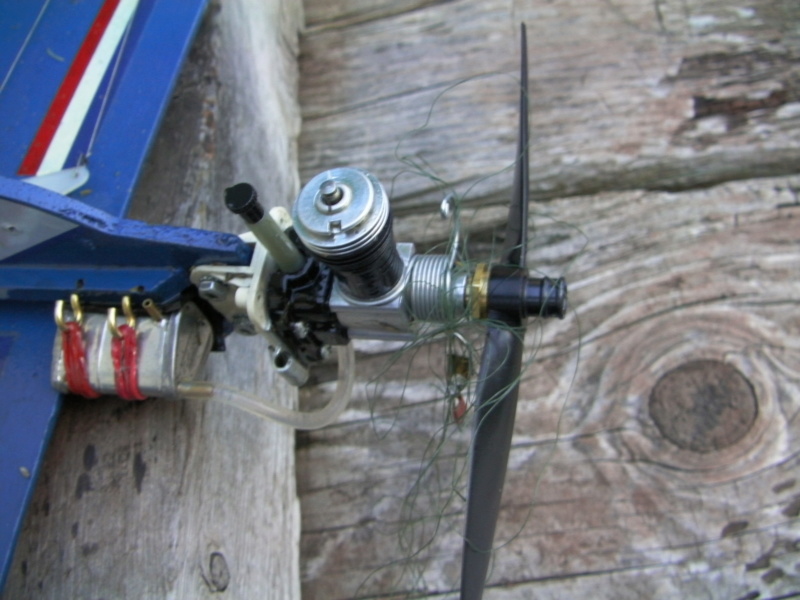
During the last flights on May 20, I noticed that the plane was feeling sluggish. I came to the conclusion that I had too much crap hanging on it. It was too heavy and too draggy. I decided that the clunk tank, engine mount spacer, and landing gear had to go.
Old setup:
New setup:
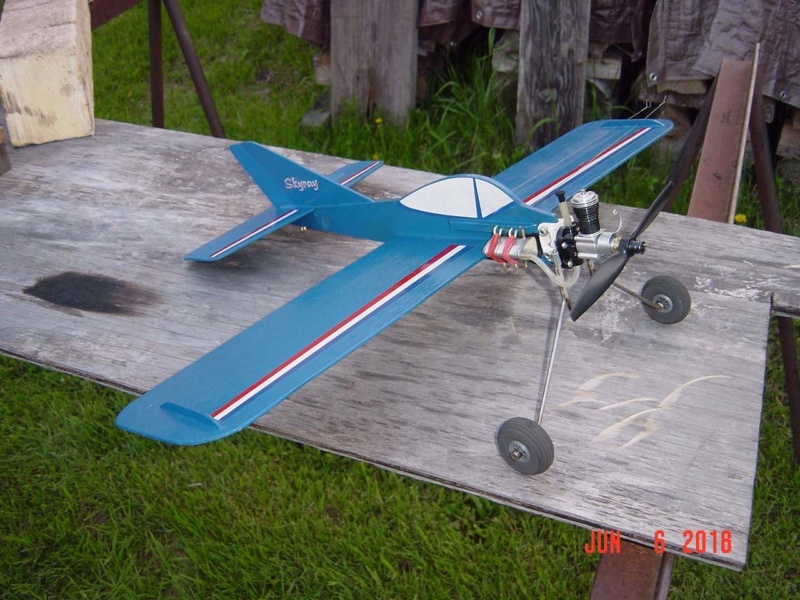
The Skyray was designed to be flown without landing gear. I only fly over grass, and the gear was just catching the grass and flipping the plane on landing. However, I still needed to get the thing off the ground, and hand launches were not possible.
So I bent up a new set of gear that falls off when the plane gets airborne.
I got a chance to try it out tonight.
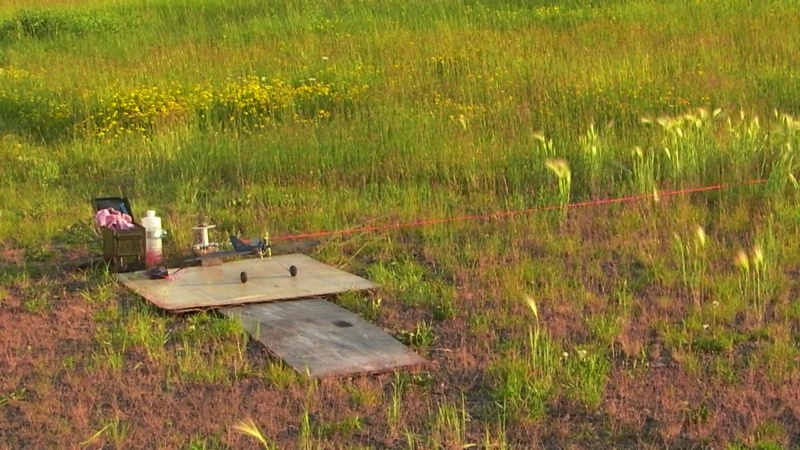

It worked slick.
Getting rid of all that nose weight moved the CG to where she's a little twitchy, but, when the engine quits, it will actually glide in and land right side up. With the old setup, it dropped like a rock when the engine quit.


As you can see in the pics, the field where I fly hasn't been mowed lately. This caused some problems with the lines catching the weeds, and crashing the plane. The last flight was real interesting. The plane had just gotten airborne when the lines caught some weeds, and the plane turned in. It flew slack line straight across the circle. When the lines tightened up again it jerked the handle out of my hand . The plane then crashed and wrapped the lines up in the prop.

Nothing got broken, and she's ready to go again, but not until that field gets mowed.
Old setup:

New setup:

The Skyray was designed to be flown without landing gear. I only fly over grass, and the gear was just catching the grass and flipping the plane on landing. However, I still needed to get the thing off the ground, and hand launches were not possible.
So I bent up a new set of gear that falls off when the plane gets airborne.

I got a chance to try it out tonight.


It worked slick.
Getting rid of all that nose weight moved the CG to where she's a little twitchy, but, when the engine quits, it will actually glide in and land right side up. With the old setup, it dropped like a rock when the engine quit.


As you can see in the pics, the field where I fly hasn't been mowed lately. This caused some problems with the lines catching the weeds, and crashing the plane. The last flight was real interesting. The plane had just gotten airborne when the lines caught some weeds, and the plane turned in. It flew slack line straight across the circle. When the lines tightened up again it jerked the handle out of my hand


Nothing got broken, and she's ready to go again, but not until that field gets mowed.
Last edited by TLAnderson on Tue Jul 24, 2018 10:01 pm; edited 2 times in total

TLAnderson- Gold Member

- Posts : 243
Join date : 2016-07-21
Location : Northern Wisconsin
 Re: Ordered a 1/2A Skyray kit
 Way to go with the drop off take off gear
  i like that idea !! Yea get out there and Mow that baby down (glad YOU didnt get hurt ) I've had them fly acrosses before and can bee scary if she is kicking ass
  at the same time ! Glad ya got rid of the bulk and put the wedge on LOOKS better too . Would like to fly some on this 4th but it's just to damn hott at 95 here may pick up on some building today i need to clear the work bench for something new !

getback- Top Poster


Posts : 10326
Join date : 2013-01-18
Age : 67
Location : julian , NC
 Re: Ordered a 1/2A Skyray kit
I have to say it does look nice with the gear you had on it. I like the stance. Having built many Skyray's over the years, I knew the turning was going to be somewhat compromised. The Skyray is intentionally designed a bit on the tail heavy side so I thought this would've balanced things out a bit. As you mentioned though there's just drag all over and the speed and maneuverability falls off. It still looks great and I commend you on a nice job there.

Ken Cook- Top Poster

- Posts : 5573
Join date : 2012-03-27
Location : pennsylvania
 Re: Ordered a 1/2A Skyray kit
Very cool mod there man!! I'd really be interested to see the detailing (close-up images) on the "drop-off gear". The fact that it functioned well for you.. is what interests me; as I've had a long-time interest/need-for a control-line take-off dolly for "1/2A proto-speed" models, but haven't been able to source any information on fabrication.
Secondary.......... the "NEST" control-line guys here in my neck of the woods, have a circle-mowing system that utilizes a small 20-22" self-propelled lawn-mower with a 40-foot tether connected to a central-post which automatically mows a 80" diameter C/L flight-circle in short-order.
I "do" like your 1/2A drop-off main-gear though. Please supply photos/drawings of your design. Thanks!!!

 Re: Ordered a 1/2A Skyray kit
Thanks to Eric, and Ken for their comments.
It's pretty basic. It's a proof of concept prototype, so some of the dimensions could be adjusted. The U shaped piece could be shorter, as could the legs. I made this before I read Ken Cook's post on soldering and binding his landing gear. I just soldered the legs to the U piece with silver solder. I doubt they would hold up to landing shocks, but they don't have to. My soldering job isn't too pretty, but the goal was to see if the idea would work. Appearance was low on the priority list.
Materials were a 4' long 1/8" diameter steel rod, and two pairs of 1" removable pin hinges.

I pulled the pins on the hinges, and used the halves with the single pin boss. I drilled out the pin bosses to 1/8" as the pins were smaller than that. The hinges are pretty soft steel. You could probably open them up by driving a 1/8" or 5/32" pin punch through the bosses.
The holes in the hinges matched the engine backplate holes close enough that I didn't have to do anything with them.
I sandwiched the hinges between the backplate and the engine mount.
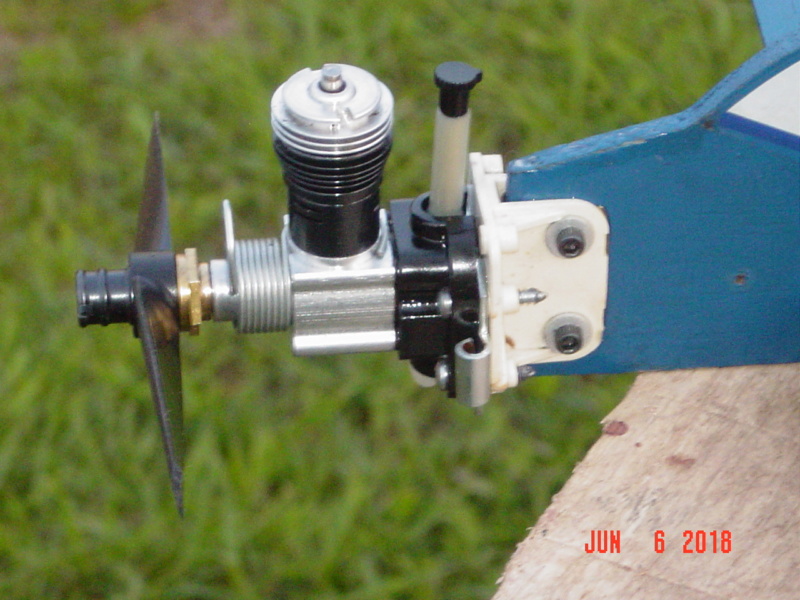
The distance between the pin bosses after mounting was 1-3/8" center to center.
I got a piece of steel from work which measured 1-1/4 x 2 x 2-1/2". I ground a rough radius on the two edges along the 1-1/4" width.
I bent the wire around the steel form so the the ends came out 1-3/8" apart, and the legs were 2 inches long.

Then I started test fitting the U into the pin bosses. I had to tweak the bends, and file the wires until the U slid into the bosses and dropped out easily.
The legs are 6" long pieces with 45 degree bends 1" in from each end.
I soldered the legs to the U with everything clamped to a steel plate so nothing moved while soldering. I used a propane torch to heat the joint, and some flux that I had laying around. The upper ends of the legs are 1/2" below the ends of the U.

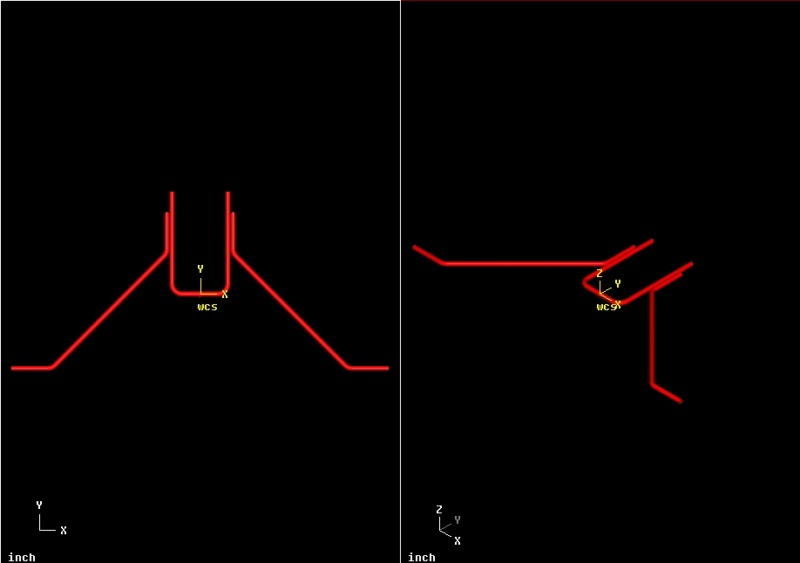
Hope that covers it well enough.
I attempted to fly the Skyray again tonight, but it was hot, humid, buggy, and the engine didn't want to run. So I gave up and went home. Oh well. Try again tomorrow, maybe.
Happy Independence Day to everyone
roddie wrote:Very cool mod there man!! I'd really be interested to see the detailing (close-up images) on the "drop-off gear". The fact that it functioned well for you.. is what interests me; as I've had a long-time interest/need-for a control-line take-off dolly for "1/2A proto-speed" models, but haven't been able to source any information on fabrication.
Secondary.......... the "NEST" control-line guys here in my neck of the woods, have a circle-mowing system that utilizes a small 20-22" self-propelled lawn-mower with a 40-foot tether connected to a central-post which automatically mows a 80" diameter C/L flight-circle in short-order.
I "do" like your 1/2A drop-off main-gear though. Please supply photos/drawings of your design. Thanks!!!
It's pretty basic. It's a proof of concept prototype, so some of the dimensions could be adjusted. The U shaped piece could be shorter, as could the legs. I made this before I read Ken Cook's post on soldering and binding his landing gear. I just soldered the legs to the U piece with silver solder. I doubt they would hold up to landing shocks, but they don't have to. My soldering job isn't too pretty, but the goal was to see if the idea would work. Appearance was low on the priority list.
Materials were a 4' long 1/8" diameter steel rod, and two pairs of 1" removable pin hinges.

I pulled the pins on the hinges, and used the halves with the single pin boss. I drilled out the pin bosses to 1/8" as the pins were smaller than that. The hinges are pretty soft steel. You could probably open them up by driving a 1/8" or 5/32" pin punch through the bosses.
The holes in the hinges matched the engine backplate holes close enough that I didn't have to do anything with them.
I sandwiched the hinges between the backplate and the engine mount.

The distance between the pin bosses after mounting was 1-3/8" center to center.
I got a piece of steel from work which measured 1-1/4 x 2 x 2-1/2". I ground a rough radius on the two edges along the 1-1/4" width.
I bent the wire around the steel form so the the ends came out 1-3/8" apart, and the legs were 2 inches long.

Then I started test fitting the U into the pin bosses. I had to tweak the bends, and file the wires until the U slid into the bosses and dropped out easily.
The legs are 6" long pieces with 45 degree bends 1" in from each end.
I soldered the legs to the U with everything clamped to a steel plate so nothing moved while soldering. I used a propane torch to heat the joint, and some flux that I had laying around. The upper ends of the legs are 1/2" below the ends of the U.


Hope that covers it well enough.
I attempted to fly the Skyray again tonight, but it was hot, humid, buggy, and the engine didn't want to run. So I gave up and went home. Oh well. Try again tomorrow, maybe.
Happy Independence Day to everyone


TLAnderson- Gold Member

- Posts : 243
Join date : 2016-07-21
Location : Northern Wisconsin
 Re: Ordered a 1/2A Skyray kit
Thanks very much for the explanation and photos of the drop-off gear. I'd never seen that type of design before now.
 Re: Ordered a 1/2A Skyray kit
Awesome idea. I never would have thought of that. I'll file it away for future use.
The Thief Mark
The Thief Mark
batjac- Diamond Member


Posts : 2360
Join date : 2013-05-22
Age : 61
Location : Broken Arrow, OK, USA
 Re: Ordered a 1/2A Skyray kit
TL,
I noticed you switched back to the wedge tank. Have you figured out why it didn't work before the clumk tank?
How long is a typical flight on wedge? What size wedge?
Thanks
I noticed you switched back to the wedge tank. Have you figured out why it didn't work before the clumk tank?
How long is a typical flight on wedge? What size wedge?
Thanks
944_Jim- Diamond Member


Posts : 2014
Join date : 2017-02-08
Age : 59
Location : NE MS
 Re: Ordered a 1/2A Skyray kit
944_Jim wrote:TL,
I noticed you switched back to the wedge tank. Have you figured out why it didn't work before the clumk tank?
How long is a typical flight on wedge? What size wedge?
Thanks
I really don't know why the wedge tank didn't work the first time around. It may have been the needle valve moving and I didn't catch it at first. My other thought is that the engine wasn't broken in and it was getting tight halfway through the run. The wedge seems to work fine now.
It's a 3/8 ounce tank. I haven't timed a run, but I'd estimate at least two minutes

TLAnderson- Gold Member

- Posts : 243
Join date : 2016-07-21
Location : Northern Wisconsin
 Re: Ordered a 1/2A Skyray kit
TLAnderson wrote:944_Jim wrote:TL,
I noticed you switched back to the wedge tank. Have you figured out why it didn't work before the clumk tank?
How long is a typical flight on wedge? What size wedge?
Thanks
I really don't know why the wedge tank didn't work the first time around. It may have been the needle valve moving and I didn't catch it at first. My other thought is that the engine wasn't broken in and it was getting tight halfway through the run. The wedge seems to work fine now.
It's a 3/8 ounce tank. I haven't timed a run, but I'd estimate at least two minutes
A 3/8 ounce tank equates to 11.1 cc's. That's a good long run for an .049 reed-valve engine.. even if it's turning some high rpm's. I've always used(Perfect-brand) wedge-tanks on my Bee's that weren't integrally-tanked. A #2 Perfect wedge is 3/8 oz. (11.1cc's) and categorized as a "medium-midge" tank. It is only 1.25" long.
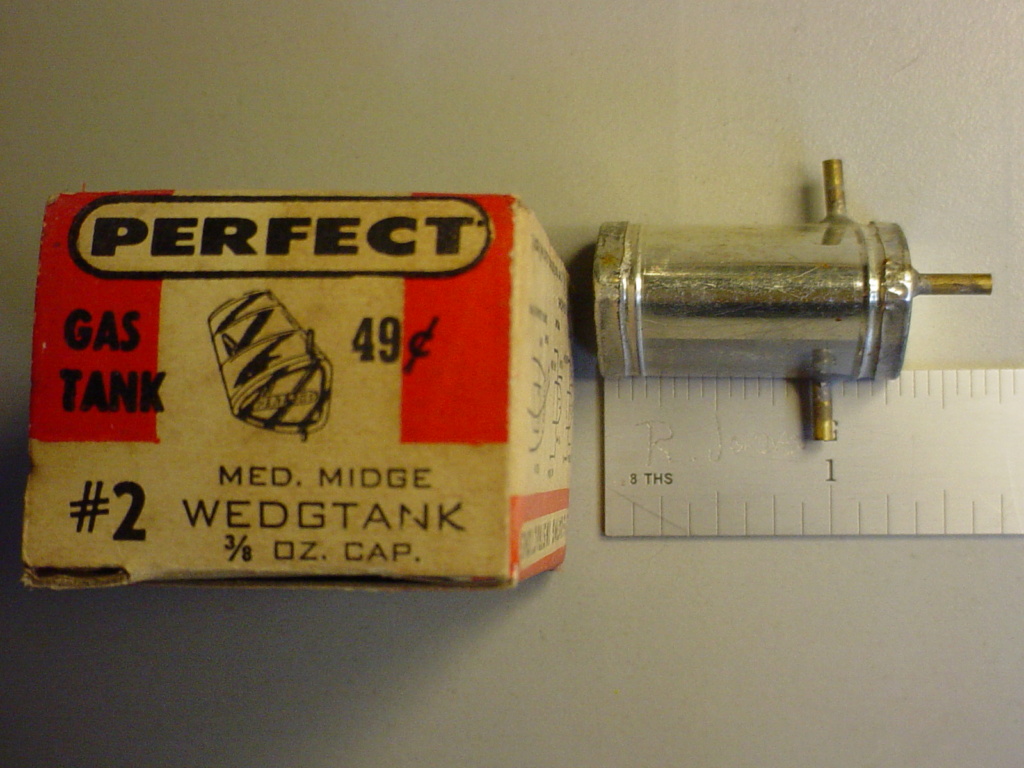
It's a nice little tank for where there isn't too much real-estate to mount it.
 Re: Ordered a 1/2A Skyray kit
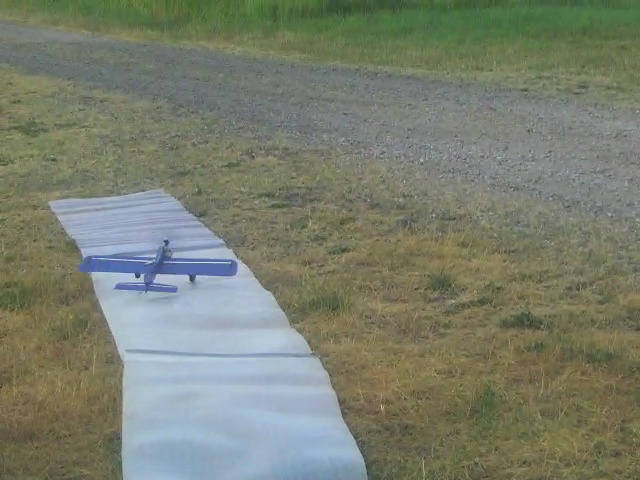
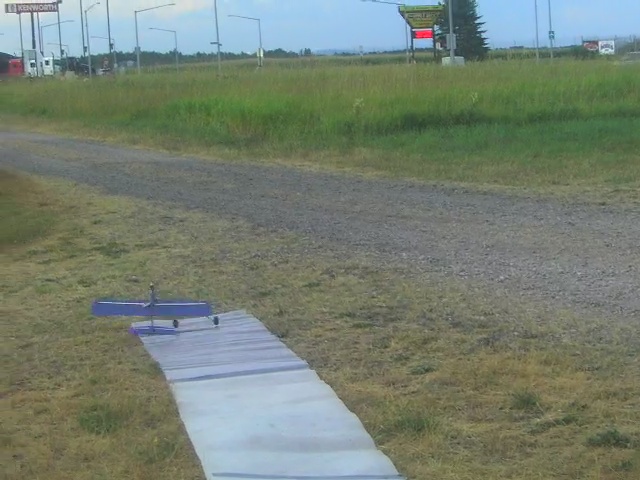
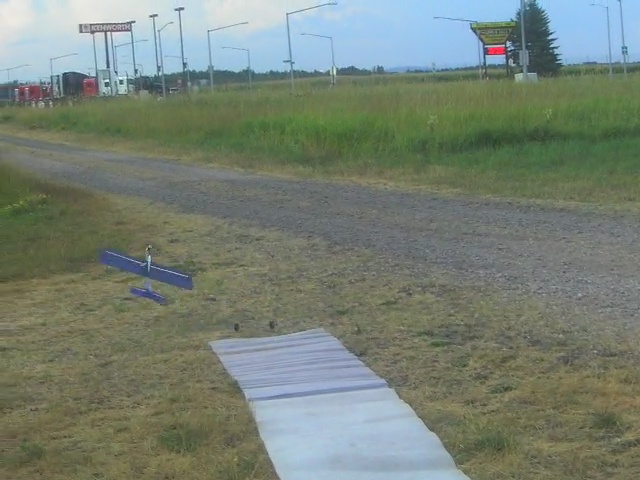
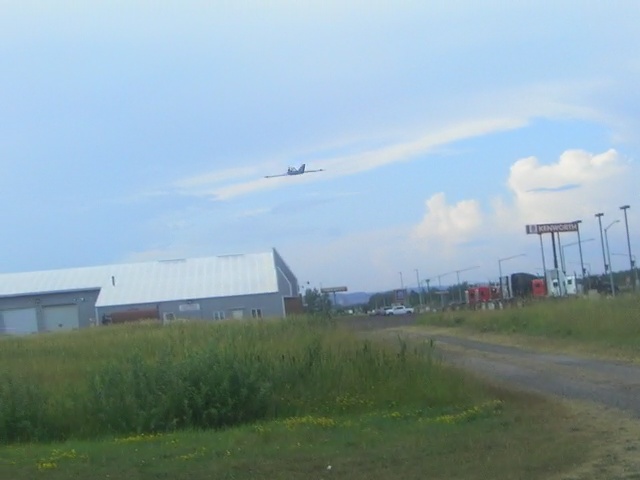
Got a chance to fly the Skyray tonight. Had nearly perfect conditions. I only got two flights in though because that long brass needle valve broke off right at the end of the threads.
The brass got brittle from the vibration, I guess. Man this stuff gets frustrating.
Now I have to figure out how to get the remains of the needle out of the spray bar. Is there a short needle with the same threads?
I tried it on 44' lines tonight. That might be a little long. Not much line tension. If there had been much of a breeze, I think I might have had problems. Have to go back to the 38' lines I was using.
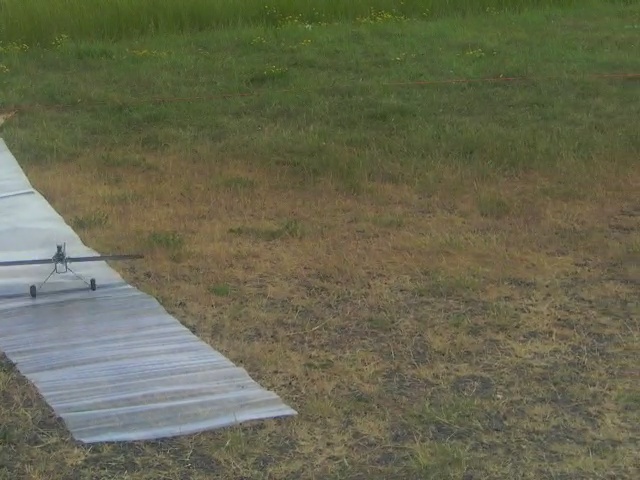
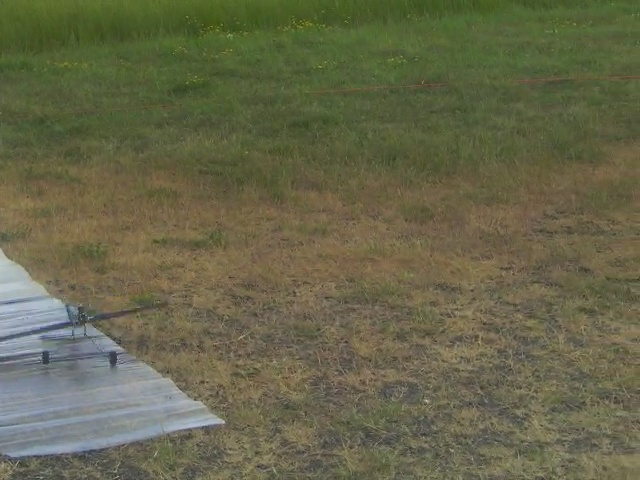
Anyway, I got a few good shots of the takeoff gear dropping off. At least that worked.


TLAnderson- Gold Member

- Posts : 243
Join date : 2016-07-21
Location : Northern Wisconsin
 Re: Ordered a 1/2A Skyray kit
Cox International has a shorter needle:
coxengines.ca - Cox .049 Needle Valve Brass Short
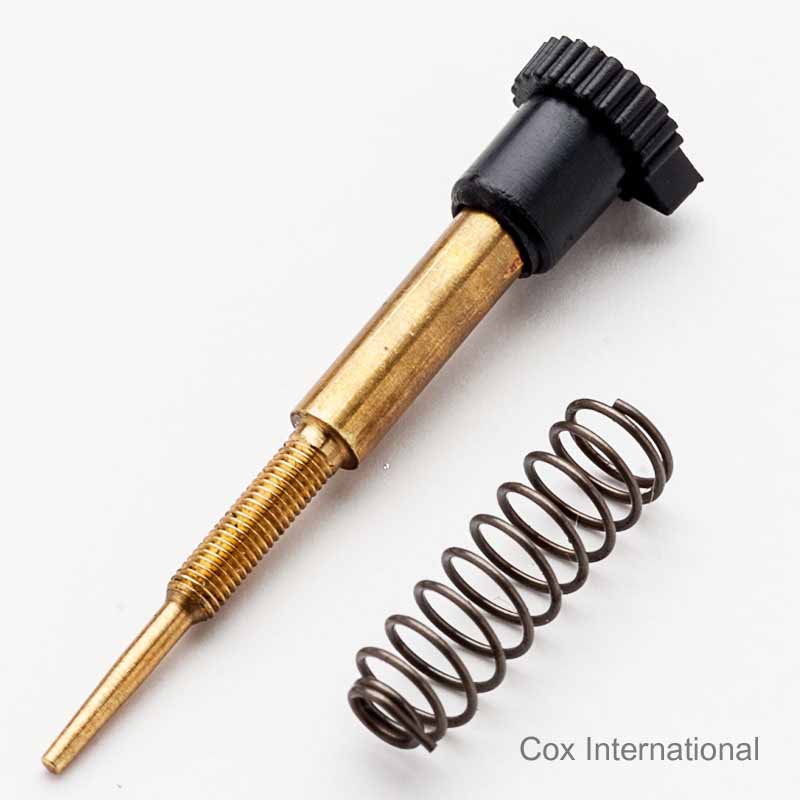
Sometimes you can take something reasonably pointed like a jewelers screwdriver or awl and carefully coax the stub out. Brass is softer compared with steel. If no luck, with care, you might patiently be able to scribe a slot on the top with a sharp pointed tool. Then use a small or jewelers screwdriver in the slot.
If no luck, Cox International also has backs for a nominal fee.
Sometimes (but not always) locating the back so needle points to the side instead of vertical helps to prevent dinging the needle on a nose over, crash or inverted landing.
coxengines.ca - Cox .049 Needle Valve Brass Short

Sometimes you can take something reasonably pointed like a jewelers screwdriver or awl and carefully coax the stub out. Brass is softer compared with steel. If no luck, with care, you might patiently be able to scribe a slot on the top with a sharp pointed tool. Then use a small or jewelers screwdriver in the slot.
If no luck, Cox International also has backs for a nominal fee.
Sometimes (but not always) locating the back so needle points to the side instead of vertical helps to prevent dinging the needle on a nose over, crash or inverted landing.

GallopingGhostler- Top Poster


Posts : 5513
Join date : 2013-07-13
Age : 70
Location : Clovis NM or NFL KC Chiefs
 Re: Ordered a 1/2A Skyray kit
Good pics. TL , you probably want get the broken one out i would apt. for one these https://coxengines.ca/cox-.049-.051-backplate-white.html and either a killer bee needle if the thread pitch is correct or a short needle like George said https://coxengines.ca/cox-.049-needle-valve-killer-bee.html Most people have said the Alum. has less issues with the vibration https://coxengines.ca/1968-cox-.049-needle-valve-aluminum-oem.html Hope you get R squared away soon . 

getback- Top Poster


Posts : 10326
Join date : 2013-01-18
Age : 67
Location : julian , NC
 Re: Ordered a 1/2A Skyray kit
Eric, you brought up an interesting point. OP would need to verify whether his back uses the finer thread needle of the Killer Bees and earlier red postage stamp RTF engines of the 1960's, or the coarser thread needles of the horseshoe back engines. Since his engine uses a black horseshoe back, I'm thinking it probably uses the coarser needle but I could be wrong.

GallopingGhostler- Top Poster


Posts : 5513
Join date : 2013-07-13
Age : 70
Location : Clovis NM or NFL KC Chiefs
 Re: Ordered a 1/2A Skyray kit
Thanks to getback and GallopingGhostler for the needle valve info.
Cox International lists the thread size of the short needle as 2-80. A #2 size thread has a major diameter of .086". My broken needle measures .085" diameter over the threads. My thread pitch guage doesn't have 80 tpi on it, but I'm guessing that my needle is a 2-80. So, I have a short needle on order from Cox International.
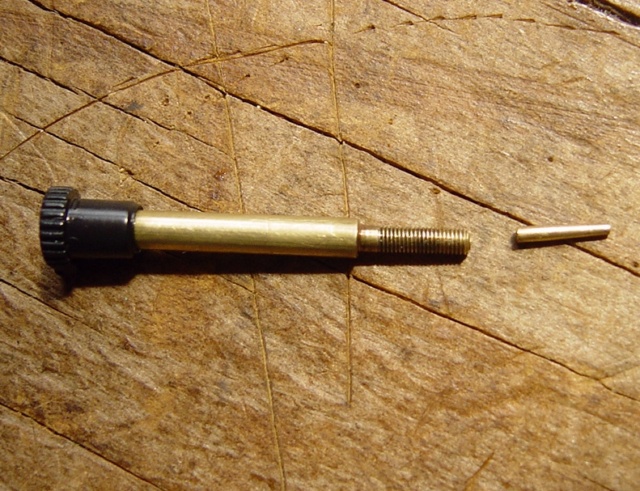
I got the broken piece out by poking a pin into the fuel inlet nipple, and pushing the needle out the other end.
In the meantime, if I get good flying weather, I'll use the engine from the PT-19.
I looked at the needle in the PT-19 engine and the threads looked much finer, so I can't just swap needles.
Cox International lists the thread size of the short needle as 2-80. A #2 size thread has a major diameter of .086". My broken needle measures .085" diameter over the threads. My thread pitch guage doesn't have 80 tpi on it, but I'm guessing that my needle is a 2-80. So, I have a short needle on order from Cox International.

I got the broken piece out by poking a pin into the fuel inlet nipple, and pushing the needle out the other end.
In the meantime, if I get good flying weather, I'll use the engine from the PT-19.
I looked at the needle in the PT-19 engine and the threads looked much finer, so I can't just swap needles.

TLAnderson- Gold Member

- Posts : 243
Join date : 2016-07-21
Location : Northern Wisconsin
 Re: Ordered a 1/2A Skyray kit
I took the engine out of the PT-19 yesterday, and put it on the Skyray. Went back to the flying field in the evening, and got three good flights in before it got too dark.

That old .049 runs great. It also runs nearly twice as long as the other engine, on a tank of fuel. Don't know what's up with that.
I shortened up the lines to 39 feet tonight. We'll see how she handles at that length. Hopefully soon.

That old .049 runs great. It also runs nearly twice as long as the other engine, on a tank of fuel. Don't know what's up with that.
I shortened up the lines to 39 feet tonight. We'll see how she handles at that length. Hopefully soon.

TLAnderson- Gold Member

- Posts : 243
Join date : 2016-07-21
Location : Northern Wisconsin

TLAnderson- Gold Member

- Posts : 243
Join date : 2016-07-21
Location : Northern Wisconsin

TLAnderson- Gold Member

- Posts : 243
Join date : 2016-07-21
Location : Northern Wisconsin
 Re: Ordered a 1/2A Skyray kit
Had a nice evening, so I decided to fly the Skyray again. On the last flight, I did something I've never done before.
 I LOOPED IT!!
It was a yank and pray move, no skill involved, but it worked. Unfortunately, the wife didn't know I was going to do it, and missed it with the video camera. Just got a partial shot of the plane coming out of the loop.

A few more pics.



Something strange happened on the second flight. As soon as the plane got off the ground, it was out of control. It went straight up and the lines went slack. I was going through some moves trying to get it under control, but it eventually came back down into some tall grass. If I had been flying over a hard surface, the plane would have been destroyed.
I have a suspicion that I might have taken too much nose weight off of it. Anyway, it was a good evening for flying, and the plane is still in one piece.
It was a yank and pray move, no skill involved, but it worked.

A few more pics.


Something strange happened on the second flight. As soon as the plane got off the ground, it was out of control. It went straight up and the lines went slack. I was going through some moves trying to get it under control, but it eventually came back down into some tall grass. If I had been flying over a hard surface, the plane would have been destroyed.
I have a suspicion that I might have taken too much nose weight off of it. Anyway, it was a good evening for flying, and the plane is still in one piece.
Last edited by TLAnderson on Sun Sep 02, 2018 8:18 pm; edited 1 time in total

TLAnderson- Gold Member

- Posts : 243
Join date : 2016-07-21
Location : Northern Wisconsin
 Re: Ordered a 1/2A Skyray kit
If nose weight is needed, a possible compromise may be to go with a single wheel landing gear. Use a lightweight parkflyer spoked wheel that is reasonably streamlined so it won't be so draggy. Just a thought.
E-Bay Item# 1938665299, 3pcs RC Model Airplane Aircraft Sponge Wheel D30mm H9mm d2mm Black-Lime
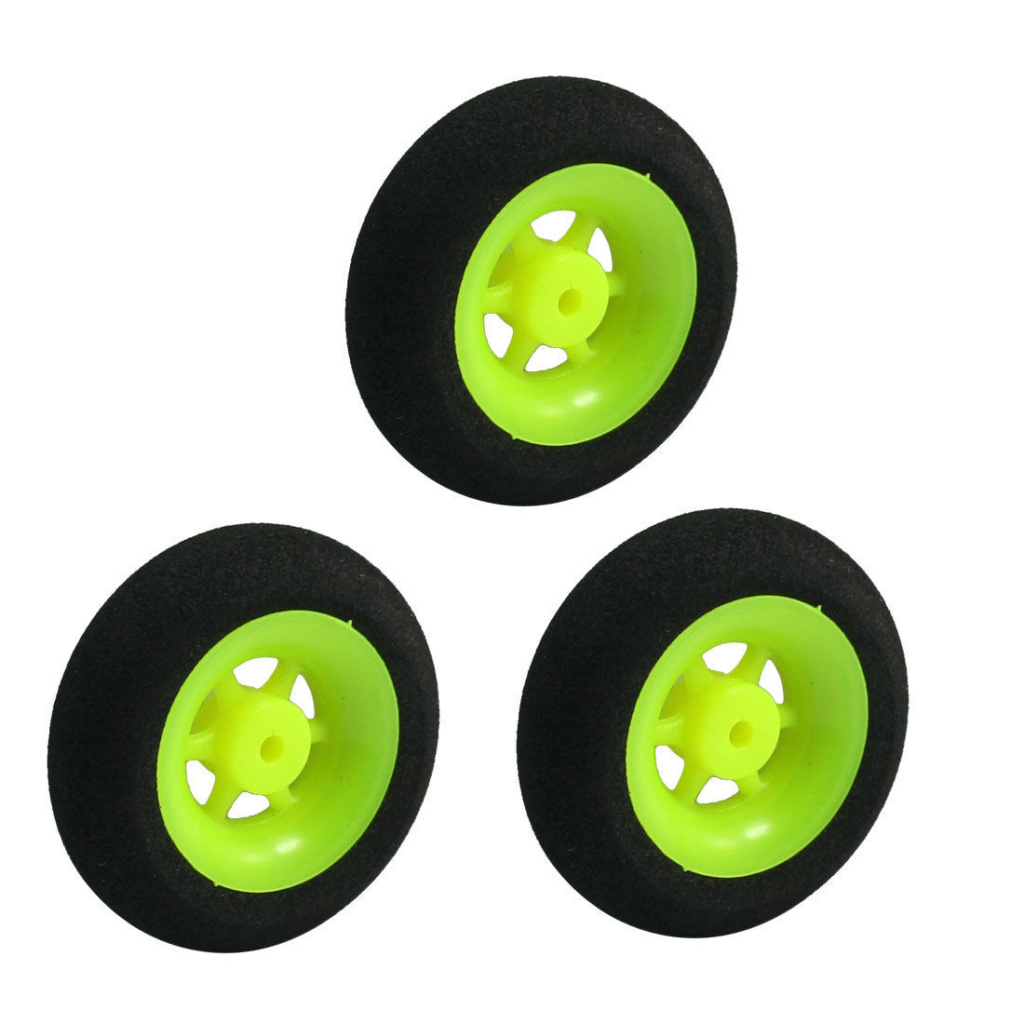
E-Bay Item# 1938665299, 3pcs RC Model Airplane Aircraft Sponge Wheel D30mm H9mm d2mm Black-Lime


GallopingGhostler- Top Poster


Posts : 5513
Join date : 2013-07-13
Age : 70
Location : Clovis NM or NFL KC Chiefs
 Re: Ordered a 1/2A Skyray kit
GallopingGhostler wrote:If nose weight is needed, a possible compromise may be to go with a single wheel landing gear. Use a lightweight parkflyer spoked wheel that is reasonably streamlined so it won't be so draggy. Just a thought.
Thanks for the suggestion GG. I'm trying to avoid using landing gear, as it just catches in the grass and flips the plane on landing. I decided to try this:
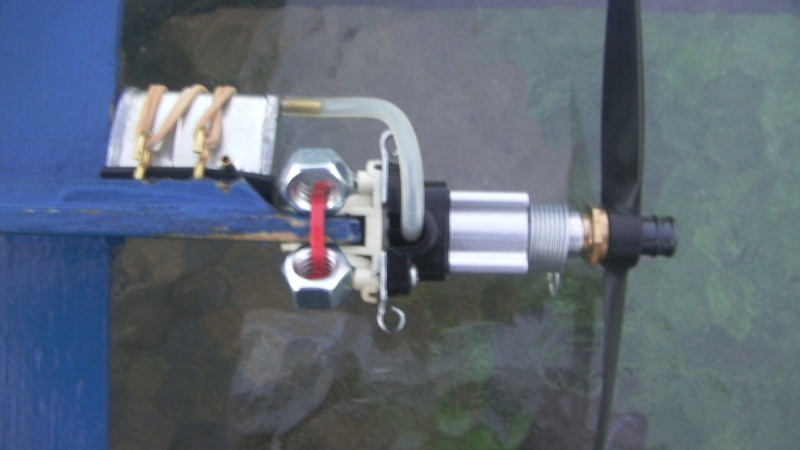
Each nut weighs about .16 ounce, and I can add or subtract weight in small increments this way.
I haven't flown the plane yet with the weights on it, so I don't know how much I'll need.
If nothing else, it's now clear what the plane's gender is.

TLAnderson- Gold Member

- Posts : 243
Join date : 2016-07-21
Location : Northern Wisconsin
 Re: Ordered a 1/2A Skyray kit
Splitting my sides laughing!

944_Jim- Diamond Member


Posts : 2014
Join date : 2017-02-08
Age : 59
Location : NE MS

Oldenginerod- Top Poster

- Posts : 4000
Join date : 2012-06-15
Age : 61
Location : Drouin, Victoria
 Re: Ordered a 1/2A Skyray kit
NUTS, that is funny!! I thought the punch line would have been “ it’s here looking for a Señorita! “

Marleysky- Top Poster


Posts : 3618
Join date : 2014-09-28
Age : 71
Location : Grand Rapids, MI
 How do you get 13 months out of a Sig Sky Ray?
Obviously! you put a COX engine on it........grin

fredvon4- Top Poster


Posts : 4007
Join date : 2011-08-26
Age : 69
Location : Lampasas Texas
Page 4 of 6 •  1, 2, 3, 4, 5, 6
 Similar topics
» Great video on building and flying the 1/2A Skyray and Skyray 35
» RARE COX THIMBLE DROME PROTOTYPE "PT-19 COROPLAST BUILD" GAS MODEL AIRPLANE
» I ordered a Baby Flight Streak for a TeeDee!
» RC Japan. Anyone ordered?
» Cox fuel tank
» RARE COX THIMBLE DROME PROTOTYPE "PT-19 COROPLAST BUILD" GAS MODEL AIRPLANE
» I ordered a Baby Flight Streak for a TeeDee!
» RC Japan. Anyone ordered?
» Cox fuel tank
Page 4 of 6
Permissions in this forum:
You cannot reply to topics in this forum

 Rules
Rules


