Log in
Search
Latest topics
» Golden Bee basic running problemby roddie Yesterday at 10:51 pm
» Simple Gliders
by rdw777 Yesterday at 6:25 pm
» Foam hand kids glider converted to 0.049 CL
by rdw777 Yesterday at 6:11 pm
» Weird search for a single comic from an old Mad Magazine
by Kim Yesterday at 1:44 pm
» Scientific "Zipper" Build...Zipper Flys!.
by getback Yesterday at 7:27 am
» Cox .049 Tee Dee engines back in stock (limited availablility)
by GallopingGhostler Yesterday at 1:05 am
» Very off-topic.........Time passes and not always for the best......
by rsv1cox Thu Jul 25, 2024 2:47 pm
» Roddie-Rigger.. a 2005 original design
by roddie Wed Jul 24, 2024 11:48 pm
» Jim Walker Bonanza etc.
by rsv1cox Wed Jul 24, 2024 6:30 pm
» Throttles for Cox Tee Dee .049 / .020 / .010 engines --- videos
by sosam117 Wed Jul 24, 2024 8:54 am
» Introducing our Cox .049 TD Engines
by Admin Tue Jul 23, 2024 2:00 am
» Project Cox .049 r/c & Citabrian Champion
by getback Mon Jul 22, 2024 4:14 pm
Cox Engine of The Month
July-2024
robot797's
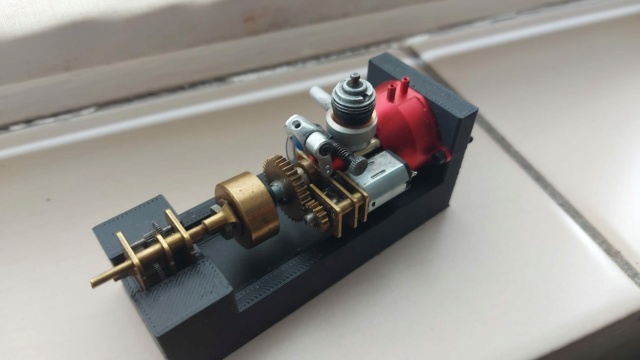
"ULTIMITE COX 010: it has a clutch, E starter, throttle, exhaust, aluminum tank, aluminum venturi, gearbox with forward and reverse, and now its on a custom drawn and printed stand"

PAST WINNERS
robot797's

"ULTIMITE COX 010: it has a clutch, E starter, throttle, exhaust, aluminum tank, aluminum venturi, gearbox with forward and reverse, and now its on a custom drawn and printed stand"

PAST WINNERS
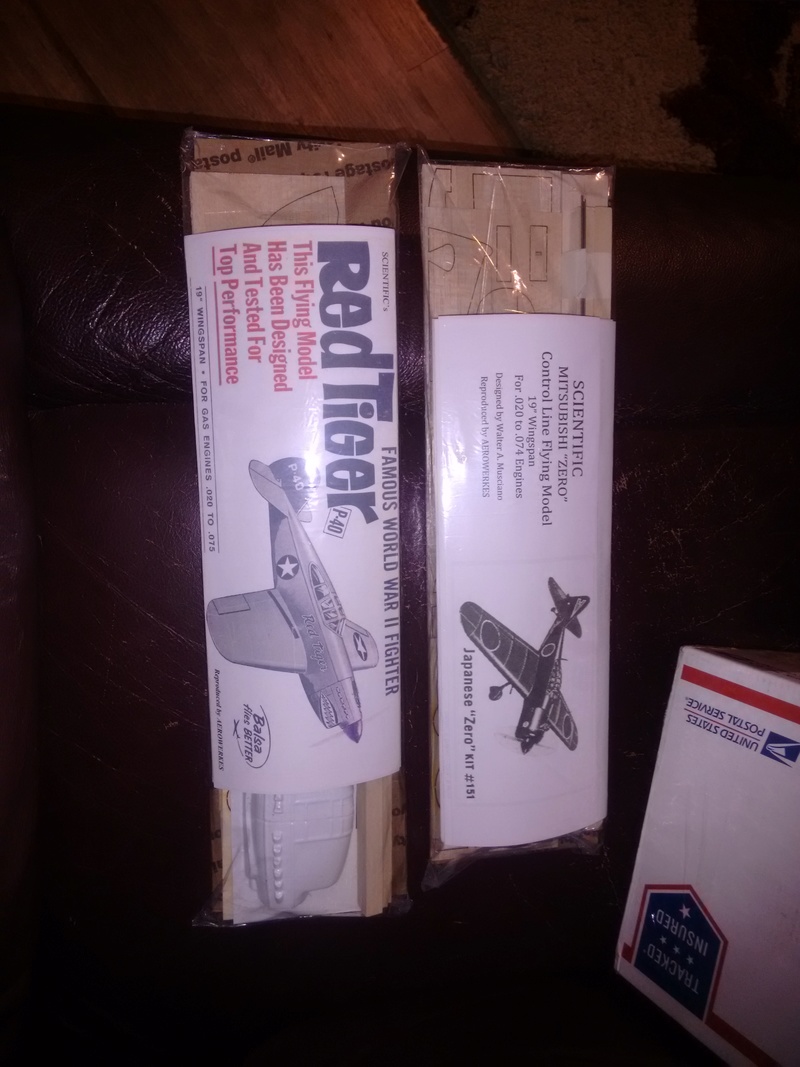
DPC Models/AeroWerkes Scientific P-40 Red Tiger Reproduction
Page 1 of 2
Page 1 of 2 • 1, 2 
 DPC Models/AeroWerkes Scientific P-40 Red Tiger Reproduction
Last edited by 944_Jim on Tue Jan 09, 2018 9:24 pm; edited 1 time in total
944_Jim- Diamond Member


Posts : 2000
Join date : 2017-02-08
Age : 59
Location : NE MS

944_Jim- Diamond Member


Posts : 2000
Join date : 2017-02-08
Age : 59
Location : NE MS
 Re: DPC Models/AeroWerkes Scientific P-40 Red Tiger Reproduction
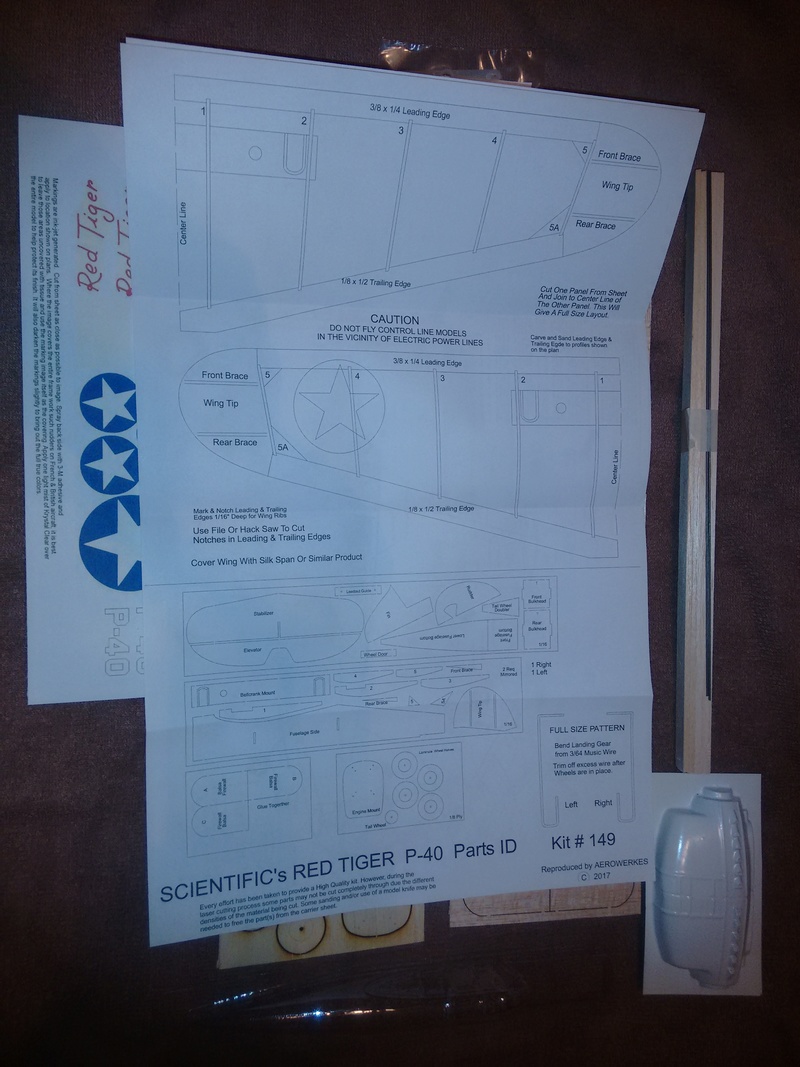
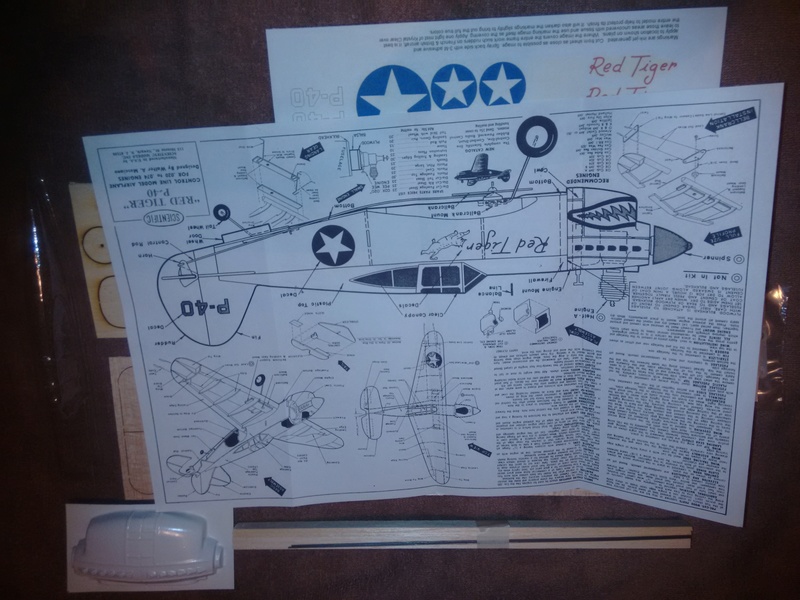
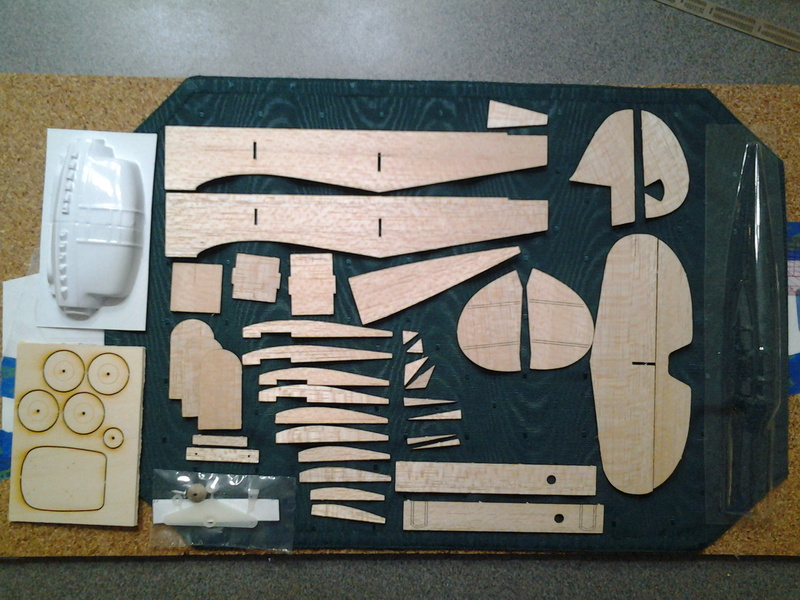
I like the laser etching that marks where the wingtip braces go, and where the landing gear wire attaches to the landing gear plate. Also note the lasercut plywood wheels. I like that they don't melt like plastic ones when the retaining washers are soldered on.
The parts sheet includes a full size wing pattern to build over (well, two halves...better than the oil and flip way of days gone by).
The "decals" are reprints on sticker paper. We'll see how they stick and clear over with dope. Look along the left edge of the last picture...you can barely see the clear turtledeck.

944_Jim- Diamond Member


Posts : 2000
Join date : 2017-02-08
Age : 59
Location : NE MS

944_Jim- Diamond Member


Posts : 2000
Join date : 2017-02-08
Age : 59
Location : NE MS
 Re: DPC Models/AeroWerkes Scientific P-40 Red Tiger Reproduction
I think I'd like to build one of these P-40s. Are they now marketing this kit?

Kim- Top Poster


Posts : 8590
Join date : 2011-09-06
Location : South East Missouri
 Re: DPC Models/AeroWerkes Scientific P-40 Red Tiger Reproduction
Yes he is! His contact info is listed on his website.
http://dpcmodels.homestead.com
Tell him you want the Scientific Red Tiger.
He also has a few other box fuse, built up wing models. He has a Dauntless bomber and a Mitsubishi Zero listed. Check out the Hellcat in 1/2A on StuntHanger.
https://stunthanger.com/smf/12-a-building/dpc-scientific-hellcat-ok-cub-049r/
You may want to look at the thread from a few weeks back:
https://www.coxengineforum.com/t11422-sold-walt-musciano-scientific-red-tiger-p-40-kit?highlight=Red+Tiger
This kit has just been done, so it isn't listed yet. You may want to wait until I finish the kit...mine is the first one off the laser-cutting and vac molding machine.
I have No Financial Interest.
Last edited by 944_Jim on Fri Jan 12, 2018 10:45 pm; edited 1 time in total

944_Jim- Diamond Member


Posts : 2000
Join date : 2017-02-08
Age : 59
Location : NE MS
 Re: DPC Models/AeroWerkes Scientific P-40 Red Tiger Reproduction
Cool. Thank you. I'll follow your thread...still have an intense interest in these little planes 50 years after first building them.
Kim
Kim

Kim- Top Poster


Posts : 8590
Join date : 2011-09-06
Location : South East Missouri

944_Jim- Diamond Member


Posts : 2000
Join date : 2017-02-08
Age : 59
Location : NE MS
 More Red Tiger work
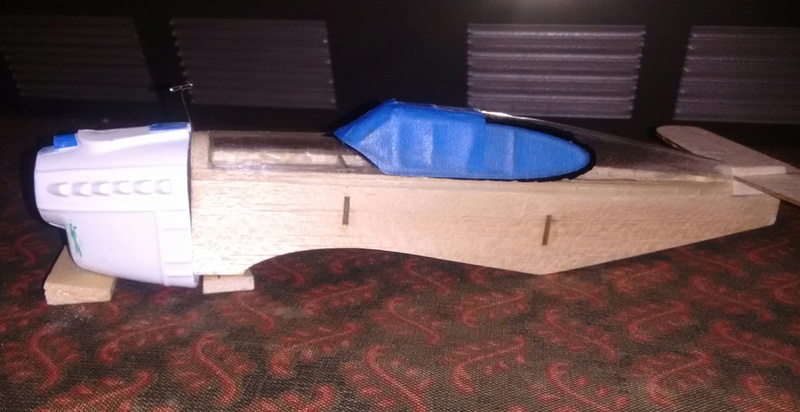
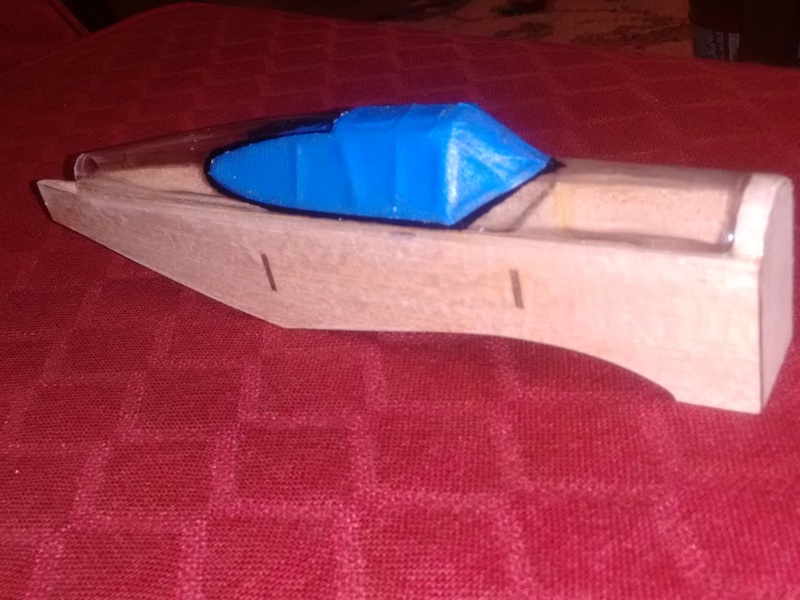
The canopy frame was painted using a paint marker to trace/fill the frame from inside. I practiced with a black Sharpie until I was comfortable with the process. Then the inside was cleaned with denatured alcohol to remove the Sharpie ink prior to the real deal in paint.
The outside is masked so when I dope it, the frame is still exposed and visible.
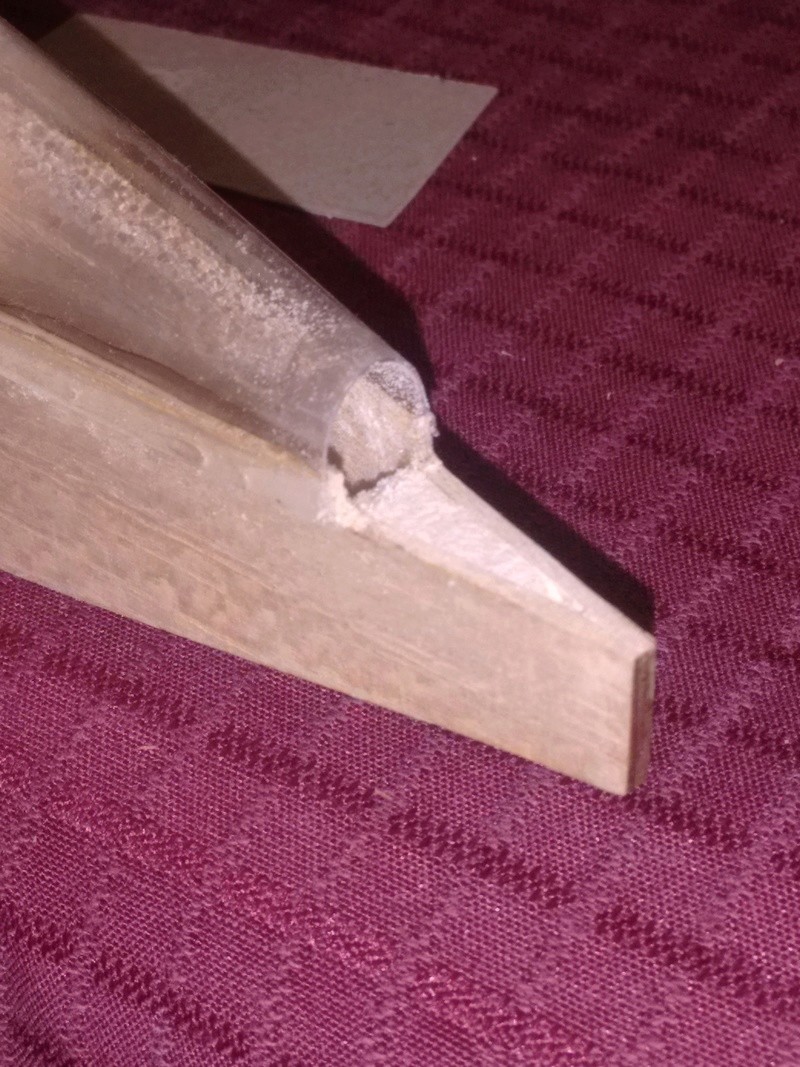
The turtle deck HAD a closed end, and the sides of the turtle deck ballooned away from the fuselage uite a bit. The shape didn't fit the box fuselage very well...something about a pointy tail being marginally covered by the wider closed end didn't look all that good. So I chopped the end off in order to pull the sides of the turtle deck tightly against the fuselage. This glued joint is about an 1/8 inch wide overlapping seam all around. I spent two weeks trying to figure out how to glue the seam, and secure the turtle deck until the epoxy cured. I felt tape would not hold the turtle deck in place while the epoxy cured. I also needed a way to ensure epoxy stayed between the turtle deck and the fuselage. Rubber bands would pull the turtle deck down too much...to the point that the sides ballooned out breaking contact with the fuselage.
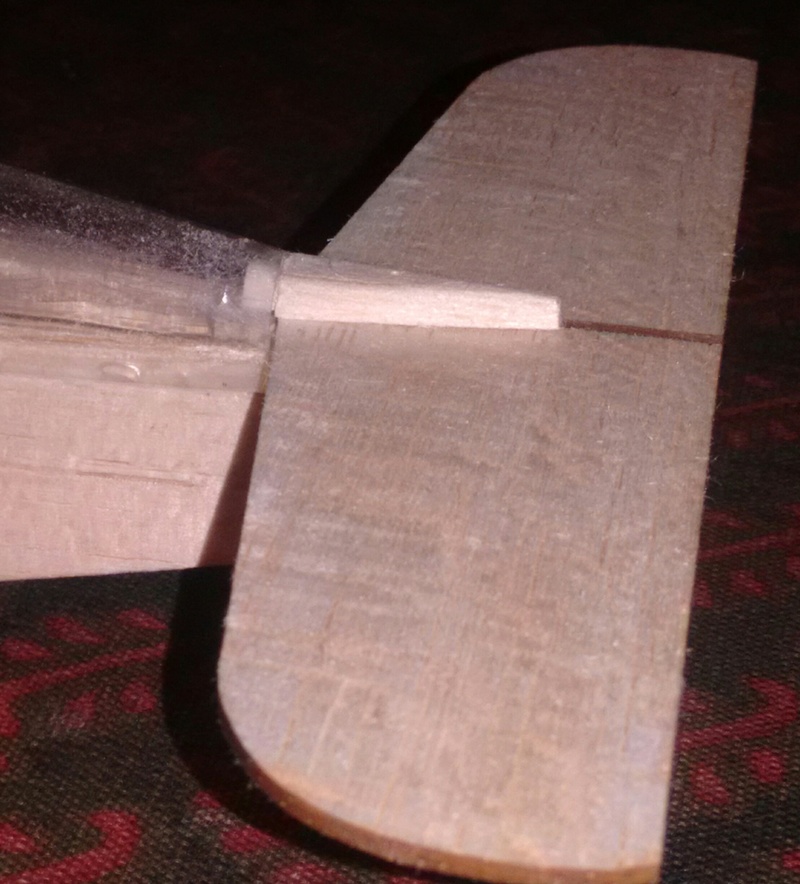
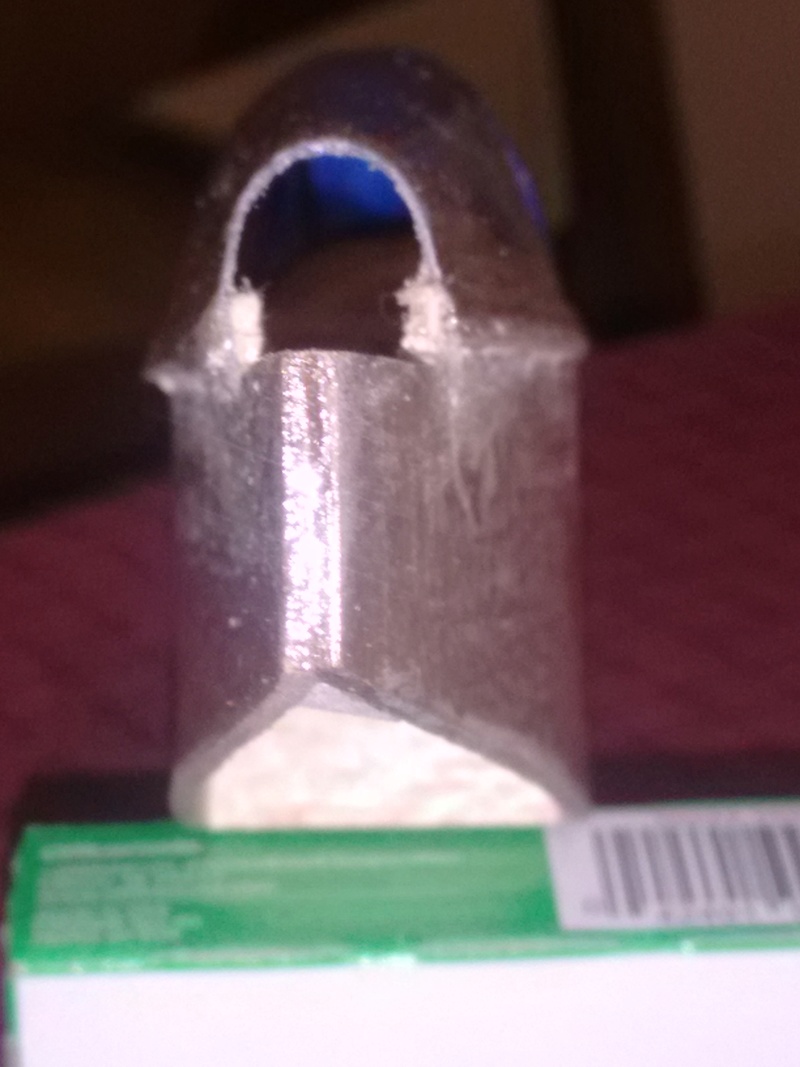
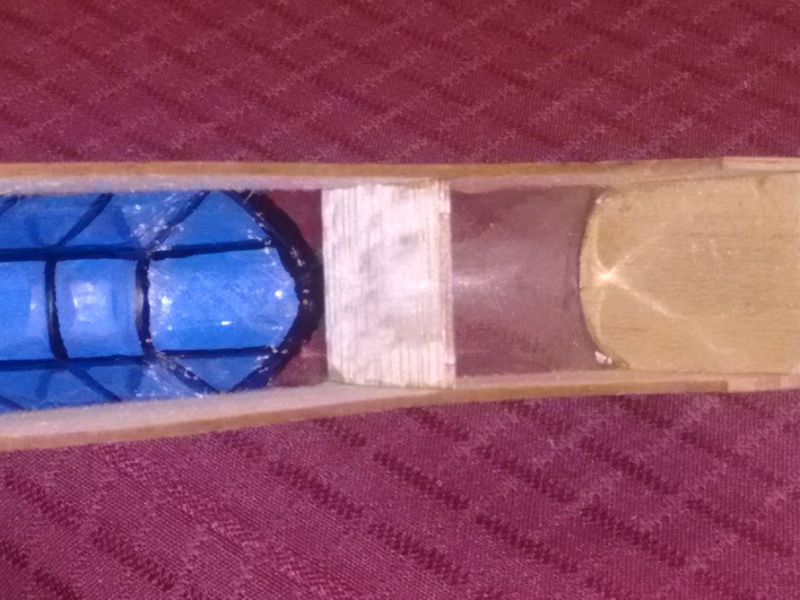
Basically, a jig was made that kept the turtle deck overlap sitting on top of the fuselage sides. The process will be documented when I build the Zero or Hellcat. Since the back of the turtle deck was cut off, I made a two-piece plug to close off the end.
The parts will be showcased before final doping. The plug was sanded and shaped so the seam from the turtle deck flows through the plug...really a silly detail since the only way to see it will be to look under the stabilizer after it is fitted. The plug is also keyed with an insert that will slide into the opening in the turtle deck. The major piece is shown in situ...the minor piece will sit on top of the stabilizer. It has been rounded to carry the shape of the turtle deck under the fin/rudder.
Since I was basically rebuilding the back end, I took the time to change where the stab sits on the model. I think it is almost 3/16 inch higher than it would have been.
A 1/4 inch piece of flat stock was fitted to the inside of the back end. This will allow me to round off the bottom corners of the fuselage in an attempt to remove that "box" look. It will also allow for a more secure tail wheel mount. I hope the weight penalty is worth the strength!
I still need to finish the main gear and install it in the wing.
I'm also toying with the idea of making the wing removable...locating dowels and rubber bands may secure the wing for flight. This is still only an option, but one that could potentially make the model more portable for little weight gain.
In the end, I'm quite pleased with the canopy/turtle deck install. The rest of the kit is pretty basic.
More will be added later!


944_Jim- Diamond Member


Posts : 2000
Join date : 2017-02-08
Age : 59
Location : NE MS

944_Jim- Diamond Member


Posts : 2000
Join date : 2017-02-08
Age : 59
Location : NE MS
 Re: DPC Models/AeroWerkes Scientific P-40 Red Tiger Reproduction
944_Jim wrote:The canopy frame was painted using a paint marker to trace/fill the frame from inside. I practiced with a black Sharpie until I was comfortable with the process. Then the inside was cleaned with denatured alcohol to remove the Sharpie ink prior to the real deal in paint.
The outside is masked so when I dope it, the frame is still exposed and visible.
The turtle deck HAD a closed end, and the sides of the turtle deck ballooned away from the fuselage uite a bit. The shape didn't fit the box fuselage very well...something about a pointy tail being marginally covered by the wider closed end didn't look all that good. So I chopped the end off in order to pull the sides of the turtle deck tightly against the fuselage. This glued joint is about an 1/8 inch wide overlapping seam all around. I spent two weeks trying to figure out how to glue the seam, and secure the turtle deck until the epoxy cured. I felt tape would not hold the turtle deck in place while the epoxy cured. I also needed a way to ensure epoxy stayed between the turtle deck and the fuselage. Rubber bands would pull the turtle deck down too much...to the point that the sides ballooned out breaking contact with the fuselage.
]
Jim,
I built a couple of planes with turtle back (Cosmic Wind, Toucan, Lil Roughneck etc. all R/C birds) and the best experience I gained was soaking the balsa sheets in hot water to allow easy bending and prevent ballooning of the back. Surprisingly, soaked balsa really bends well without cracking, and CA glue sticks to even wet balsa...(and to wet index and thumb fingers too) Sorry if my advice seems commonsense..

balogh- Top Poster


Posts : 4803
Join date : 2011-11-06
Age : 65
Location : Budapest Hungary
 Re: DPC Models/AeroWerkes Scientific P-40 Red Tiger Reproduction
Looking forward to reading all about here on this forum Jim, I don't have the time to visit others. Hopefully Kim will do a forum build too.
Bob
Bob

rsv1cox- Top Poster


Posts : 10851
Join date : 2014-08-18
Location : West Virginia
 Re: DPC Models/AeroWerkes Scientific P-40 Red Tiger Reproduction
Nice looking kit there Jim , i will bee watching this to the finish . Thanks for letting us tag a long . 

getback- Top Poster


Posts : 10276
Join date : 2013-01-18
Age : 66
Location : julian , NC
 Re: DPC Models/AeroWerkes Scientific P-40 Red Tiger Reproduction
new to the forum, but definately watching this one, as I had the original Scientific kit back in the day, not sure what happened to it.... I still have a few of my old airplanes I'm redoing now, This could be my forst airplane kit in 30 years..

green dragon- Beginner Poster

- Posts : 6
Join date : 2018-11-26
 Re: DPC Models/AeroWerkes Scientific P-40 Red Tiger Reproduction
Argh! Oh, the shame of it all!
Dragon,
I don't know how you found this thread. Worse, I just reviewed time stamps. I have to get this kit finished!
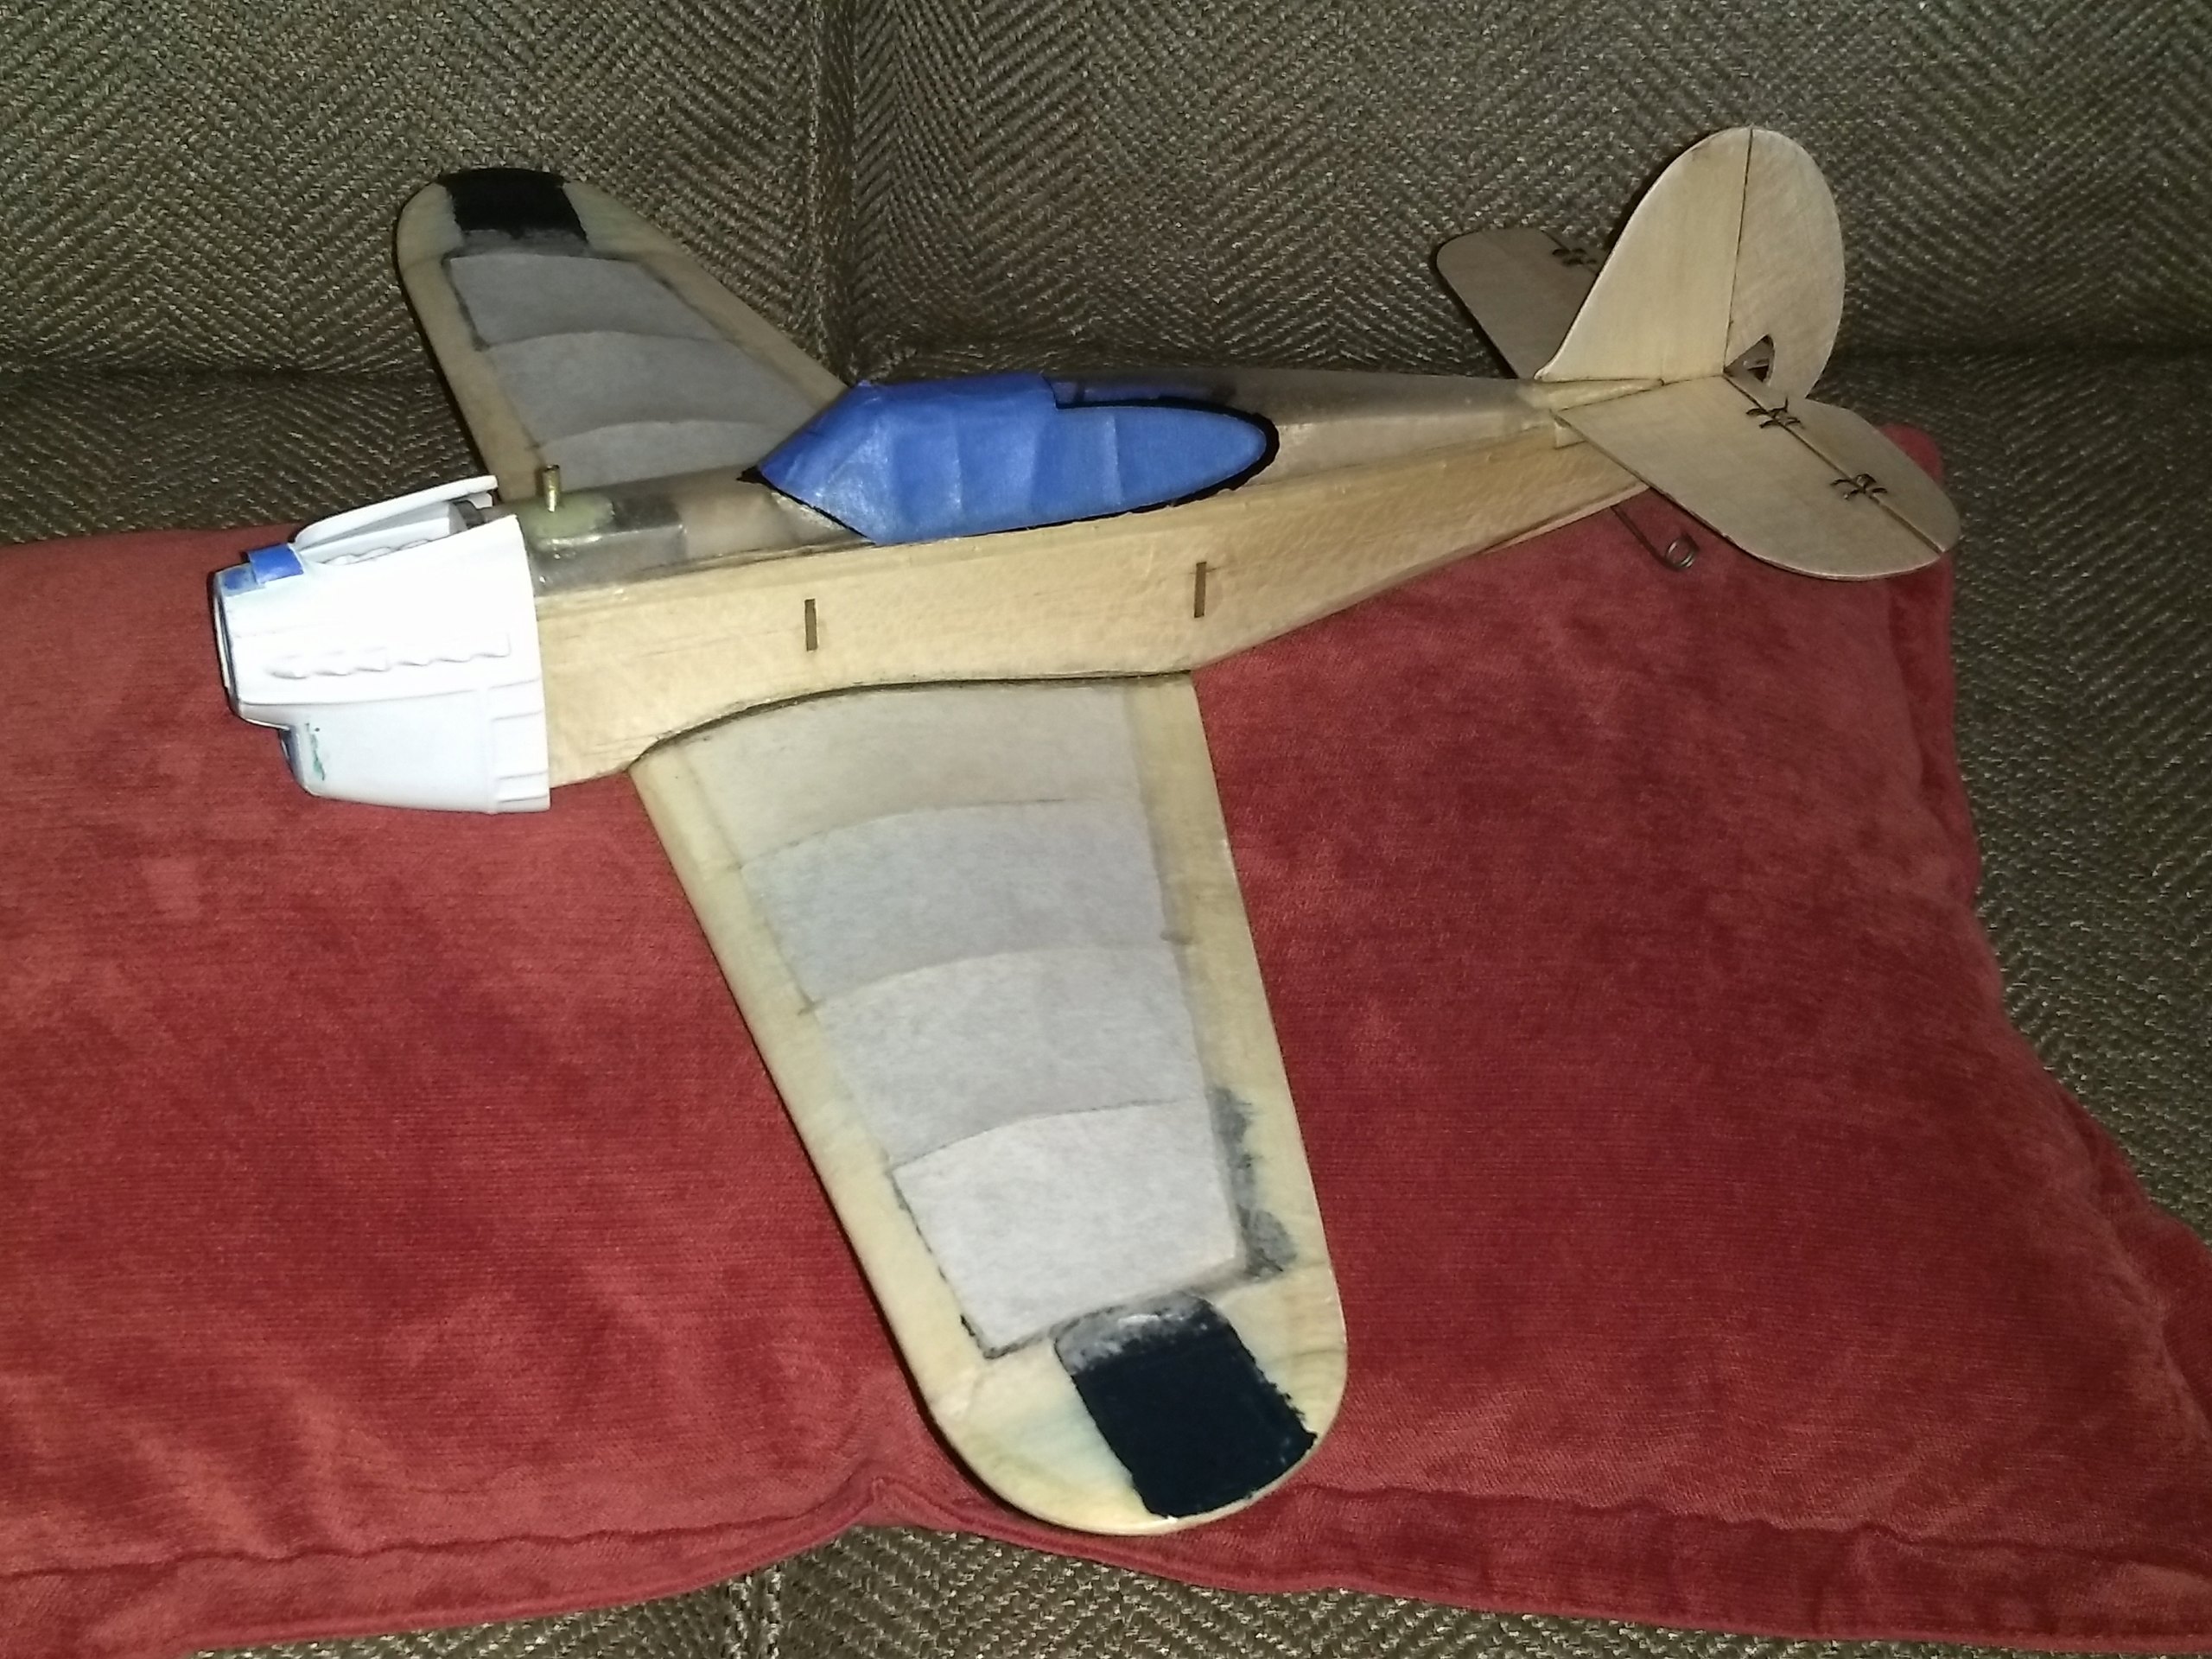
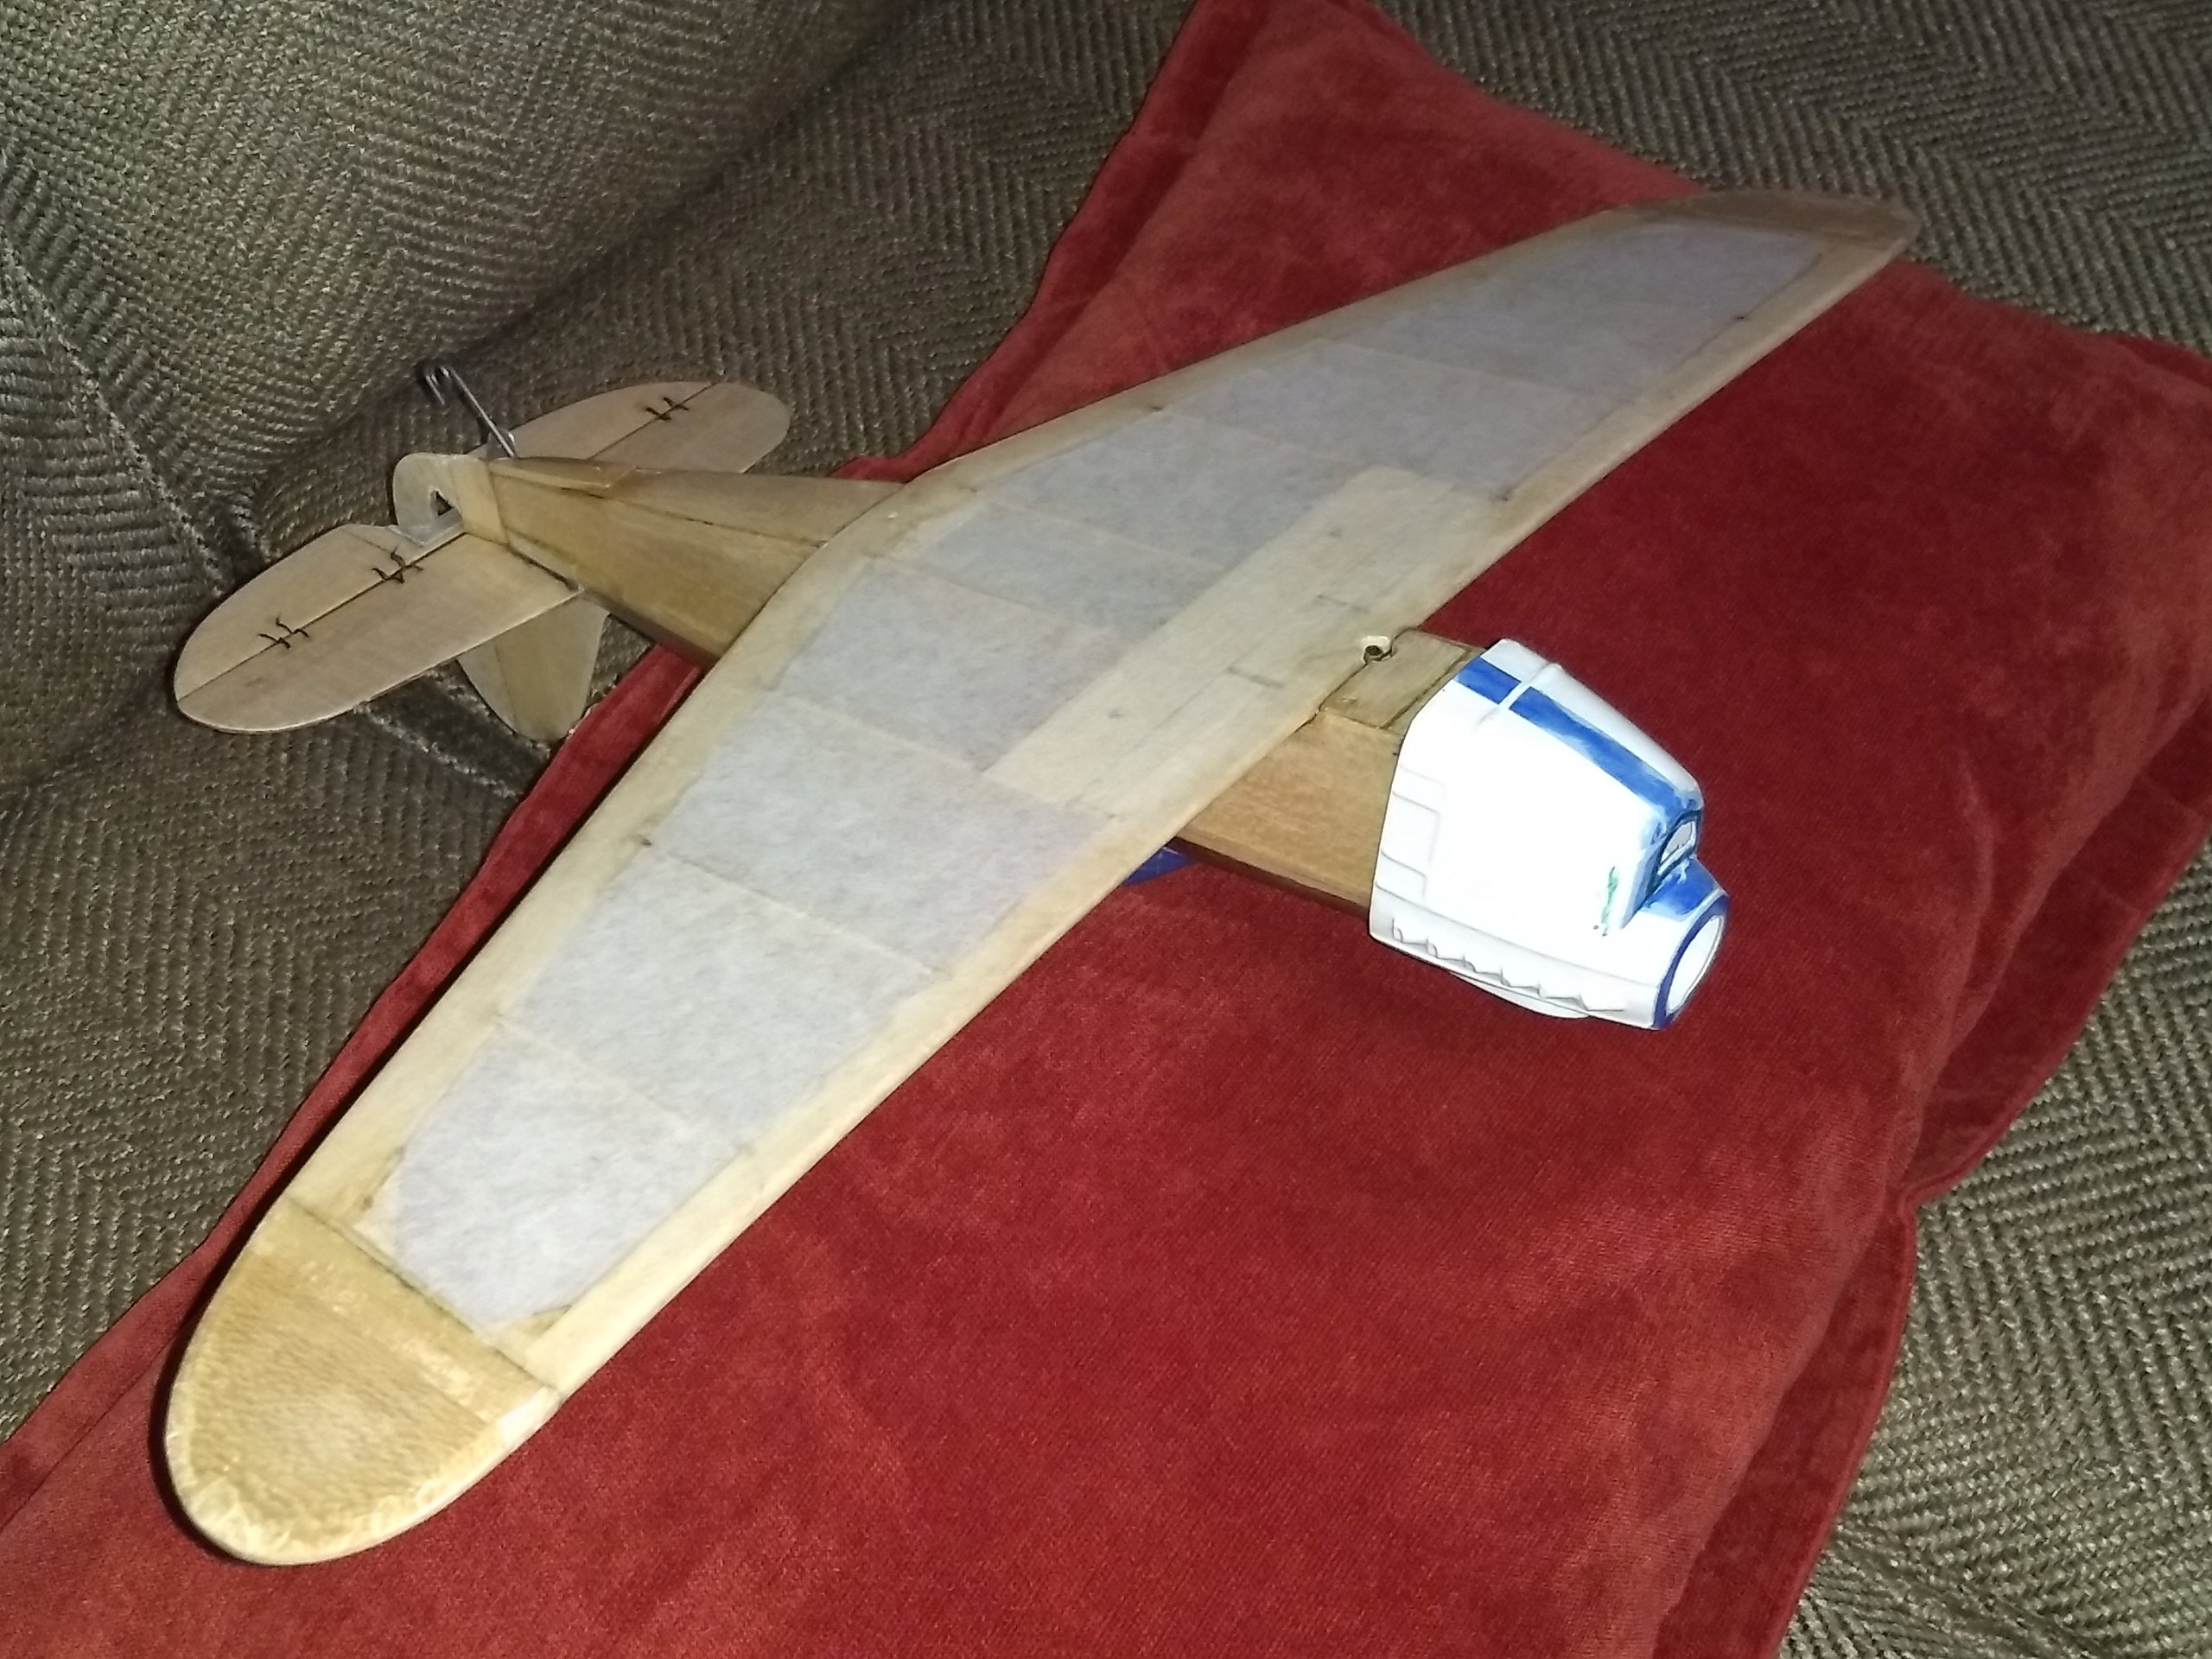
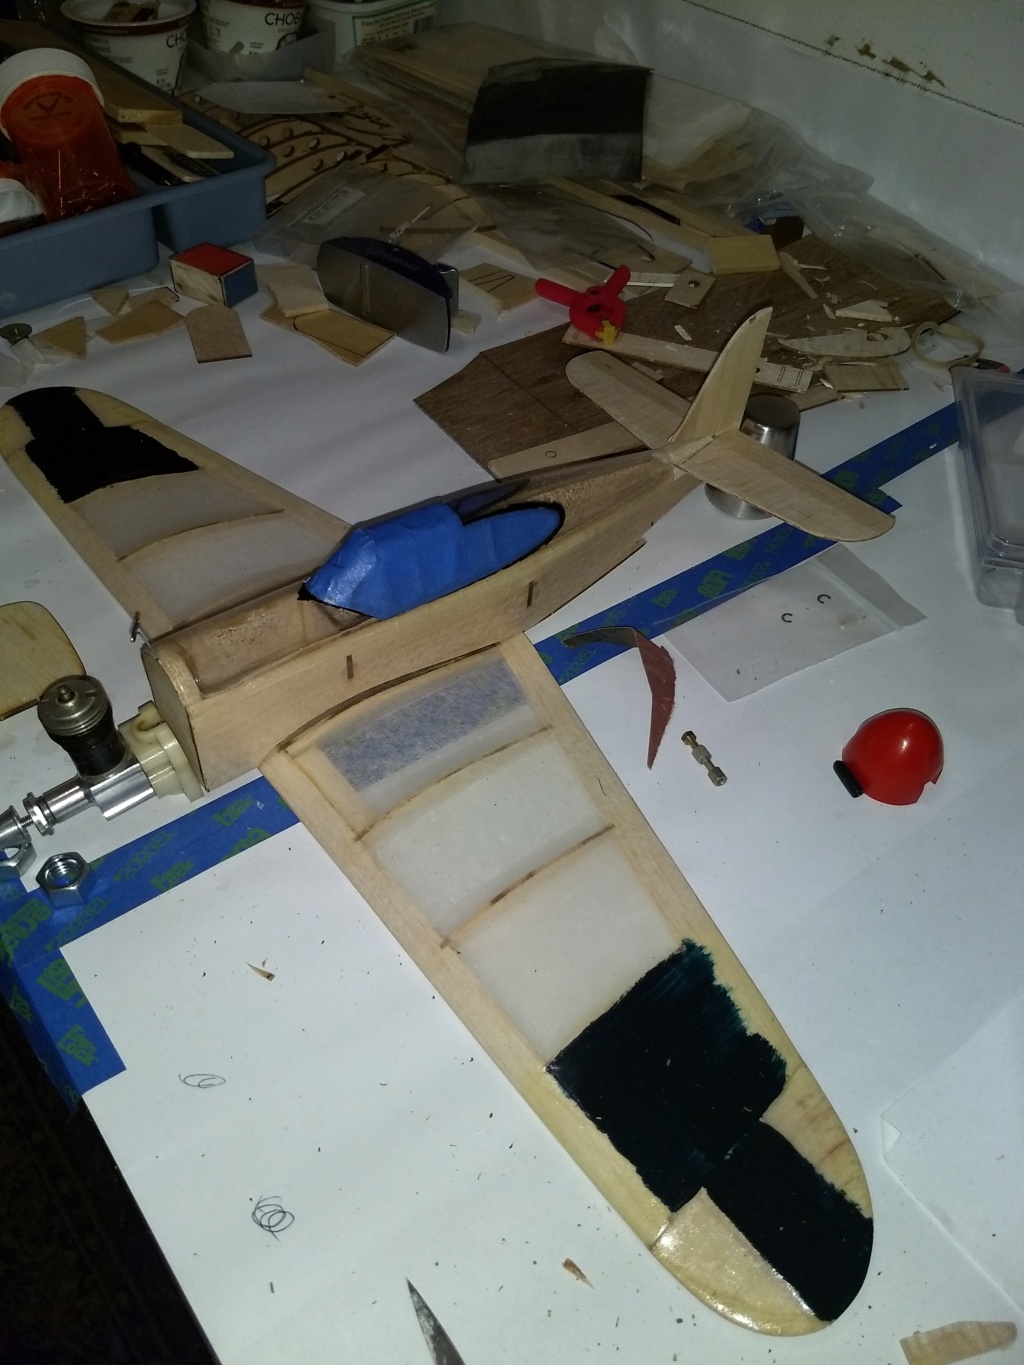
Look closely at the wing tips above. I glued the braces upside down. This has the bottom of the tips flush with the bottom of the wing. And, as the tissue shrinlk, the tips draw downward. A couple weeks back (well, maybe a month ago) I cut them off and replaced with slightly thicker balsa, and new braces. The effects are much more presentable (see below).
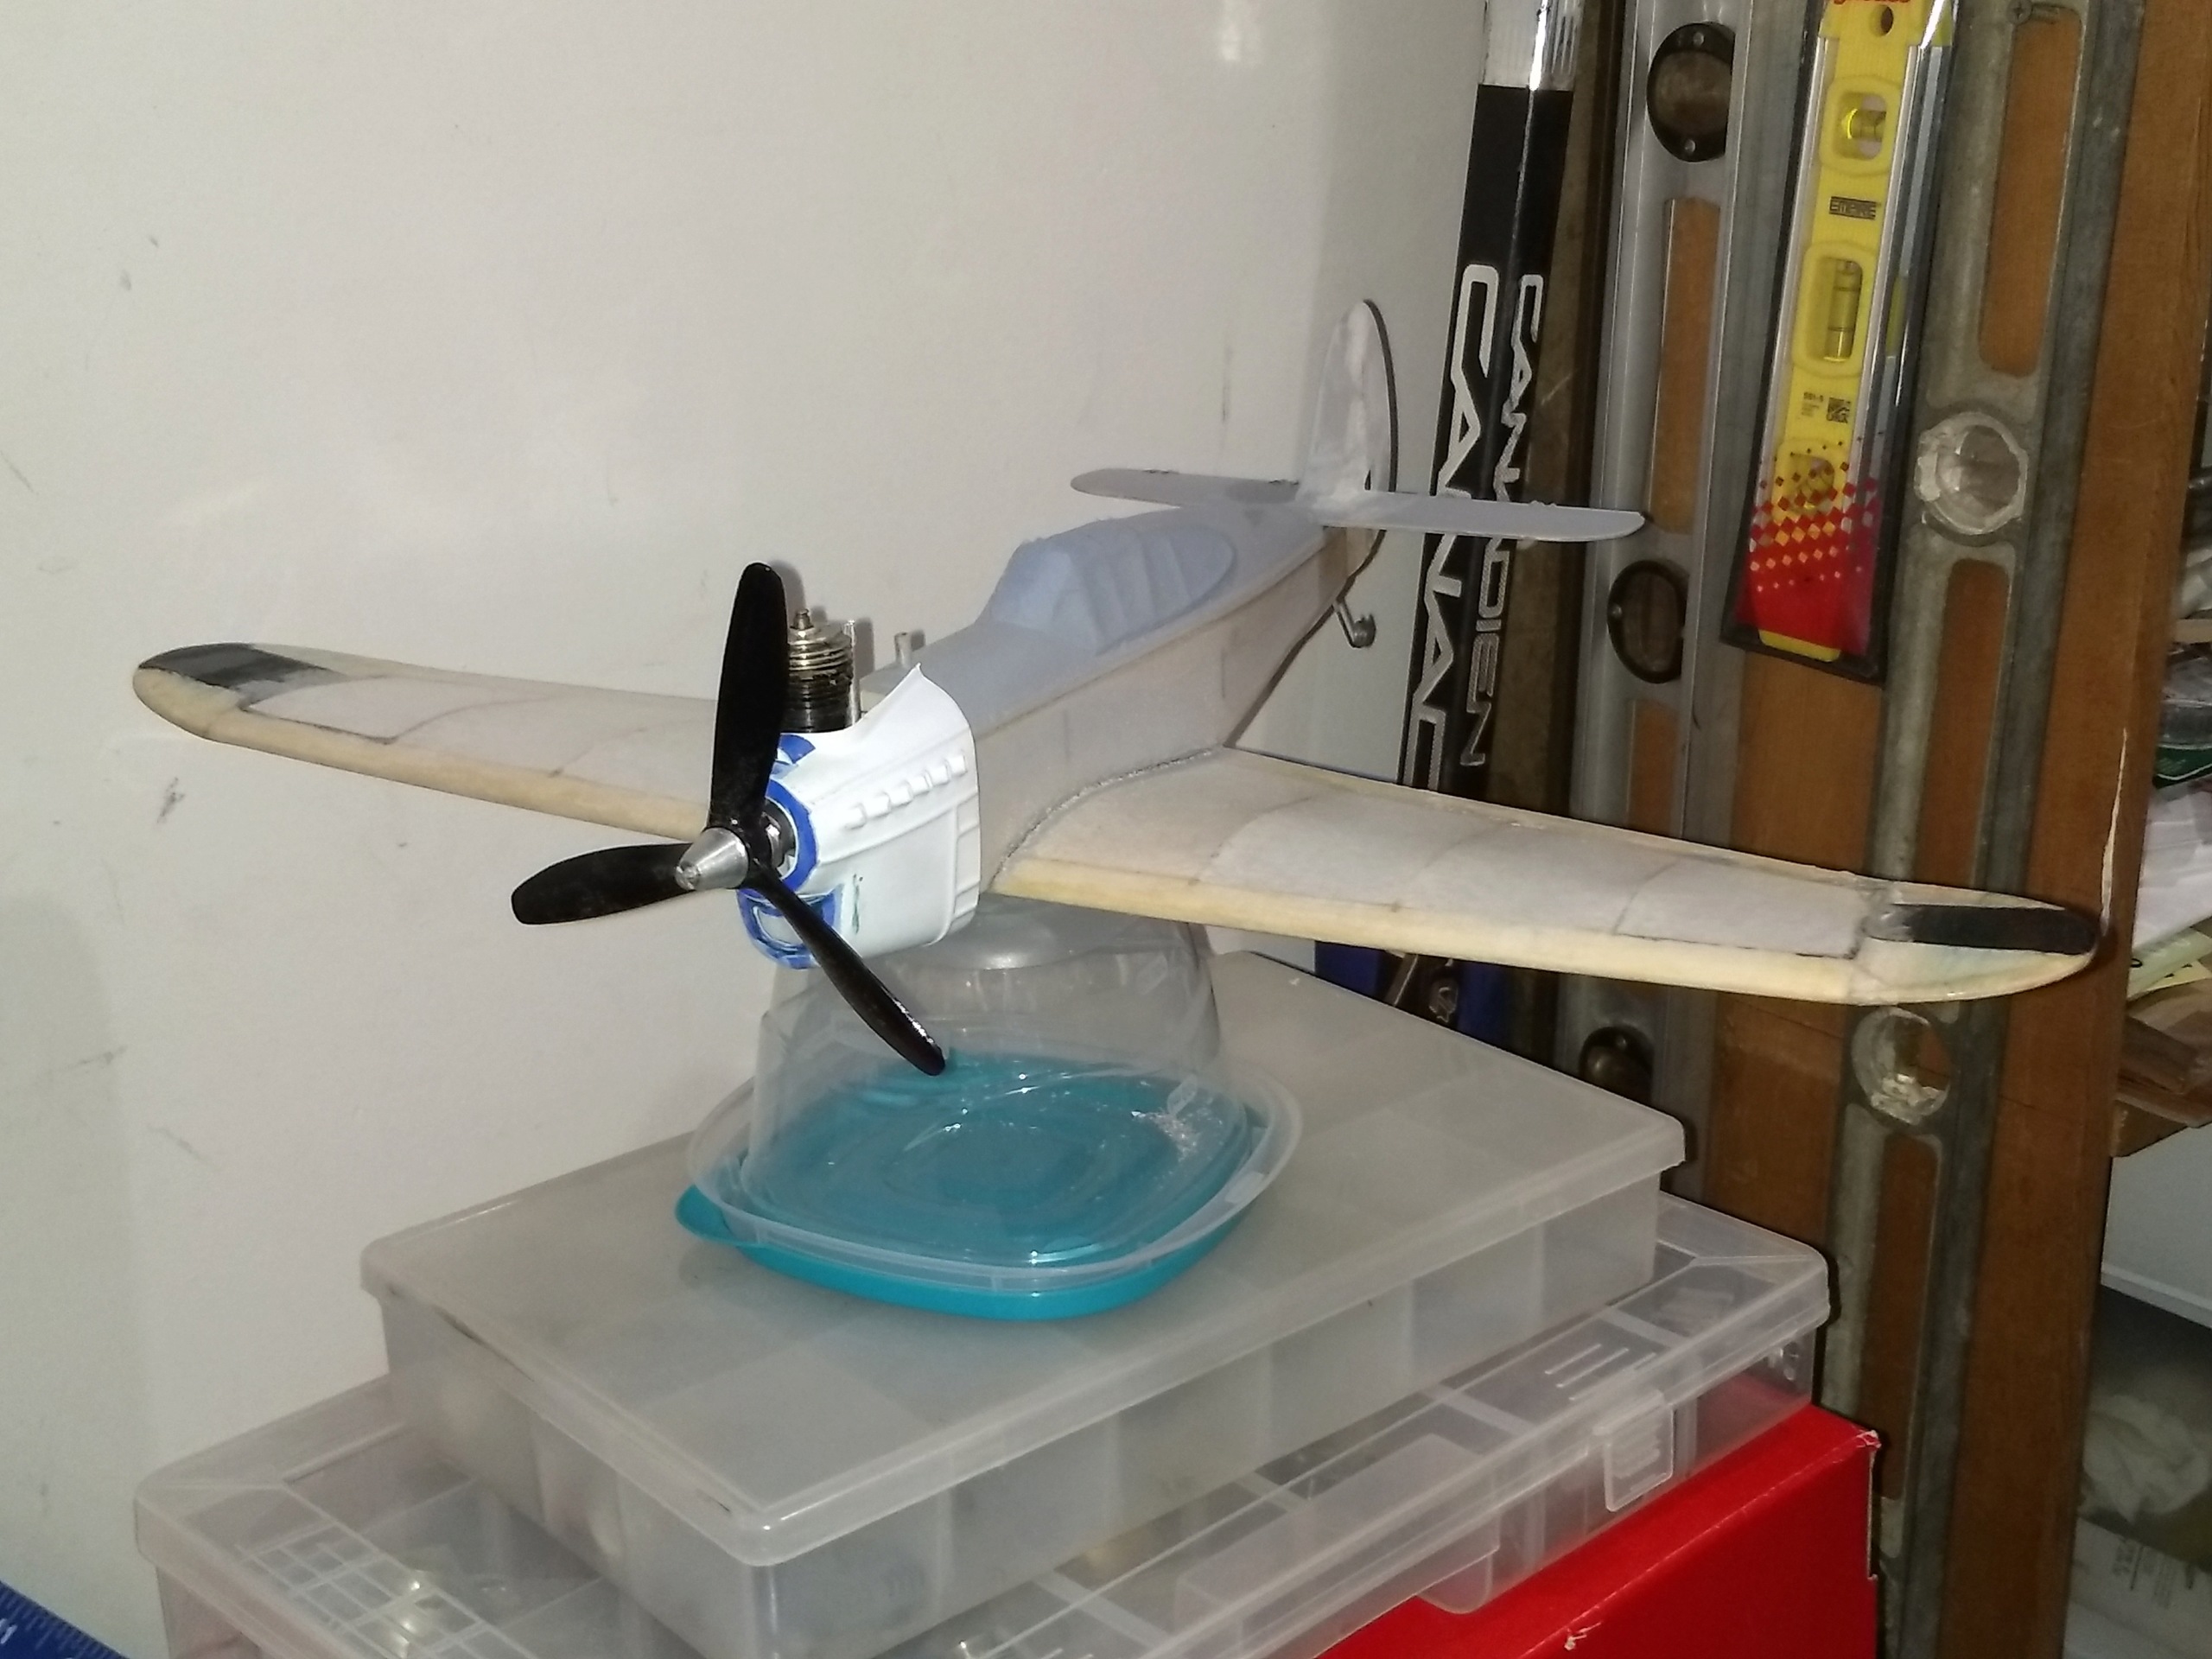
I had originally planned to use a Cox Babe Bee, but have changed my mind. I think the model would be too nose heavy. Not only that, but the engine cowl isn't long enough to cover a Bee. Sizing up a product engine means it should fit just fine. Of course, I'll need to make or source an external tank and place it in the fuselage. I still have access even though the fuse top is hard-glued on.
I love the Scientific kits. Find my boys Scientifics here and on RCGroups.com under the same username. They built the profile FW-190 and Typhoon with this same flat bottomed built-up wing (one is in 1/2A, and the other in Control Line forums). Also look for my Scientific Profile P-40 with symmetrical wing here and RCGroups. It really flies. The YouTube video is under CL_Jim.
Find Dave Cowell of DPCModels aka AeroWerkes:
http://dpcmodels.homestead.com/SRKS.html
He'll sell you laser-cut reproductions that go together quite well. I've seen internet posts of his other reproductions, and they all look fabulous. In fact, my first connection to him was to get the Sterling P-38 (still un-built) when I was looking for kits to draw my boys into the hobby. Unfortunately, they didn't enjoy it like I do.
Well, here it is a year later...not.much progress, but sometimes life gets in the way. If.you want more.pics or details, just ask!


944_Jim- Diamond Member


Posts : 2000
Join date : 2017-02-08
Age : 59
Location : NE MS
 Re: DPC Models/AeroWerkes Scientific P-40 Red Tiger Reproduction
JIm, Thanks for the info / update... And yeah, I did not notice the posts were from Feb, just saw the 2018 and figured it was still 'current' , lol.
I dug out my old CL stuff a few years back, started on one of the Stunt Chimp models to try to get back into it, then everything got pushed to the side for a few years, now my grandsons are 9 and 6, gave me an excuse, 9 yr old actually helped me recover and dope my original Lil Satan a few weeks back. If the snow ever melts we'll go fly some.
I've always been a builder, so looking forward to cranking out a few airplanes and see if the kids get the bug or not
I'll have to drop a note about the Red Tiger kit, like noted, it's one I recall building, seems maybe it was damaged on first try , memory isn't what it was, lol.
I still have my original Lil Satan with Babe Bee, a Scientific Zig Zag I just repaired ( needs paint), and an 020 powered Guillows ME109 that we never could get to fly / trim....
Been trying to find a plan for a plane my brother had - Stuntman or Swordsman type sheet wing 'stunter', but I remember it having the plastic Goldberg type motor mount, positive it was a kit, not modified, so not sure what it was ( no pics of anything back in the day ).. will have to get pics of what I still have.
( thinking I should post this somewhere as an introduction, lol ).
Look forward to reading all the back posts and getting motivated. ( I need a new hobby like a hole in the head, lol )
AL

green dragon- Beginner Poster

- Posts : 6
Join date : 2018-11-26

944_Jim- Diamond Member


Posts : 2000
Join date : 2017-02-08
Age : 59
Location : NE MS
 Re: DPC Models/AeroWerkes Scientific P-40 Red Tiger Reproduction
Looking good Jim , is this going to bee R/C ?

getback- Top Poster


Posts : 10276
Join date : 2013-01-18
Age : 66
Location : julian , NC
 Re: DPC Models/AeroWerkes Scientific P-40 Red Tiger Reproduction
I really like your sewn hinges! Also, I would like to know how you cut and put that upward flange on the cowling for the engine clearance! In the kit I have the cowlings were cut out of the flat section with out being glued together, making it difficult to glue the two halfs together.

Marleysky- Top Poster


Posts : 3618
Join date : 2014-09-28
Age : 71
Location : Grand Rapids, MI
 Re: DPC Models/AeroWerkes Scientific P-40 Red Tiger Reproduction
Eric,
This one is control line. I don't think I could see a plane this small if it flew more than 150' away from me!
Chuckles...
Marley,
The ridge around the top is by design from Scientific on this kit (an unusual feature for sure). The original kit was bought from one of the CEF members and shipped to Dave Cowell. This particular kit is "reproduction serial number" 001. Dave asked if I wanted the original or the repop. I took the repop and owe him a build log.
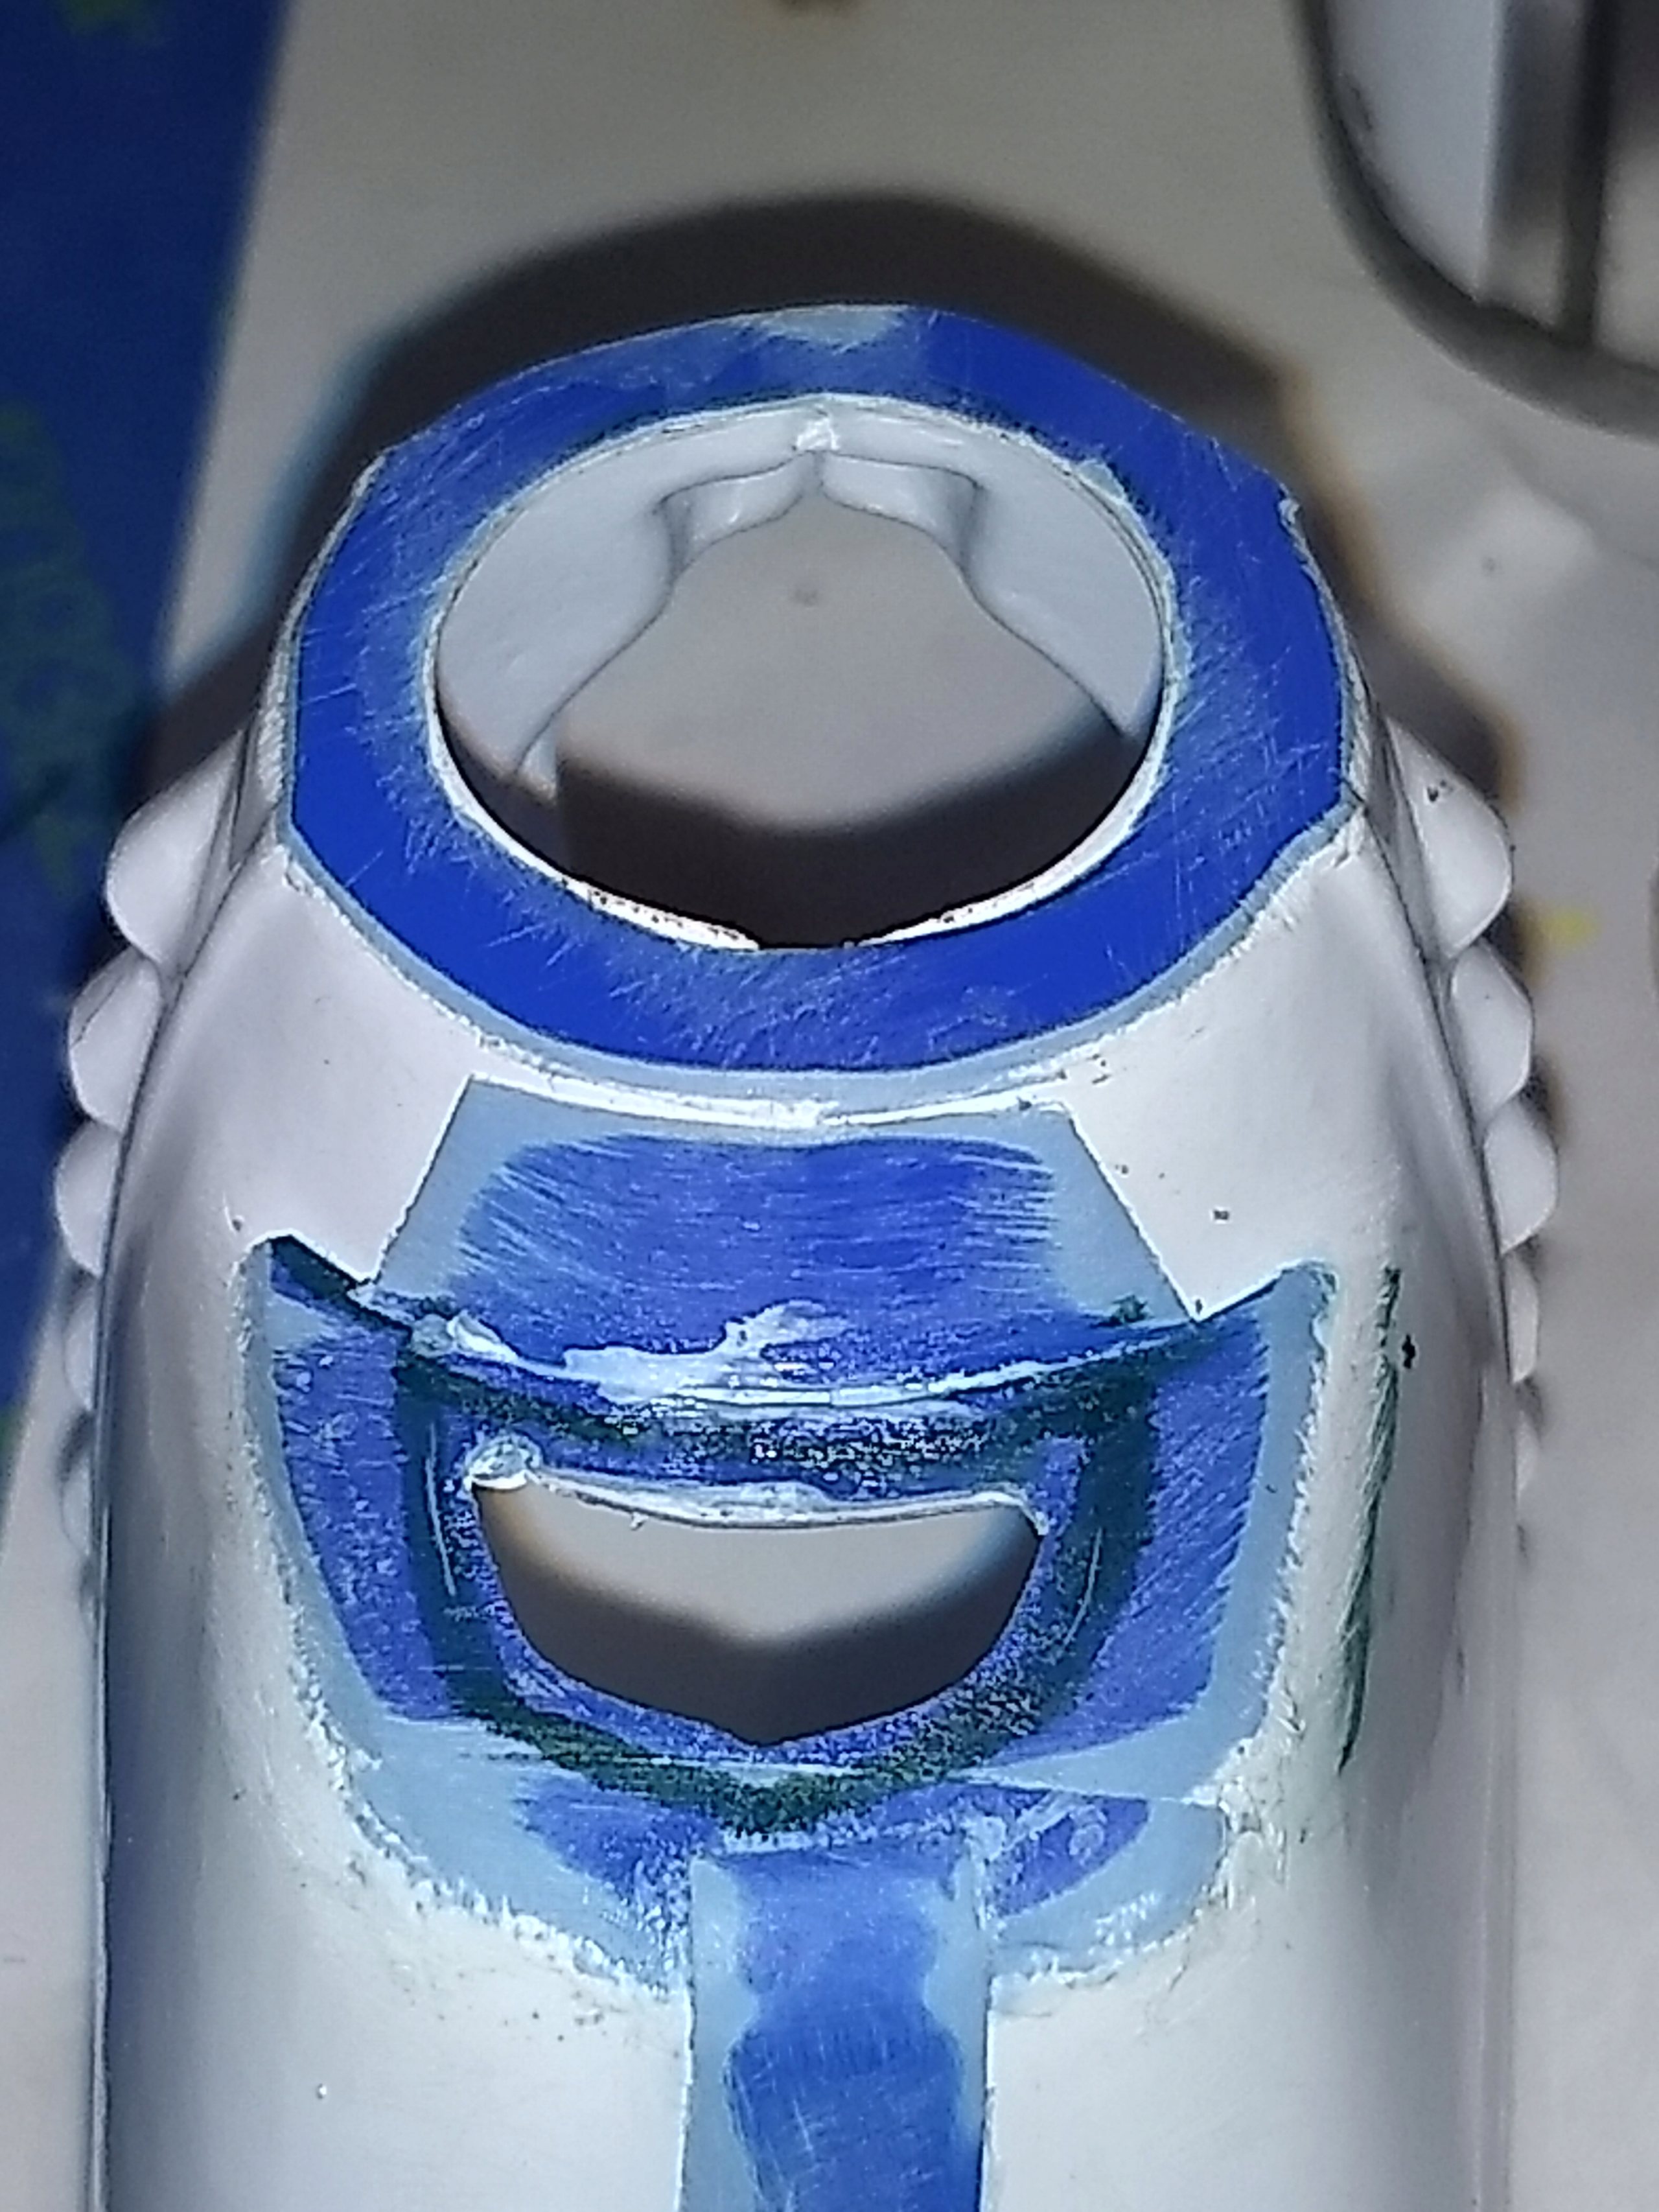
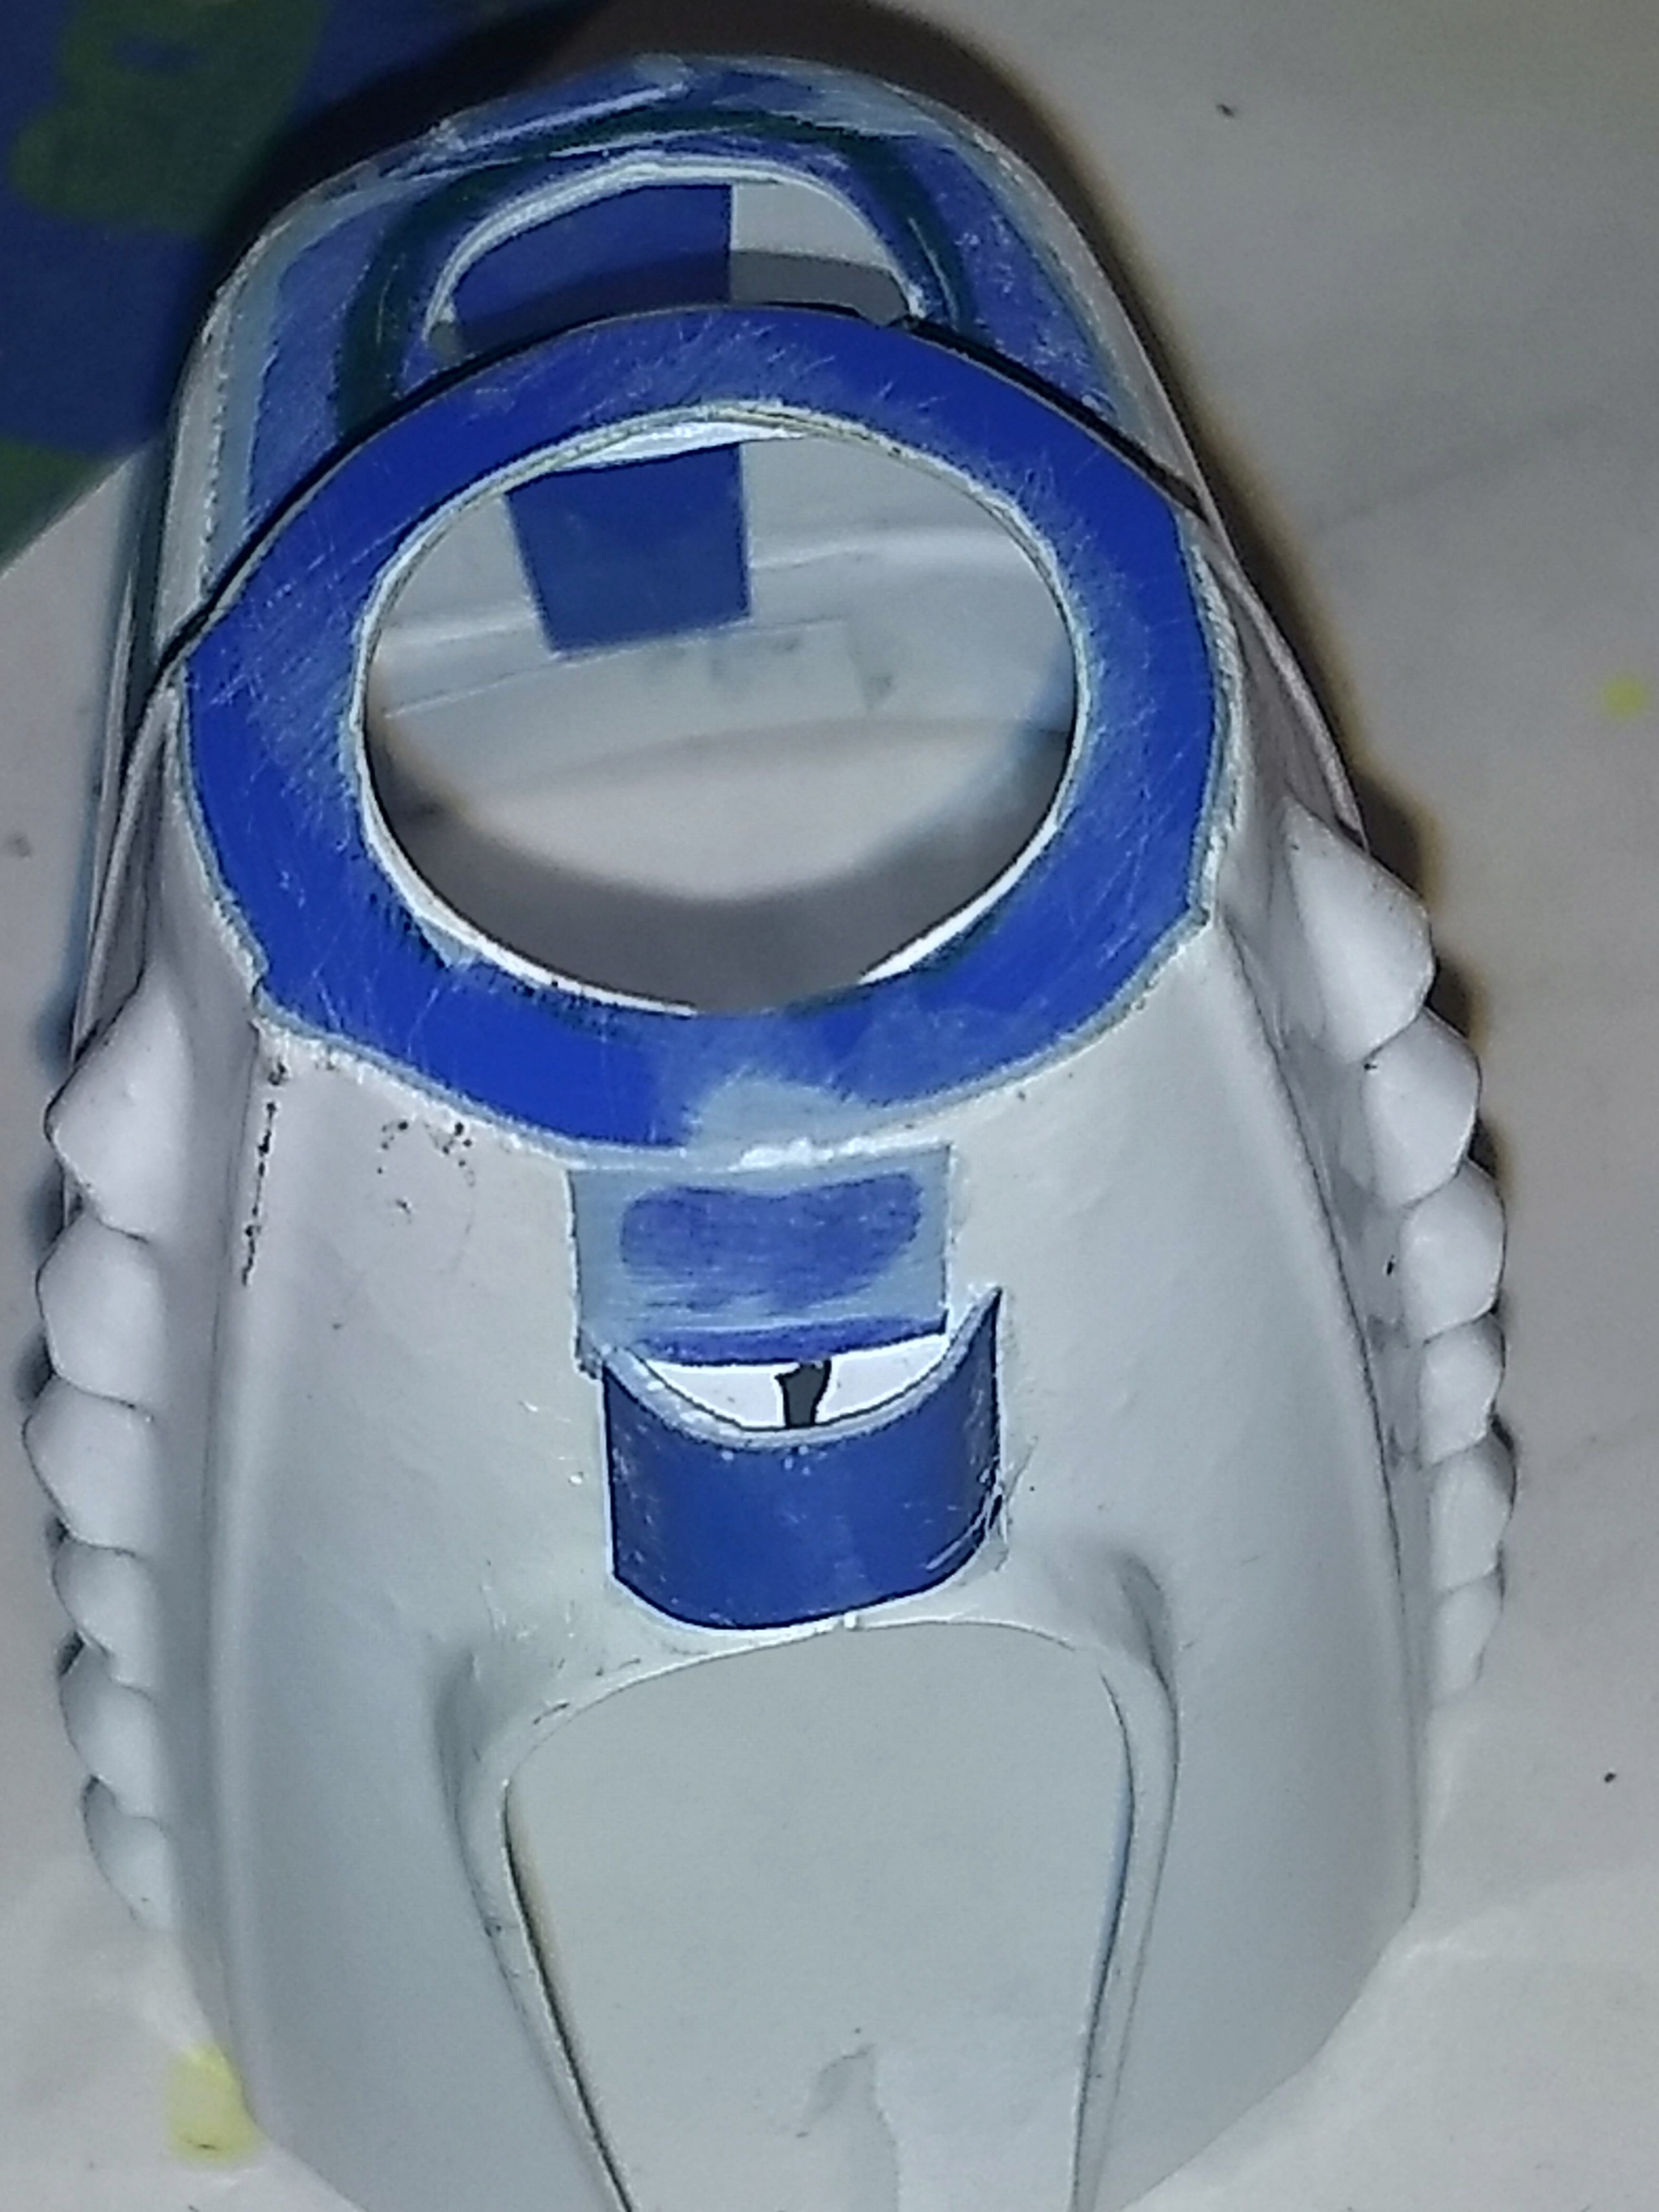
Liquid plastic cement (the watery, runny stuff, not tube model glue) is used because it fuses and dries/evaporate very quickly. The tube glue will melt and deform the kit plastic since it doesn't evaporate, it just dries and hardens. The glue sets fast enough that I rarely tape a seam. It is also fluid enough that it WILL wick along the tape and damage any area it is trapped in/on. I will use fingers to hold endpoints of a flange, and glue the midpoints. Once the midpoints set, I secure the endpoints. This styrene sands so fast and easy that imperfections can be sanded off for a second attempt. It.cuts readilly with a razor, and it also feathers down on edges well.
I use sharp baby nail scissors to cut close to the flange, but leaving enough to manipulate as needed, and sand the finished edge to fit.
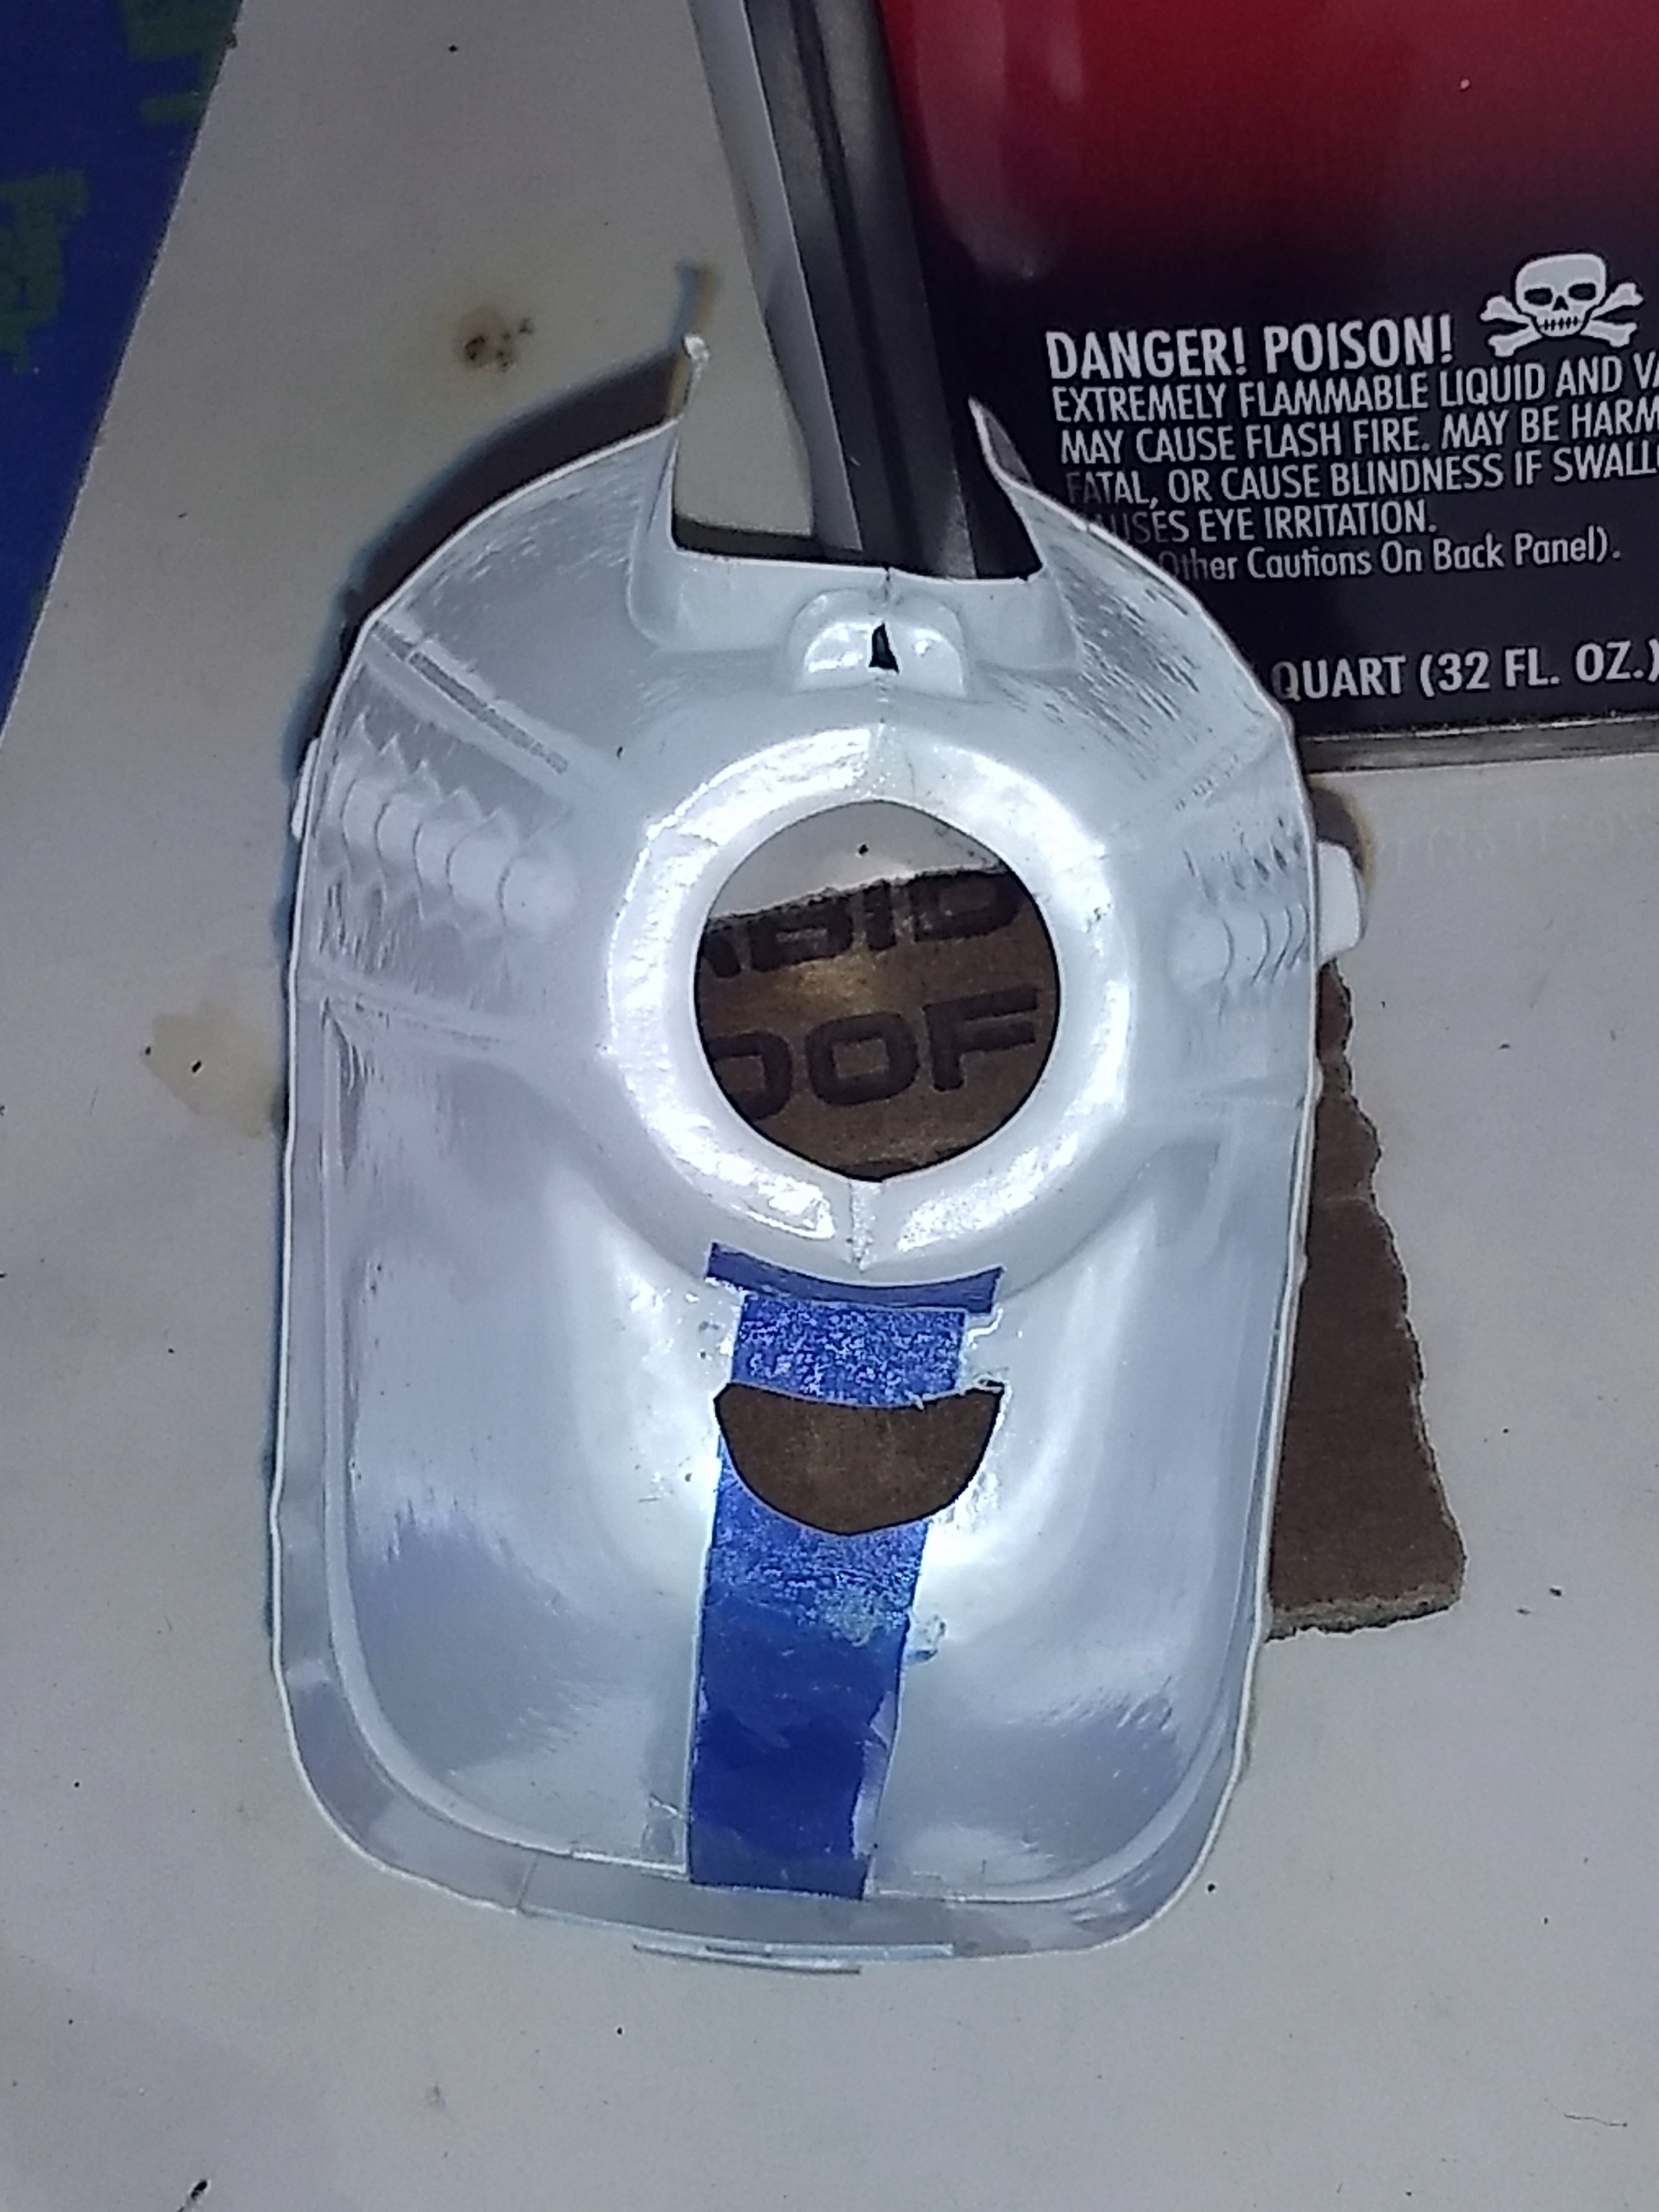
I used on-hand plastic cups (think Solo-brand party cups) to make a flange line inside the cowl, and any strengthening that may be needed. Even in the instance that the two halves can be butt, or glued edge-to-edge, I still glue a flange inside the seam line.
My process has been to cut the two cowl halves apart, lay each against the other and paperclip the flanges together. Then I offer the cowl to the firewall to check for clearance. If there is, then I know I can trim the halves to remove the flanges, and check once more. A pencil is used to trace one seam-line onto the other half. A check is made to see if I'll be removing a lot, or a little cowl. Slow goes best here.
However, if the cowl is significantly smaller, then I consider making a new firewall, or sanding the OEM one down until it fits the cowl. Failing that, I use tape to fix the halves together and measure the gap between the halves. Then plastic cup material is used to make an extender with particular attention paid to any details that need to be preserved. Any extension would be applied opposite details (say, at the underside of the cowl where no one looks).
You can see the repairs/modifications I made in blue. The top snout on the cowl needed to be reinforced where the plastic was awfully thin. I know that was a bunch of text...I hope the pictures work.


944_Jim- Diamond Member


Posts : 2000
Join date : 2017-02-08
Age : 59
Location : NE MS

944_Jim- Diamond Member


Posts : 2000
Join date : 2017-02-08
Age : 59
Location : NE MS
 Re: DPC Models/AeroWerkes Scientific P-40 Red Tiger Reproduction
I'm Confused......is this an older build log on the P-40 that is no more?

OhBee- Platinum Member

- Posts : 698
Join date : 2016-03-23
Age : 73
Location : Minnesota
 Re: DPC Models/AeroWerkes Scientific P-40 Red Tiger Reproduction
Nope. Two different types of models. The other was a larger, symetric wing profile fuselage model with plastic cowl. I picked up the other first, and scored this one later. The other is a slightly larger kit at 24.5".
This one is related to the Zipper model being built (by Kim, I believe) right now. They feature a full (coffin shaped) fuselage with a plastic/sort-of-detailed turtle deck from front to back. There was a line of WWII kits like this...a Zero, a Dauntless, this one, and a Hellcat. Then there were a few more that weren't models of combat planes. All these guys came in at closer to 18"-19".
This one, the Zipper, and a few profile fuselage models shared the same basic flat-bottomed wing. Those profile kits also had engine cowls. My boys did one each from the smaller profile series, a Hawker Typhoon, and a FW-190.
I started this one after the other was flying. While the other flew, I stopped working this one. I have to get something in the air soon! I really want to finish painting this one...fly it a few times, and hang it in the living room.
And there is also a UKIE .35 waiting for some attention...time to get back to bench-running that Monster .35 Fox powered beast. The UKIE will most likely fly within the next few weeks.

944_Jim- Diamond Member


Posts : 2000
Join date : 2017-02-08
Age : 59
Location : NE MS
 Re: DPC Models/AeroWerkes Scientific P-40 Red Tiger Reproduction
Well as you know I love P-40's. Is that another old discontinued kit?....as I've looked around and can't seem to find anything like that. Love the looks of that one!

OhBee- Platinum Member

- Posts : 698
Join date : 2016-03-23
Age : 73
Location : Minnesota
Page 1 of 2 • 1, 2 
 Similar topics
» Scientific P-40 Red Tiger
» Scientific Red Tiger
» *SOLD* Walt Musciano Scientific "Red Tiger P-40" kit
» Scientific Models, INC
» Favorite Musciano/Scientific Models
» Scientific Red Tiger
» *SOLD* Walt Musciano Scientific "Red Tiger P-40" kit
» Scientific Models, INC
» Favorite Musciano/Scientific Models
Page 1 of 2
Permissions in this forum:
You cannot reply to topics in this forum

 Rules
Rules


