

 Rules
Rules
Log in
Search
Latest topics
» Older ignition booksby lla Today at 3:58 pm
» Fox .35 Modifications
by Onelife Today at 3:54 pm
» Jim Walkers FireBee - This is going to be fun
by rsv1cox Today at 3:33 pm
» *Cox Engine of The Month* Submit your pictures! -May 2024-
by getback Today at 10:23 am
» S1 Ringmaster
by Onelife Today at 8:40 am
» Speed plane - Crispy but not too crispy
by rsv1cox Today at 7:54 am
» O&R 23 & Brown Jr
by getback Today at 7:47 am
» Introducing our Cox .049 TD Engines
by MauricioB Today at 2:31 am
» Jim Walker Firebaby
by rdw777 Yesterday at 4:16 pm
» Hemostat clamp/smooth-jaws
by roddie Yesterday at 3:48 pm
» Black Widow Run time
by Ken Cook Yesterday at 3:44 pm
» 1:64 scale Diecast (Hot Wheels)
by roddie Yesterday at 3:33 pm
Cox Engine of The Month


CEF Traveling Engine


Win This Engine!

Live on Patrol


Prop Rod engine screws and restoration
Page 4 of 4
Page 4 of 4 •  1, 2, 3, 4
Re: Prop Rod engine screws and restoration
![]() bottomgun Tue Apr 26, 2022 1:13 pm
bottomgun Tue Apr 26, 2022 1:13 pm
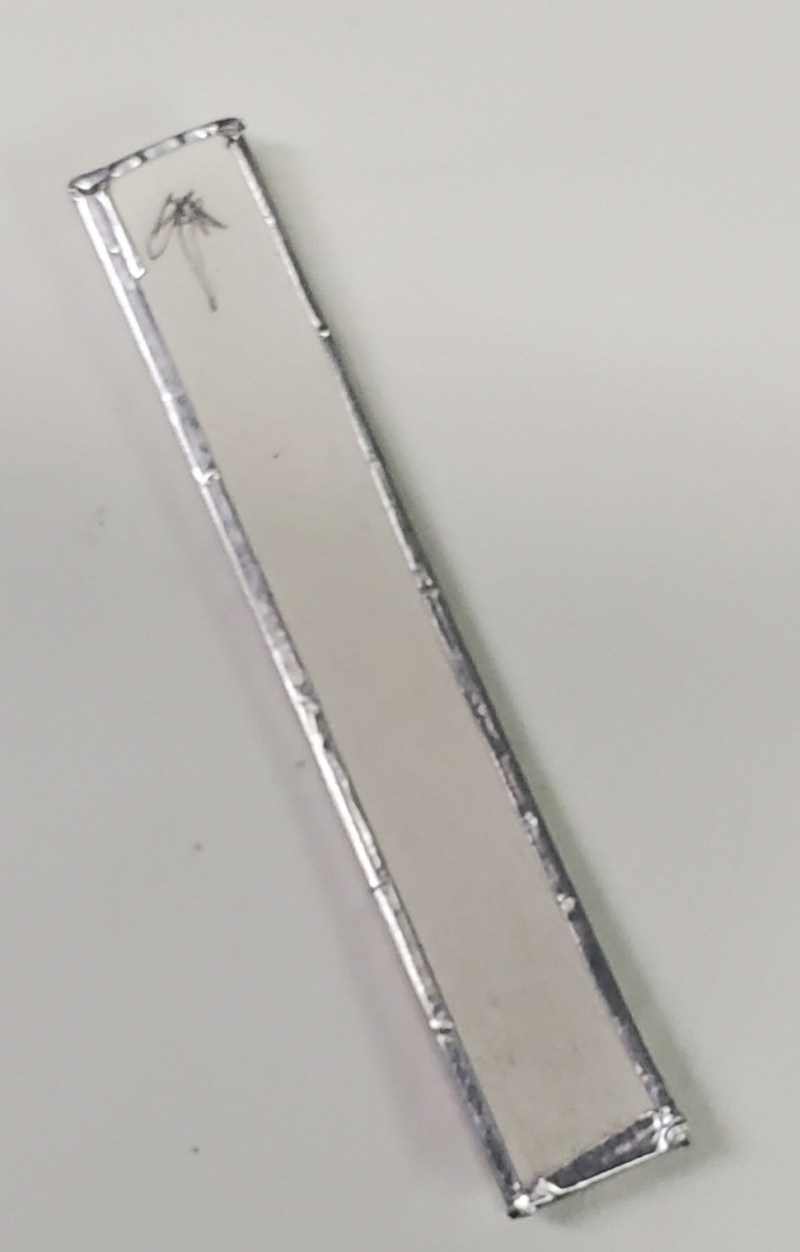
Made the serrations with a triangle edge fine metal file. 1/8 inches apart.

bottomgun- Gold Member

- Posts : 131
Join date : 2012-12-27
Age : 66
Location : Southern California
Re: Prop Rod engine screws and restoration
![]() Marleysky Tue Apr 26, 2022 1:21 pm
Marleysky Tue Apr 26, 2022 1:21 pm
rsv1cox wrote:So, I guess those Friskies Flyer decals on Rene's car are authentic originals not someone's add-ons?
Yes, they are originals, waterslide type. Some of it was scratched off in use, some in my cleaning. I might just leave them "as is" for a shelf queen. I'd like to try a duplicate Bottomgun's chrome duct tape snout on one for fun.

Marleysky- Top Poster


Posts : 3618
Join date : 2014-09-28
Age : 71
Location : Grand Rapids, MI
Re: Prop Rod engine screws and restoration
![]() bottomgun Tue Apr 26, 2022 1:23 pm
bottomgun Tue Apr 26, 2022 1:23 pm
Folded the tape over onto the bottom and burnished to good to keep it from lifting in the future, although I don't think it's going to be a problem.
bottomgun- Gold Member
- Posts : 131
Join date : 2012-12-27
Age : 66
Location : Southern California
Re: Prop Rod engine screws and restoration
![]() bottomgun Tue Apr 26, 2022 3:18 pm
bottomgun Tue Apr 26, 2022 3:18 pm
Polished out the hood piece and glued it on using a very thin film of 5 minute epoxy on both surfaces. 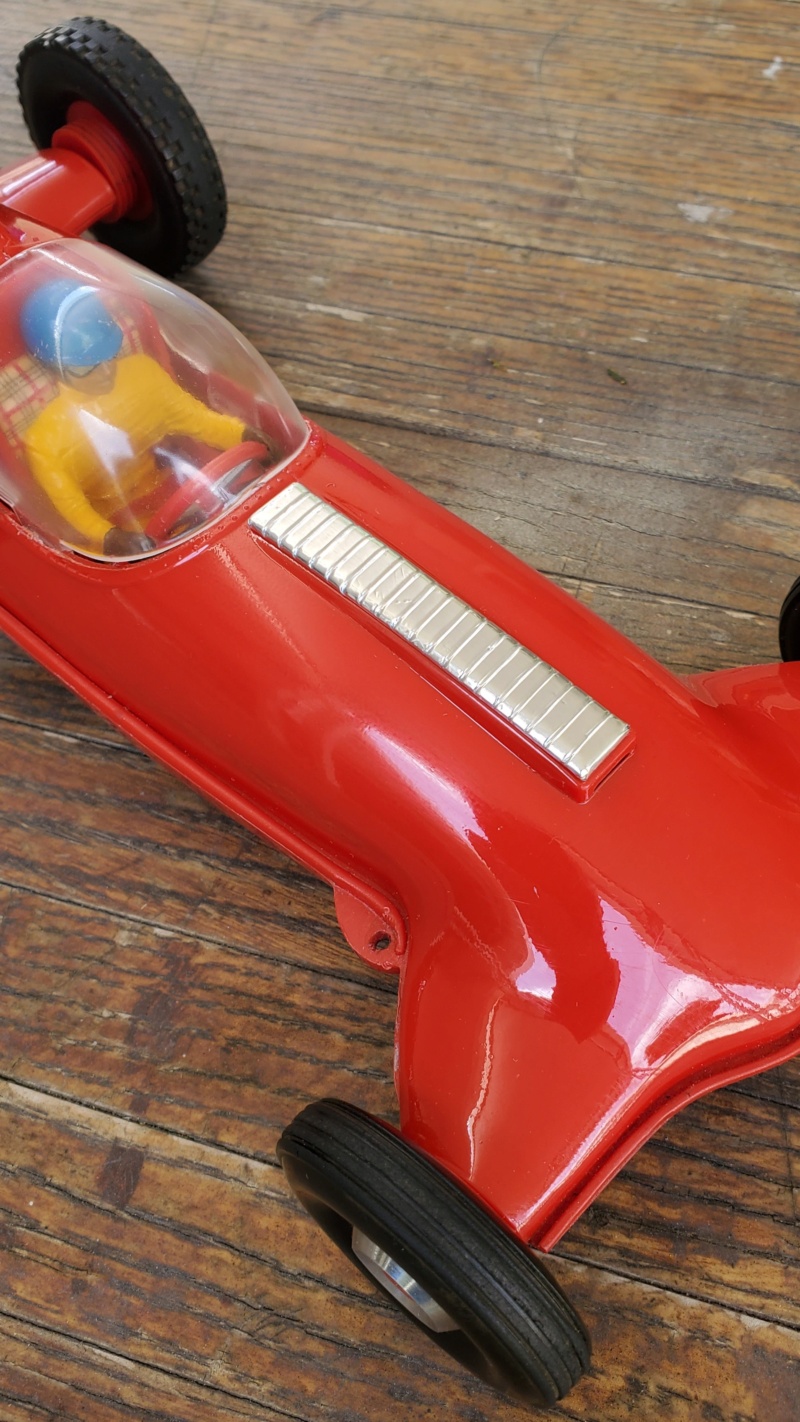
bottomgun- Gold Member
- Posts : 131
Join date : 2012-12-27
Age : 66
Location : Southern California
Re: Prop Rod engine screws and restoration
![]() rsv1cox Tue Apr 26, 2022 7:51 pm
rsv1cox Tue Apr 26, 2022 7:51 pm
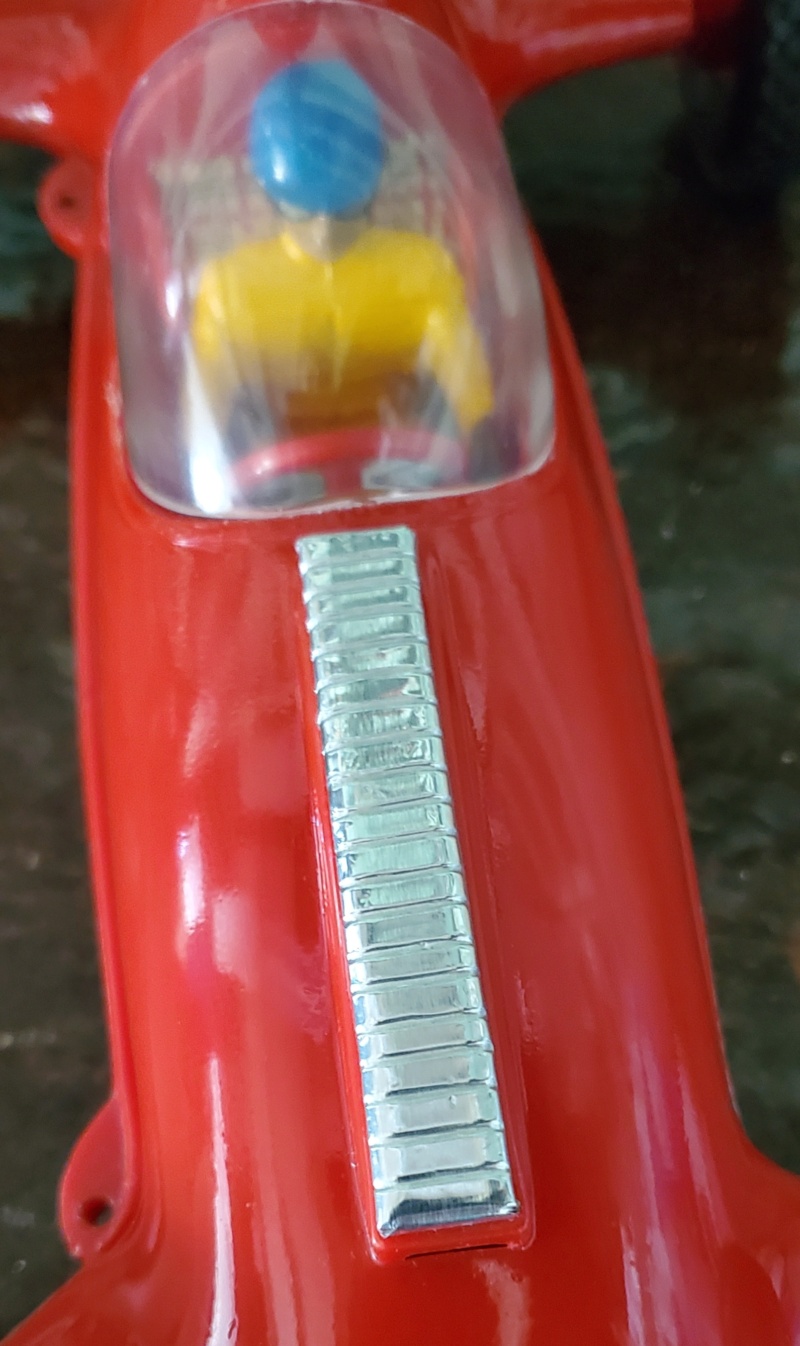
bottomgun wrote:Plastic styrene sheet and the metal tape used for repairing ducts. I cut it to 3/8 inches wide by 2 1/2 inches long just basing it on close up pics off the internet. Because it was thin, I glued three layers with model car glue to build it up
I have thicker strips in 1/4 inch wide but too narrow. I didn't want to to drive 27 miles to get wider ones.And the finished product:
It's a lot shinier than the picture shows. Almost like chrome.

So your talking about something like aluminum duct tape cut to width and length and layered x 3? Did you remove the backing first, it's pretty sticky?
Looks like you got the intervals perfect. How did you press them in? It's doubtful that I could do as nice a job.
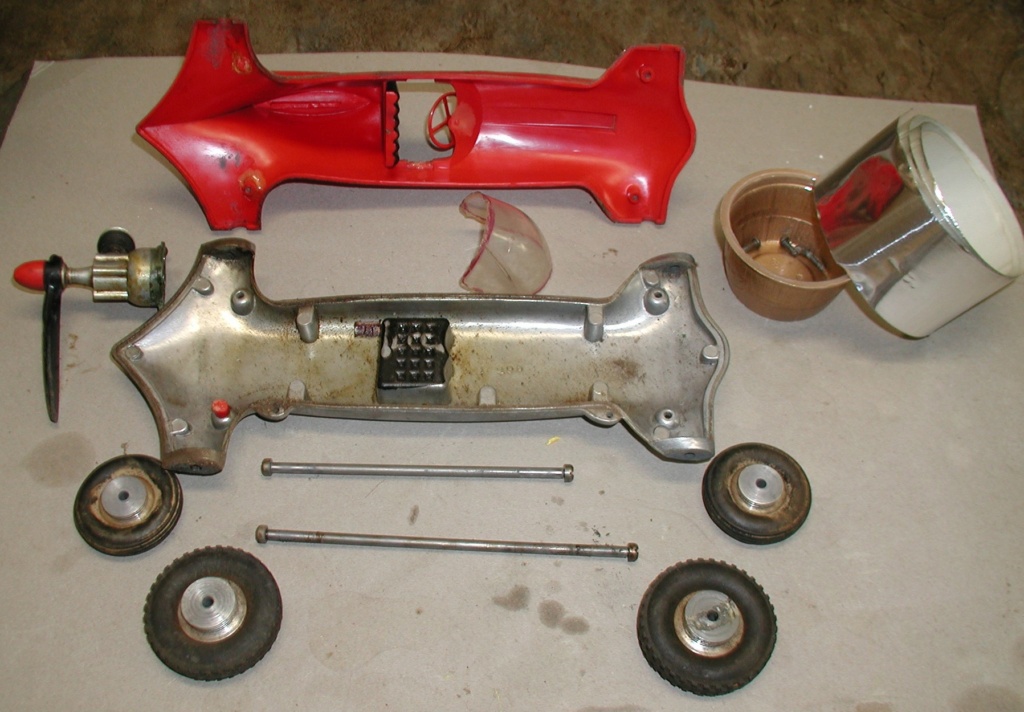
Took mine apart. Not pretty in there. Chuck - I imagine a 11 to 16 year old tried to repair the broken rear mounting posts with epoxy, didn't work. I will probably replace with canopy cement. Chuck probably had a lot of fun playing with this. Good for him, what it was meant for, but now it's due for some rest.


rsv1cox- Top Poster
-

Posts : 10575
Join date : 2014-08-18
Location : West Virginia
Re: Prop Rod engine screws and restoration
![]() bottomgun Tue Apr 26, 2022 9:04 pm
bottomgun Tue Apr 26, 2022 9:04 pm
I used three pieces of thin styrene plastic cut to 3/8" wide by 2 1/2" long and glued them together. The only reason I did it this way is because I didn't have thicker styrene that was 3/8" wide. I only had 1/4" that was thick enough ( about 3/32"), but it was not wide enough. I round-beveled the sides and front of the piece with a small sanding block. Using a close up pic of an original hood scoop ornament off the net, I counted 20 serrations, which made them about 1/8" apart. I used a jeweler's file to cut the lines. Did a follow up sanding with 800 grit, cleaned it with alcohol and then put an oversized strip of sticky- back metal tape over it. I burnished it down with my fingers and trimmed any excess. I used the edge of an old credit card to burnish it down into the cut lines. Got it done in the space of about 40 minutes. These were used only on the later prop rods with the plastic chassis pans for a few years before Cox redesigned it into the Shrike. That's quite a project you have. Did the rear posts break off right at the base?
bottomgun- Gold Member
- Posts : 131
Join date : 2012-12-27
Age : 66
Location : Southern California
Re: Prop Rod engine screws and restoration
![]() bottomgun Sat May 07, 2022 9:09 pm
bottomgun Sat May 07, 2022 9:09 pm
Got my number stickers from Callie Graphics today and put them on tonight. They turned out really good. 
bottomgun- Gold Member
- Posts : 131
Join date : 2012-12-27
Age : 66
Location : Southern California
Re: Prop Rod engine screws and restoration
![]() rsv1cox Sun May 08, 2022 6:33 am
rsv1cox Sun May 08, 2022 6:33 am
Looks great. Got your method. Build the base then the metal tape loose, then press it down. I might try it.
I got that $45 canopy, not worth it. Cloudy and a poor fit. It does have some flash which I will remove, some plastic polish and try again.


I got that $45 canopy, not worth it. Cloudy and a poor fit. It does have some flash which I will remove, some plastic polish and try again.
rsv1cox- Top Poster
-
Posts : 10575
Join date : 2014-08-18
Location : West Virginia
Re: Prop Rod engine screws and restoration
![]() bottomgun Sun May 08, 2022 10:28 am
bottomgun Sun May 08, 2022 10:28 am
I have the same repro canopy on my example and had the same trouble with it as you can see in my pics. Tried using plastic polish by hand with only minimal improvement. Maybe a small buffing wheel and polishing compound on my dremel might work, but I have to be careful. My metal pan version was fortunate to have the original canopy with it in decent shape.
bottomgun- Gold Member
- Posts : 131
Join date : 2012-12-27
Age : 66
Location : Southern California
Page 4 of 4 • 1, 2, 3, 4
» Screws For Engines
» Engine Restoration
» Cox TD-3 Instructions.
» COX QRC restoration (was: Help with identifying an engine)
» restoration PT-19 .049 engine advice needed
» Engine Restoration
» Cox TD-3 Instructions.
» COX QRC restoration (was: Help with identifying an engine)
» restoration PT-19 .049 engine advice needed
Page 4 of 4
Permissions in this forum:
You cannot reply to topics in this forum