

 Rules
Rules
Log in
Search
Latest topics
» Simple Glidersby getback Today at 7:13 am
» Cox PT-19 Wing
by getback Today at 6:24 am
» Foam hand kids glider converted to 0.049 CL
by getback Today at 6:23 am
» Roddie-Rigger.. a 2005 original design
by getback Today at 6:17 am
» Golden Bee basic running problem
by roddie Yesterday at 10:51 pm
» Weird search for a single comic from an old Mad Magazine
by Kim Yesterday at 1:44 pm
» Scientific "Zipper" Build...Zipper Flys!.
by getback Yesterday at 7:27 am
» Cox .049 Tee Dee engines back in stock (limited availablility)
by GallopingGhostler Yesterday at 1:05 am
» Very off-topic.........Time passes and not always for the best......
by rsv1cox Thu Jul 25, 2024 2:47 pm
» Jim Walker Bonanza etc.
by rsv1cox Wed Jul 24, 2024 6:30 pm
» Throttles for Cox Tee Dee .049 / .020 / .010 engines --- videos
by sosam117 Wed Jul 24, 2024 8:54 am
» Introducing our Cox .049 TD Engines
by Admin Tue Jul 23, 2024 2:00 am
Cox Engine of The Month
July-2024
robot797's
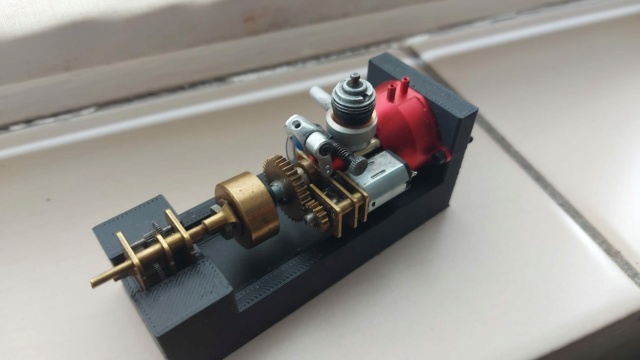
"ULTIMITE COX 010: it has a clutch, E starter, throttle, exhaust, aluminum tank, aluminum venturi, gearbox with forward and reverse, and now its on a custom drawn and printed stand"

PAST WINNERS
robot797's
"ULTIMITE COX 010: it has a clutch, E starter, throttle, exhaust, aluminum tank, aluminum venturi, gearbox with forward and reverse, and now its on a custom drawn and printed stand"
PAST WINNERS
CEF Traveling Engine


Win This Engine!

Live on Patrol


Restoring the Jr Satan
Page 2 of 2
Page 2 of 2 •  1, 2
1, 2
Re: Restoring the Jr Satan
![]() Ken Cook Mon Nov 19, 2012 3:51 pm
Ken Cook Mon Nov 19, 2012 3:51 pm
Rusty, I certainly feel that it would prevent the burp that you may be experiencing on outside maneuvers. I wanted to do a thread on remote needles and brackets I make. Here is a photo of my Cox Tee Dee foamie that I just abuse the heck out of. Shawn comes out of the wingovers and throws these wiggles in which makes me always stuff the plane in the ground. I put this plane in full bore out of the wingover 10 times one Saturday. I was getting hot due to having to constantly dismantle the engine and flush before restart. No damage to the needle and I was burying the plane up to the leading edge like a lawn dart.
 [/
[/
url]
[url=https://servimg.com/view/17420312/166]
This is where you really can improve your skills soldering. I've come up with some pretty unique ways to keep things square and clean looking. This needle is the same needle as yours. My needle valve body is a ACE body. I lightly chuck the needle into my drill press and I cut it off with a hacksaw blade nice and square. This brass is tough. I clean real well and proceed to solder. I use small tubing cut square to hold the washer on square during soldering. It also prevents flux and solder from running down onto the threads. Don't clean any brass that you don't want solder on. I then sand clean and wash in a laquer thinner. Ken
[/url]
[url=https://servimg.com/view/17420312/166]
This is where you really can improve your skills soldering. I've come up with some pretty unique ways to keep things square and clean looking. This needle is the same needle as yours. My needle valve body is a ACE body. I lightly chuck the needle into my drill press and I cut it off with a hacksaw blade nice and square. This brass is tough. I clean real well and proceed to solder. I use small tubing cut square to hold the washer on square during soldering. It also prevents flux and solder from running down onto the threads. Don't clean any brass that you don't want solder on. I then sand clean and wash in a laquer thinner. Ken

Ken Cook- Top Poster

- Posts : 5542
Join date : 2012-03-27
Location : pennsylvania
Re: Restoring the Jr Satan
![]() JPvelo Mon Nov 19, 2012 3:55 pm
JPvelo Mon Nov 19, 2012 3:55 pm
RknRusty wrote:Either side is the same. If the cylinder is on the side, I can mount the NV so the needle either points up or it points down. If it's pointed down and I land on the belly I bend the needle. If it's pointed up and it lands land on its back I bend the needle. I test mounted the engine at a 45 degree angle to see if it was protected and the needle is still exposed.JPvelo wrote:You could also buy a Venturi spacer from cox international. It goes between the needle assembly and the carb body and allows you to rotate the needle to the other side.
Jim
This venturi spacer?
http://coxengines.ca/cox-.049-venturi-spacer-3.html
What does it do? I can already put the needle on either side by just removing it and flipping it over. Am I missing something?
I've always tried to rotate the valve around and there'd not enough clearance. Didn't think about just flipping it. Nevermimd
Fredvon, Thanks for the link to the Nelson finishing products.

JPvelo- Diamond Member

- Posts : 1972
Join date : 2011-12-02
Age : 56
Location : Colorado
Re: Restoring the Jr Satan
![]() RknRusty Mon Nov 19, 2012 6:18 pm
RknRusty Mon Nov 19, 2012 6:18 pm
That's a good idea for a stubby needle, thanks. I can work out something like that.Ken Cook wrote:
This is where you really can improve your skills soldering. I've come up with some pretty unique ways to keep things square and clean looking. This needle is the same needle as yours. My needle valve body is a ACE body. I lightly chuck the needle into my drill press and I cut it off with a hacksaw blade nice and square. This brass is tough. I clean real well and proceed to solder. I use small tubing cut square to hold the washer on square during soldering. It also prevents flux and solder from running down onto the threads. Don't clean any brass that you don't want solder on. I then sand clean and wash in a laquer thinner. Ken
_________________
Don't Panic!
...and never Ever think about how good you are at something...
while you're doing it!
My Hot Rock & Blues Playlist
...and never Ever think about how good you are at something...
while you're doing it!
My Hot Rock & Blues Playlist

RknRusty- Rest In Peace

- Posts : 10869
Join date : 2011-08-10
Age : 68
Location : South Carolina, USA
Re: Restoring the Jr Satan
![]() Ken Cook Tue Dec 04, 2012 4:47 am
Ken Cook Tue Dec 04, 2012 4:47 am

The rewards paid off this past weekend. A neat little flyer and it was nice to see this moldy oldie flying once again. A bit twitchy, but certainly cool. I always wanted to build one and although I didn't build this one, all the work I put into it I could say I did. Next project already started is the big brother the Voodoo. I got it framed up the other evening all complete with internal bladder compartment. Ken
Ken Cook- Top Poster
- Posts : 5542
Join date : 2012-03-27
Location : pennsylvania
Re: Restoring the Jr Satan
![]() Cribbs74 Tue Dec 04, 2012 6:40 am
Cribbs74 Tue Dec 04, 2012 6:40 am
What a great action shot!!!! Glad it flew well for you guys. What did you end up using to pull it?
Ron
Edit: nevermind I just saw your Cox engine of the month submission. Good choice!
Ron
Edit: nevermind I just saw your Cox engine of the month submission. Good choice!

Cribbs74- Moderator


Posts : 11904
Join date : 2011-10-24
Age : 50
Location : Tuttle, OK
Re: Restoring the Jr Satan
![]() RknRusty Tue Dec 04, 2012 9:28 am
RknRusty Tue Dec 04, 2012 9:28 am
Great picture, Ken. It always feels so good to finally get that first flight in the air. For me, long after the bulk of the thing has been built, there is always an endless pile of pesky last details that take forever to get done just right. I have to force myself to be patient and do it right.
I'm glad you went with that color scheme, it's perfect classic Satan.
Is that a Medallion .15?
I'm glad you went with that color scheme, it's perfect classic Satan.
Is that a Medallion .15?
_________________
Don't Panic!
...and never Ever think about how good you are at something...
while you're doing it!
My Hot Rock & Blues Playlist
...and never Ever think about how good you are at something...
while you're doing it!
My Hot Rock & Blues Playlist
RknRusty- Rest In Peace
- Posts : 10869
Join date : 2011-08-10
Age : 68
Location : South Carolina, USA
Re: Restoring the Jr Satan
![]() Ken Cook Tue Dec 04, 2012 6:20 pm
Ken Cook Tue Dec 04, 2012 6:20 pm
Rusty, it is indeed a Medallion .15. It suffered the same fate as the one Jason recently had. This engine has less than 10 flights on it. The first few resulted in the engine seizing and galling like Jason's engine. I was at a loss finding replacement parts. I saw Henry Werner from Virginia Hobbysports at Brodak's in 2009. He fixed me up with some new piston cylinders and were back in business. Prop was a wide blade 7x4. It worked exceptionally well and it had good speed. After some trimming, Shawn put it through the paces and I was very impressed with having the engine run the same upright as inverted. Ken
Ken Cook- Top Poster
- Posts : 5542
Join date : 2012-03-27
Location : pennsylvania
Re: Restoring the Jr Satan
![]() Cribbs74 Tue Dec 04, 2012 6:28 pm
Cribbs74 Tue Dec 04, 2012 6:28 pm
Ken Cook wrote:
Rusty, it is indeed a Medallion .15. It suffered the same fate as the one Jason recently had. This engine has less than 10 flights on it. The first few resulted in the engine seizing and galling like Jason's engine. I was at a loss finding replacement parts. I saw Henry Werner from Virginia Hobbysports at Brodak's in 2009. He fixed me up with some new piston cylinders and were back in business. Prop was a wide blade 7x4. It worked exceptionally well and it had good speed. After some trimming, Shawn put it through the paces and I was very impressed with having the engine run the same upright as inverted. Ken
How do you feel it compares to a modern combat wing?
Cribbs74- Moderator
-
Posts : 11904
Join date : 2011-10-24
Age : 50
Location : Tuttle, OK
Re: Restoring the Jr Satan
![]() Ken Cook Tue Dec 04, 2012 6:44 pm
Ken Cook Tue Dec 04, 2012 6:44 pm
I didn't fly it this weekend. Shawn however said it was pretty cool. We had some issues initally. The plane was overly sensitive. Shawn flies with a inflight adjustable handle. I can post a pic of it if you would like to see. The handle spacing of these are pretty small and these handles weren't available back then. I can see that if someone tried to fly this plane with the CG properly in place and a wide handle spacing, your going to have a wild ride. I certainly feel this 2" bellcrank is the problem here as it's just too sensitive. The problem is there's just not enough room in there for a 3". This means a taller control horn, and a narrower handle spacing. Comparing this to a modern wing is like night and day.
I don't mean that in a negative way. Realize that were dealing with 60's technology here. A straight leading edge plane generally pivots around on a turn rather quickly. We were using a wide blade 7x4. It was doing quite well through the maneuvers and also on speed. We were quite pleased on how the plane responded and flew through the maneuvers. For those that have some Cox.15's around, this plane fits the bill. It was a lot of fun and I truly enjoyed it. I can say this, the 2 oz. tank flies a loooong time with this engine. Ken
I don't mean that in a negative way. Realize that were dealing with 60's technology here. A straight leading edge plane generally pivots around on a turn rather quickly. We were using a wide blade 7x4. It was doing quite well through the maneuvers and also on speed. We were quite pleased on how the plane responded and flew through the maneuvers. For those that have some Cox.15's around, this plane fits the bill. It was a lot of fun and I truly enjoyed it. I can say this, the 2 oz. tank flies a loooong time with this engine. Ken
Ken Cook- Top Poster
- Posts : 5542
Join date : 2012-03-27
Location : pennsylvania
Page 2 of 2 • 1, 2
» Just finished rebuilding and restoring Cox 190-8 engine
» Restoring a B&S 5HP
» New guy - restoring two .020 models
» Properly restoring a Strato Bug
» Time to submit August's COX ENGINE OF THE MONTH photos
» Restoring a B&S 5HP
» New guy - restoring two .020 models
» Properly restoring a Strato Bug
» Time to submit August's COX ENGINE OF THE MONTH photos
Page 2 of 2
Permissions in this forum:
You cannot reply to topics in this forum