

 Rules
Rules
by 944_Jim Today at 8:58 pm
» Tired of it all…
by Admin Today at 8:36 pm
» Roddie's flat-bottomed boat..
by OVERLORD Today at 2:20 pm
» PT-19 Mayhem at Buder Park...a Decade Ago!!!!
by Kim Today at 7:41 am
» Project Cox .049 r/c & Citabrian Champion
by getback Today at 6:46 am
» Three -- sold out (making two more) Cox .010 Carburetors with wrench
by balogh Today at 12:34 am
» Joe Wagners Sioux
by GallopingGhostler Yesterday at 9:03 pm
» Happy Anzac Day!
by GallopingGhostler Yesterday at 4:16 pm
» Revivng Some Childhood Classics
by getback Yesterday at 7:31 am
» Fox .35 Modifications
by Ken Cook Yesterday at 3:16 am
» Introducing our Cox .049 TD Engines
by getback Fri Apr 26, 2024 6:20 am
» Cox powered jet-pump for model Sprint Boat
by roddie Thu Apr 25, 2024 10:25 pm


"Phred's Phault"
Page 1 of 7 • 1, 2, 3, 4, 5, 6, 7 ![]()

"Phred's Phault"
![]() roddie Thu Nov 06, 2014 2:44 pm
roddie Thu Nov 06, 2014 2:44 pm

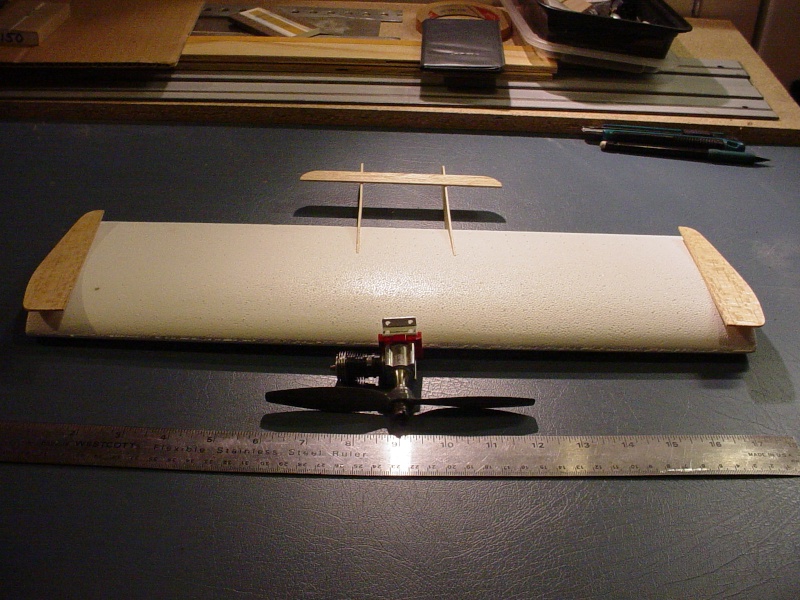
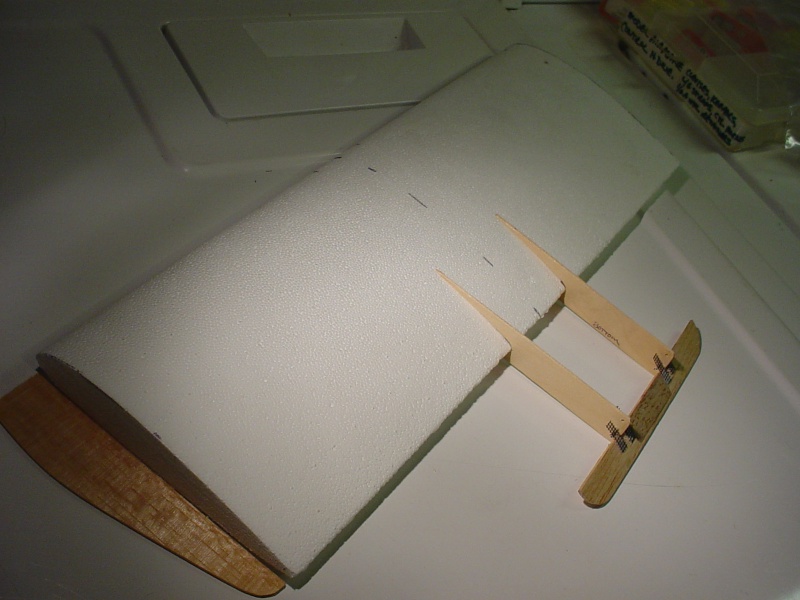
The 18" core will be cut down to 16" and the tips will be installed to restore the span to 18.5" for a total of 97 squares. The 1/16" hard balsa stabilator spans 6" and has a 3.75 sq. in. area.
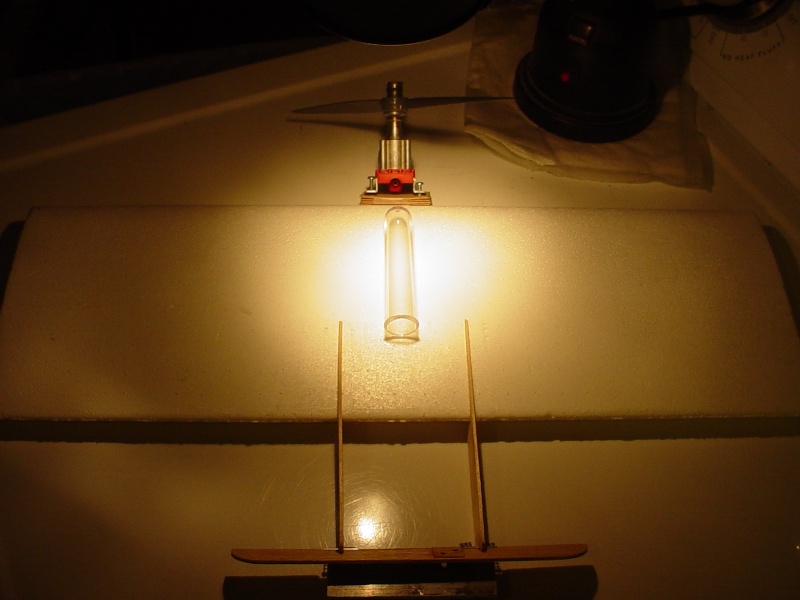
This also seemed like a fun project for my postage-stamp mount. Maybe I'll try a bladder..

roddie- Top Poster

- Posts : 8274
Join date : 2013-07-17
Age : 64
Location : N. Smithfield, Rhode Island -

Too Funny
![]() fredvon4 Fri Nov 07, 2014 8:10 am
fredvon4 Fri Nov 07, 2014 8:10 am
Late yesterday I hit work stop on the Texas Slow needing a new fuse (original is too warped) and some 3/4" Fat Balsa plank to cut out a new larger center rib. Ordered from Stuka Stunt the bass wood and some balsa planks are on the way.
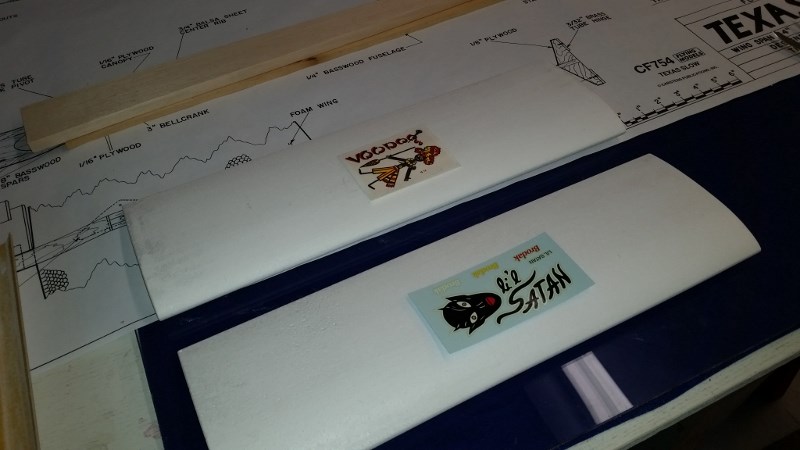
While fussing about what to construct waiting on the mail next week, I started to open the Brodak Jr Satan kit and had to move several boxes of Ace tapered and constant chord foam wing sets out of the way. Then an Idea struck me! Build a smallish VooDoo and Jr Satan using the wing cores.
Spent a little time sanding down the dimples and will lay out the balsa and ply parts this afternoon

fredvon4- Top Poster

Posts : 4001
Join date : 2011-08-26
Age : 68
Location : Lampasas Texas
Re: "Phred's Phault"
![]() roddie Fri Nov 07, 2014 2:07 pm
roddie Fri Nov 07, 2014 2:07 pm
roddie- Top Poster
- Posts : 8274
Join date : 2013-07-17
Age : 64
Location : N. Smithfield, Rhode Island -
Re: "Phred's Phault"
![]() RknRusty Fri Nov 07, 2014 5:15 pm
RknRusty Fri Nov 07, 2014 5:15 pm
_________________
...and never Ever think about how good you are at something...
while you're doing it!
My Hot Rock & Blues Playlist

RknRusty- Rest In Peace

- Posts : 10869
Join date : 2011-08-10
Age : 68
Location : South Carolina, USA
Re: "Phred's Phault"
![]() roddie Fri Nov 07, 2014 5:59 pm
roddie Fri Nov 07, 2014 5:59 pm
RknRusty wrote:Are you saying they're intentionally asymmetrical or just not straight?
Hi Ya' Rusty! Their spec'd as being 17% semi-symmetrical.. so I guess that means that there's 17% less a degree of camber on the bottom than on the top?
 I know that for c/l stunt.. they should be 100% symmetrical.. so I'm wondering if this is a recipe for disaster?
This wing will want to lift while upright.. that's why I was wondering if down-thrust would work.. especially when inverted?
roddie- Top Poster
- Posts : 8274
Join date : 2013-07-17
Age : 64
Location : N. Smithfield, Rhode Island -
Re: "Phred's Phault"
![]() GallopingGhostler Fri Nov 07, 2014 6:50 pm
GallopingGhostler Fri Nov 07, 2014 6:50 pm
I dunno.
 Give it a shot and see.

GallopingGhostler- Top Poster

Posts : 5302
Join date : 2013-07-13
Age : 70
Location : Clovis NM or NFL KC Chiefs
Re: "Phred's Phault"
![]() RknRusty Fri Nov 07, 2014 6:59 pm
RknRusty Fri Nov 07, 2014 6:59 pm
Rusty
George beat me to it.
_________________
...and never Ever think about how good you are at something...
while you're doing it!
My Hot Rock & Blues Playlist
RknRusty- Rest In Peace
- Posts : 10869
Join date : 2011-08-10
Age : 68
Location : South Carolina, USA
Re: "Phred's Phault"
![]() roddie Fri Nov 07, 2014 7:50 pm
roddie Fri Nov 07, 2014 7:50 pm
I need some advice on the bellcrank/lead-out arrangement. In any case; I plan to recess guide-tubes down 1/2 way into the tip. Should I hog-down to form a bellcrank bay.. and slot the inboard wing for the lead-outs? If I don't.. and just mount a bellcrank on the bottom or top surface; I will either have a tip-high or tip-low condition; respectively.. as opposed to level. I'll be using "solids".. so they wont saw-away at the foam like a braid might. Econokote would seal and bridge the slots cut for the lead-outs and pushrod.
If I use one of my small custom 1.5" bellcranks.. I could hole-saw cut through the entire panel with a 1.5" tool.. and hog-down a channel for a 1/16" plywood mount, that would be epoxied in place. This would provide access for installing the bellcrank with machine-screw, washers and locknut. I can make a gage-block for sanding the lead-out slots 1/2 way down into the foam.
roddie- Top Poster
- Posts : 8274
Join date : 2013-07-17
Age : 64
Location : N. Smithfield, Rhode Island -
Re: "Phred's Phault"
![]() batjac Fri Nov 07, 2014 10:44 pm
batjac Fri Nov 07, 2014 10:44 pm
As for the bellcrank, I'd just do a surface mount, centerline behind the engine mount. I've used these wings in the past, and I know I'd prefer not to weaken them by cutting troughs for the leadouts and a well in the center for the bellcrank. I think this would greatly increase the likelihood of a wing failure in the cores. Epoxy a small square or round of 1/16 ply top and bottom, and then put a tube going top to bottom for the screw to go through so the foam doesn't get crushed as you tighten the bellcrank screw down. Since your elevator is high on the tail, a top mounted bellcrank keeps a straight pushrod. If you had the leadout eyelets on the top of the wing/wingtip, I doubt you'd really see any appreciable difference than if it were wing centered. you're not building a super-duper contest plane, so the trim isn't going to be that critical. Just ensure the engine thrust line is in line with the wing chord. The full flying stabilator will take care of the rest.
The Worry-Free Mark
edit: Man! I've been debating ordering a couple of Ace wing cores, but they're so expensive. Maybe I should bite the bullet and try this...
Last edited by batjac on Fri Nov 07, 2014 10:55 pm; edited 2 times in total

batjac- Diamond Member

-
Posts : 2336
Join date : 2013-05-22
Age : 61
Location : Broken Arrow, OK, USA
Re: "Phred's Phault"
![]() batjac Fri Nov 07, 2014 10:50 pm
batjac Fri Nov 07, 2014 10:50 pm
roddie wrote:
Hi Ya' Rusty! Their spec'd as being 17% semi-symmetrical.. so I guess that means that there's 17% less a degree of camber on the bottom than on the top?
This wing will want to lift while upright.. that's why I was wondering if down-thrust would work.. especially when inverted?
Roddie, when they say it's a 17% semi-symmetrical, they mean that the total thickness at the thickest part of the wing is 17% of the chord length. So, for an R/C wing, the chord is kinda fat. For a C/L stunt/combat plane, it's not that fat at all. With the way this thing should flip about if built as a L'il Satan, the fact it's semi-symmetrical is negligible.
The Slender Mark
batjac- Diamond Member
-
Posts : 2336
Join date : 2013-05-22
Age : 61
Location : Broken Arrow, OK, USA
Re: "Phred's Phault"
![]() roddie Fri Nov 07, 2014 11:29 pm
roddie Fri Nov 07, 2014 11:29 pm
batjac wrote:Cool idea! One set of constant chord wings will make one set of combat planes! I wouldn't worry at all about them being semi-symmetrical. If I had a spare set sitting around, I'd give this a try.
As for the bellcrank, I'd just do a surface mount, centerline behind the engine mount. I've used these wings in the past, and I know I'd prefer not to weaken them by cutting troughs for the leadouts and a well in the center for the bellcrank. I think this would greatly increase the likelihood of a wing failure in the cores. Epoxy a small square or round of 1/16 ply top and bottom, and then put a tube going top to bottom for the screw to go through so the foam doesn't get crushed as you tighten the bellcrank screw down. Since your elevator is high on the tail, a top mounted bellcrank keeps a straight pushrod. If you had the leadout eyelets on the top of the wing/wingtip, I doubt you'd really see any appreciable difference than if it were wing centered. you're not building a super-duper contest plane, so the trim isn't going to be that critical. Just ensure the engine thrust line is in line with the wing chord. The full flying stabilator will take care of the rest.
The Worry-Free Mark
edit: Man! I've been debating ordering a couple of Ace wing cores, but they're so expensive. Maybe I should bite the bullet and try this...
Hi Mark, you've swayed me the other way now.. and it's a good thing..
roddie- Top Poster
- Posts : 8274
Join date : 2013-07-17
Age : 64
Location : N. Smithfield, Rhode Island -
Re: "Phred's Phault"
![]() RknRusty Sat Nov 08, 2014 1:22 am
RknRusty Sat Nov 08, 2014 1:22 am
_________________
...and never Ever think about how good you are at something...
while you're doing it!
My Hot Rock & Blues Playlist
RknRusty- Rest In Peace
- Posts : 10869
Join date : 2011-08-10
Age : 68
Location : South Carolina, USA
Re: "Phred's Phault"
![]() fredvon4 Sat Nov 08, 2014 9:44 am
fredvon4 Sat Nov 08, 2014 9:44 am
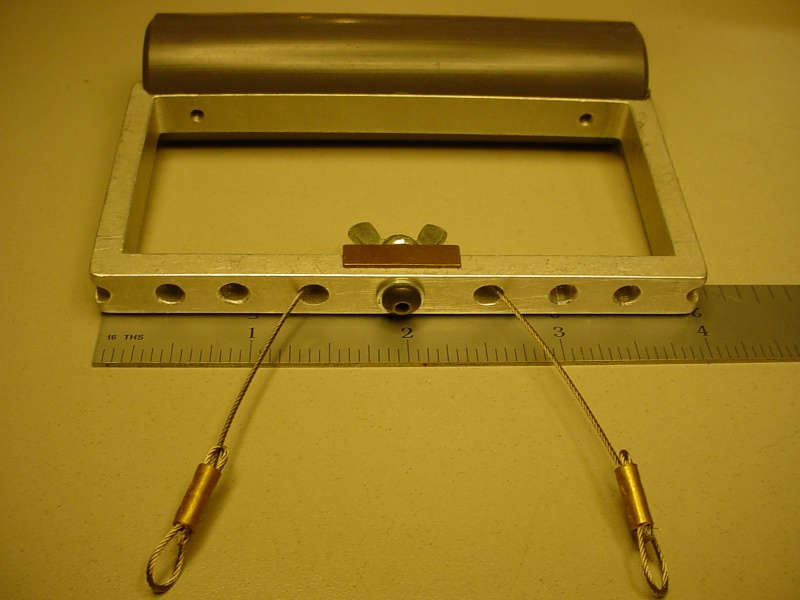
I plan on one of these 2.25" aluminum BCs and a fairly tall plastic horn with rod in top hole...Later I can put rod in a lower hole to speed up/ and increase the elevator throw. I plan on using soldering iron to recess the bell crank ply flush to the surface, a plastic through tube to the piviot bolt and a small ply bottom piece to prevent crushing the wing.
Your idea if recessing the crank into the wing and the slits for the solids will work, look good, and probably not compromise this wing core (I have bashed these before and they are very tough when using one panel like we are doing. If two are mated then spars are needed
In the extreme upper right of the photo is one of my smaller combat wings lead out guide suggestion. Simply a small piece of ply buried and epoxied slightly aft of the CG. Both lead-outs pass in the same hole and this has proved very efficient method.
At this size the very slight difference top to bottom in the wing shape (semi symmetrical airfoil) will have little noticeable difference in stability on 35' lines
fredvon4- Top Poster
-
Posts : 4001
Join date : 2011-08-26
Age : 68
Location : Lampasas Texas
Re: "Phred's Phault"
![]() GallopingGhostler Sat Nov 08, 2014 11:17 am
GallopingGhostler Sat Nov 08, 2014 11:17 am

GallopingGhostler- Top Poster
-
Posts : 5302
Join date : 2013-07-13
Age : 70
Location : Clovis NM or NFL KC Chiefs
Re: "Phred's Phault"
![]() roddie Sat Nov 08, 2014 12:19 pm
roddie Sat Nov 08, 2014 12:19 pm
The 1.5" bellcranks I made; are not pre-drilled for the pushrod or lead-outs.. only "witness-marks" a few thousandths deep to mark the centerlines in relation to the pivot. I could choose to drill a pushrod hole very close to the pivot.. for minimum linear travel.. and use a long horn on the stab, starting with the outermost hole. That's really what would dictate the sensitivity.. right?
I'm going to try to incorporate an adjustable front lead-out into the tip and cut the front lead-out slot with a slightly increasing outward taper toward the tip and closer to the rear lead-out slot.. to prevent binding. (sort of like lengthening rib holes an a built-up wing) I'll likely be using .025" dia. m/w solids.. for the lead-outs.
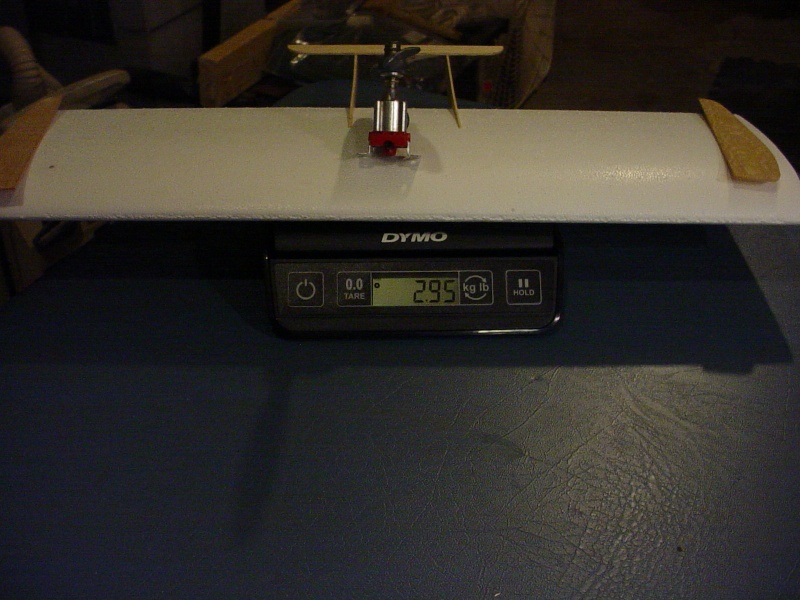
Although far from completion.. the weight is at 2.95oz.
roddie- Top Poster
- Posts : 8274
Join date : 2013-07-17
Age : 64
Location : N. Smithfield, Rhode Island -
Re: "Phred's Phault"
![]() fredvon4 Sat Nov 08, 2014 1:02 pm
fredvon4 Sat Nov 08, 2014 1:02 pm
I am not a good enough pilot to start handicapped; So on all my "training" /"experimental" birds, I give myself best chance to comfortably fly a plane with out the "OH Crap!" panic
I get the cool looking bell cranks from Yaro of AeroHobby Canada. Check out all sorts of stuff he has for F2D combat and not so much for 1/2A but a source for very fast Fora .049 engines and the small "glass" propellers
http://aerohobby.ca/store/index.php?main_page=index&cPath=15&sort=20a&page=2
fredvon4- Top Poster
-
Posts : 4001
Join date : 2011-08-26
Age : 68
Location : Lampasas Texas
Re: "Phred's Phault"
![]() roddie Sun Nov 09, 2014 9:11 pm
roddie Sun Nov 09, 2014 9:11 pm
fredvon4 wrote:The problem with push rod hole too close to the pivot is total travel. And a narrow spacing BC then demands an equally very narrow handle line spacing to retain a 1:1 ratio of up and down elevator throw. Your's will work but be extremely sensitive.
I am not a good enough pilot to start handicapped; So on all my "training" /"experimental" birds, I give myself best chance to comfortably fly a plane with out the "OH Crap!" panic
I get the cool looking bell cranks from Yaro of AeroHobby Canada. Check out all sorts of stuff he has for F2D combat and not so much for 1/2A but a source for very fast Fora .049 engines and the small "glass" propellers
http://aerohobby.ca/store/index.php?main_page=index&cPath=15&sort=20a&page=2
Hi Phred, cool link! Fora's... I've heard about them.. screamers.. I set-up a 1.5" handle spacing for the same bellcrank I put in my Rare Bear speed model. Although as yet "untested".. it will have a 1:1 ratio.
I cut my wing core tips down 1" ea. side
I'm hung-up on a nacelle design. My gut is telling me to go with a plywood box.. faired into the leading-edge.. as the tailbooms are to the trailing edge. A balsa filler-block on the inside. A postage-stamp backplated Bee won't weigh much.. and my custom mounts are short. Crankcase to firewall distance is .531" Question is; should I build the radial mount's firewall close to the wing's leading edge.. or should I design the engine mounting to be adjustable.. by using firewall shims of 1/32" plywood? Four shims would provide for 1/8" of CG trimming. That would be very useful I think. The firewall "backplate" which will be on the wing's leading-edge, will have 2-56 threaded T-nuts glued-in.. so that varied length machine-screws can be used to suit the amount of firewall shims used.
This is what I enjoy... (while most of you are thinking.. "just build it") I really enjoy thinking about design.
Last edited by roddie on Sun Nov 09, 2014 11:42 pm; edited 1 time in total
roddie- Top Poster
- Posts : 8274
Join date : 2013-07-17
Age : 64
Location : N. Smithfield, Rhode Island -
Re: "Phred's Phault"
![]() roddie Sun Nov 09, 2014 11:05 pm
roddie Sun Nov 09, 2014 11:05 pm
I'll drill the booms, and make the set-up..

and probably seal all the wood, after gluing-in the screen hinges (BTW.. they hold with CA for tacking..) Maybe I could forego the epoxy reinforcement.. and try balsa filler to fill the screen.. and feather-sand to the stab?" That would be a lot lighter. I'm hoping to deal with CG issues up front... mainly with the engine. A planned balloon-tank will straddle the CG.
roddie- Top Poster
- Posts : 8274
Join date : 2013-07-17
Age : 64
Location : N. Smithfield, Rhode Island -
Re: "Phred's Phault"
![]() OVERLORD Mon Nov 10, 2014 2:40 am
OVERLORD Mon Nov 10, 2014 2:40 am
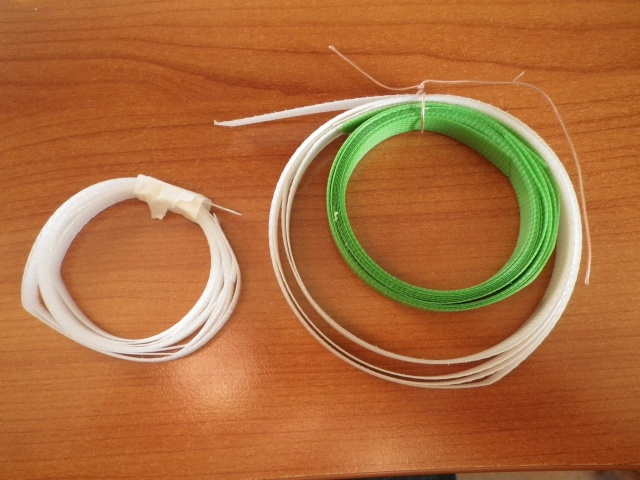
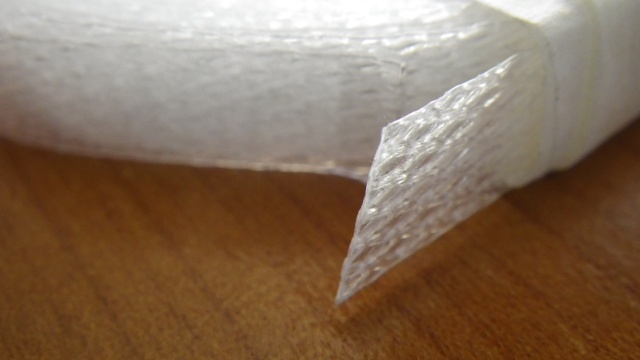
Good to see you're getting along well with your build. For hinges, I keep on collecting plastic bands for wrapping of cartons. They come in different sizes, widths and thicknesses. They should resist to a lot of bending, I suppose.
Lieven

OVERLORD- Diamond Member
- Posts : 1789
Join date : 2013-03-19
Age : 57
Location : Normandy, France
Re: "Phred's Phault"
![]() fredvon4 Mon Nov 10, 2014 6:22 am
fredvon4 Mon Nov 10, 2014 6:22 am
Make your engine nacelle and mount up with the engine as close to the leading edge as possible
Obviously a tanked engine needs no external tank. I am using pressure so have to make a place in the wing for the bladder
Once you center your engine mount, tape or lightly tack glue it with the engine and propeller installed
the booms and elevator (with all hardware) can be put on as it is pinch fit
If you have a piece of triangle stock, put in on a flat place, place the plane on top, and see where the plane balances
if it is about 1.5 inches back from LE +/- 1/4" you are done.
I suspect it will be nose heavy and best way to fix that is to lengthen the booms OR better make a bigger or heavier elevator. If tail heavy just shorten the booms a very little at a time
fredvon4- Top Poster
-
Posts : 4001
Join date : 2011-08-26
Age : 68
Location : Lampasas Texas
Re: "Phred's Phault"
![]() roddie Tue Nov 11, 2014 2:15 pm
roddie Tue Nov 11, 2014 2:15 pm
OVERLORD wrote:Hi Roddie,
Good to see you're getting along well with your build. For hinges, I keep on collecting plastic bands for wrapping of cartons. They come in different sizes, widths and thicknesses. They should resist to a lot of bending, I suppose.
Lieven
Those look cool Lieven. Have you tested adhesives that will work? I like the fiberglass screen for my app.. because of the weave. I can use thin CA to attach.. fill the weave afterward with a sandable filler.. and then feather-in to the stab.
I'm not completing anything yet.. but bouncing between different areas of construction. I also decided to start tracing the parts.. and making notes on mat'l. specs.
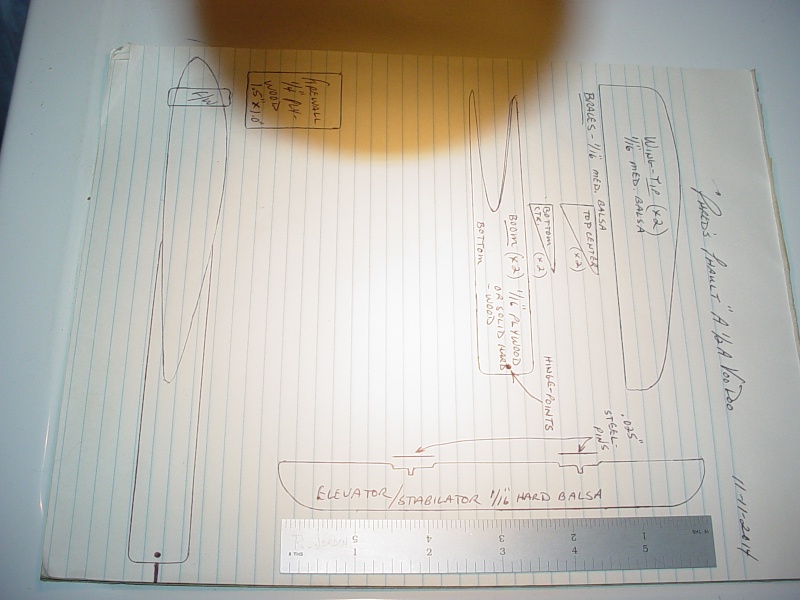
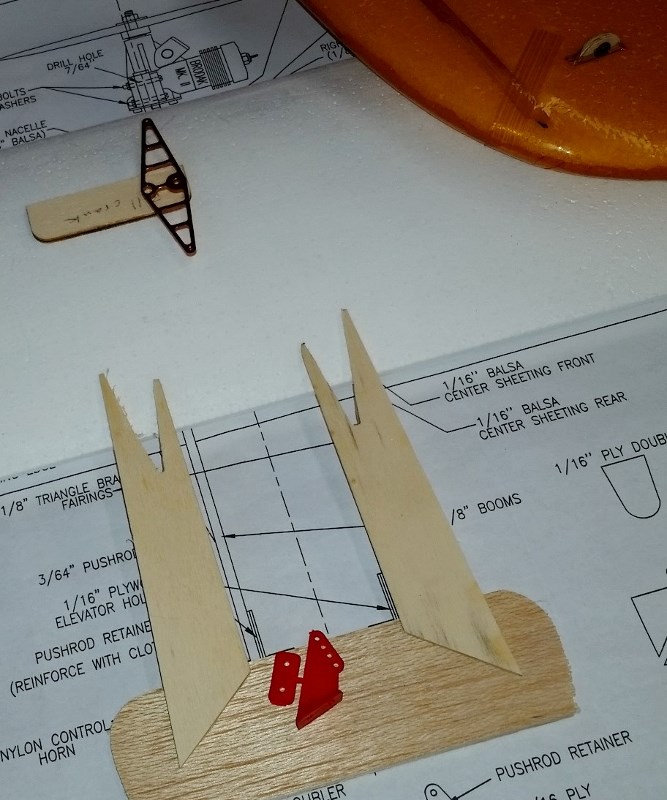
Looking at the profile at the left of my drawing.. you can see where I'm insetting a 1.5" x 1.0" x 1/4" plywood block into the center of the leading edge about 3/4" to 1" deep. This forms a mount that has a lot of area for a glue-bond. Extending the engine forward is a simple matter of using shims/longer screws.. but gives a strong initial base that's less likely to break-off when "you know what" happens..
This tall horn is screaming "over-kill" to me.. 1/64" ply spreader-plate on the top, spans between the booms.. and a 1/2" square plate on the bottom for the mounting-plate.
roddie- Top Poster
- Posts : 8274
Join date : 2013-07-17
Age : 64
Location : N. Smithfield, Rhode Island -
Re: "Phred's Phault"
![]() roddie Tue Nov 11, 2014 4:41 pm
roddie Tue Nov 11, 2014 4:41 pm
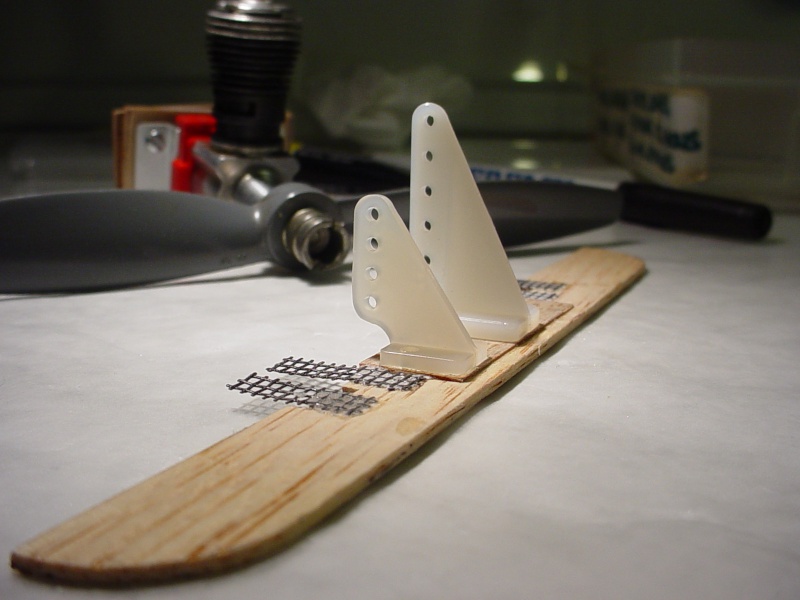
I hope this tail isn't too fragile.. It's super light. I may go with a carbon-fiber pushrod.. just for less of a torsional load.

roddie- Top Poster
- Posts : 8274
Join date : 2013-07-17
Age : 64
Location : N. Smithfield, Rhode Island -
Re: "Phred's Phault"
![]() getback Tue Nov 11, 2014 4:54 pm
getback Tue Nov 11, 2014 4:54 pm
Eric 
getback- Top Poster
-
Posts : 10120
Join date : 2013-01-18
Age : 66
Location : julian , NC
Re: "Phred's Phault"
![]() roddie Tue Nov 11, 2014 5:28 pm
roddie Tue Nov 11, 2014 5:28 pm
getback wrote:that looks stiff for 1/2A and the web is all on one side ? I have made this mistake a few time over and then under !! not over and over
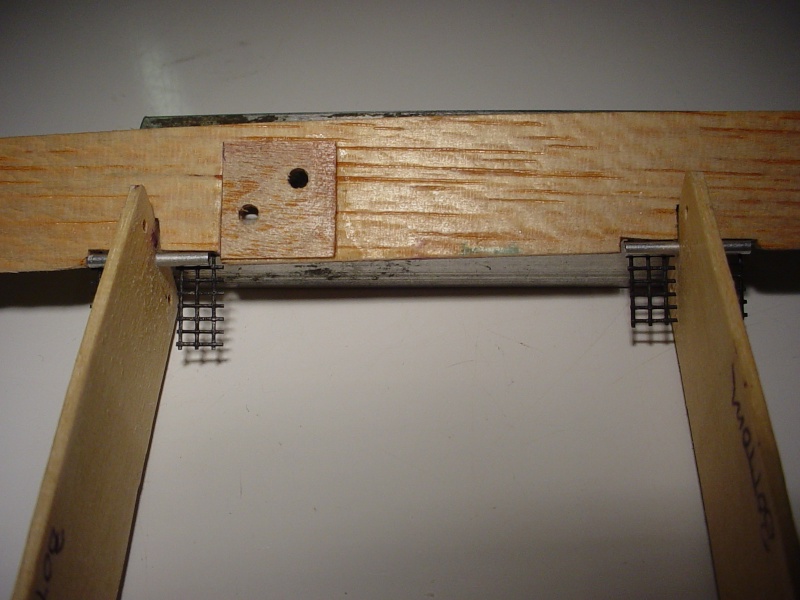
Hey Eric.. not sure if your seeing this correctly. The screen will be looped around the pin and glued to the other side of the stab. The pins ride in holes drilled in the center of the booms.
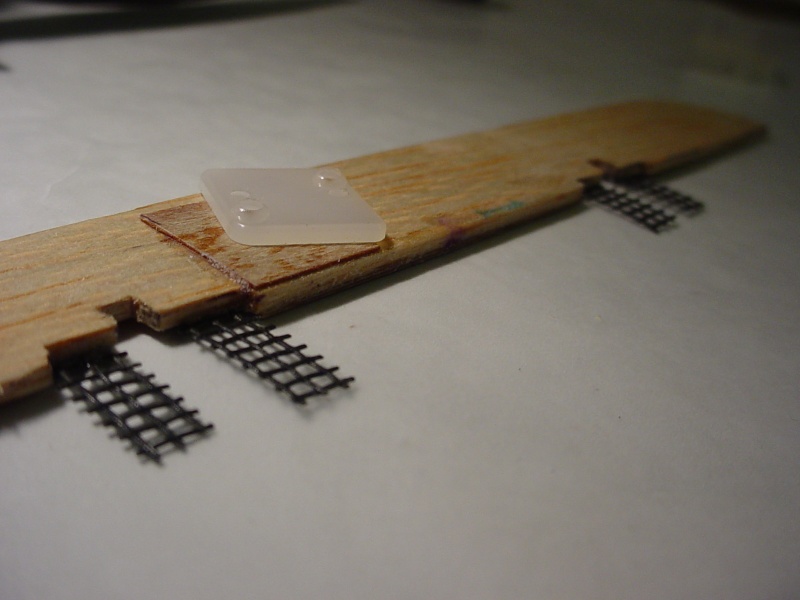
Here's a shot of the underside.. I ended up choosing the shorter horn's mount-spacing.. and drilled .089" clearance holes for it's 2-56 x 1/4" long screws.
roddie- Top Poster
- Posts : 8274
Join date : 2013-07-17
Age : 64
Location : N. Smithfield, Rhode Island -
Re: "Phred's Phault"
![]() roddie Tue Nov 11, 2014 7:10 pm
roddie Tue Nov 11, 2014 7:10 pm
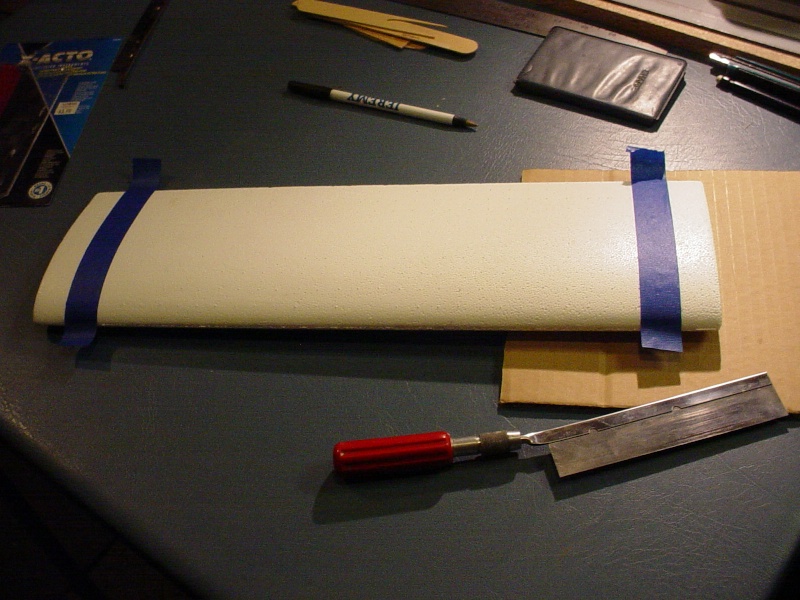
I was brave with the razor saw..
This is a bittersweet build.. because when I built the Rare Bear for the 1st CEF Speed Contest.. I had been unemployed during that time. I just received notice this week.. so I find myself back there again.
roddie- Top Poster
- Posts : 8274
Join date : 2013-07-17
Age : 64
Location : N. Smithfield, Rhode Island -
Page 1 of 7 • 1, 2, 3, 4, 5, 6, 7 ![]()