Log in
Search
Latest topics
» Golden Bee basic running problemby roddie Yesterday at 10:51 pm
» Simple Gliders
by rdw777 Yesterday at 6:25 pm
» Foam hand kids glider converted to 0.049 CL
by rdw777 Yesterday at 6:11 pm
» Weird search for a single comic from an old Mad Magazine
by Kim Yesterday at 1:44 pm
» Scientific "Zipper" Build...Zipper Flys!.
by getback Yesterday at 7:27 am
» Cox .049 Tee Dee engines back in stock (limited availablility)
by GallopingGhostler Yesterday at 1:05 am
» Very off-topic.........Time passes and not always for the best......
by rsv1cox Thu Jul 25, 2024 2:47 pm
» Roddie-Rigger.. a 2005 original design
by roddie Wed Jul 24, 2024 11:48 pm
» Jim Walker Bonanza etc.
by rsv1cox Wed Jul 24, 2024 6:30 pm
» Throttles for Cox Tee Dee .049 / .020 / .010 engines --- videos
by sosam117 Wed Jul 24, 2024 8:54 am
» Introducing our Cox .049 TD Engines
by Admin Tue Jul 23, 2024 2:00 am
» Project Cox .049 r/c & Citabrian Champion
by getback Mon Jul 22, 2024 4:14 pm
Cox Engine of The Month
July-2024
robot797's
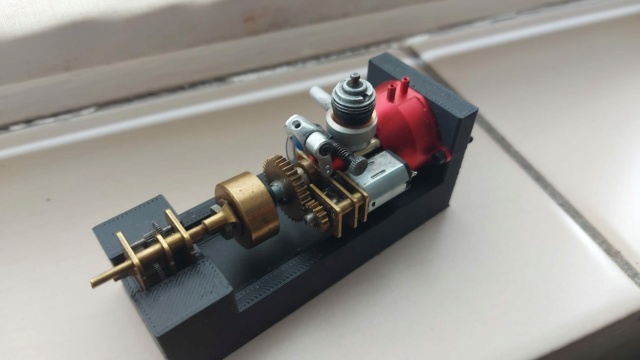
"ULTIMITE COX 010: it has a clutch, E starter, throttle, exhaust, aluminum tank, aluminum venturi, gearbox with forward and reverse, and now its on a custom drawn and printed stand"

PAST WINNERS
robot797's

"ULTIMITE COX 010: it has a clutch, E starter, throttle, exhaust, aluminum tank, aluminum venturi, gearbox with forward and reverse, and now its on a custom drawn and printed stand"

PAST WINNERS
New project... Loop Graupner "Glow"
Page 2 of 3
Page 2 of 3 •  1, 2, 3
 Re: New project... Loop Graupner "Glow"
 Really great this idea of detachable wings for me it has become a must when the time comes to build a model it is very practical to be able to store in a box suitable even for the smallest plane it Protects and helps keep clean The model you chose might be good for my new k&b .20 I will follow this construction closely you should reinforce the straw with fiberglass to prevent the straw from deforming and possibly cracking the balsa Of course, everything depends on the thickness of the straw and the balsa used, but as a precaution, a small reinforcement at strategic points will ensure solidity. Mauricio I am always impressed by the planes you build and I must say that you are very productive these days. Cool build i like it
davidll1984- Diamond Member

- Posts : 2303
Join date : 2020-02-12
Age : 39
Location : shawinigan
 Re: New project... Loop Graupner "Glow"
Thank you very much friends for your words. It's always nice to share here.
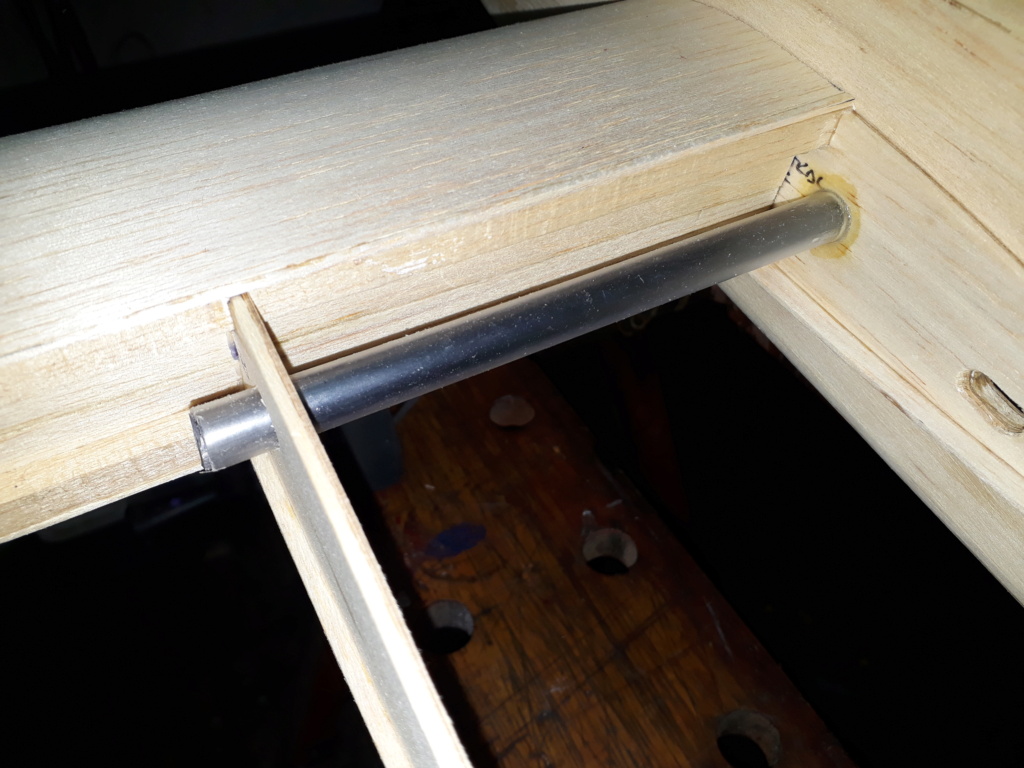
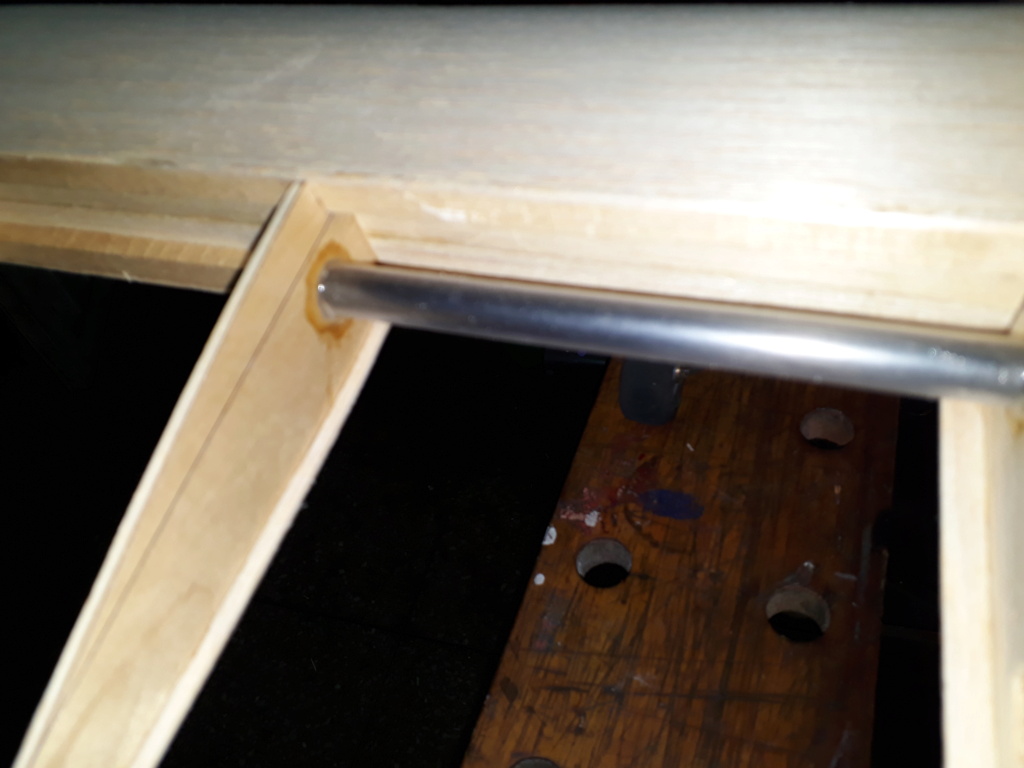
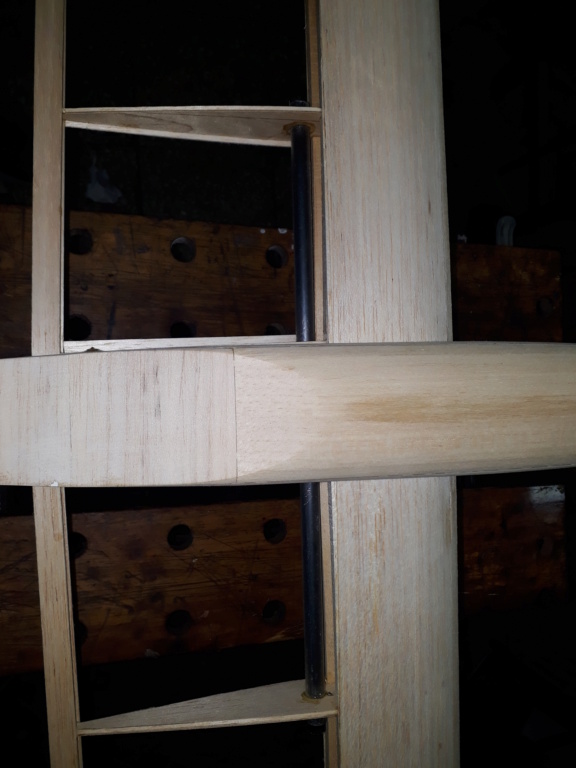
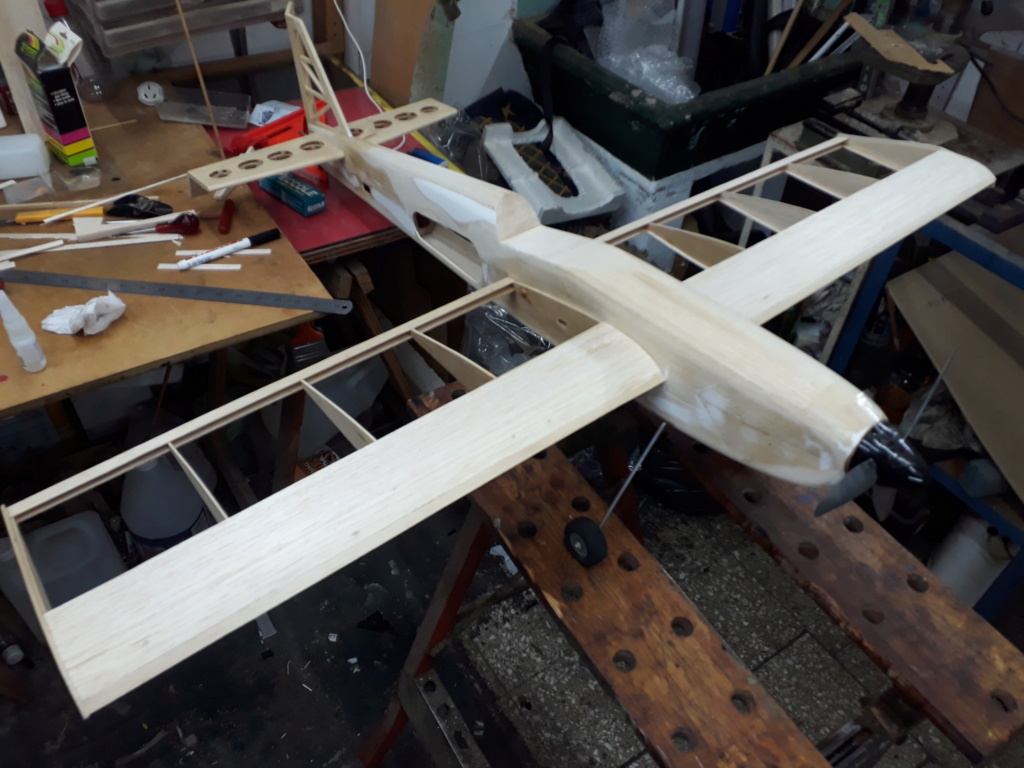
David, the plastic tube of soda, only acts as a sheath, as a guide, the force is really carried out by the carbon tube.
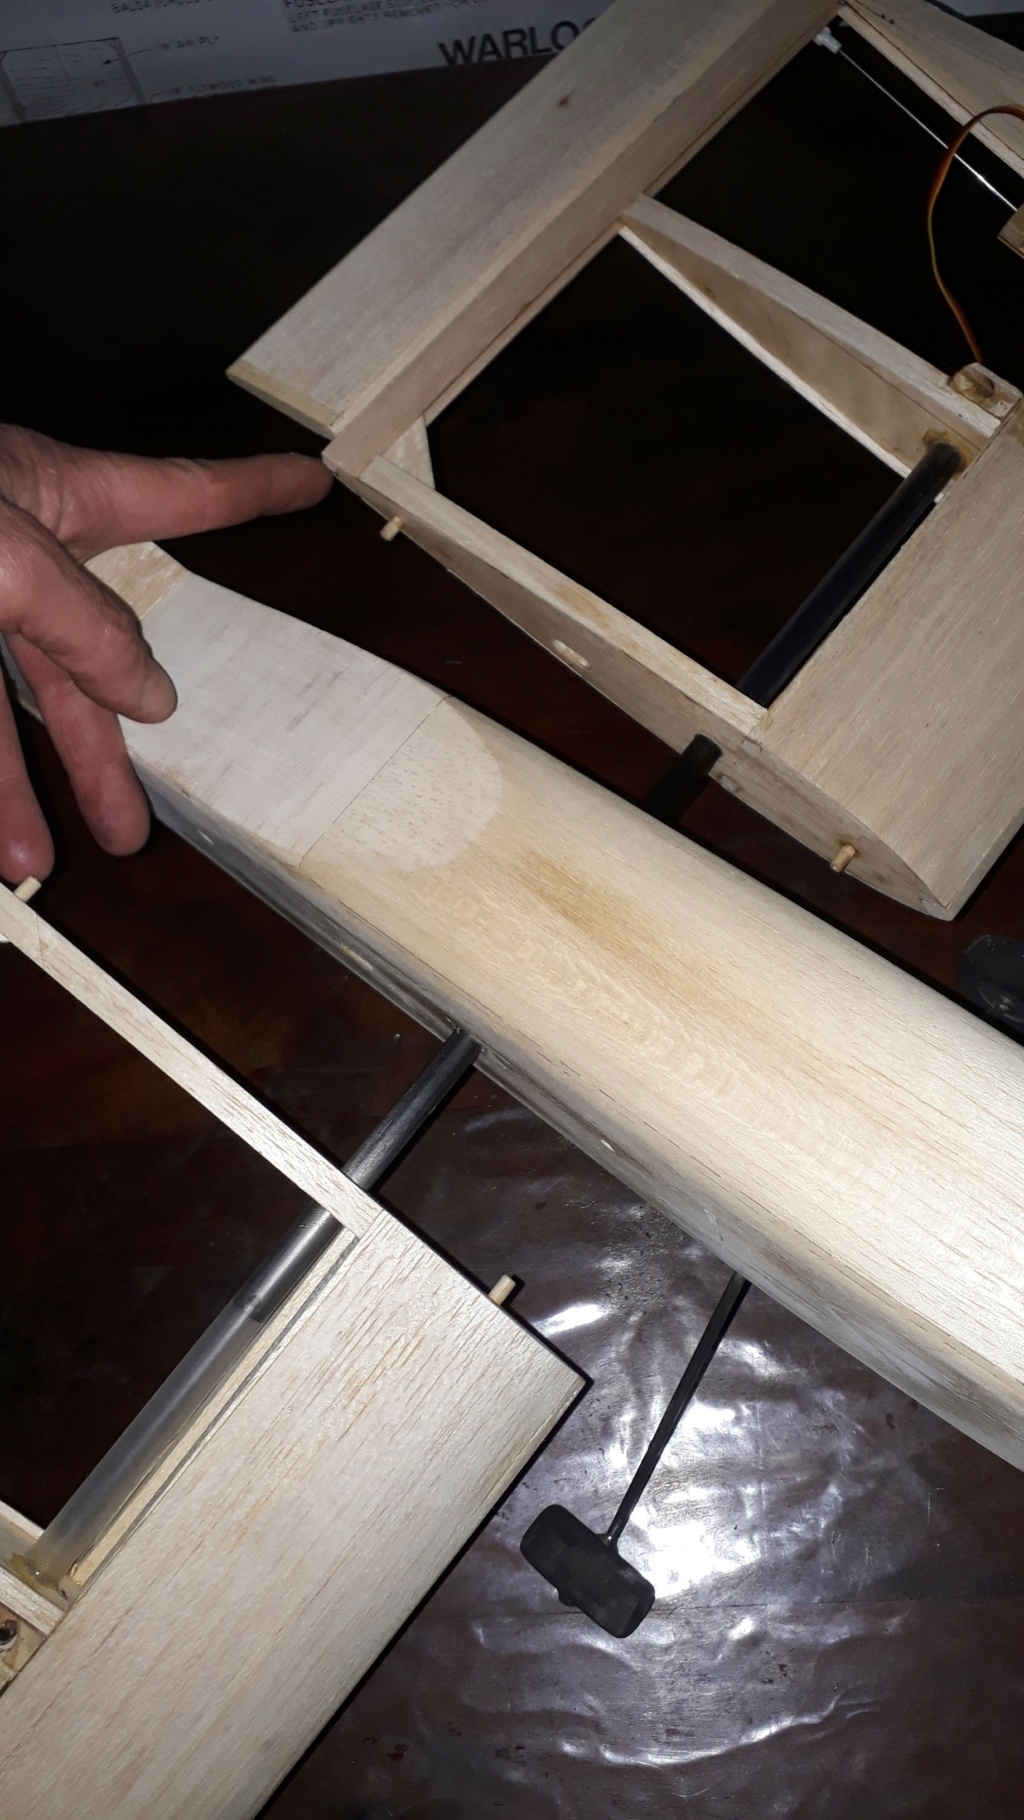
The soda pod, or tube, is glued to balsa ribs, which in turn have a three-ply hardwood rib, which makes it super strong. later I will show how each semi-wing is attached with its screws, that step is not done yet.
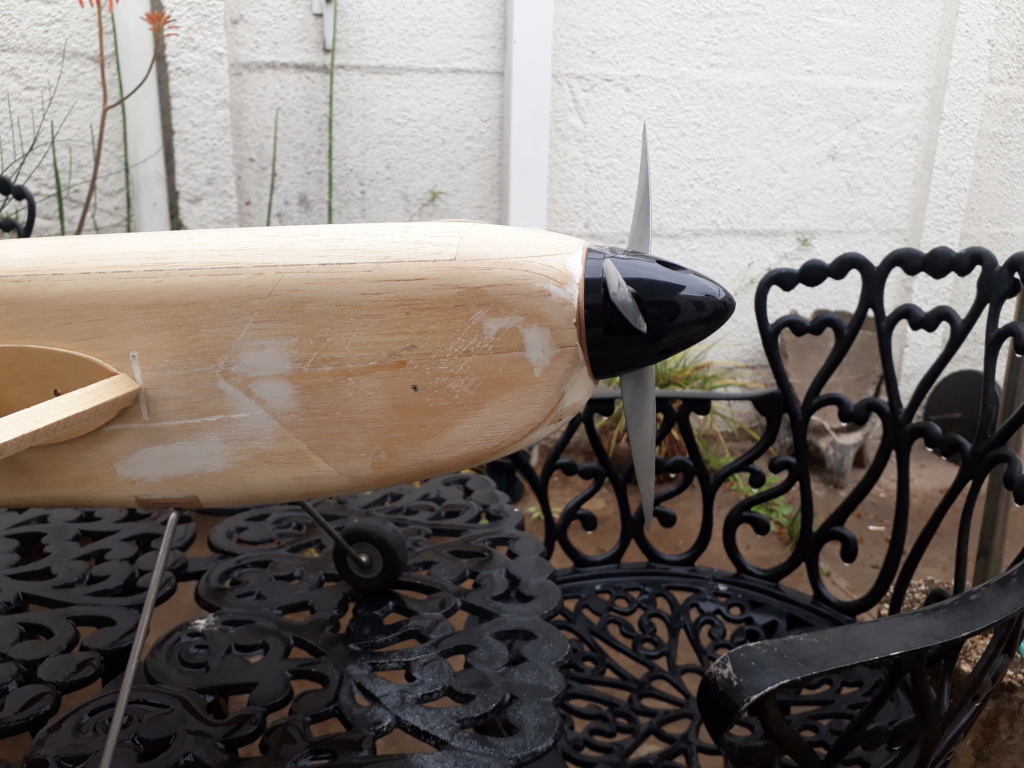
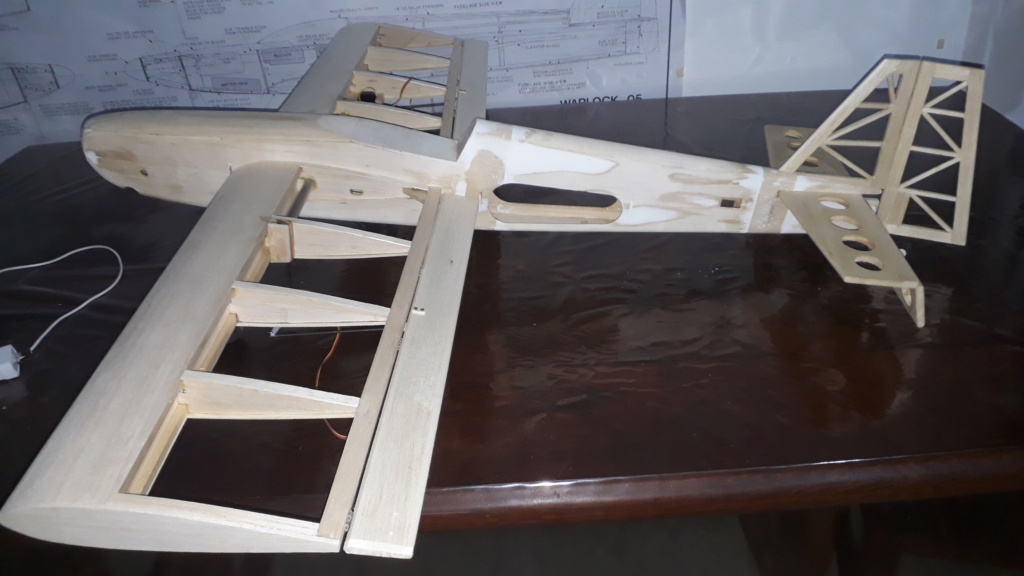
I aligned all the parts and to my surprise everything seems to fit perfectly, the stabilizer at 0 degrees, the semi-wings are at a positive 1 degree each, perfect to my liking.
I will continue working and sharing with you!...


MauricioB- Top Poster

- Posts : 3649
Join date : 2016-02-16
Age : 53
Location : ARG
 Re: New project... Loop Graupner "Glow"
getback wrote:Looking Good my Friend , did you have trouble deciding witch stab/elev. to use ? i see you have made 3 different ones .I love the way you take every day things like the clip and make it work for you on the plane (keeps the mine working)


Eric, my dear friend!....no no, it's still the same stabilizer, that is, the structure goes first, then I made a 1 mm thick balsa wood plywood to give firmness and then I cut the circles, all this because I noticed that the raft was too soft to leave it alone in structure and surely in flight it could easily flutter, so I ensured just that point.

MauricioB- Top Poster

- Posts : 3649
Join date : 2016-02-16
Age : 53
Location : ARG
 Re: New project... Loop Graupner "Glow"
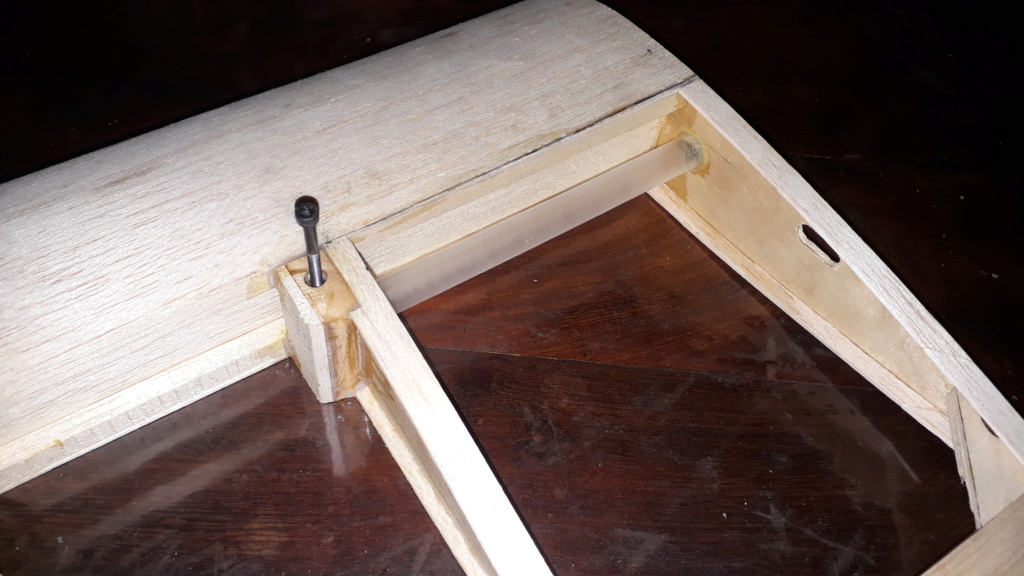
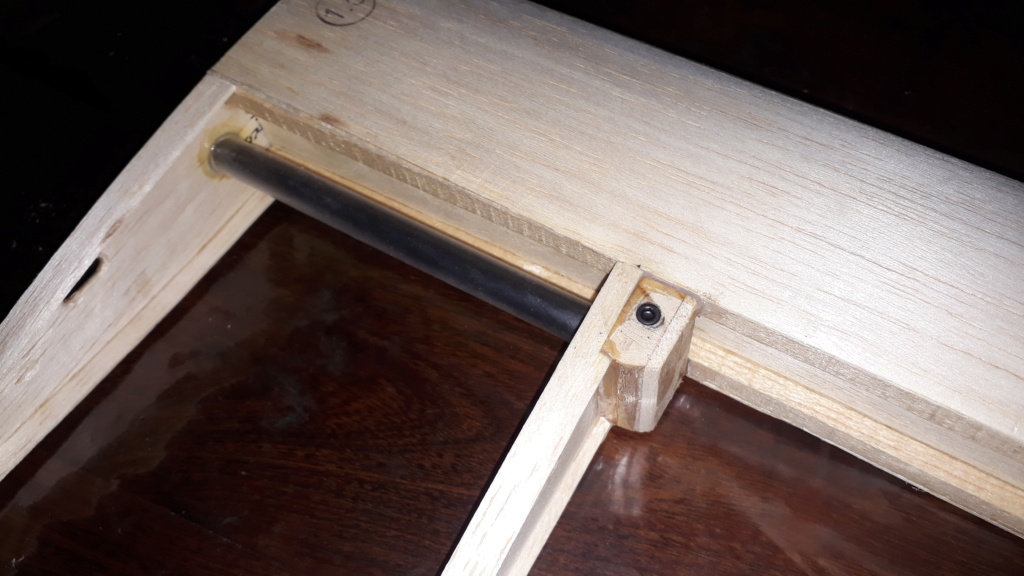
Well, here I show you how the semi-wings are already assembled. everything lined up perfectly, great! all the pieces fit together correctly, so this model airplane project looks like it's going to turn out well.
The aileron are made with a low-density styrofoam core, veneer with 1 mm balsa and glued with white carpenter's glue.
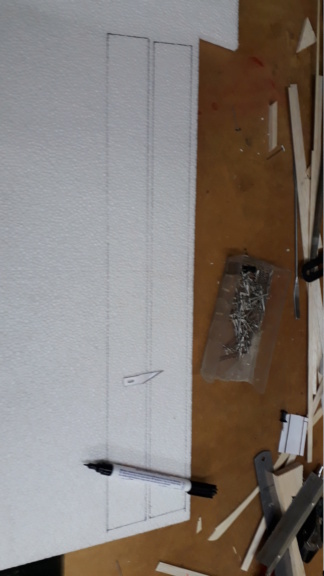
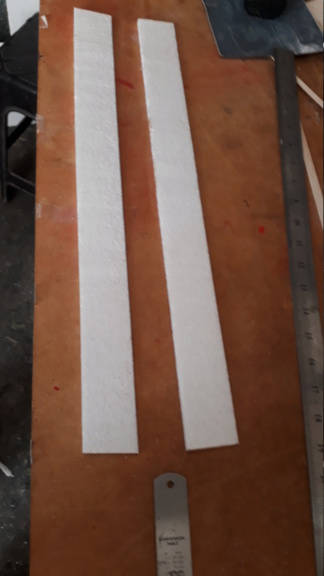
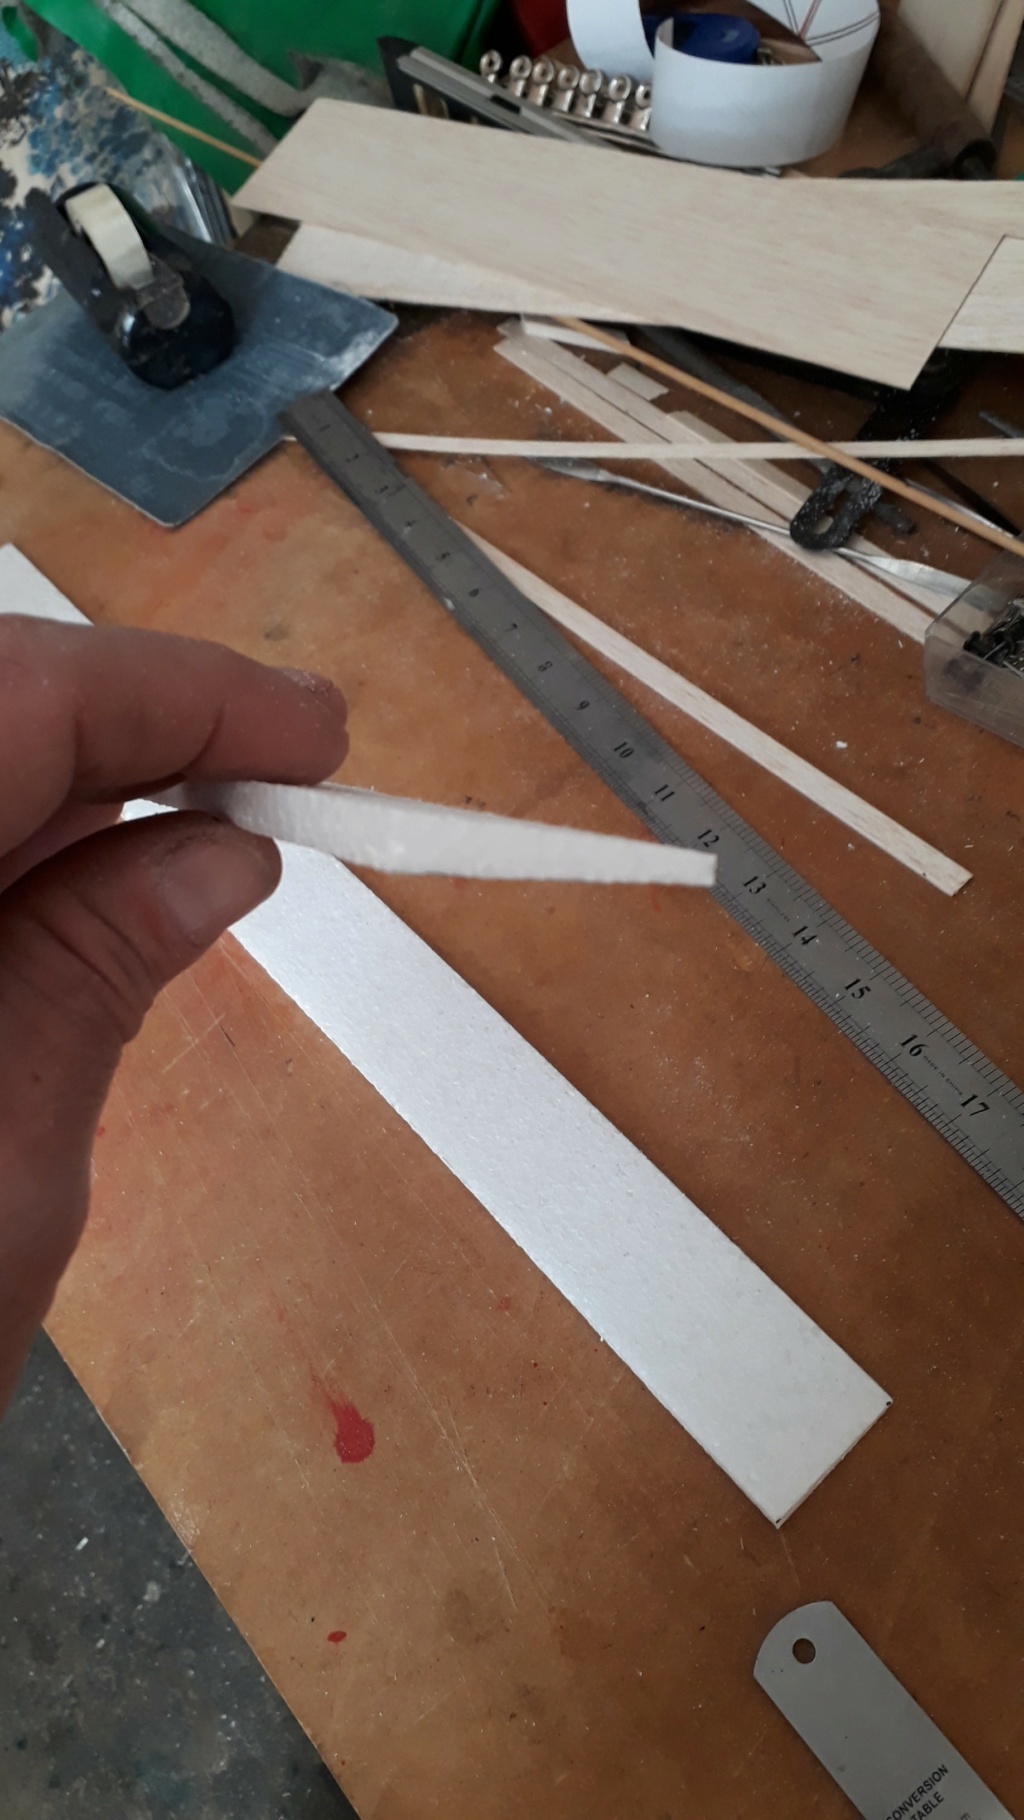

The aileron are made with a low-density styrofoam core, veneer with 1 mm balsa and glued with white carpenter's glue.


MauricioB- Top Poster

- Posts : 3649
Join date : 2016-02-16
Age : 53
Location : ARG
 Re: New project... Loop Graupner "Glow"
It is amazingly perfect Mauricio...so far you have not introduced the 4-stroke engine that you will put in the nose....what engine brand will you use?
The small dowels that fit the wing halves to the fuselage are hardwood I guess..with my flying skills where unplanned landings can never be ruled out, I would probably use small diameter carbon tube for dowel.
I noted both ends of the carbon tube may be perpendicularly drilled where the wing retainer bolts intersect the carbon tube..I guess you will reinforce the drill holes in the carbon tube with CA glue? I find carbon tubes easily cranking along the fibers.

balogh- Top Poster


Posts : 4803
Join date : 2011-11-06
Age : 65
Location : Budapest Hungary
 Re: New project... Loop Graupner "Glow"
Beautiful craftsmanship Mauricio!…..I can tell you like to build and enjoy working out solutions for challenges…. It seems there’s always something to learn from your threads and photos…..Gracias Señor 

rdw777- Diamond Member


Posts : 1470
Join date : 2021-03-11
Location : West Texas
 Re: New project... Loop Graupner "Glow"
Thank you very much guys for your words, as I always say, it is beautiful to share here with you.
Let's go for some details....
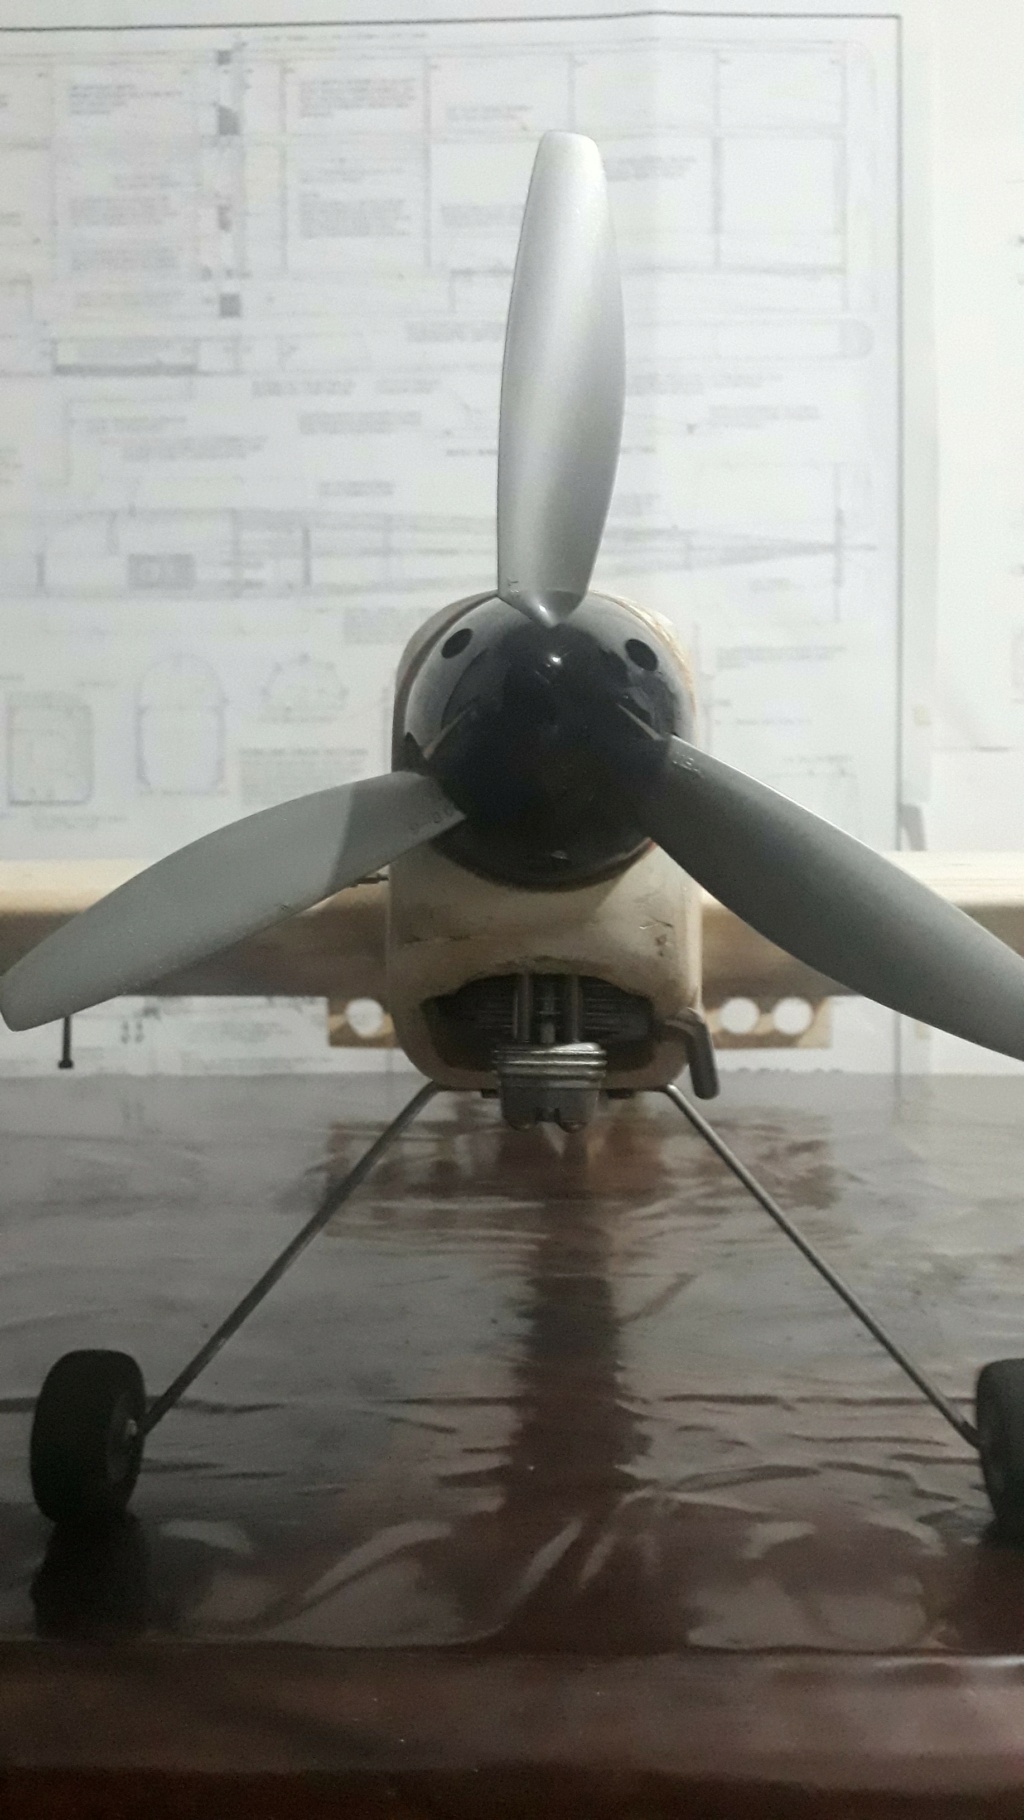
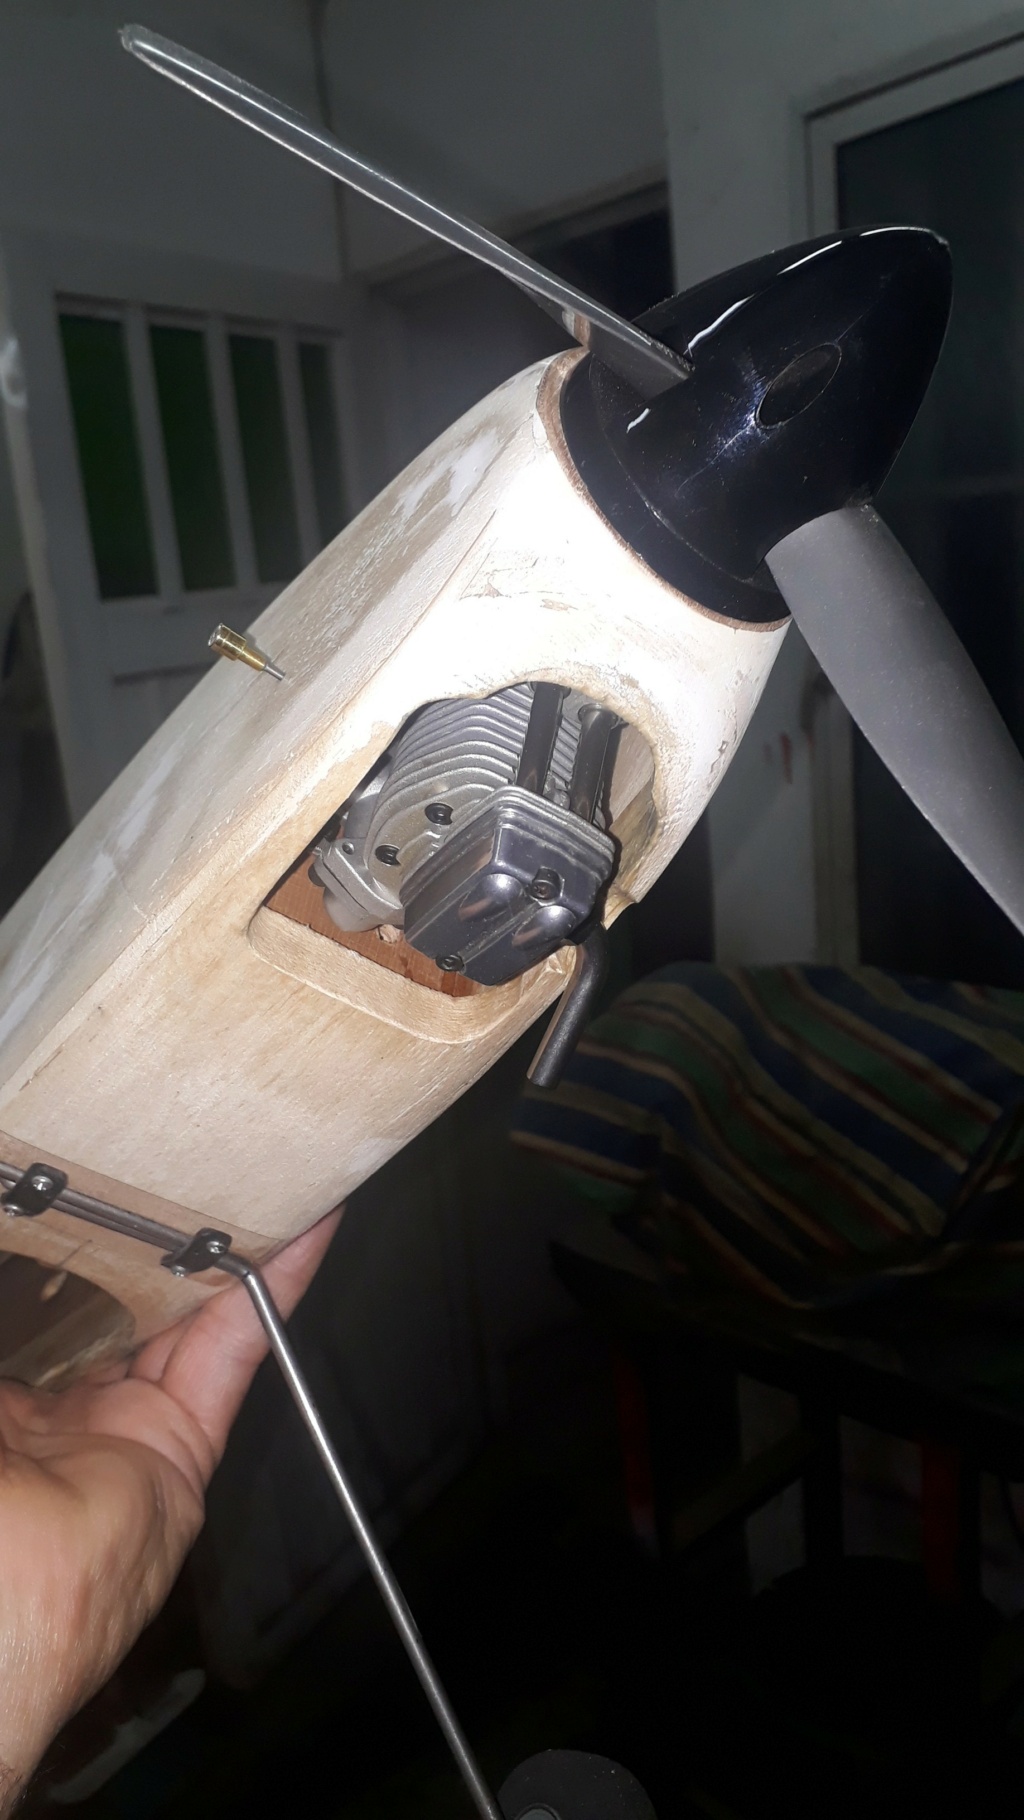
András, the engine that I plan to use here is a 4-stroke engine of the O.S. brand, this project is quite a challenge since the displacement of the engine is very small, I am just looking to use such a small engine for this plane, it is therefore, the weight of the aircraft must be as little as possible, its wing loading must be very low and then it remains to be seen what happens in practice.
The displacement of the engines thought here are: .20 4T // .26 4T // .30 4T, all these engines share the same block, I have a .20 4T and a .26 4T, so it is very possible that I start with the .20 4T since I have it in use and if I see that everything is going very well, I will put a new .26 4T that I have available.
The range of propellers are:
Tri-blade: 8 x 6 inches
Two-blade: 10 1/2 x 6 inches
Regarding the construction details:
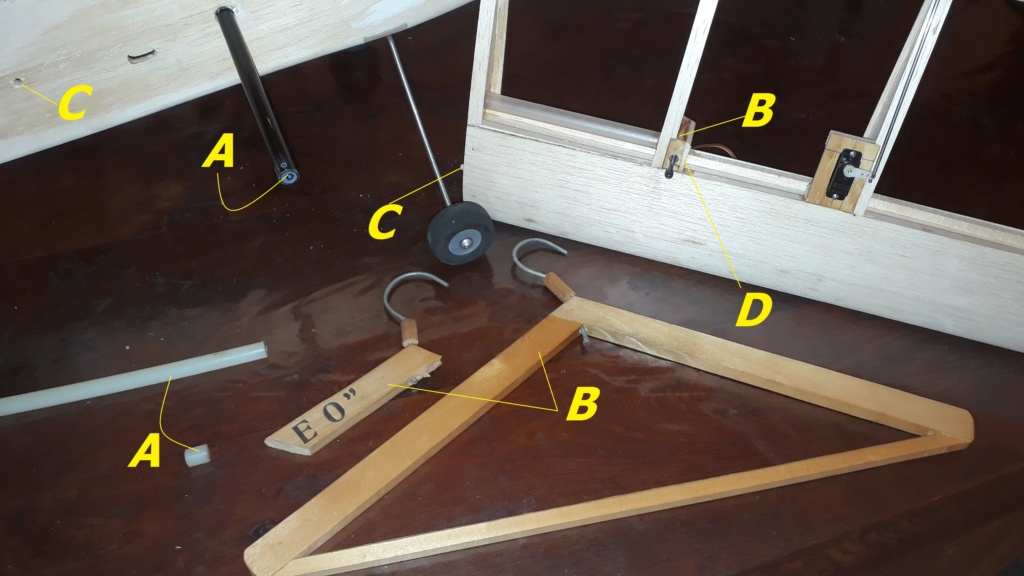
The carbon bayonet has at the ends a grylon insert glued with cyan, this gives firmness and security, indicated with the letters (A)
The wood for the support and adjustment of the 3-millimeter allem screw is made of pine, I have used a clothes hanger here hahaha...(and well, no one will notice that there is one less in the wardrobe hahaha)..indicated with letter (B) .
The guide fixing bolts are also made of pine wood, 5 mm, indicated with letter (C).
The top cover that closes the bayonet sheath housing is made of 3 mm balsa wood, sufficient for the function it fulfills, indicated with letter (D).


MauricioB- Top Poster

- Posts : 3649
Join date : 2016-02-16
Age : 53
Location : ARG
 Re: New project... Loop Graupner "Glow"
Lots of good ideas, thank you Mauricio...the OS Max is a very dependable 4-stroker, I have 2 of them, each .56 alpha, and they power and fly planes intended for same size 2 strokers, which are almost twice powerful.
Looking forward to seeing your project advance further!
Looking forward to seeing your project advance further!

balogh- Top Poster


Posts : 4803
Join date : 2011-11-06
Age : 65
Location : Budapest Hungary
 Re: New project... Loop Graupner "Glow"
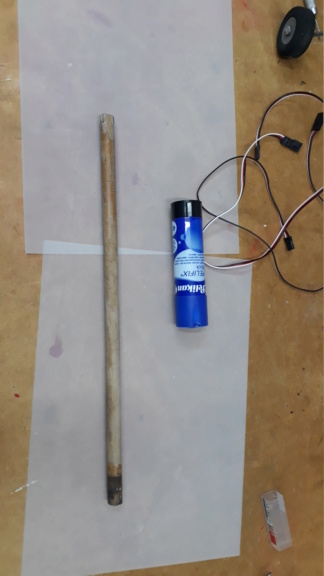
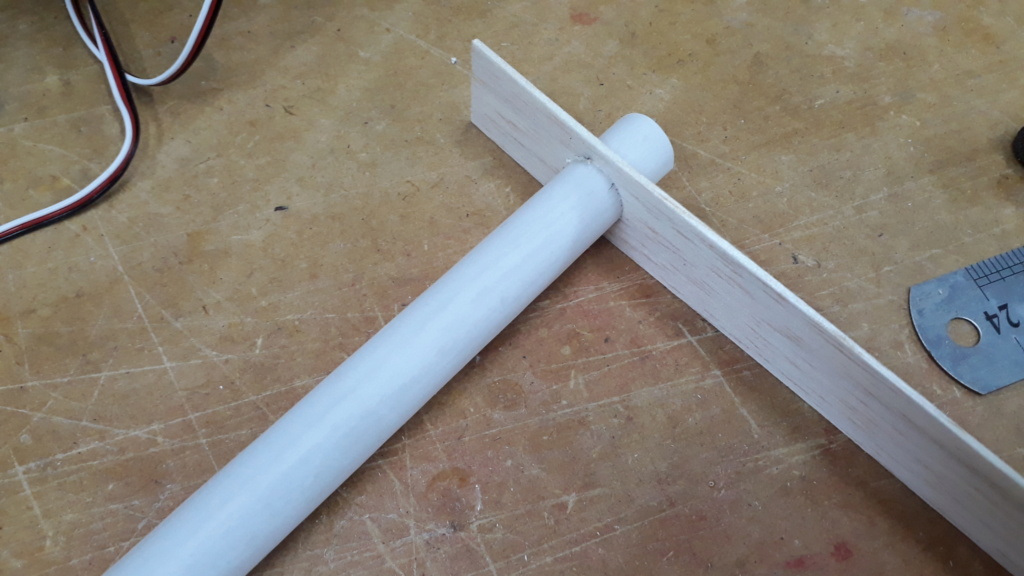
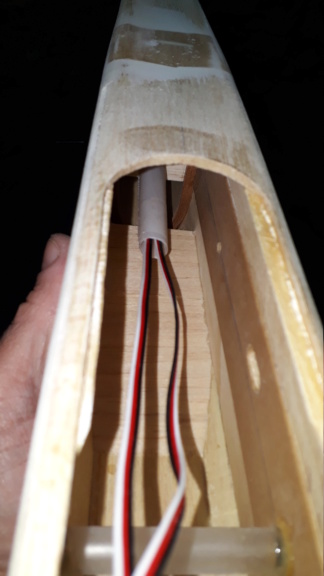
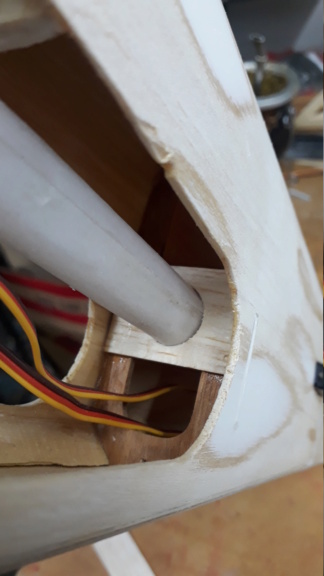
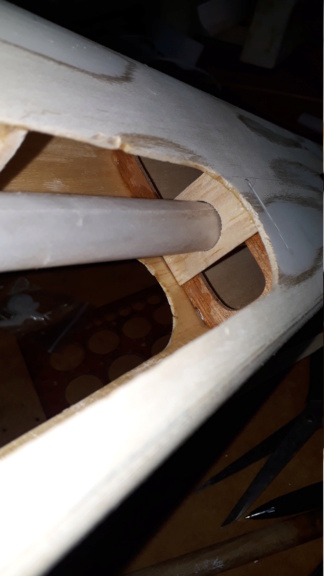
well, here I show you how I make the conduit channel for the cables of the tail servos.
It is important that the cables are not loose, since their movement can cause some cable to lose its insulation due to friction, in addition to that it is not good that the cables, with the movement of the model airplane, go from one side to another, for so i do the following
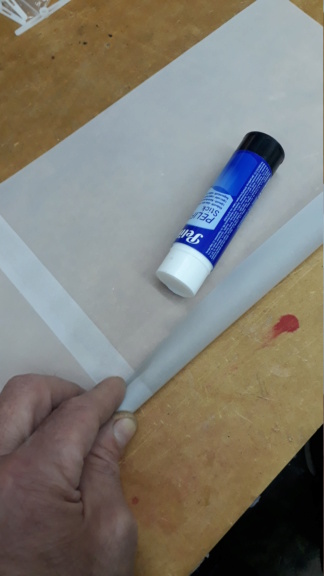
I take a couple of sheets of parchment paper, I take a round piece of wood, and some glue.
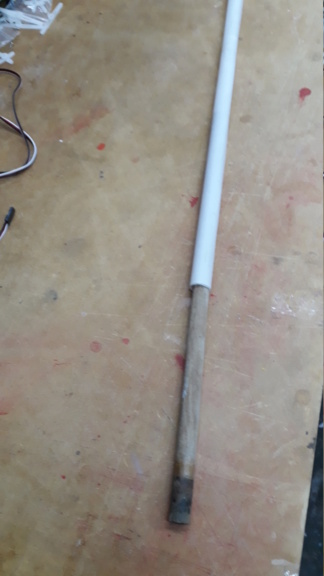
I make a tube with the parchment paper adding a little glue for each turn. I install the tube inside the fuselage with two 1.5 mm pieces of wood.
The conduit is ready to use.
This is how the cables look already passed through the tube. This allows cables to be safely removed and placed.


MauricioB- Top Poster

- Posts : 3649
Join date : 2016-02-16
Age : 53
Location : ARG
 Re: New project... Loop Graupner "Glow"
That conduit is indeed a smart and tidy "marshalling" tool for the cables, I have never thought of that..may be just because I build smaller planes where any extra weight on board is unwanted?

balogh- Top Poster


Posts : 4803
Join date : 2011-11-06
Age : 65
Location : Budapest Hungary
 Re: New project... Loop Graupner "Glow"
balogh wrote:That conduit is indeed a smart and tidy "marshalling" tool for the cables, I have never thought of that..may be just because I build smaller planes where any extra weight on board is unwanted?
András, in the small or very small models, it is not necessary to place any tube, since there is no space available and the servos are "never" in the queue. This tube is applied from models where the servos are applied in the tail of the model and this is so that the cables are not left loose dancing inside the fuselage. Many times instead of placing a tube, some people put cable ties along the cable run, but once the fuselage is covered with monokote or skinning material, it is impossible to remove those cables if necessary. The tube also allows the cables to be removed when necessary, for maintenance or servo replacement, for example.
In small models, I repeat, the servos never go in the tail, they are generally housed in the central sector of the fuselage and the cables are all at hand and can be fixed with plastic ties.

MauricioB- Top Poster

- Posts : 3649
Join date : 2016-02-16
Age : 53
Location : ARG

MauricioB- Top Poster

- Posts : 3649
Join date : 2016-02-16
Age : 53
Location : ARG
 Re: New project... Loop Graupner "Glow"
Another lovely plane in the making...the 3 bladed prop with the inverted engine give it added beauty..
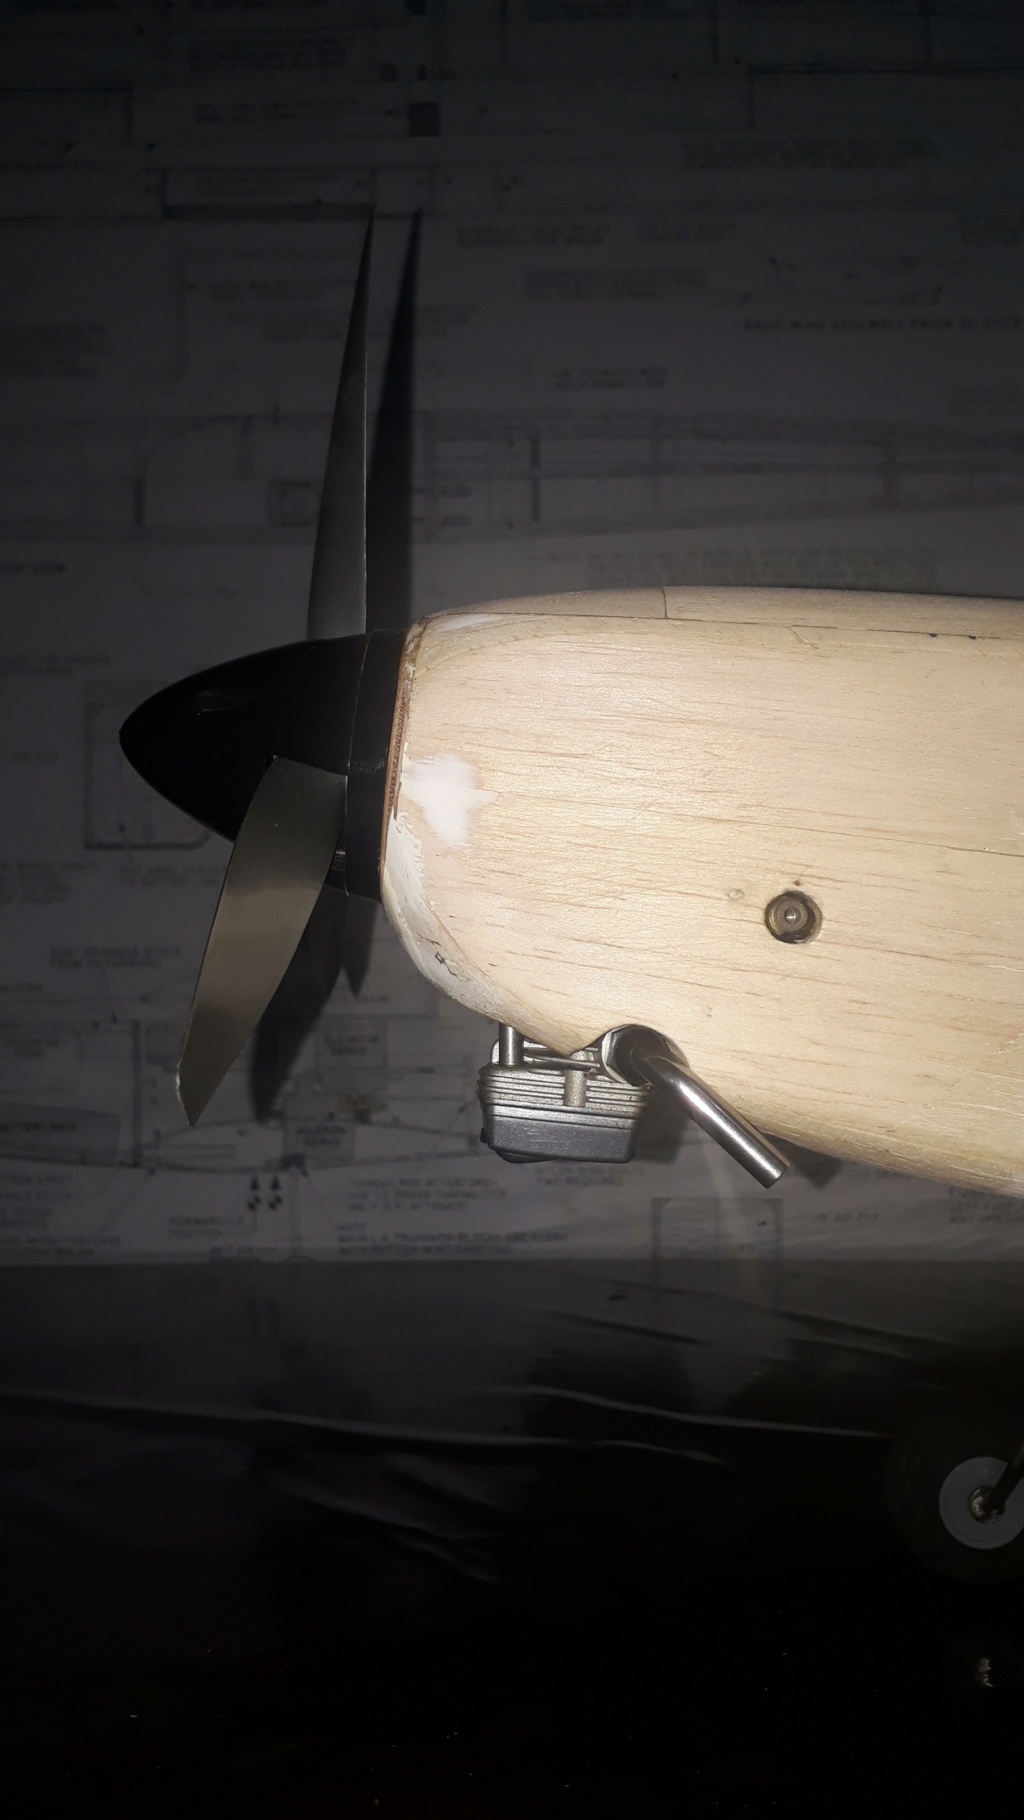
Just a stupid question, older 4stroker OS engines (before the OS 56FS alpha) had a breather tube from their crankcase..where do you lead out the crankcase gases from the cowl, or, you just let them breathed into the engine cowl?
Just a stupid question, older 4stroker OS engines (before the OS 56FS alpha) had a breather tube from their crankcase..where do you lead out the crankcase gases from the cowl, or, you just let them breathed into the engine cowl?

balogh- Top Poster


Posts : 4803
Join date : 2011-11-06
Age : 65
Location : Budapest Hungary
 Re: New project... Loop Graupner "Glow"
balogh wrote:Another lovely plane in the making...the 3 bladed prop with the inverted engine give it added beauty..
Just a stupid question, older 4stroker OS engines (before the OS 56FS alpha) had a breather tube from their crankcase..where do you lead out the crankcase gases from the cowl, or, you just let them breathed into the engine cowl?
Thank you very much András, I'm glad you like it.
Yes, the engine there with that three-blade propeller is very good.
In all these processes there are no stupid questions, on the contrary, you have to ask everything you want, because sometimes the obvious is not so obvious.
For the ventilation of the crankcase I will place a neoprene tube attached to some sector of the internal part of the fairing with discharge downwards, in the photo it is not done yet.

MauricioB- Top Poster

- Posts : 3649
Join date : 2016-02-16
Age : 53
Location : ARG
 Re: New project... Loop Graupner "Glow"
That's a Smart looking model your building and the tube is a very good idea , i figured the servo must be in the tail cause the were no rods.  Incorporating the wings to bee removeable is outstanding also !!
 Incorporating the wings to bee removeable is outstanding also !!

getback- Top Poster


Posts : 10276
Join date : 2013-01-18
Age : 66
Location : julian , NC
 Re: New project... Loop Graupner "Glow"
well, after the pause for the surgery and now with some injections that are delicious!!... then I can try and go back to working the wood without feeling pain, yes, I do it with time intervals, as the friend said George, on the bike post: I don't want to undo what's been done.
I show you the fabrication of the cabin.
I painted one of them fire red, or metal red so that the line it has is better noticeable.
here the photos:
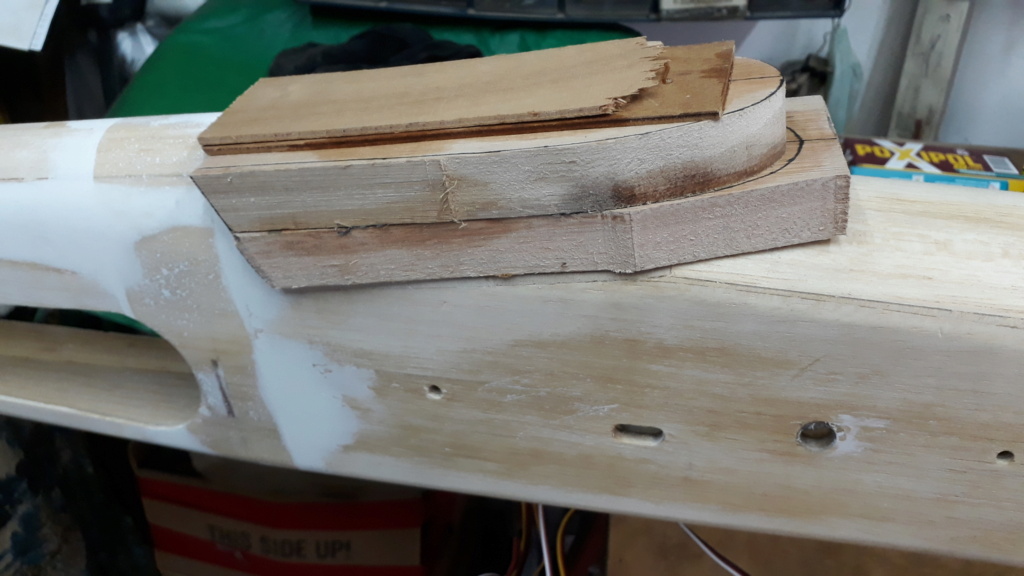
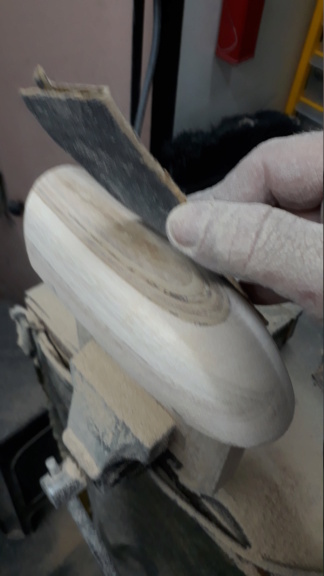
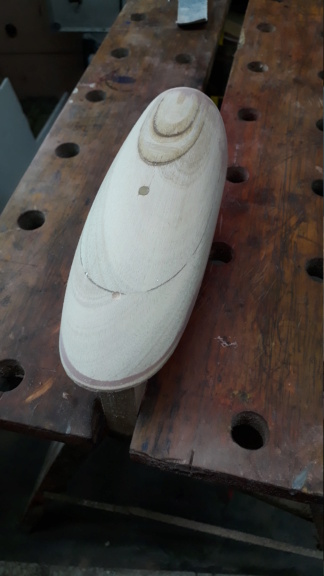
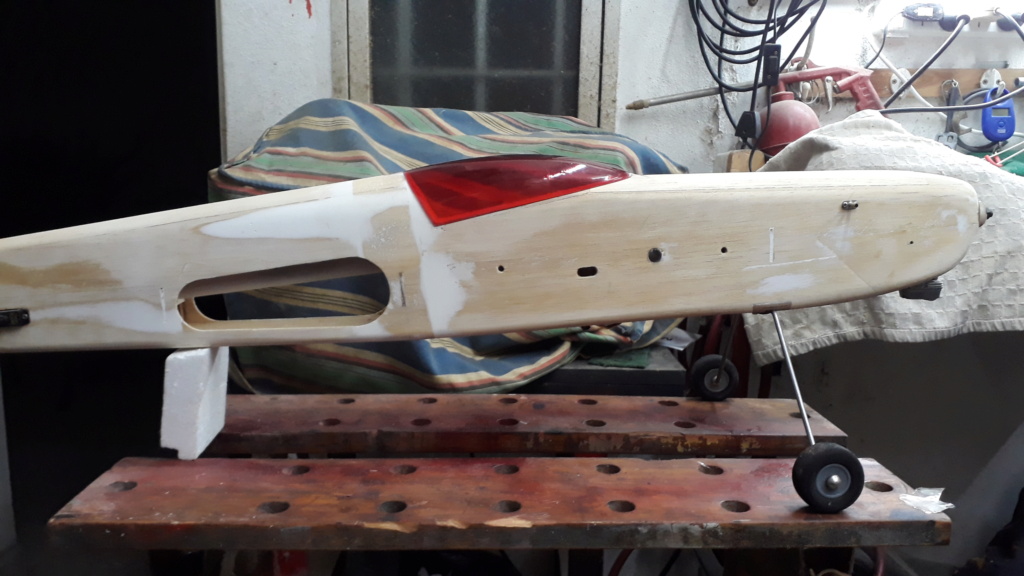
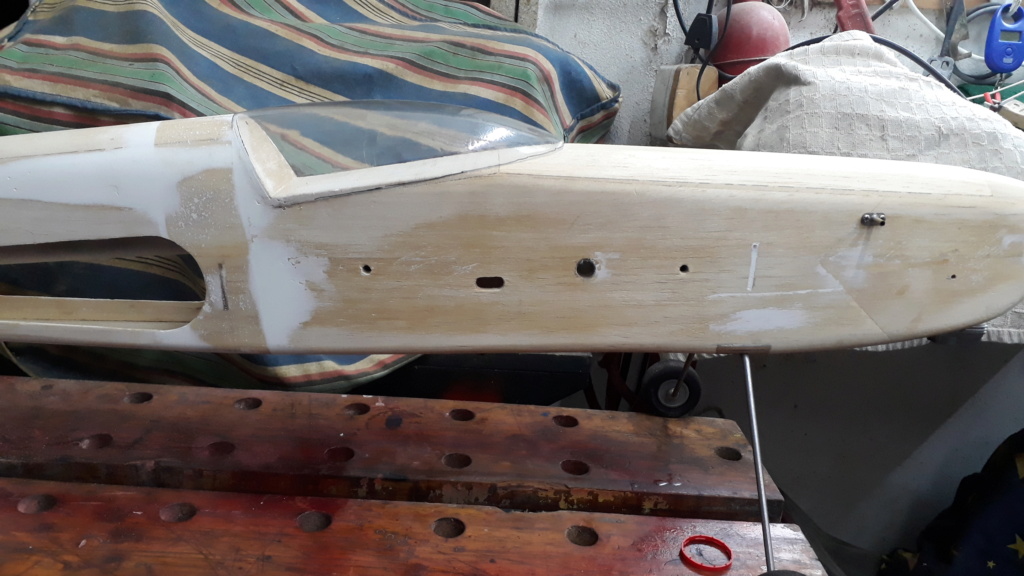
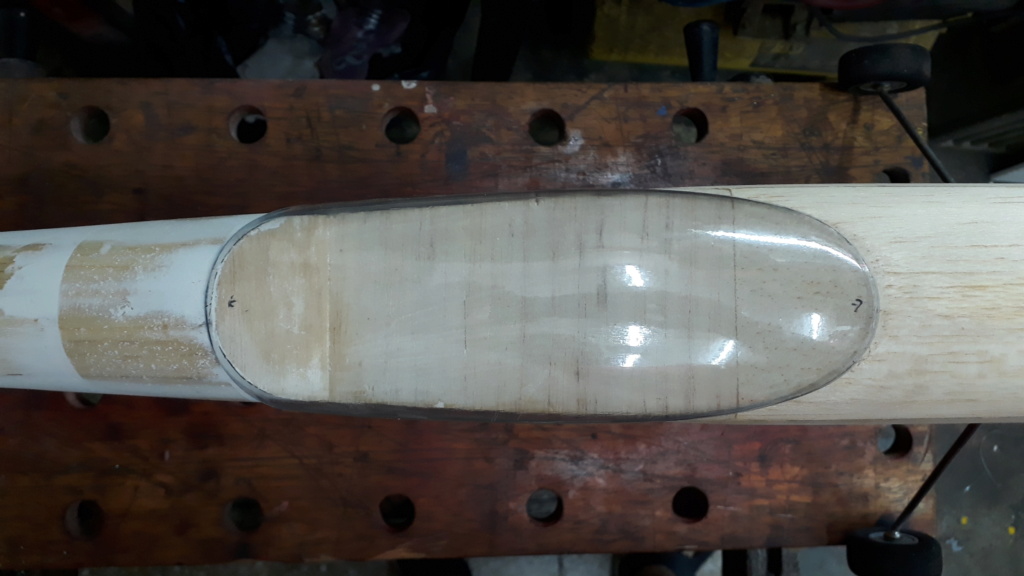
I show you the fabrication of the cabin.
I painted one of them fire red, or metal red so that the line it has is better noticeable.
here the photos:


MauricioB- Top Poster

- Posts : 3649
Join date : 2016-02-16
Age : 53
Location : ARG
 Re: New project... Loop Graupner "Glow"
Master craftsmanship dear Mauricio.

Levent Suberk- Diamond Member

- Posts : 2228
Join date : 2017-12-24
Location : Türkiye
 Re: New project... Loop Graupner "Glow"
That is a perfect fit ! Very nice indeed , i like the red tint 


getback- Top Poster


Posts : 10276
Join date : 2013-01-18
Age : 66
Location : julian , NC
 Re: New project... Loop Graupner "Glow"
Side Force Generators
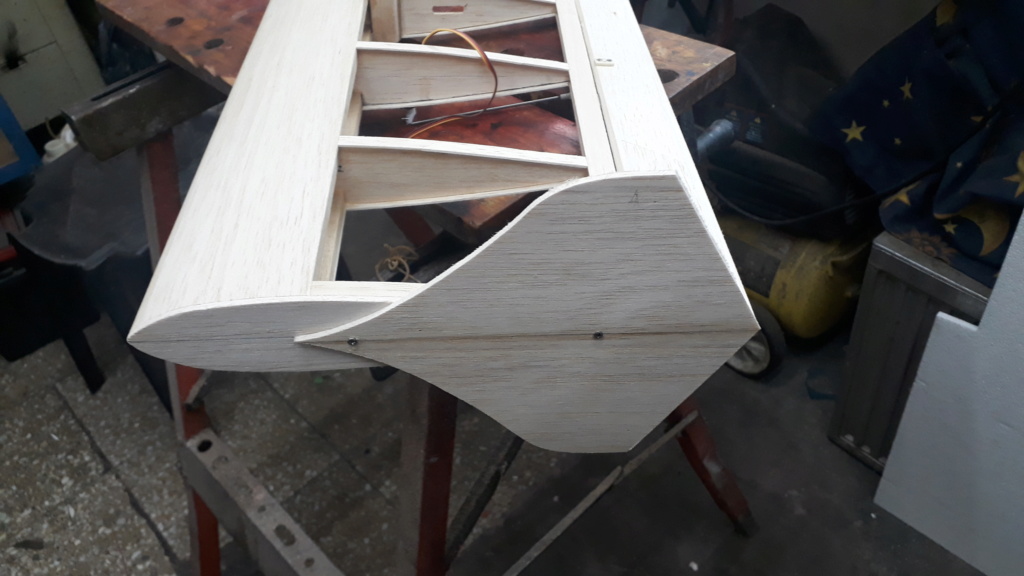
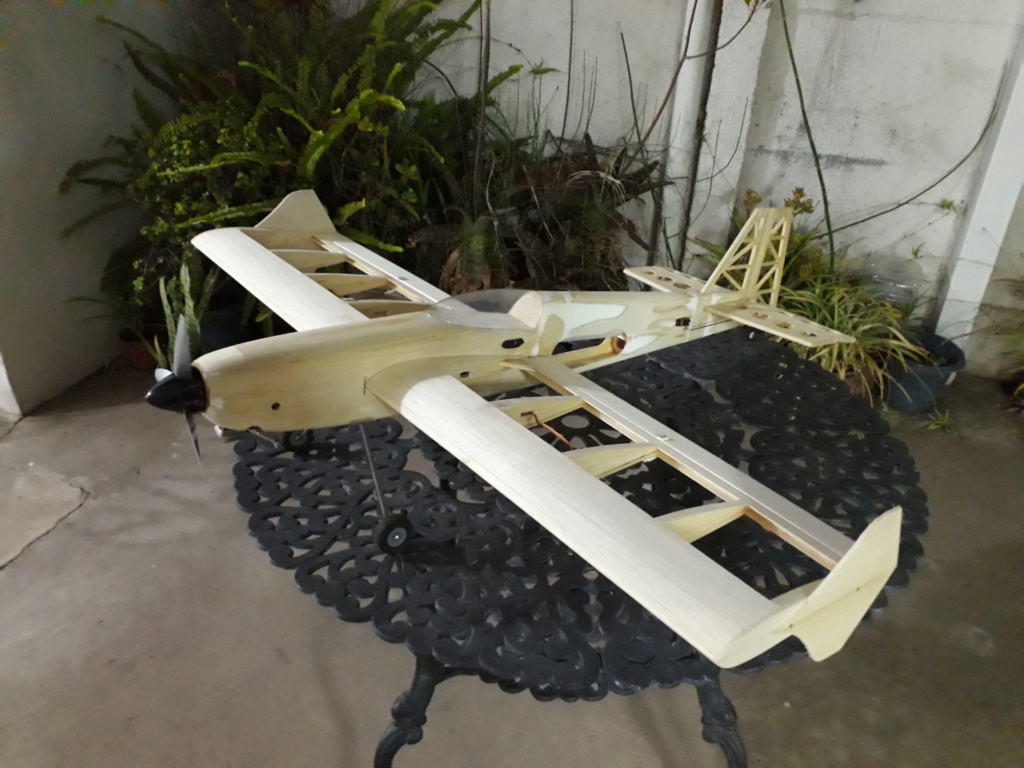
In the current RC stunt flight, an infinity of accessories are used that, according to theory and then in practice, some fulfill a good function and others do not serve so much.
In this case, I want to add the Side Force Generators (SGF), which are placed on the marginal edge of each half wing, this helps in some maneuvers such as knife-edge flight, but also, they make more resistance to turns when only use rudder, since the model wants to stay straight on its path.
Well, since the power of this model is very small, I am looking to make the experience of whether or not they help the engine to support the model better in certain flight positions.
These pieces can be removed if you wish, by means of two screws that hold each of these pieces, we'll see what it turns out....
Note:
The Side Force Generators are not completely finished, they have a carbon rod that will give them the right resistance to bending.

Here I am flying about 10 years ago with a Great Planes commercial model, the name is Pluma.
The model is electric, very light, it has uprights between the wings that are precisely designed wide, generating more surface area, which allows the model to be supported laterally.
In a nutshell, these uprights do both things, holding the wings together and generating lateral force.
In the current RC stunt flight, an infinity of accessories are used that, according to theory and then in practice, some fulfill a good function and others do not serve so much.
In this case, I want to add the Side Force Generators (SGF), which are placed on the marginal edge of each half wing, this helps in some maneuvers such as knife-edge flight, but also, they make more resistance to turns when only use rudder, since the model wants to stay straight on its path.
Well, since the power of this model is very small, I am looking to make the experience of whether or not they help the engine to support the model better in certain flight positions.
These pieces can be removed if you wish, by means of two screws that hold each of these pieces, we'll see what it turns out....
Note:
The Side Force Generators are not completely finished, they have a carbon rod that will give them the right resistance to bending.


Here I am flying about 10 years ago with a Great Planes commercial model, the name is Pluma.
The model is electric, very light, it has uprights between the wings that are precisely designed wide, generating more surface area, which allows the model to be supported laterally.
In a nutshell, these uprights do both things, holding the wings together and generating lateral force.

MauricioB- Top Poster

- Posts : 3649
Join date : 2016-02-16
Age : 53
Location : ARG
 Re: New project... Loop Graupner "Glow"
Hi Mauricio , so glad you are back in your shop to be able to do what you love…. And to share with us también!! Your craftsmanship is inspiring 
The side force generators are interesting and I can see how they may help with certain flight traits….Good you made them them removable to be able to test both arrangements…
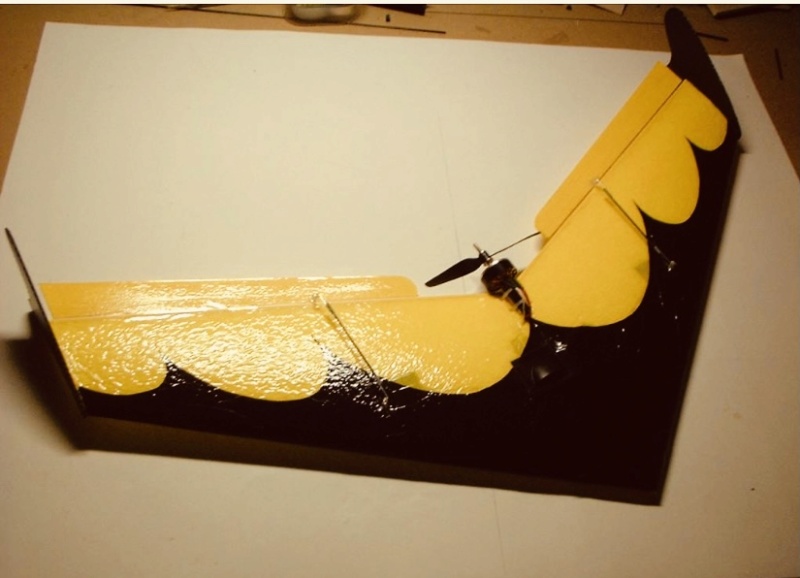
I was building flying wings several years ago and they utilized tip plates for stability…. I remember they needed to be toed in slightly….similar to an auto front end to be able to track well…
The one in the photo below weighed a little less than six ounces and powered at 65 watts…Was very quick but would slow down and thermal easily as well…


rdw777- Diamond Member


Posts : 1470
Join date : 2021-03-11
Location : West Texas
 Re: New project... Loop Graupner "Glow"
Friends, here I share the presentation of the Loop 4T model, those interested remember that they can use the automatic youtube translator.
Flight tests will come later... fingers crossed friends!!
Flight tests will come later... fingers crossed friends!!

MauricioB- Top Poster

- Posts : 3649
Join date : 2016-02-16
Age : 53
Location : ARG
 Re: New project... Loop Graupner "Glow"
and it's time for flight tests
Graupner Loop flight model modified to glow
Test flights were carried out:
Wind: 45km/h
Gusts of: 55 km/h
(data Aeroclub V.Tuerto ARG)
Engine: S.O. .26FS 4T
Two propellers were tested: Bolly 11 x 4 and APC 11 x 3
The model flies impeccably, without defects.
There are no adjustments necessary.
Original plan: Outerzone UK
Modifications to Glow: MauricioB

MauricioB- Top Poster

- Posts : 3649
Join date : 2016-02-16
Age : 53
Location : ARG
 Re: New project... Loop Graupner "Glow"
Pretty strong winds, but excellent flight with another exemplary model, Congratulations Mauricio.
I may have missed your explanation, but where are the winglets from the wingtips? Have you decided to remove them? Has it something to do with the strong winds that would have caused excessive lateral forces on the wings?
I may have missed your explanation, but where are the winglets from the wingtips? Have you decided to remove them? Has it something to do with the strong winds that would have caused excessive lateral forces on the wings?
Last edited by balogh on Tue Dec 13, 2022 3:59 am; edited 1 time in total

balogh- Top Poster


Posts : 4803
Join date : 2011-11-06
Age : 65
Location : Budapest Hungary
 Re: New project... Loop Graupner "Glow"
balogh wrote:Pretty strong winds, but excellent flight with another exemplary model, Congratulations mauricio.
I may have missed your explanation, but where are the winglets from the wingtips? Have you decided to remove them? Has it something to do with the strong winds that would have caused excessive lateral forces on the wings?
Thank you very much Andras!!...it is beautiful how the plane behaves.
Of course, remove the lateral force generators, initially with this strong prevailing wind the model always wants to go straight, that is, instead of helping to hold the model laterally they were going to channel the wind making the hardest turns with the rudder, for that reason do not apply them.
I have to go one day without wind and try there to see how they look. That was what happened.


MauricioB- Top Poster

- Posts : 3649
Join date : 2016-02-16
Age : 53
Location : ARG
 Re: New project... Loop Graupner "Glow"
Another Beautiful model Mauricio you do some incredible work with your plane and fling in that wind is creditable ! It will be interesting to see how it will perform with out the interference .. will you the the side force generators another day ? I don't see them on the model ? 


getback- Top Poster


Posts : 10276
Join date : 2013-01-18
Age : 66
Location : julian , NC
Page 2 of 3 •  1, 2, 3
 Similar topics
» micro Servo substitute=musclewire
» CL myth #4.....The outside loop
» The outside loop......not a myth
» "Mining Precious Metals"...Well, Actually, Sorting Glow Plugs/Glow Heads
» This started as a simple reply to the Sam's first loop thread
» CL myth #4.....The outside loop
» The outside loop......not a myth
» "Mining Precious Metals"...Well, Actually, Sorting Glow Plugs/Glow Heads
» This started as a simple reply to the Sam's first loop thread
Page 2 of 3
Permissions in this forum:
You cannot reply to topics in this forum

 Rules
Rules


