Log in
Search
Latest topics
» Stealth SB-Xby Admin Yesterday at 8:28 pm
» ST .35 STUNT / VOODOO / ZERO POINT ZERO NITRO
by TD ABUSER Yesterday at 7:45 pm
» SUPERTIGER .15 PROJECT
by TD ABUSER Yesterday at 7:42 pm
» For sale -- Cox Custom Carburetors for Tee Dee engines
by sosam117 Yesterday at 5:23 pm
» WHERE ARE YOU BUYING YOUR FUEL AND GLOW PLUGS...?
by TD ABUSER Yesterday at 4:35 pm
» Waiting for Engines from Ken Enya
by sosam117 Yesterday at 4:33 pm
» Unusual Cox 049 cylinder - Need help identifying
by anm2 Yesterday at 4:12 pm
» Jim Walker Bonanza etc.
by rsv1cox Yesterday at 2:57 pm
» What's the Best Reed for Cox Reed Valve Engines.
by roddie Yesterday at 1:37 pm
» Fuel choice
by 1975 control line guy Fri Aug 30, 2024 4:01 pm
» "Fall S.M.A.L.L." Video 3.
by GallopingGhostler Fri Aug 30, 2024 2:37 pm
» Gifted Fox
by Ken Cook Fri Aug 30, 2024 11:12 am
Cox Engine of The Month
August-2024
balogh's

"Cox TD09 R/C Beast of Burden featuring Kamtechnik head and DIY metallic fuel nipple"

PAST WINNERS
balogh's

"Cox TD09 R/C Beast of Burden featuring Kamtechnik head and DIY metallic fuel nipple"

PAST WINNERS
P-38 Lightning-Roddie style..
Page 2 of 9
Page 2 of 9 •  1, 2, 3, 4, 5, 6, 7, 8, 9
 Re: P-38 Lightning-Roddie style..
getback wrote:Great start on the P38 , Nice project for when your home bound . I think Bob has a good idea about drawing in some of the components to keep the weight down and make easier for adjustments later in the build ? You may can find the pictures online (print ) and apply to the model ? Just thinking out loud.
Thanks Eric!
 Yea.. I'm still having a lot of backlash from the flu... It's been almost a month. I bruised/cracked
  ribs on both sides from coughing.. and they're KILLING ME.
 Having a lot of trouble sleeping.. but I haven't smoked a cigarette since Dec. 20th............. I'm pretty psyched about that. I'd been wanting to quit.. and coming down with the flu gave me the perfect opportunity.
This P38 is kinda' a "skin and bones" version.. so there's not much room for extra detailing. The booms are 1/4" balsa.. so trying to replicate the turbochargers isn't on my to-do list. My aim was to keep it simple..
 Re: P-38 Lightning-Roddie style..
That's looking great, Roddie! Thanks for sharing the hinging technique. I like that method and will have to try it out. I usually end up driving an Xacto blade into my fingers a time or two during the hinging process.

Tee Bee- Platinum Member

- Posts : 763
Join date : 2011-08-25
Location : Angleton, TX
 Re: P-38 Lightning-Roddie style..
Tee Bee wrote:That's looking great, Roddie! Thanks for sharing the hinging technique. I like that method and will have to try it out. I usually end up driving an Xacto blade into my fingers a time or two during the hinging process.
Thanks Troy!
 I've been dragging my feet a bit with it over the last couple of days. I hope to get a little more done today. It can be tricky where there's no drawings or instructions.
  Re: P-38 Lightning-Roddie style..
I'd been putting this step off.. but couldn't really proceed without completeing it. Assembling the wing. Yea.. it's a sheet-wing.. but it's made-up of seven pieces butt-jointed together with thin CA..
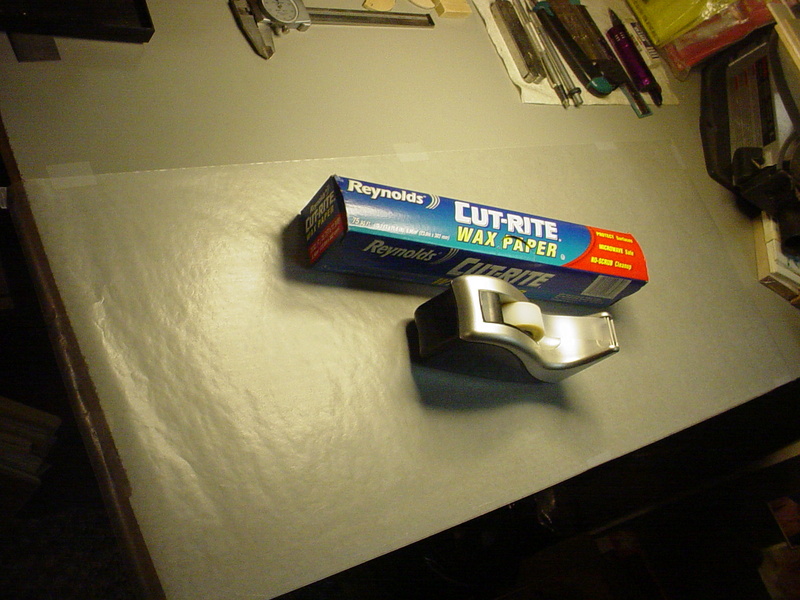
I begin by making sure that my melamine work-surface is clean and dust-free beforehand.. then I tape a piece of wax paper to it. CA glue will not stick to wax paper.
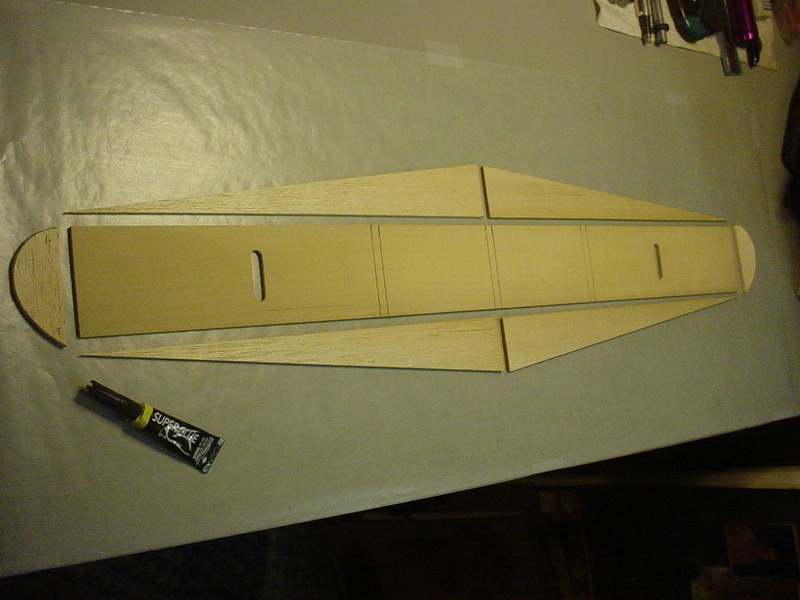
I've never been one to spend a lot of money on premium CA glue..
Here's the wing glued together..
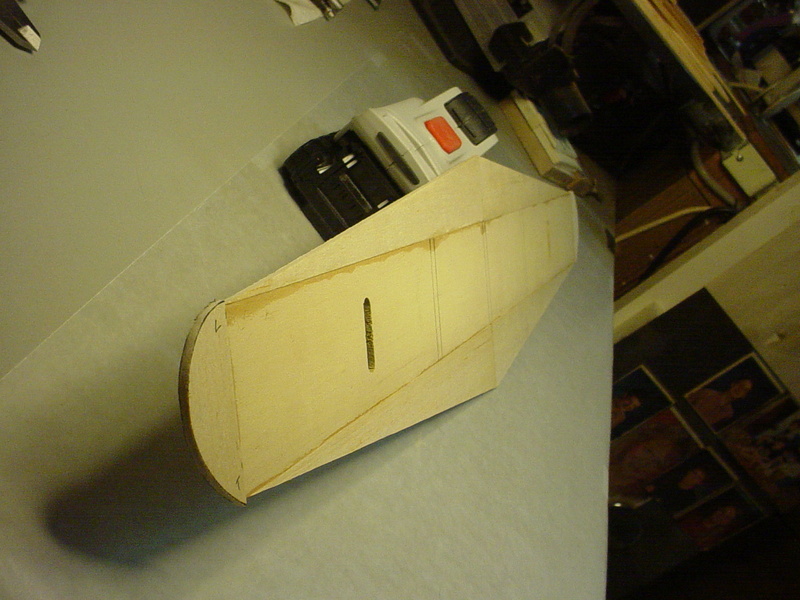
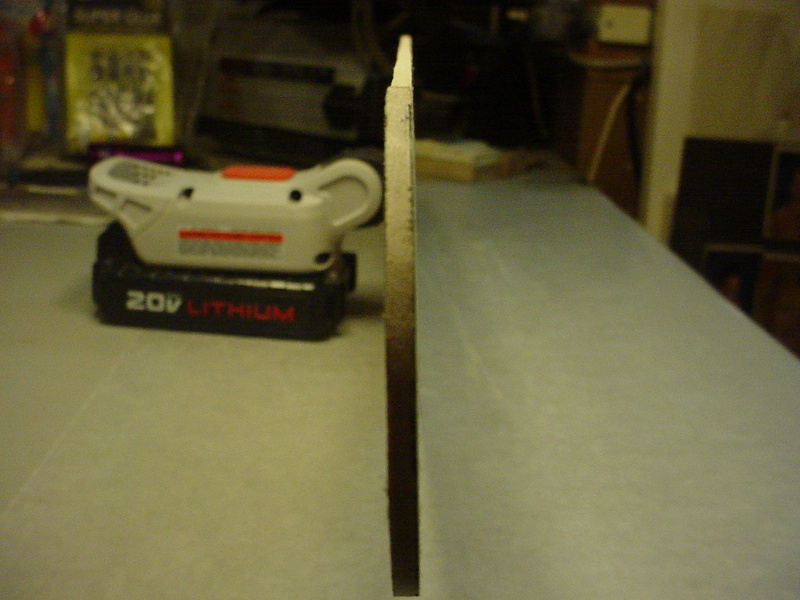
straight as an arrow too... Sometimes I build these as a "frame".. and cover them with heat-shrink. Because the panel is made from multiple pieces.. it's much more resistant to warping.
I needed to get this together.. so I could mark the location of the wing-slots in the booms. I slotted the booms for the stabilizer.. and am pretty happy with how that turned out.
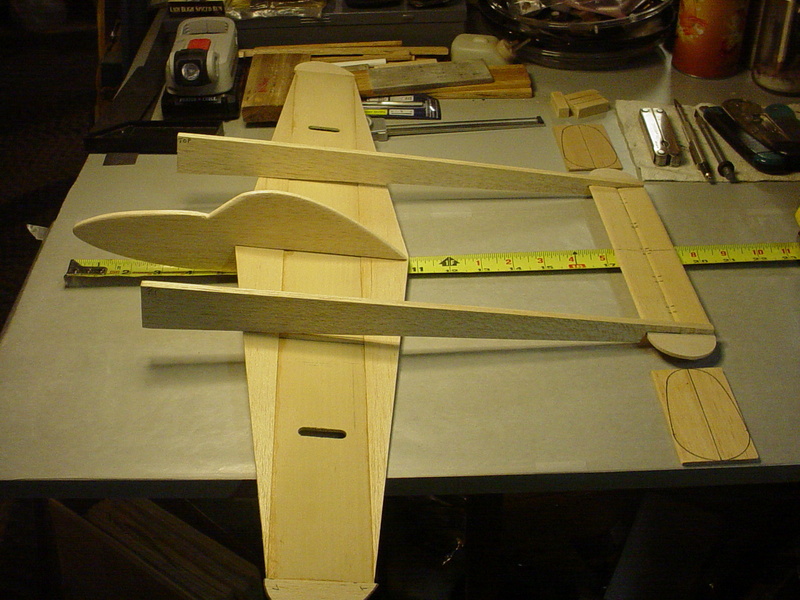
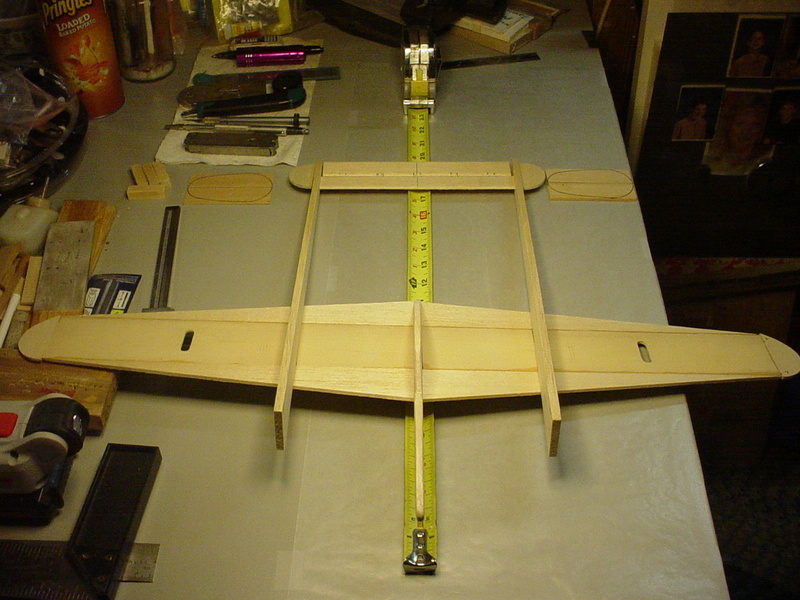
I just chopped 1.0" off the front of both booms. The engines would have been too far forward I think.. and I wanted to maintain the 19.0" overall length.
I begin by making sure that my melamine work-surface is clean and dust-free beforehand.. then I tape a piece of wax paper to it. CA glue will not stick to wax paper.


I've never been one to spend a lot of money on premium CA glue..
Here's the wing glued together..

straight as an arrow too... Sometimes I build these as a "frame".. and cover them with heat-shrink. Because the panel is made from multiple pieces.. it's much more resistant to warping.

I needed to get this together.. so I could mark the location of the wing-slots in the booms. I slotted the booms for the stabilizer.. and am pretty happy with how that turned out.


I just chopped 1.0" off the front of both booms. The engines would have been too far forward I think.. and I wanted to maintain the 19.0" overall length.
 Re: P-38 Lightning-Roddie style..
roddie wrote:I'd been putting this step off.. but couldn't really proceed without completeing it. Assembling the wing. Yea.. it's a sheet-wing.. but it's made-up of seven pieces butt-jointed together with thin CA..
I begin by making sure that my melamine work-surface is clean and dust-free beforehand.. then I tape a piece of wax paper to it. CA glue will not stick to wax paper.
I've never been one to spend a lot of money on premium CA glue..
Here's the wing glued together..
straight as an arrow too... Sometimes I build these as a "frame".. and cover them with heat-shrink. Because the panel is made from multiple pieces.. it's much more resistant to warping.
I needed to get this together.. so I could mark the location of the wing-slots in the booms. I slotted the booms for the stabilizer.. and am pretty happy with how that turned out.
I just chopped 1.0" off the front of both booms. The engines would have been too far forward I think.. and I wanted to maintain the 19.0" overall length.
That is pretty cool. Nice.


oldguy- Gold Member

- Posts : 368
Join date : 2015-12-10
Age : 70
Location : Idaho
 wing-slots cut
I cut the wing-slots in the booms. I think that the moments are going to be close enough to work with; both physically and aesthetically. The booms don't have much shape to them.. but the vertical-stabs. still need to be fitted before making a judgment on the overall shape of the airplane.
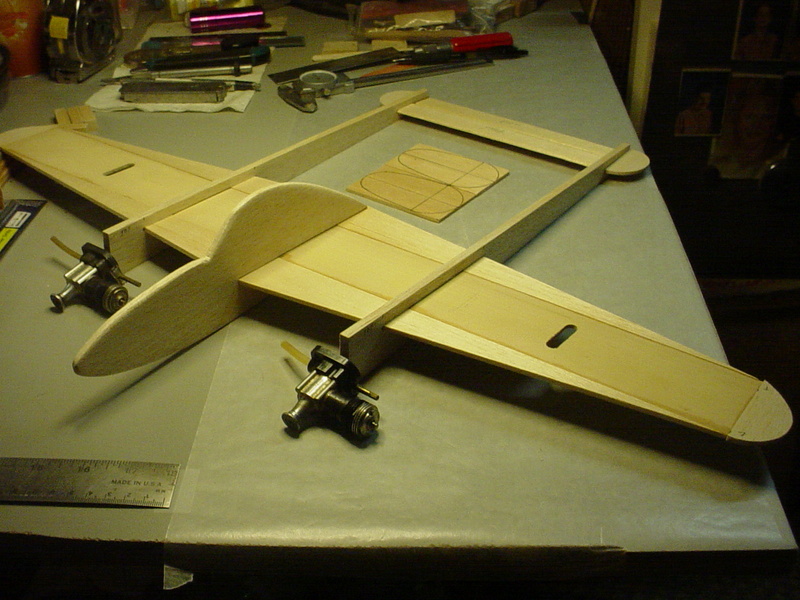
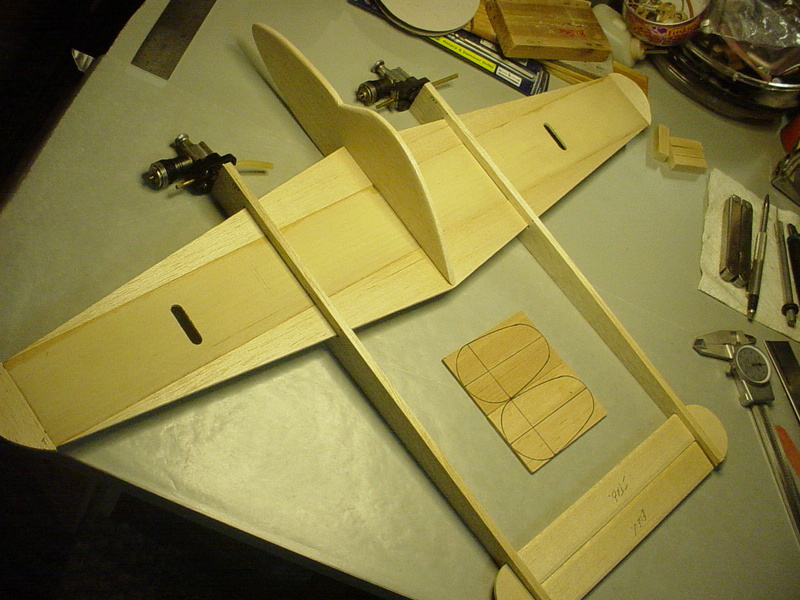
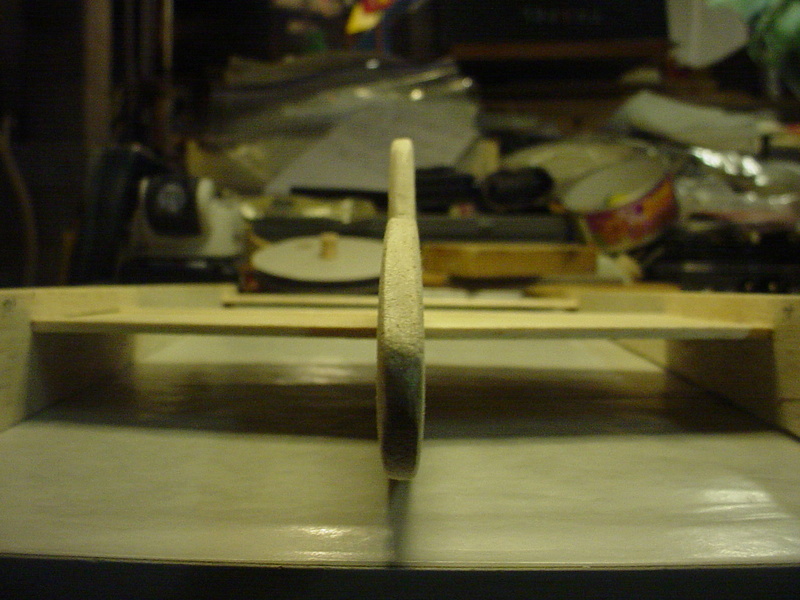
I will be cutting the vertical stabs. into two pieces horizontally. The lower-section will attach to the outside of the boom and the bottom of the stabilizer's wingtip. The upper-section will also attach to the outside of the boom and the top of the stabilizer's wingtip. This will add strength to the entire rear-section by tying those three components together.


I will be cutting the vertical stabs. into two pieces horizontally. The lower-section will attach to the outside of the boom and the bottom of the stabilizer's wingtip. The upper-section will also attach to the outside of the boom and the top of the stabilizer's wingtip. This will add strength to the entire rear-section by tying those three components together.
 Re: P-38 Lightning-Roddie style..
Looking awesome, Roddie! I can’t wait to see the finished product. And the tip about using the knife sharpened to bevel the control surfaces is brilliant! I had to look for my knife sharpener. The cut back booms for the engines looks just about right.
A little tip for the CA hinges. Fold them over in half both ways and exercise them about 200 times before you glue them in. Exercising them will make the elevator move much more freely.
The Work-Out Mark
A little tip for the CA hinges. Fold them over in half both ways and exercise them about 200 times before you glue them in. Exercising them will make the elevator move much more freely.
The Work-Out Mark
batjac- Diamond Member


Posts : 2360
Join date : 2013-05-22
Age : 61
Location : Broken Arrow, OK, USA
 Re: P-38 Lightning-Roddie style..
batjac wrote:Looking awesome, Roddie! I can’t wait to see the finished product. And the tip about using the knife sharpened to bevel the control surfaces is brilliant! I had to look for my knife sharpener. The cut back booms for the engines looks just about right.
A little tip for the CA hinges. Fold them over in half both ways and exercise them about 200 times before you glue them in. Exercising them will make the elevator move much more freely.
The Work-Out Mark
Thank You Mark!
 It's cool that we're both in the process of building twins. The knife-sharpener/edge-beveller takes a little practice.. but once you get the hang of it, I think you'll really like it. Try clamping the sharpener in a bench-vise.. or otherwise clamp it stationary so that you can draw (pull) the work-piece through the carbide blades.
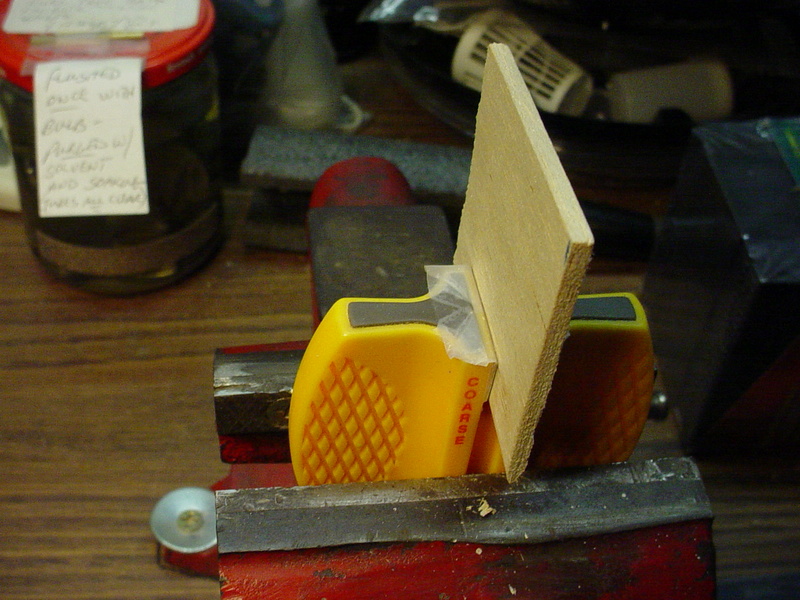
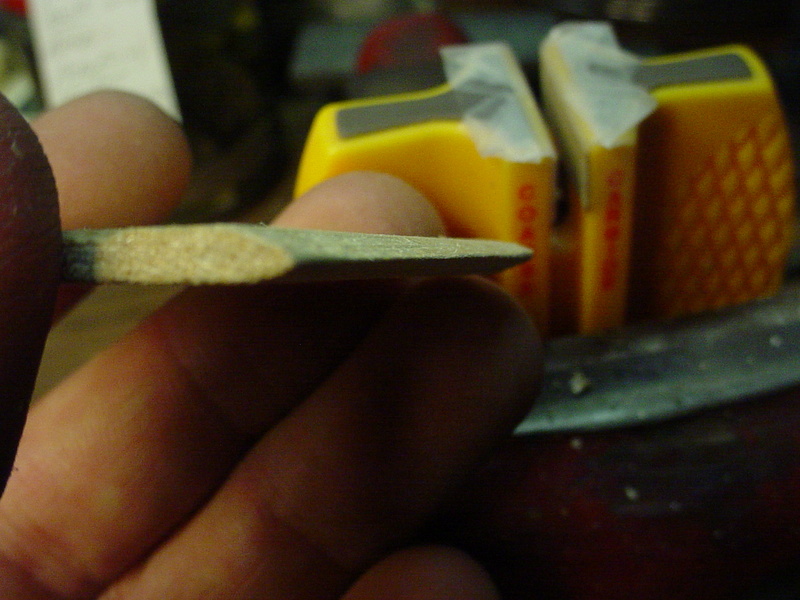
Incidentally.. you can also use scissors clamped in a vise.. if you can't find your knife sharpener.

 Re: P-38 Lightning-Roddie style..
OK.......... I've been working on this airplane "on and off" throughout the day today. The "hard part" came into play.. as I knew it would. The controls.. I always stress-out over the controls...................
 need to re-do
I worked on the controls the other night.. but I also indulged a bit too much with an adult beverage. I attempted to make-up a set of lead-outs.. but I don't like how they turned-out. That's when I knew it was time to quit..
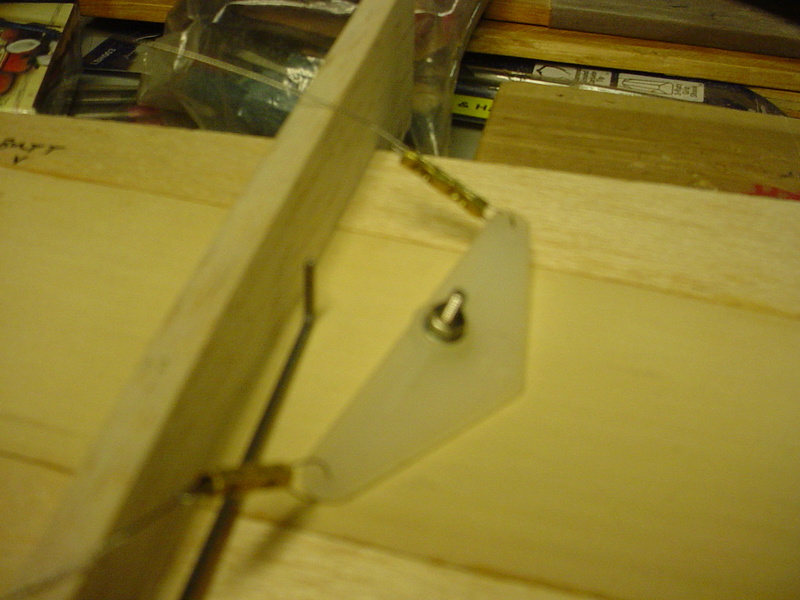
Earlier.. I installed the elevator-horn, made a pushrod support.. and made a pushrod.. but the pushrod needs to be shortened.
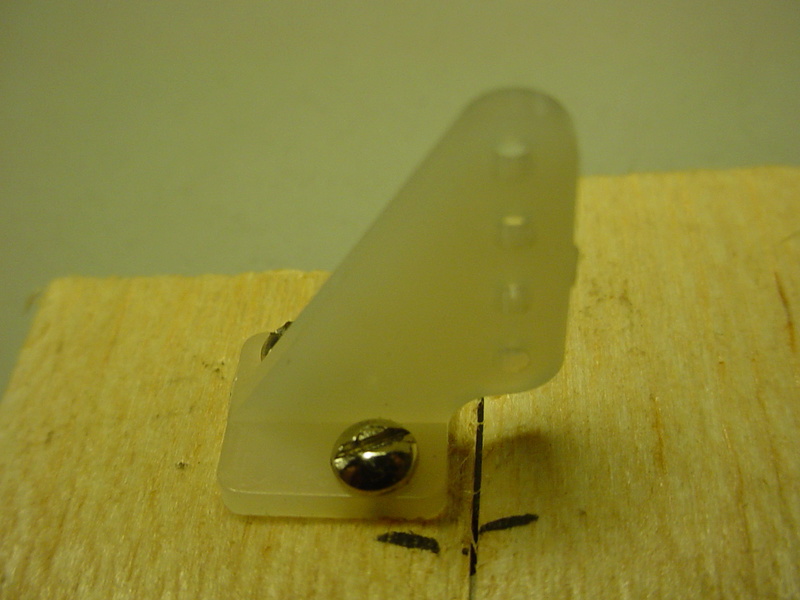
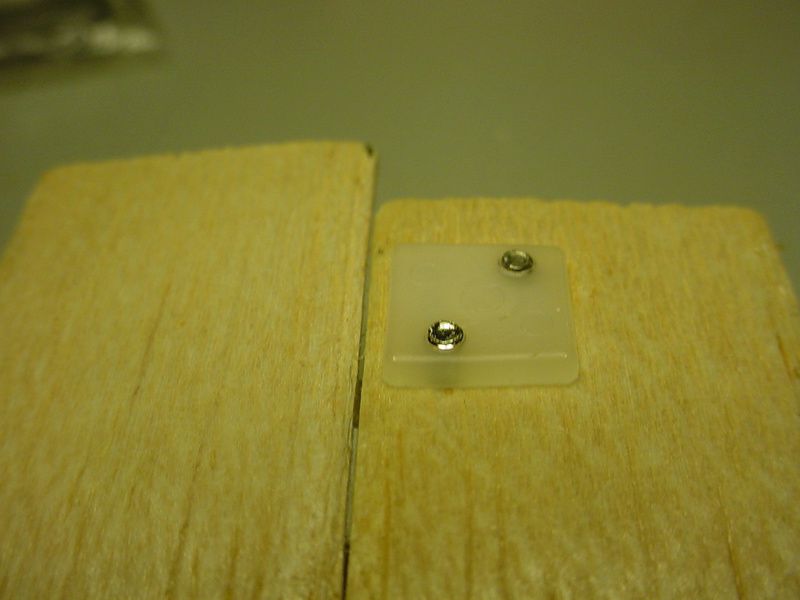
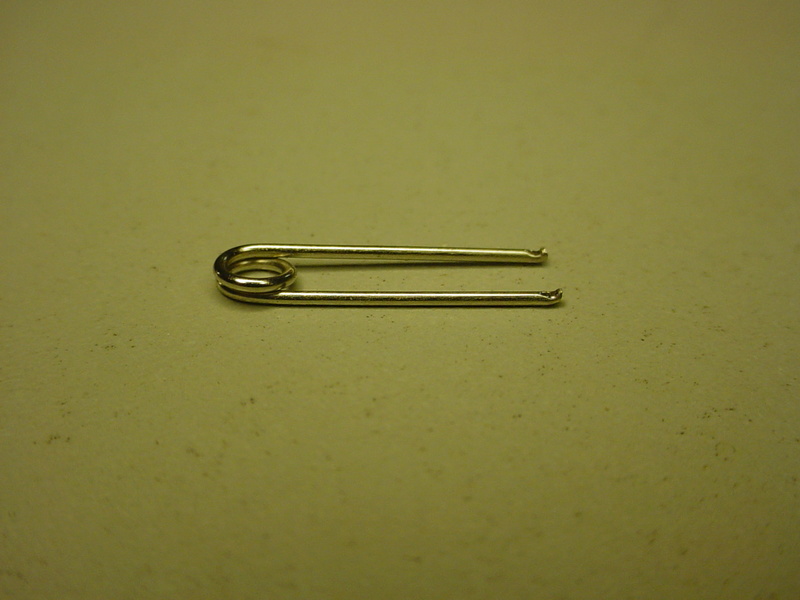
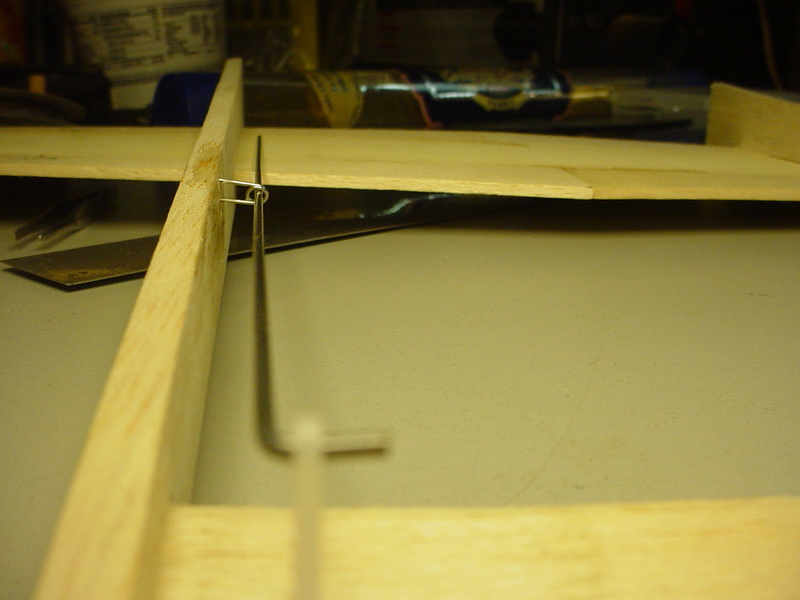
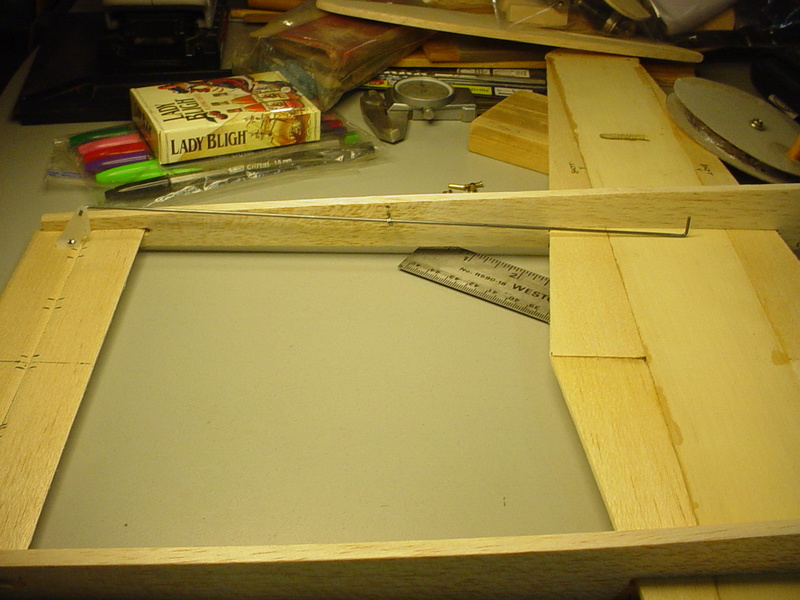
The controls are on the outboard-side of this model. The pushrod runs along the inside of the outboard boom.. and the bellcrank will be mounted on the underside of the wing. I decided to design it this way for multiple reasons. Mounting the controls on-center leaves no support for the pushrod against flexing. Mounting the controls "inboard" presented the challenge of mounting the bellcrank so as to pivot through a slot in the inboard boom because of the elevator-horn having to be on the "inside" of either boom. I thought about this for a few days.... and decided that an "outboard" position would weight the model similarly as adding necessary outboard wingtip-weight. The central-cockpit and inboard-boom will have tubes installed, for the lead-out cables to pass-through.

Earlier.. I installed the elevator-horn, made a pushrod support.. and made a pushrod.. but the pushrod needs to be shortened.


The controls are on the outboard-side of this model. The pushrod runs along the inside of the outboard boom.. and the bellcrank will be mounted on the underside of the wing. I decided to design it this way for multiple reasons. Mounting the controls on-center leaves no support for the pushrod against flexing. Mounting the controls "inboard" presented the challenge of mounting the bellcrank so as to pivot through a slot in the inboard boom because of the elevator-horn having to be on the "inside" of either boom. I thought about this for a few days.... and decided that an "outboard" position would weight the model similarly as adding necessary outboard wingtip-weight. The central-cockpit and inboard-boom will have tubes installed, for the lead-out cables to pass-through.
 Re: P-38 Lightning-Roddie style..
Well thought out roddie. I'm eager to see the finished product.
Have you thought of a paint scheme yet? There is everything from simple YIPPEE red to complicated invasion stripes.
Bob
Have you thought of a paint scheme yet? There is everything from simple YIPPEE red to complicated invasion stripes.
Bob

rsv1cox- Top Poster


Posts : 10928
Join date : 2014-08-18
Location : West Virginia
 Re: P-38 Lightning-Roddie style..
rsv1cox wrote:Well thought out roddie. I'm eager to see the finished product.
Have you thought of a paint scheme yet? There is everything from simple YIPPEE red to complicated invasion stripes.
Bob
I haven't thought too much about paint yet Bob. I think about paint.. and it makes me hyperventilate..
Yes.. naturally I've thought a "little" about this models' finish. I'm leaning toward a matte grey/blue..

 more odds and ends...
I swore that I'd keep this simple.. but it's not so easy with a twin. I'm really anxious to assemble the airframe.. but there's several steps that I really should complete before I do that. Some of these steps are also tough to do without the airframe being assembled; for measurement-purposes. 
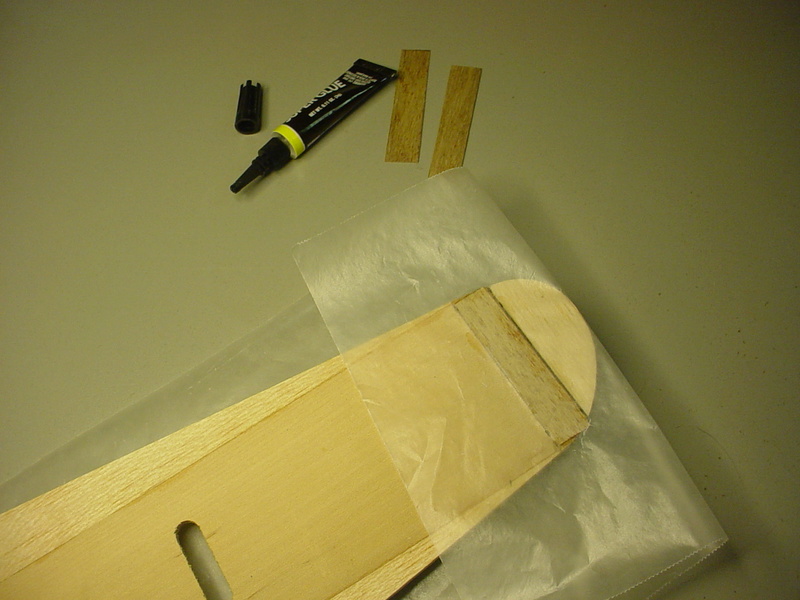
While fitting the bellcrank.. one of wingtips separated at the glue-joint. I knew this could happen.. and had planned on reinforcing the tips top/bottom with 1/64" plywood plates.

The inboard plates will support the under-wing lead-out guides.
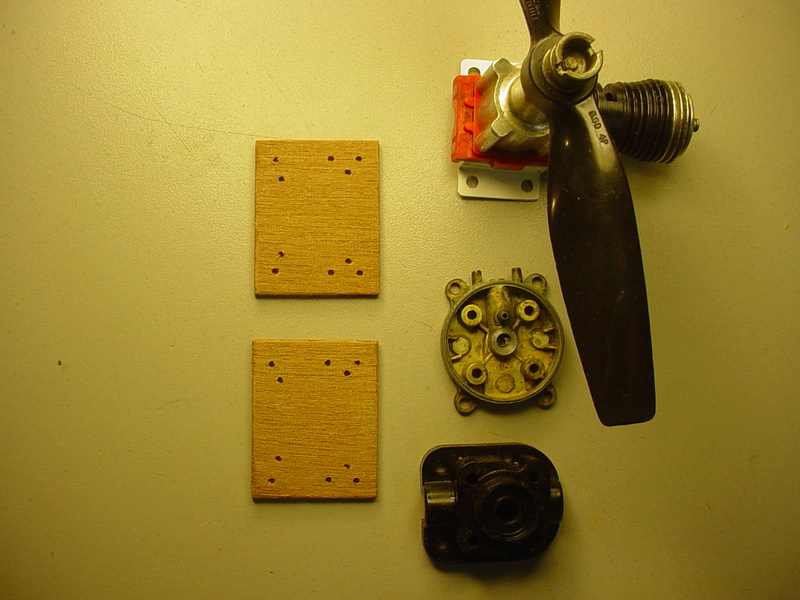
The engine mounts are my typical construction. These use 7/16" hardwood square-stock and a 3mm plywood firewall.

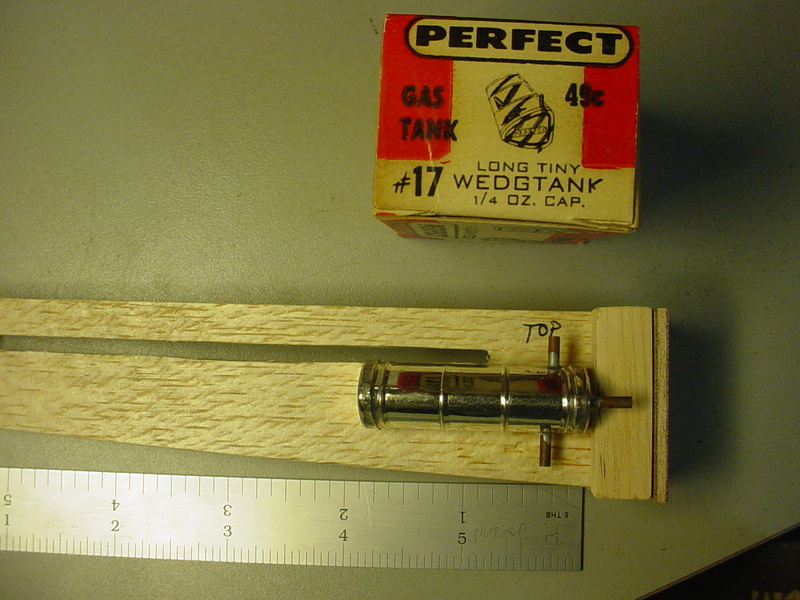
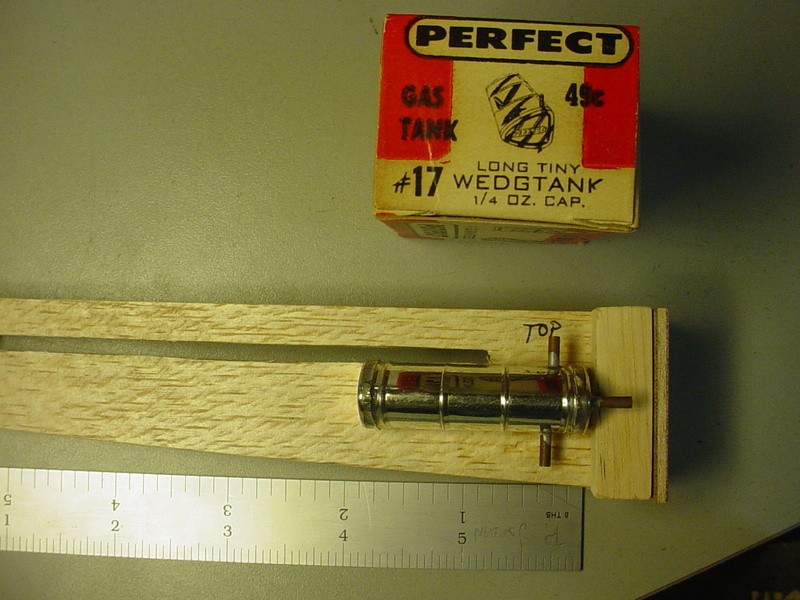
I may go with these Perfect #17 1/3oz. (9.76cc) tanks. I need to figure out a mount for them though.
Then there's the landing-gear.. ............. The nose-gear strut I want to be shock-absorbing.. and the mains need to be two separate-assemblies. simple..
While fitting the bellcrank.. one of wingtips separated at the glue-joint. I knew this could happen.. and had planned on reinforcing the tips top/bottom with 1/64" plywood plates.

The inboard plates will support the under-wing lead-out guides.

The engine mounts are my typical construction. These use 7/16" hardwood square-stock and a 3mm plywood firewall.

I may go with these Perfect #17 1/3oz. (9.76cc) tanks. I need to figure out a mount for them though.

Then there's the landing-gear..
 ............. The nose-gear strut I want to be shock-absorbing.. and the mains need to be two separate-assemblies. simple..
  engine-mounts and stuff..
I love to experiment with construction techniques. When you figure that a model-airplane could last decades.. as opposed to minutes.. it's tough to discern whether an experimental building-technique was actually beneficial. Adhesives/glues change physically over time.. and may not provide the structural benefit as when they were first applied. If the model experiences a structural failure.. was it the result of a poor design.. or choosing the wrong adhesive for the application?
I was pondering the assembly-adhesive for the engine-mounts for this model. Epoxy would have been high on the list.. but epoxy would have required more complex clamping/fixturing than I was willing to forego for this airplane. I hadn't designed too much of it with crash-resistance in mind.
Without further ado... here's what I did..

The perforations in the blocks and the fuses' will hopefully absorb the thick/gel CA in order to strengthen the bond. The 3mm plywood firewalls were drilled for a variety of Cox reed-valve engine configurations.
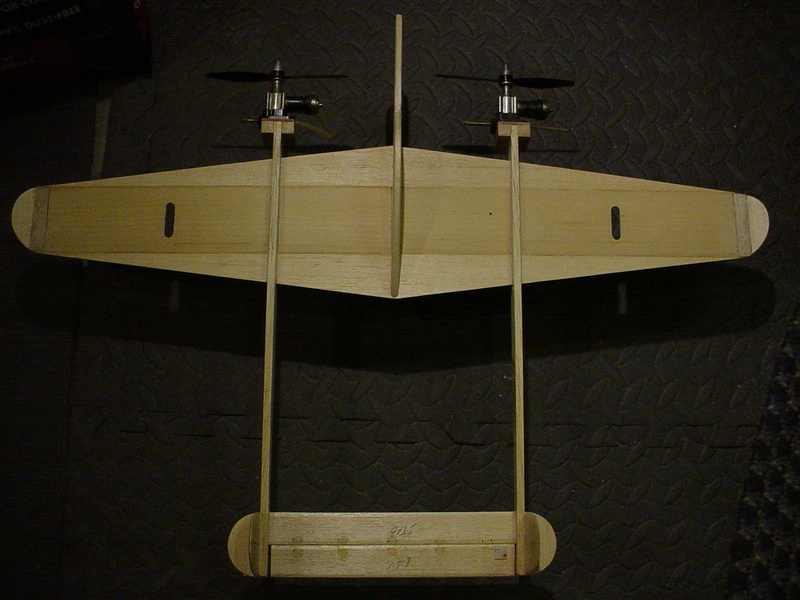
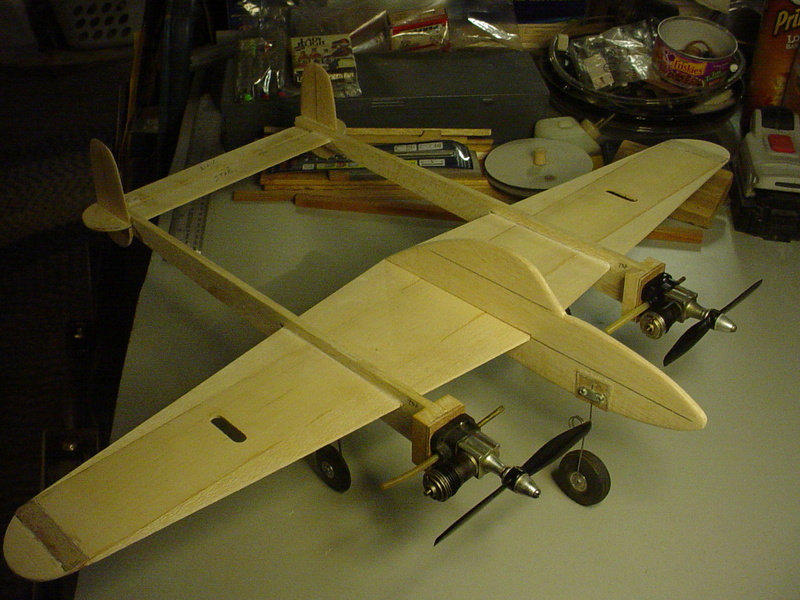
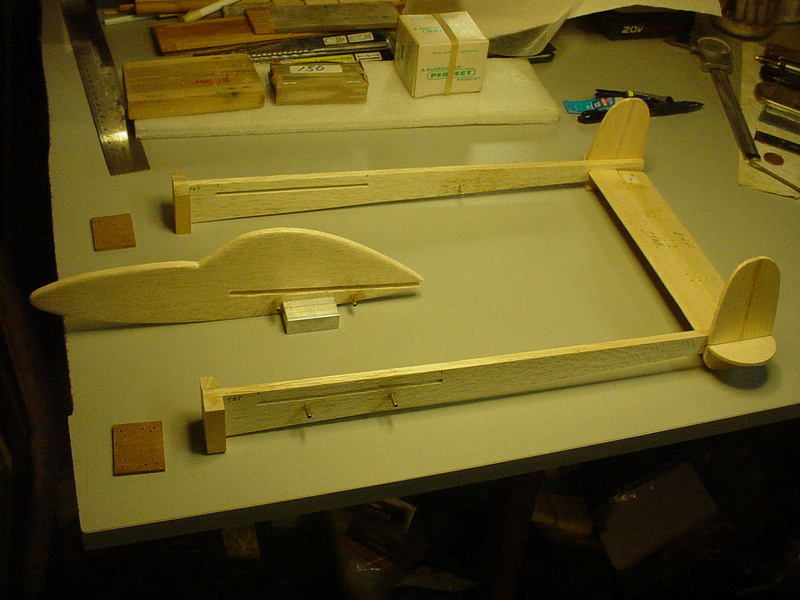
Here's a shot showing the airplane without the wing. The hardwood-blocks for the engine-mounts have been glued-onto the booms. The vertical-stabilizers have been propped in-place. Notice that there are flared-tubes installed, for where the lead-out cables will pass-through the center-section.. and inboard boom.
Still.. I need to work-out a "somewhat-scale" landing-gear.. that will allow the model to track predictably.. while permitting the use of a launching-stooge.
I was pondering the assembly-adhesive for the engine-mounts for this model. Epoxy would have been high on the list.. but epoxy would have required more complex clamping/fixturing than I was willing to forego for this airplane. I hadn't designed too much of it with crash-resistance in mind.
Without further ado... here's what I did..

The perforations in the blocks and the fuses' will hopefully absorb the thick/gel CA in order to strengthen the bond. The 3mm plywood firewalls were drilled for a variety of Cox reed-valve engine configurations.

Here's a shot showing the airplane without the wing. The hardwood-blocks for the engine-mounts have been glued-onto the booms. The vertical-stabilizers have been propped in-place. Notice that there are flared-tubes installed, for where the lead-out cables will pass-through the center-section.. and inboard boom.

Still.. I need to work-out a "somewhat-scale" landing-gear.. that will allow the model to track predictably.. while permitting the use of a launching-stooge.
 Re: P-38 Lightning-Roddie style..
She's coming along very nicely there roddie. Looking better and better every time I check in here. I like your variety of super glue. I just buy whatever small pack of 2, 3, 4, or 5 little bottles the dollar store has on hand when I need it. So far, to me anyways, it works just as well as the big name brand.

NEW222- Top Poster

- Posts : 3895
Join date : 2011-08-13
Age : 45
Location : oakbank, mb
 Re: P-38 Lightning-Roddie style..
NEW222 wrote:She's coming along very nicely there roddie. Looking better and better every time I check in here. I like your variety of super glue. I just buy whatever small pack of 2, 3, 4, or 5 little bottles the dollar store has on hand when I need it. So far, to me anyways, it works just as well as the big name brand.
Yes Chancey! I buy the cheapest I can find. Thank You for checking-in!
 I did some work on the tricycle-gear tonight.. but it was a tough-assignment. I'm not sure how to proceed there..
  I wanted to keep it "simple".. but designing the gear for this model has proven to be a bit complicated. I think I need to "sleep on it"... and start-out tomorrow with a fresh mind.
  Re: P-38 Lightning-Roddie style..
Also roddie, in your post above, you made perforations for the glue to go into. I believe it will work to help it go deeper into the wood. I do the same sometimes in places, but when I do that, I had used mostly Gorilla Glue Polyurethane 'white quick dry, as it expands and does indeed fill the holes, but I also use that with white/carpenters glue to strengthen the bond. It never hurts to try for better adhesion.

NEW222- Top Poster

- Posts : 3895
Join date : 2011-08-13
Age : 45
Location : oakbank, mb
 RE: glue-up..
NEW222 wrote:Also roddie, in your post above, you made perforations for the glue to go into. I believe it will work to help it go deeper into the wood. I do the same sometimes in places, but when I do that, I had used mostly Gorilla Glue Polyurethane 'white quick dry, as it expands and does indeed fill the holes, but I also use that with white/carpenters glue to strengthen the bond. It never hurts to try for better adhesion.
I heard or read somewhere that cyanoacrylate adhesive has little strength along the "shear-plane". When assembling joints with CA, one should consider whether the joint could be subjected to a shearing force.. and if so; whether the force would be directly parallel to the joint, which would be a worst-case scenario.
My engine-mount design will incorporate 90 degree joints which will offset a direct shear-load.. therefor I'm not too concerned about a failure of the adhesive.
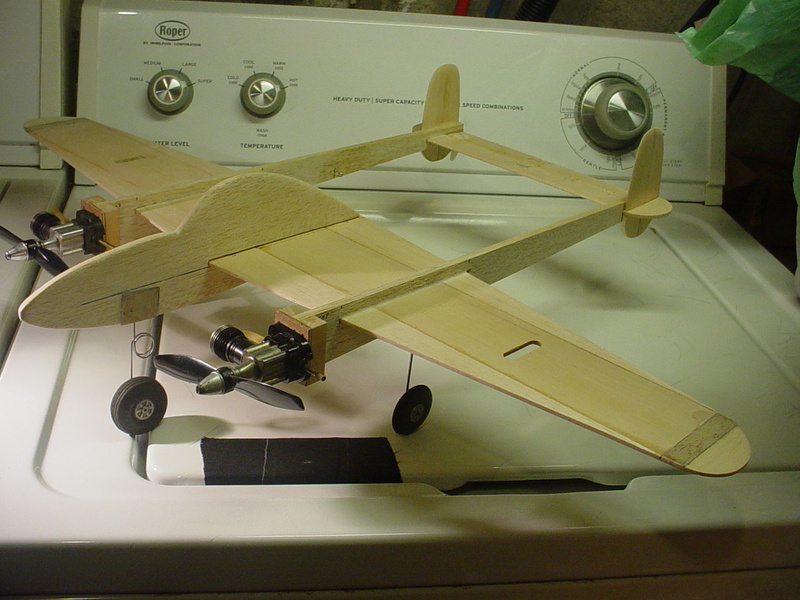
 main landing-gear
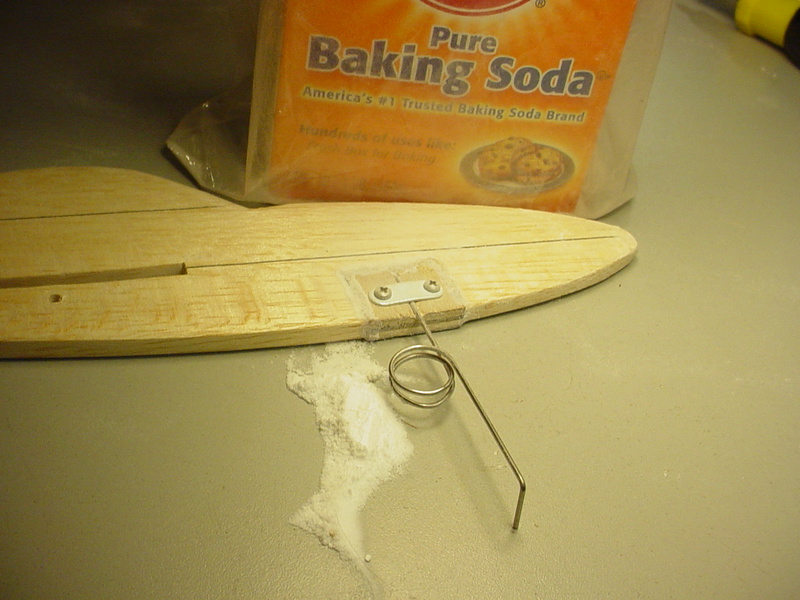
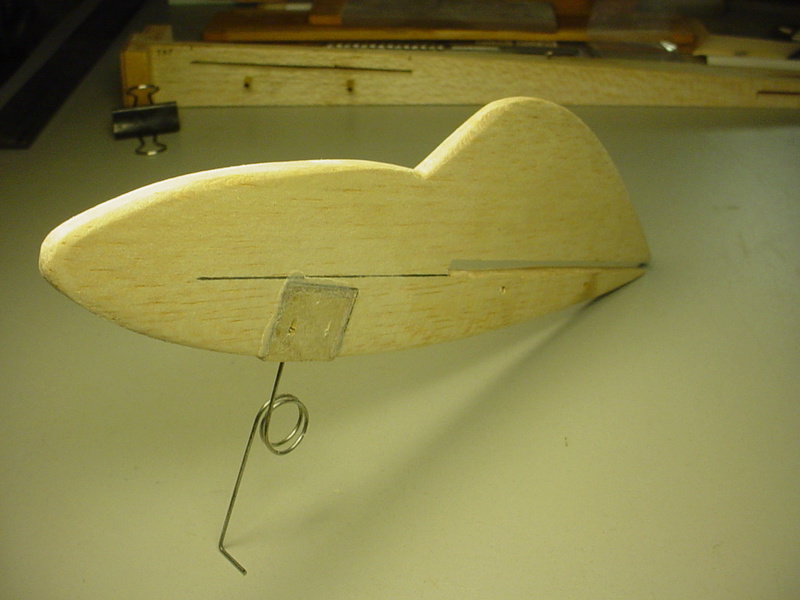
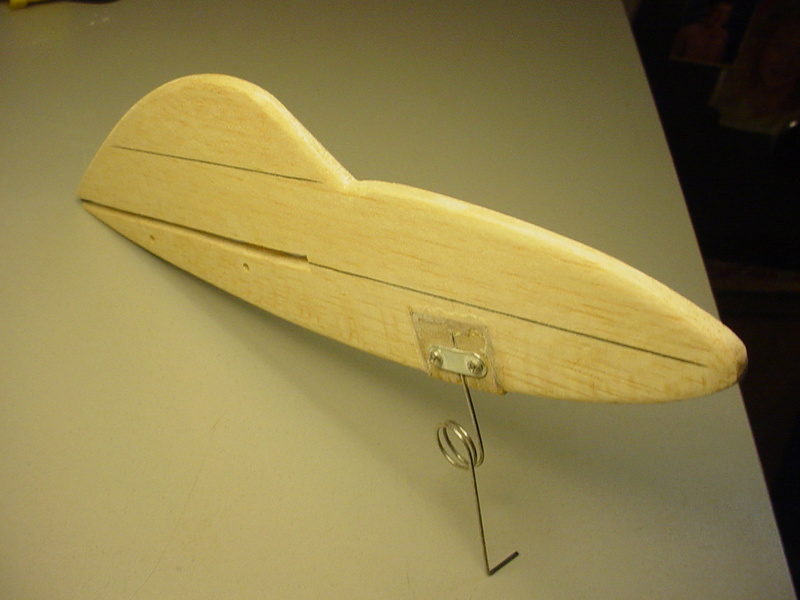
I had pre-cut the main-struts last night.. and after making the bends, thought that I'd made a mistake. It bothers me when I waste material.. and I always try to maximize yields where I can. I had reached "burn-out" last night.. after working on the model for several hours throughout the afternoon/evening.
Today I gave the entire gear-design some thought and realized that I "could" use the struts that I'd fabricated, by redesigning the hardwood gear-blocks.
Here's some photos..
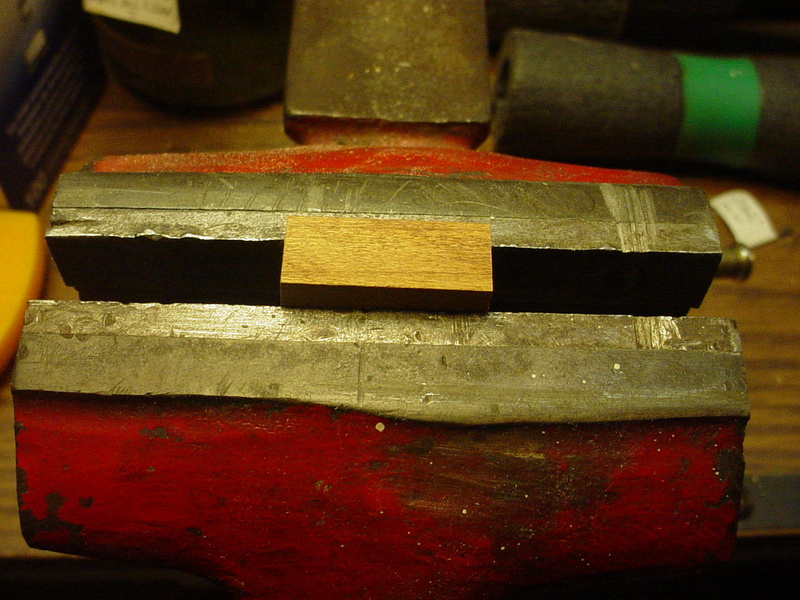
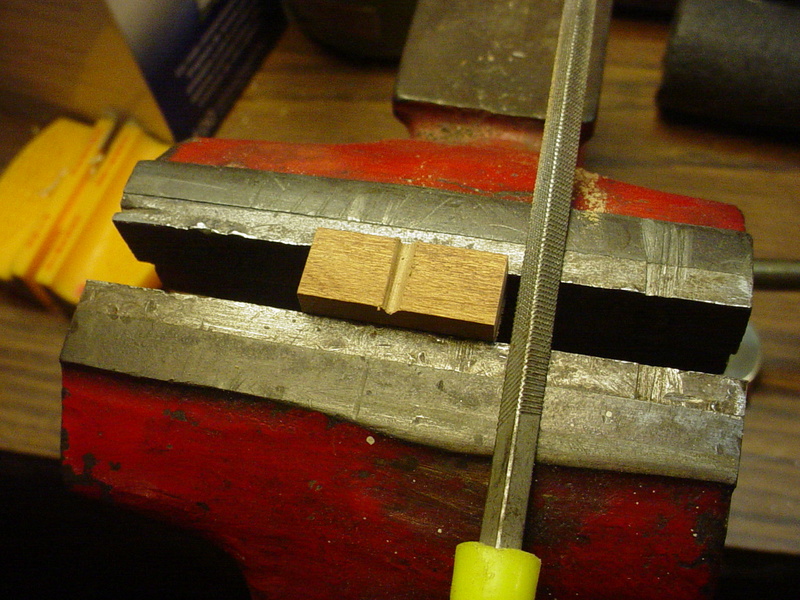
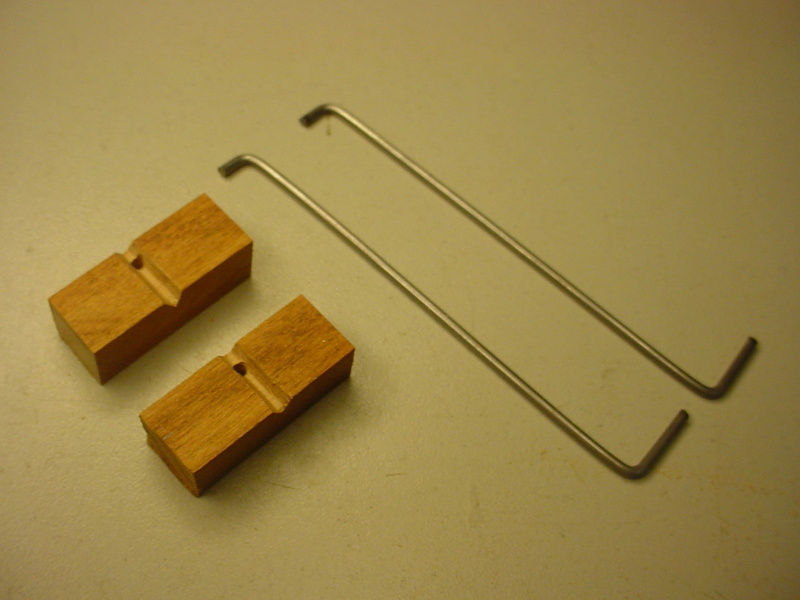
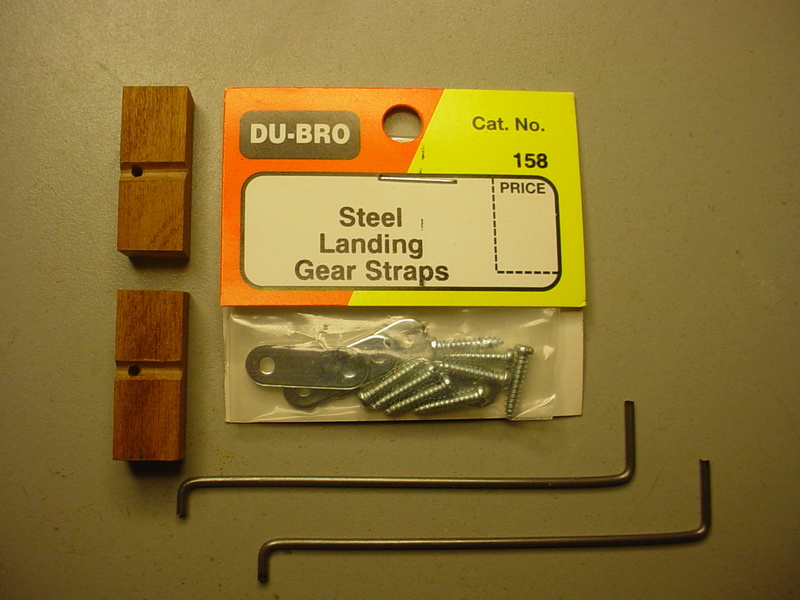
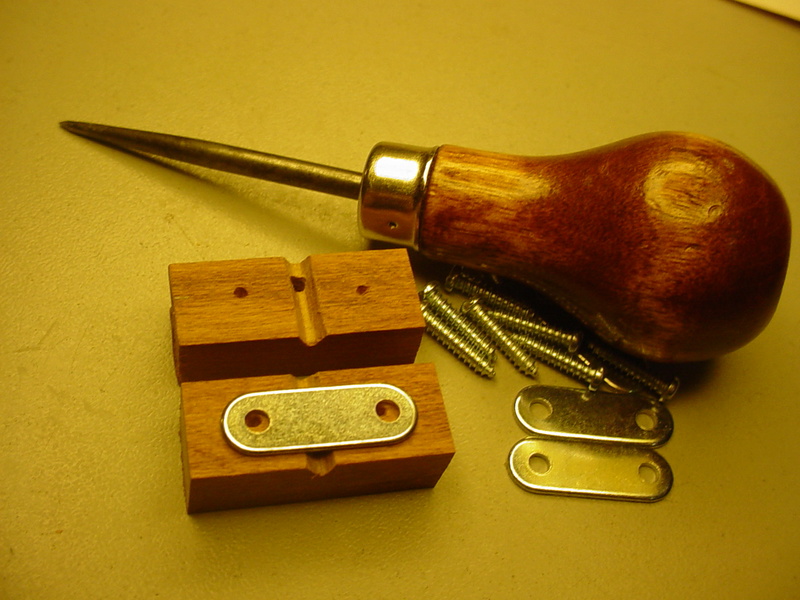
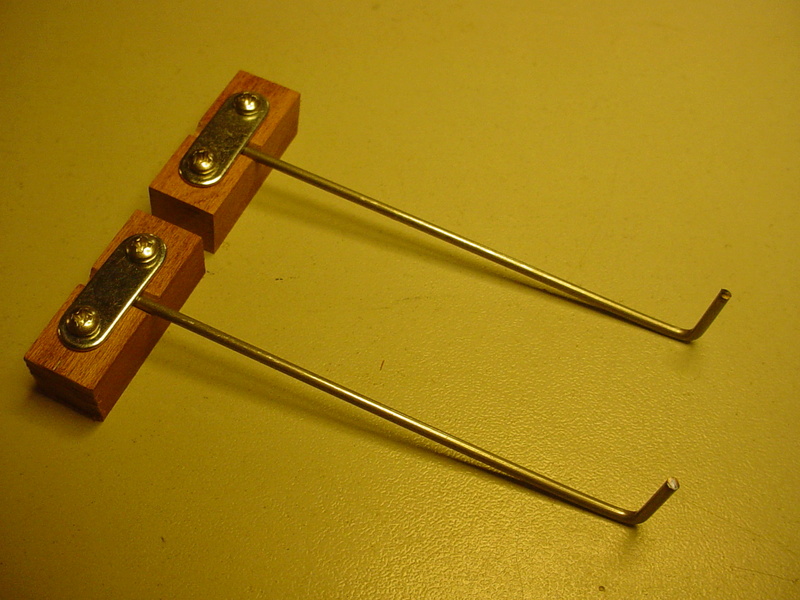
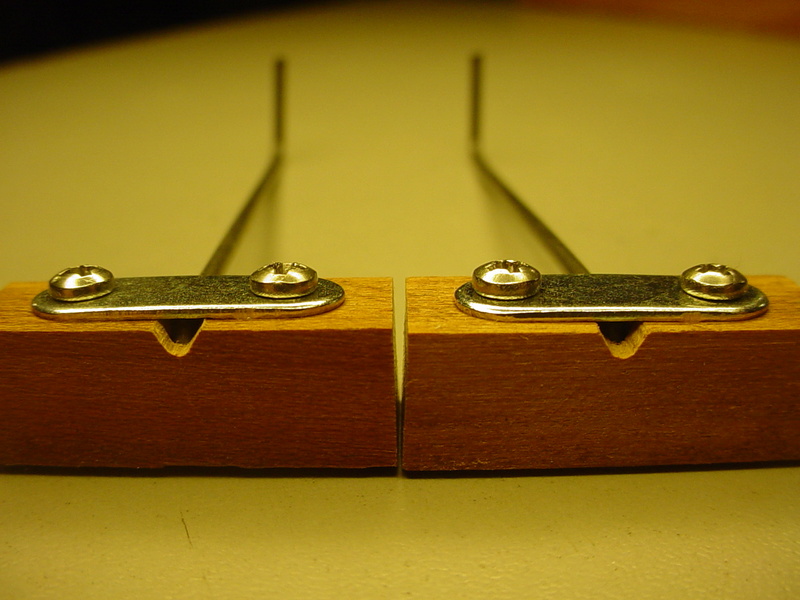
These main-struts are 1/16" (.062") music-wire. The gear-blocks will be glued into the underside-junction mid-chord, of the wing and boom for maximum strength.
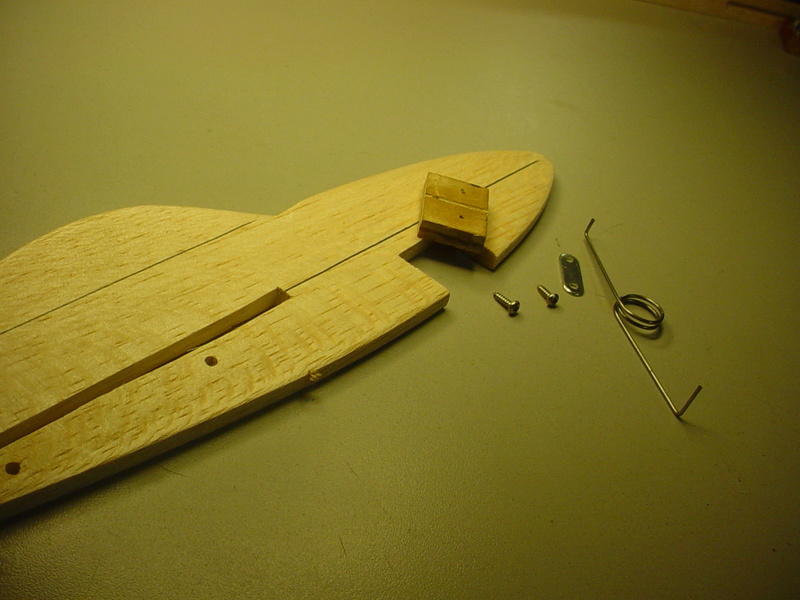
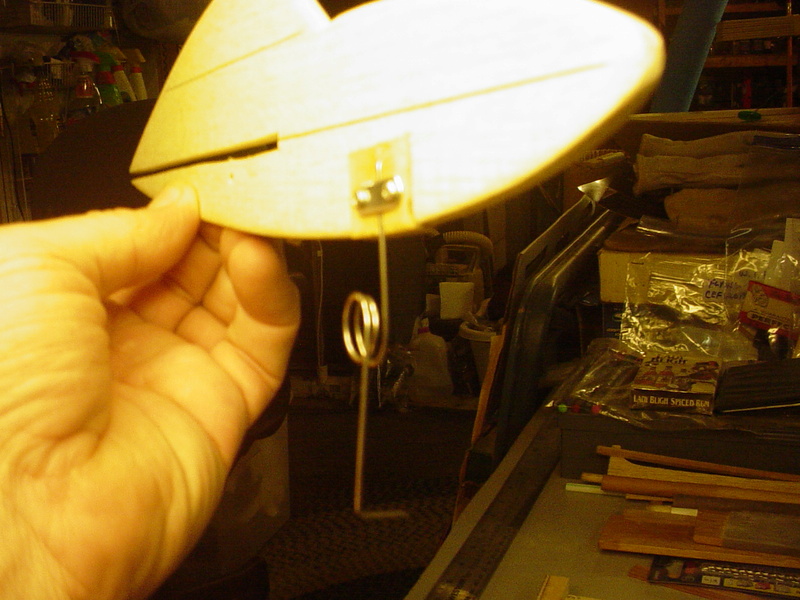
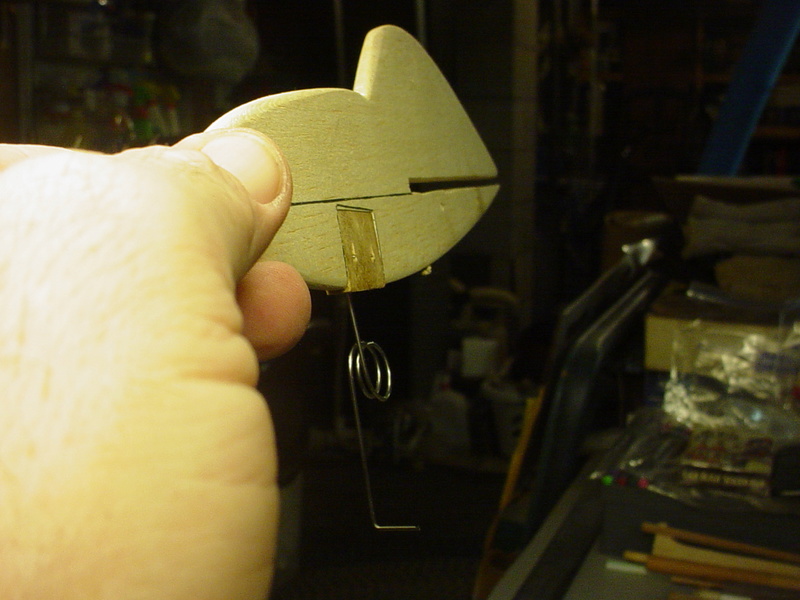
The single nose-gear strut will be 3/64" (.047") music-wire.. and will be "coiled" to help absorb shock. I need to figure-out how to design the nose-gear block to integrate with the cockpit-module. The 1/4" sheet-balsa cockpit-module is more subject to "nose-in "crash-damage, than any other component. I'm not yet settled on how to reinforce it at the wing-joint.
Today I gave the entire gear-design some thought and realized that I "could" use the struts that I'd fabricated, by redesigning the hardwood gear-blocks.
Here's some photos..


These main-struts are 1/16" (.062") music-wire. The gear-blocks will be glued into the underside-junction mid-chord, of the wing and boom for maximum strength.
The single nose-gear strut will be 3/64" (.047") music-wire.. and will be "coiled" to help absorb shock. I need to figure-out how to design the nose-gear block to integrate with the cockpit-module. The 1/4" sheet-balsa cockpit-module is more subject to "nose-in "crash-damage, than any other component. I'm not yet settled on how to reinforce it at the wing-joint.
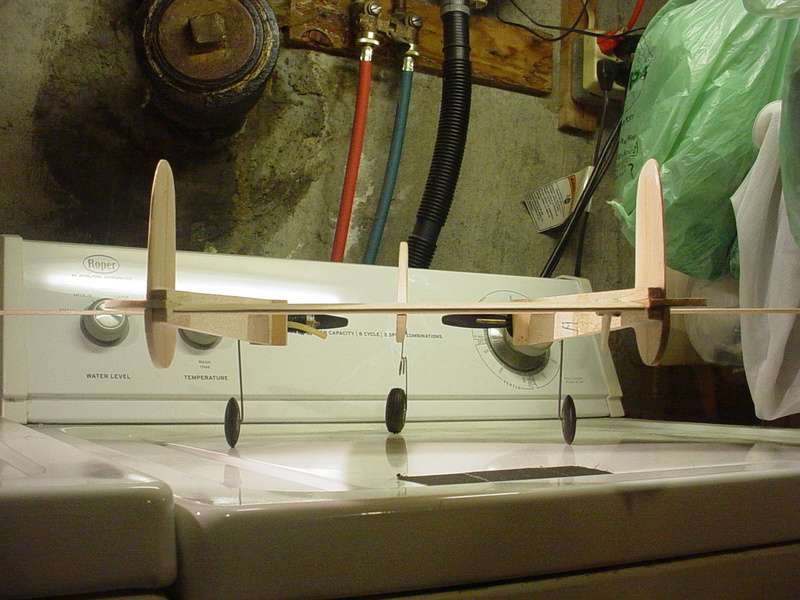
 Balancing..
While browsing P-38 specs. I found this image..
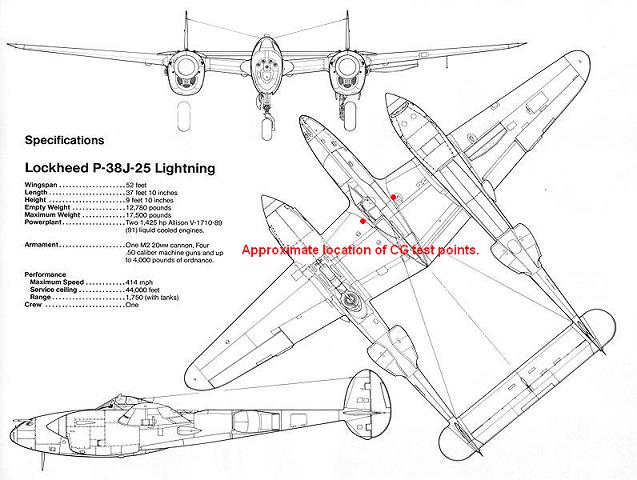
It's probably meaningless for my application.. but "not for nothin" (Rhode Island slang..) I figured; why not see where this model balances so far..

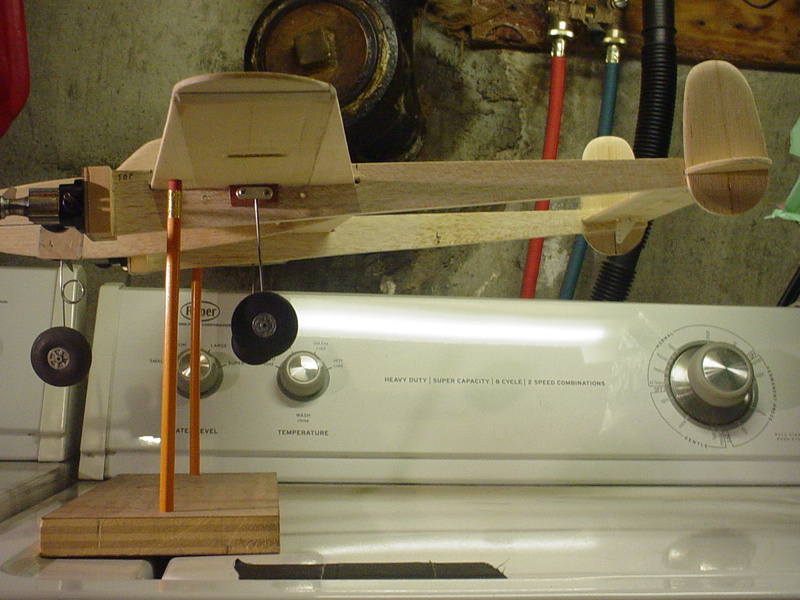

 There will be a significant addition of weight "rearward" with the pushrod installed.. and the weight of the finish. The planned fuel tank location should straddle the CG... which would be ideal.

It's probably meaningless for my application.. but "not for nothin" (Rhode Island slang..) I figured; why not see where this model balances so far..


 There will be a significant addition of weight "rearward" with the pushrod installed.. and the weight of the finish. The planned fuel tank location should straddle the CG... which would be ideal.
 Re: P-38 Lightning-Roddie style..
She’s lookin good! Allways like it when the pieces put together, start to look like a airplane! I do like your balance station.

Marleysky- Top Poster


Posts : 3618
Join date : 2014-09-28
Age : 71
Location : Grand Rapids, MI
Page 2 of 9 •  1, 2, 3, 4, 5, 6, 7, 8, 9
 Similar topics
» Red Wen Mac P-38 Lightning
» Wen Mac P-38's
» AeroFred Tunder Lightning
» The P-38 Lightning Wow factor
» "Storm B.O.T." goes on another mission...STILL No Lightning !!!
» Wen Mac P-38's
» AeroFred Tunder Lightning
» The P-38 Lightning Wow factor
» "Storm B.O.T." goes on another mission...STILL No Lightning !!!
Page 2 of 9
Permissions in this forum:
You cannot reply to topics in this forum

 Rules
Rules


