

 Rules
Rules
by Boats13 Today at 12:43 am
» Fox .35 Modifications
by Onelife Today at 12:22 am
» Three -- sold out (making two more) Cox .010 Carburetors with wrench
by 1/2A Nut Today at 12:08 am
» Happy Anzac Day!
by Boats13 Yesterday at 11:03 pm
» Project Cox .049 r/c & Citabrian Champion
by MauricioB Yesterday at 4:08 pm
» Revivng Some Childhood Classics
by rsv1cox Yesterday at 7:17 am
» Introducing our Cox .049 TD Engines
by getback Yesterday at 6:20 am
» Roddie's flat-bottomed boat..
by Levent Suberk Yesterday at 12:23 am
» Cox powered jet-pump for model Sprint Boat
by roddie Thu Apr 25, 2024 10:25 pm
» Micro Draco Gets to Fly on a Beautiful Morning.
by rdw777 Thu Apr 25, 2024 8:15 pm
» Jim Walker Firebaby
by rdw777 Thu Apr 25, 2024 8:06 pm
» Hydro-bat by Vic Smeed: engine probs
by GallopingGhostler Thu Apr 25, 2024 5:12 pm


Another of C.T. engines cleaned ---- Cox Tee Dee .09 --- Just today (3/26/2024) more Cox parts

Another of C.T. engines cleaned ---- Cox Tee Dee .09 --- Just today (3/26/2024) more Cox parts
![]() sosam117 Mon Mar 25, 2024 2:14 pm
sosam117 Mon Mar 25, 2024 2:14 pm
The Cox Tee Dee .09 as received (with missing needle valve assist.)

I cleaned up the needle valve and "silver soldered" a replacement.
Of course, I remove all traces of the "lead solder" that was there as you can see, the lead solder did not hold up.
Silver solder is the best use for this application.

On to the engine.
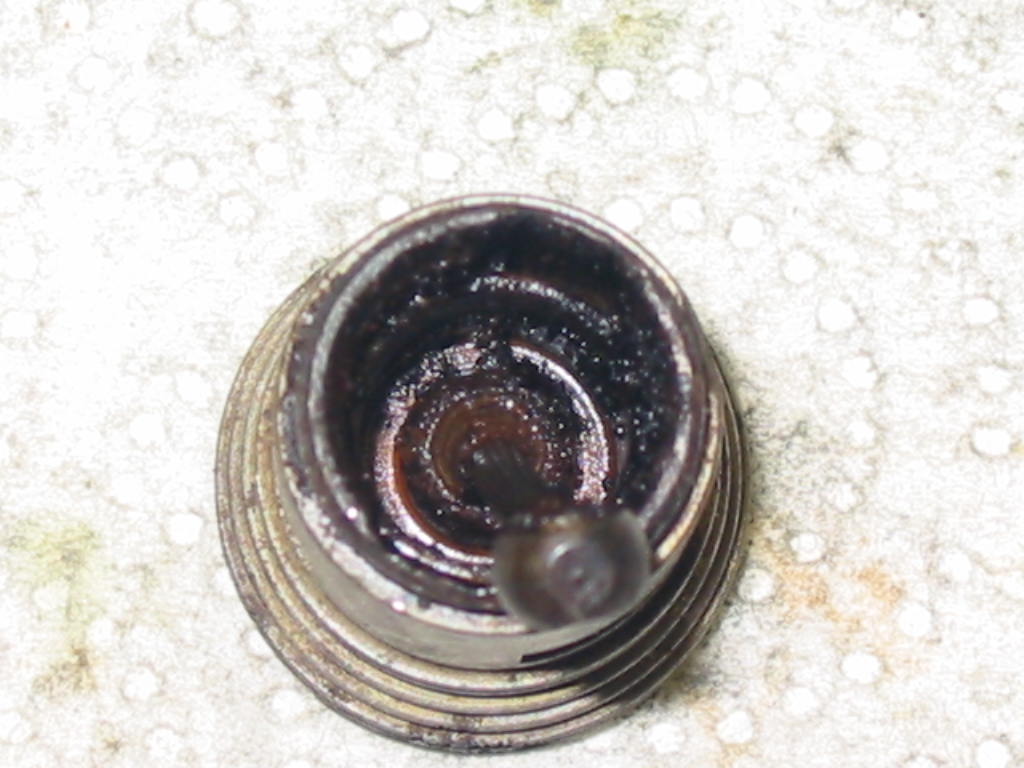
It was not in that bad of condition. The piston was stuck, throttle ring rusted in place, venturi was pitted from the Florida air,
and the cylinder did not have the flat spot on the top to use a Cox wrench, so I had to use my strap wrench to remove the cylinder.
That is because the throttle sleeve made it impossible to use any wrench in the exhaust ports.
The glow head came off easy enough with no problems.
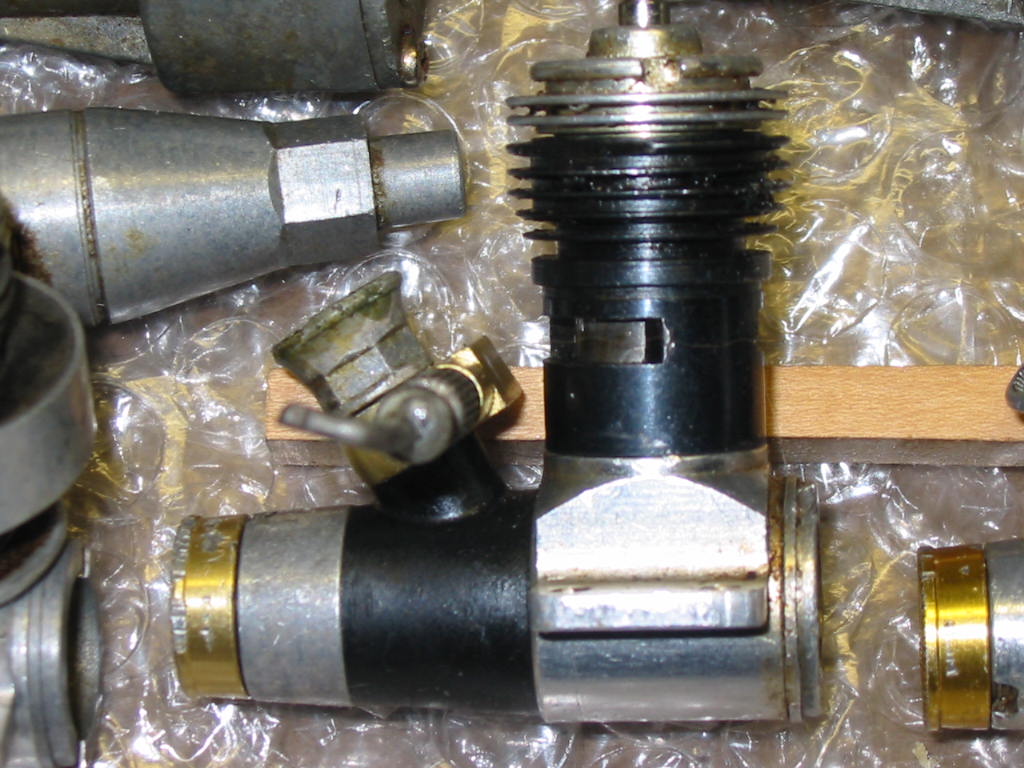
I placed all of the parts into my sonic tank to be cleaned and they came out not bad.
Got the piston unstuck after the cleaning ---- luckily no rust on the piston or cylinder bore.
Buffed up the aluminum parts, wire brushed (fine stainless steel) the steel parts (crankshaft, cylinder, throttle sleeve),
then used my Dremel with a cone shaped buffing wheel to remove the pitting in the venturi.
Sent all the parts again through the sonic tank.
Cleaned all of the steel parts with Acetone (brushed them with an "acid" brush) then blued the parts three different times.
Acetone brush -- bluing -- lightly rubbed with scotch-brite pad --- then repeat with acetone/bluing/scotch-brite pad. (twice more)
Until I got the deep enough bluing needed?
Below are the finished photos:


I did check the Timing/SPI of the top of the piston to the top of the cylinder id shoulder, and it was close to being spot on, so no cylinder shimming was necessary.
Last edited by sosam117 on Tue Mar 26, 2024 3:04 pm; edited 1 time in total
sosam117- Diamond Member

- Posts : 1282
Join date : 2016-03-23
Location : Suburb of Chicago, Illinois
Re: Another of C.T. engines cleaned ---- Cox Tee Dee .09 --- Just today (3/26/2024) more Cox parts
![]() rdw777 Mon Mar 25, 2024 2:56 pm
rdw777 Mon Mar 25, 2024 2:56 pm


rdw777- Diamond Member


Posts : 1278
Join date : 2021-03-11
Location : West Texas
Re: Another of C.T. engines cleaned ---- Cox Tee Dee .09 --- Just today (3/26/2024) more Cox parts
![]() sosam117 Tue Mar 26, 2024 1:22 pm
sosam117 Tue Mar 26, 2024 1:22 pm
rdw777 wrote:Looks like throttled Tee Dee .09’s are getting a lot of attention lately!…. Beautiful job on the restoration Mike…. With the cleaning/servicing/repairs and checking spec timing it will be a fine runner!!
I forgot to add that I also reset the socket joint on the connecting rod as it was really loose.
sosam117- Diamond Member
- Posts : 1282
Join date : 2016-03-23
Location : Suburb of Chicago, Illinois
Re: Another of C.T. engines cleaned ---- Cox Tee Dee .09 --- Just today (3/26/2024) more Cox parts
![]() rdw777 Tue Mar 26, 2024 2:02 pm
rdw777 Tue Mar 26, 2024 2:02 pm
sosam117 wrote:I forgot to add that I also reset the socket joint on the connecting rod as it was really loose.
With your attention to detail that is a given
Speaking of timing, A few months ago I made up the brass disc with a hole in it and an old glow head drilled out as described in one of Kirn’s letters to check deck height on my .020’s …. Some spot on,…. Others never touch… And one would not pass the disc…. I think it may explain why some run better with two head gaskets and others with one using the same 24% fuel…
rdw777- Diamond Member
-
Posts : 1278
Join date : 2021-03-11
Location : West Texas
Re: Another of C.T. engines cleaned ---- Cox Tee Dee .09 --- Just today (3/26/2024) more Cox parts
![]() sosam117 Tue Mar 26, 2024 2:56 pm
sosam117 Tue Mar 26, 2024 2:56 pm
rdw777 wrote:Looks like throttled Tee Dee .09’s are getting a lot of attention lately!…. Beautiful job on the restoration Mike
I forgot to add that I also reset the socket joint on the connecting rod as it was really loose.
sosam117- Diamond Member
- Posts : 1282
Join date : 2016-03-23
Location : Suburb of Chicago, Illinois
Re: Another of C.T. engines cleaned ---- Cox Tee Dee .09 --- Just today (3/26/2024) more Cox parts
![]() sosam117 Tue Mar 26, 2024 3:00 pm
sosam117 Tue Mar 26, 2024 3:00 pm
rdw777 wrote:sosam117 wrote:I forgot to add that I also reset the socket joint on the connecting rod as it was really loose.
With your attention to detail that is a given
Speaking of timing, A few months ago I made up the brass disc with a hole in it and an old glow head drilled out as described in one of Kirn’s letters to check deck height on my .020’s …. Some spot on,…. Others never touch… And one would not pass the disc…. I think it may explain why some run better with two head gaskets and others with one using the same 24% fuel…
I always like to check the deck height to make sure that it is even, that way each engine will run about the same.
It will have about the same compression ratio and if I add more head shims, that will decrease the compression ratio (if I need to).
sosam117- Diamond Member
- Posts : 1282
Join date : 2016-03-23
Location : Suburb of Chicago, Illinois
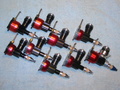
Cox Parts from Burnie to fix pthe other of C.T. engines
![]() sosam117 Tue Mar 26, 2024 3:14 pm
sosam117 Tue Mar 26, 2024 3:14 pm
The Tee Dee .051 R/C

The Kustom Kraftsmanship .051 ( with a really stuck piston/cylinder assembly)

And the Tee Dee .049 with a cracked venturi body -- black
sosam117- Diamond Member
- Posts : 1282
Join date : 2016-03-23
Location : Suburb of Chicago, Illinois
EMBARRASSED!!
![]() Boats13 Tue Mar 26, 2024 4:43 pm
Boats13 Tue Mar 26, 2024 4:43 pm
Thanks, again, Mike,
Thanks to all that have made me feel so welcome, here,
CT

Boats13- Silver Member

-
Posts : 91
Join date : 2018-01-28
Location : Kemah
Re: Another of C.T. engines cleaned ---- Cox Tee Dee .09 --- Just today (3/26/2024) more Cox parts
![]() balogh Wed Mar 27, 2024 1:46 am
balogh Wed Mar 27, 2024 1:46 am
balogh- Top Poster

-
Posts : 4745
Join date : 2011-11-06
Age : 65
Location : Budapest Hungary
Re: Another of C.T. engines cleaned ---- Cox Tee Dee .09 --- Just today (3/26/2024) more Cox parts
![]() Yabby Wed Mar 27, 2024 6:00 am
Yabby Wed Mar 27, 2024 6:00 am

Mike, your cleanup and recon of the engines is excellent

Yabby- Platinum Member

-
Posts : 702
Join date : 2021-06-08
Location : Yorke Peninsula South Australia
Re: Another of C.T. engines cleaned ---- Cox Tee Dee .09 --- Just today (3/26/2024) more Cox parts
![]() sosam117 Wed Mar 27, 2024 9:45 am
sosam117 Wed Mar 27, 2024 9:45 am
I posted a couple of years ago a posting on how to do the timing on the Cox engines.
Below is where it is at:
Timing and SPI shimming of the Cylinder
I have instructions that I also gave to Jacob to post in the "INFO" section under the Documents and Manuals.
The instructions originally came from Kustom Kraftsmanship.
I have "FIVE" Kustom Kraftsmanship shimming kits for timing still new in their packages along with thousands of KK parts that I have purchased over the years when they were in business along with many Kk engines.

sosam117- Diamond Member
- Posts : 1282
Join date : 2016-03-23
Location : Suburb of Chicago, Illinois
Re: Another of C.T. engines cleaned ---- Cox Tee Dee .09 --- Just today (3/26/2024) more Cox parts
![]() rdw777 Wed Mar 27, 2024 5:13 pm
rdw777 Wed Mar 27, 2024 5:13 pm
….. I Made up the test rig but haven’t tried to make shims yet… Interesting just see where they are at….Another visual….
rdw777- Diamond Member
-
Posts : 1278
Join date : 2021-03-11
Location : West Texas
Re: Another of C.T. engines cleaned ---- Cox Tee Dee .09 --- Just today (3/26/2024) more Cox parts
![]() sosam117 Wed Mar 27, 2024 6:58 pm
sosam117 Wed Mar 27, 2024 6:58 pm
If you look at the prints of the cylinder sleeve, it will have machining tolerances of plus and minus.
The glow head shoulder inside the bore has a +/-, then the bottom of the cylinder that threads into the crankcase has a +/- tolerance.
Next is the tolerance of the connecting rod which has its own +/- tolerances.
And the crankcase, centerline to the top of the crankcase that the cylinder sleeve threads into has its own +/- tolerances.
So, what do you get?
Crankcase at a minus / con rod a plus / and a cylinder at a minus equals a piston that will be pass the glow plug shoulder height.
Now "if" the crankcase was -0- /con rod a minus / and the cylinder a plus equals a piston that will be below the glow plug shoulder.
As a simple of an explanation as above, engineers call these +/- tolerances on each part when assembled as "Bonus Tolerances".
The bonus tolerances are tolerated as the product will work (but not at the best performance) and "if" the bonus tolerances are too much (another 1% or so) the product will not work altogether.
So, you have at either end of the scale of a product that is designed as it was supposed to and another at the other end of the scale that will not work.
That is why, some model engine mfg. tested their engines before leaving the factory.
At Cat (where I worked in the Fuel Systems Division), when the injectors were assembled on the assembly line, at the end of the assembly line there were test stands to run the injectors through its paces (High RPM/Low RPM/Mid range and idle as well as fuel rate at the different speeds)
If/when it failed the test stand, there was a printout for the failure, and went to rework to change the part that gave the injector too high discharge or too low discharge fuel rate.(changing out the shim spacer for the check lift height --- just like a Cox engine!)
My job for a couple of years was to check and verify the calibrations of the test stands with "working" injector masters at the start of the shift.
Then, once a week use the "silver" masters in the test stands to verify the "working masters" (plus/minus tolerances here too)
Then go to the "Gage Lab" and with the "silver masters" and verify them against the "Gold Master" (which never leave the lab)
every 3 months.
By the way --- The Gage Lab is a temperature controlled/positive air flow room. ( temperature at 68°+/- 2° and humidity at 47%+/- 3°)
sosam117- Diamond Member
- Posts : 1282
Join date : 2016-03-23
Location : Suburb of Chicago, Illinois
Re: Another of C.T. engines cleaned ---- Cox Tee Dee .09 --- Just today (3/26/2024) more Cox parts
![]() Yabby Thu Mar 28, 2024 6:19 am
Yabby Thu Mar 28, 2024 6:19 am
I have had some 049 TDs I built that were just absolutely great, high revving, easy start, just a joy to use and fly. And then others I assembled that just were problems. note. the cause of this is my assembly method NOT the engines.
Im glad I asked.
This is a great forum
 I learn so much from it which helps make my flying time more enjoyable
Yabby- Platinum Member
-
Posts : 702
Join date : 2021-06-08
Location : Yorke Peninsula South Australia
Re: Another of C.T. engines cleaned ---- Cox Tee Dee .09 --- Just today (3/26/2024) more Cox parts
![]() sosam117 Thu Mar 28, 2024 6:59 am
sosam117 Thu Mar 28, 2024 6:59 am
Yabby wrote:Thank you very much for the link, and the "how to" along with the explanation of the tolerances. I will make up a test jig as described and test and adjust my TD 049 engines as described. I have a suspicion that the piston going just past the correct height may be why I am having trouble with glowheads always coming loose on some engines but not others. It will take me some time to setup a jig and sort out, but, I am keen to try and set the deck height on my engines correctly. My engines are all home assembled from crankcase assemblies I bought from Matt and cylinders from Bernie. So the tolerances could be anywhere dependant on which parts I choose to combine. could be great, could be bad. Now with the "How to" and the jig I can measure, swap parts, use shims to get it as right as I can.
I have had some 049 TDs I built that were just absolutely great, high revving, easy start, just a joy to use and fly. And then others I assembled that just were problems. note. the cause of this is my assembly method NOT the engines.
Im glad I asked.
This is a great forum
Yabby,
The engines that don't go past the shoulder (lower) where the glow head stops will have a lower compression and less of a gap for SPI (sub-port induction) which gives the Cox engines that extra power.
Now with the ones that go past the shoulder, those have then two problems.
1st is the piston hammering into the bottom of the glow head (like you have noticed the glow head loosening).
2nd is the SPI is larger than it should be and with that larger "air" gap, you are losing a little of your fuel/air mixture.
Now with that 2nd problem.
You could just add 3 of more shims under the glow head but that really is the right way to fix the problem because the SPI is still more than it should be -- though the engine will run without the glow head backing out.
Kustom Kraftsmanship knew of the problem and how to resolve it by them selling a timing shim kit for the Cox engines.
It would be nice to have them available these days?
sosam117- Diamond Member
- Posts : 1282
Join date : 2016-03-23
Location : Suburb of Chicago, Illinois
Re: Another of C.T. engines cleaned ---- Cox Tee Dee .09 --- Just today (3/26/2024) more Cox parts
![]() Yabby Thu Mar 28, 2024 7:47 am
Yabby Thu Mar 28, 2024 7:47 am
Bernie sells timing shims and I think Matt does also.
I am definately going to put some effort into this to tryand get my engines right. Glow plugs not coming loose and the correct fuel charge entering the crankcase without spi blowback. definatey worth the effort.
thanks for explaining so cleary. Im in with half a chaceow.
Yabby- Platinum Member
-
Posts : 702
Join date : 2021-06-08
Location : Yorke Peninsula South Australia
Re: Another of C.T. engines cleaned ---- Cox Tee Dee .09 --- Just today (3/26/2024) more Cox parts
![]() sosam117 Thu Mar 28, 2024 5:55 pm
sosam117 Thu Mar 28, 2024 5:55 pm
Yabby wrote:Thanks for the additional information. It matches what I have experienced with the odd engine I have built. the ones with the glow plug coming loose all the time also tend to blow fuel back out the venturi as ive added glow gaskets increased the spi window and spi air is going in when a fuel charge is still coming in through the crank.
Bernie sells timing shims and I think Matt does also.
I am definately going to put some effort into this to tryand get my engines right. Glow plugs not coming loose and the correct fuel charge entering the crankcase without spi blowback. definatey worth the effort.
thanks for explaining so cleary. Im in with half a chaceow.
The shims Burnie/Matt sells is to eliminate the SPI so that you can use a sleeve throttle on the outside of the cylinder.
It is not really for timing.
But it will shim up your cylinder (maybe more than you would like)
This is straight from Cox International about the "Cox .049 / .051 Timing Shims"
Set of four (4)
Features:
Raises exhaust port to delete SPI (Sub Port Induction)
Counteracts RPM loss when using a muffler or throttle ring on engines with SPI
Installs between crankcase and base of cylinder
Two (2) Shims .27mm (.010")
Two (2) Shims .39mm (.015")
Brand new Current Production items
sosam117- Diamond Member
- Posts : 1282
Join date : 2016-03-23
Location : Suburb of Chicago, Illinois
Re: Another of C.T. engines cleaned ---- Cox Tee Dee .09 --- Just today (3/26/2024) more Cox parts
![]() Yabby Fri Mar 29, 2024 5:34 am
Yabby Fri Mar 29, 2024 5:34 am
Using the jig, I can also try mixing and matching different engine components, but, a shim would probaby be easier.

Yabby- Platinum Member
-
Posts : 702
Join date : 2021-06-08
Location : Yorke Peninsula South Australia
Re: Another of C.T. engines cleaned ---- Cox Tee Dee .09 --- Just today (3/26/2024) more Cox parts
![]() Yabby Fri Mar 29, 2024 8:00 am
Yabby Fri Mar 29, 2024 8:00 am
. I think this is extremely worthwhile. bad luck cant get the shim holder anymore. but once the tools and shim stock are purchased can make more shims.
thank you greatly. awesome info.

Yabby- Platinum Member
-
Posts : 702
Join date : 2021-06-08
Location : Yorke Peninsula South Australia
Re: Another of C.T. engines cleaned ---- Cox Tee Dee .09 --- Just today (3/26/2024) more Cox parts
![]() sosam117 Fri Mar 29, 2024 6:32 pm
sosam117 Fri Mar 29, 2024 6:32 pm
Yabby wrote:Thanks for all the info. I am going to buy the tools and shimstock to make the shims from
. I think this is extremely worthwhile. bad luck cant get the shim holder anymore. but once the tools and shim stock are purchased can make more shims.
thank you greatly. awesome info.
Another thing you can do (and I do it) have 400grit sandpaper on a flat surface (I have "T" bar sanders) and using your "fattest finger, (the thumb?) place the shim between the thumb and the sandpaper and sand the shim down (if it is too thick?)
sosam117- Diamond Member
- Posts : 1282
Join date : 2016-03-23
Location : Suburb of Chicago, Illinois
Re: Another of C.T. engines cleaned ---- Cox Tee Dee .09 --- Just today (3/26/2024) more Cox parts
![]() Yabby Sat Mar 30, 2024 5:13 am
Yabby Sat Mar 30, 2024 5:13 am
 but, im going to give it a good go as it makes sense, and if i sort out an engine this way I will be especially pleased.
Yabby- Platinum Member
-
Posts : 702
Join date : 2021-06-08
Location : Yorke Peninsula South Australia
Re: Another of C.T. engines cleaned ---- Cox Tee Dee .09 --- Just today (3/26/2024) more Cox parts
![]() Sponsored content
Sponsored content
Sponsored content
» Enya fitted with Muffler // "Two" G-Mark .061 engines rebuilt/cleaned up
» Testors/McCoy .049 smoked...
» Norvel engines and parts.
» Tach Race 2014 !!!!!!!!!