Log in
Search
Latest topics
» Tired of it all…by getback Today at 2:32 pm
» Roddie's flat-bottomed boat..
by OVERLORD Today at 2:20 pm
» PT-19 Mayhem at Buder Park...a Decade Ago!!!!
by Kim Today at 7:41 am
» Project Cox .049 r/c & Citabrian Champion
by getback Today at 6:46 am
» Three -- sold out (making two more) Cox .010 Carburetors with wrench
by balogh Today at 12:34 am
» Joe Wagners Sioux
by GallopingGhostler Yesterday at 9:03 pm
» Happy Anzac Day!
by GallopingGhostler Yesterday at 4:16 pm
» Jim Walkers FireBee - This is going to be fun
by rsv1cox Yesterday at 12:27 pm
» Revivng Some Childhood Classics
by getback Yesterday at 7:31 am
» Fox .35 Modifications
by Ken Cook Yesterday at 3:16 am
» Introducing our Cox .049 TD Engines
by getback Fri Apr 26, 2024 6:20 am
» Cox powered jet-pump for model Sprint Boat
by roddie Thu Apr 25, 2024 10:25 pm
Cox Engine of The Month
WIZARD - a "Wonderful Wizard"
Page 1 of 2
Page 1 of 2 • 1, 2 
 WIZARD - a "Wonderful Wizard"
 After reading a few articles on Electric Control line flying and being determined to try control line again (remember - in my area and for miles we are not allowed to us IC engines but there are few restrictions on electrickery - YET!) - I wondered where to start.
I looked through the forum and came across:-
https://www.coxengineforum.com/t561-l-il-wizard-first-flight-since-1978?highlight=Wizard
and thought - if Ron can do it
 so can I.
Then came
https://www.coxengineforum.com/t2945-the-wizard-can-stunt?highlight=Wizard
Oh - he managed to loop the loop!

Then a very rare unanswered post (perhaps a collector's item!)
https://www.coxengineforum.com/t4171-cg-on-a-l-il-wizard?highlight=Wizard
Followed by
https://www.coxengineforum.com/t3848-li-l-wizard-stunt?highlight=Wizard
Ron made one for his son to fly. So how hard can it be?
My mind was made up (doesn't take long really). The decision only slowed by the fact that I am not drawn to profile models with sheet wings. Then I thought - it will only take seconds to build it!

Anyways on. After more research
 I discovered that Den's Model Supplies had an 1/2A Wizard kit and ........ timer for the electrickery and ..... control lines. (I already have a handle -well quite a few somewhere but I can only find one).
So order placed and two days later (which is very quick as Den is based on a tiny island off the South Coast of England and we are experiencing the ravages of Christmas post) the goodies arrived.
As a sideline - Den is the nearest thing we have in the UK to a Cox stockist and control line affectionado.
http://www.densmodelsupplies.co.uk/
Back to the Wizard.
As usual; me, the InterWeb and my eyesight don't get on. I looked at the kit this morning and, to my delight, it is almost a real model aeroplane. It has a built up wing and the slab that some chaps call a fuselage will be ideal for shimmying electrickery up and down to balance. Oh and the C of G range (between sport and stunt) is marked on the plan.
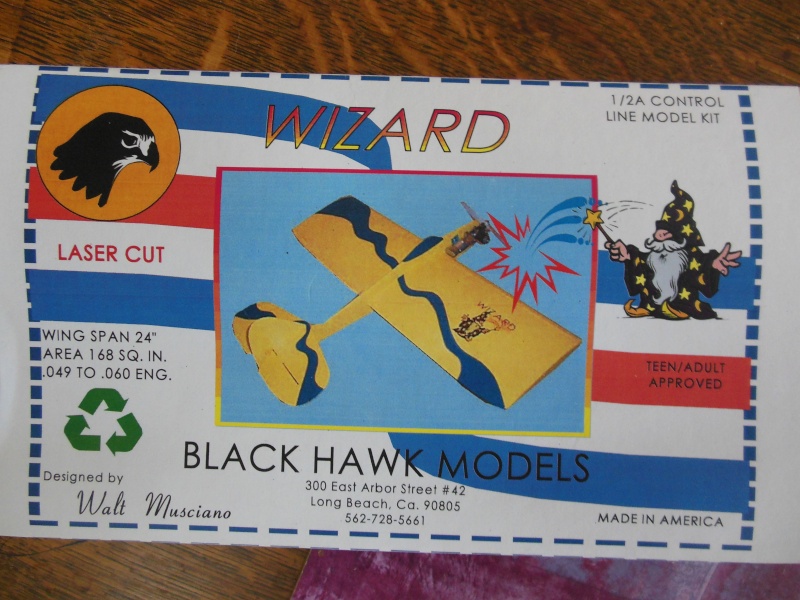
Soon to be started ------------------

ian1954- Diamond Member

- Posts : 2688
Join date : 2011-11-16
Age : 69
Location : England
 Re: WIZARD - a "Wonderful Wizard"
I got one of those. Haven't built it yet.
After my recent learning I expect it to be somewhat "ringmaster"-like with round maneuvering characteristics, but will welcome a surprise of it being more nimble in the air. The square inches look good, but the wingspan looks narrow. (The baby Flite Streak span is 2 inches wider, and 18 fewer square inches)
http://www.blackhawkmodels.com/wizard.html
I lack an engine suitable for this model so it will wait. I think I want to put a NV big mig onto it when I am ready for it. It can sit for a while in the box.
Phil

pkrankow- Top Poster

- Posts : 3025
Join date : 2012-10-02
Location : Ohio
 Re: WIZARD - a "Wonderful Wizard"
Congrats. on the new kit Ian! I will be very interested in your choice of motor/battery/timer etc.
Good luck and Happy Holidays to you!
Roddie
Good luck and Happy Holidays to you!
Roddie
 Re: WIZARD - a "Wonderful Wizard"
Ian, I didn't see where you commented on a post of mine a while back.. and wondered if you'd seen this link to indoor control line flying. There's some awesome technology that you may possibly be able to incorporate into this model.
Check out the last video in particular.. http://www.indoorgeebee.com/#!video/caxh
(edit) link to timers with accelerometers for both indoor/outdoor flight.
http://www.indoorgeebee.com/#!timers/czfy
Roddie
Check out the last video in particular.. http://www.indoorgeebee.com/#!video/caxh
(edit) link to timers with accelerometers for both indoor/outdoor flight.
http://www.indoorgeebee.com/#!timers/czfy
Roddie
 Re: WIZARD - a "Wonderful Wizard"
Ian!!!
Very cool, it's not a Goldberg Wizard, it's even better. That model should be an excellent flier. Built up wing with plenty of Sq" you should be able to perfect the pattern with that one.
Looking forward to a build thread Ian. Even if it's powered by witchcraft.
Very cool, it's not a Goldberg Wizard, it's even better. That model should be an excellent flier. Built up wing with plenty of Sq" you should be able to perfect the pattern with that one.
Looking forward to a build thread Ian. Even if it's powered by witchcraft.

Cribbs74- Moderator


Posts : 11895
Join date : 2011-10-24
Age : 50
Location : Tuttle, OK
 Re: WIZARD - a "Wonderful Wizard"
roddie wrote:Ian, I didn't see where you commented on a post of mine a while back.. and wondered if you'd seen this link to indoor control line flying. There's some awesome technology that you may possibly be able to incorporate into this model.
Check out the last video in particular.. http://www.indoorgeebee.com/#!video/caxh
(edit) link to timers with accelerometers for both indoor/outdoor flight.
http://www.indoorgeebee.com/#!timers/czfy
Roddie
Thanks Roddie. I hadn't picked up on this at all and I am impressed with the accelerometer but at 100 euro = $137. That is a little steep. These are nice slow flyers but only for indoors or flat, flat calm days. The slightest breeze will upset one of these.
They look like they are relaxing to fly - almost stress free!
I have not flown control line for almost 30 years and don't want to get too complicated. I will be happy to spin around for 1 minute without crashing.
The main thing I have to bear in mind is that (and this is contra to few other opinions) electric flight is far more dangerous that IC powered flight on several counts.
1. The propellers are very sharp. I have one that I broke after sitting on it and I now use it as a letter opener.
2. Omitting "Park Flyers" running on a single cell Lipo at 3.7 volts and feather weight foam, brushless motors are powerful and do not stop of their own accord. I have caught my fingers in glos and diesels more times than I can remember. Yes it hurts, cuts and bruises but it stops.
The electric motor does not stop, carries on chopping and if it meets resistance - it will overheat and then the battery will explode/catch fire. When flying electric RC you learn to quickly shut down following or prior to a disaster (I have had quite a few).
3. Nose dive an electric control line model into the ground or belly land it and you won't have long to prevent flames. Seconds not minutes! You can't cut the motor remotely.
4. The timer is vital. Although it won't prevent the above incident and some ESCs do - running any Lipo cell down to 3v is a recipe for disaster. The cell will swell and overheat with obvious consequences. Furthermore, even if the signs aren't there, an attempt to recharge will result in disaster. How do I know - I recharged a swollen 150mah lipo to see what would happen. I should have had my camera with me - it was spectacular - a foot circular flame wooshed from it.
5. It is easy to make a mistake and "instructions" are not often correct. The Blew Angel I built recently hasn't flown yet. Why? Because I burned out the motor in 2 seconds.
I had followed the instructions that cam with the kit - 8x4 propeller, C20 1550kv motor and I fitted a 30 amp ESC. The recommended power pack was a 3S 11.1volt lipo pack.
BIG MISTAKE. I had tested it several times when installing and to make sure that I had it spinning the right way. The night before I was to fly it, I went through the full tests and to set the motor to the throttle stick on my transmitter. Also to check that the motor cut out on loss of signal and didn't start if I switched on with the throttle stick not closed.
All fine and dandy until I opened the throttle to full. The room filled with smoke and a flame burst out of the motor. Powering off instantly made no difference, too late!
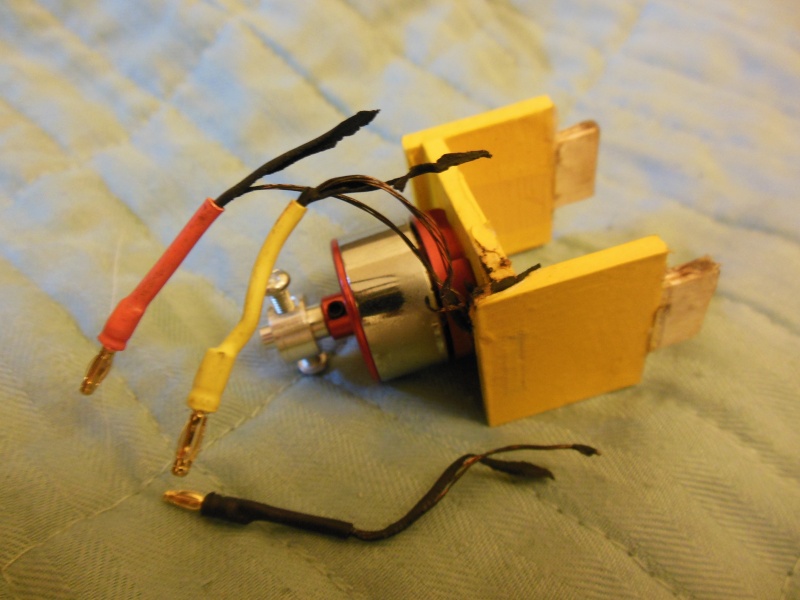
I now know that the limit for this particular motor is 11 volts. A fully charged 3S lipo is 12.6 volts. I should have double checked!
In the many thousands of glow, diesel and some petrol engines I have fired up - I have never had one catch fire (even though I smoke!). I have seen them disintegrate and even a cylinder head melt!
Wary is what I am. Even though the motor will be a fraction of my 600 watt jobs - it is still far more powerful than a tiny Park Flyer - and powering a much heavier model.

ian1954- Diamond Member

- Posts : 2688
Join date : 2011-11-16
Age : 69
Location : England
 Re: WIZARD - a "Wonderful Wizard"
Cribbs74 wrote:Ian!!!
Very cool, it's not a Goldberg Wizard, it's even better. That model should be an excellent flier. Built up wing with plenty of Sq" you should be able to perfect the pattern with that one.
Looking forward to a build thread Ian. Even if it's powered by witchcraft.
"The force is with me"

ian1954- Diamond Member

- Posts : 2688
Join date : 2011-11-16
Age : 69
Location : England
 Re: WIZARD - a "Wonderful Wizard"
On electric CL there are timer kits that will stop the motor in event of a prop strike preventing most of those bullet points.
Phil
Phil

pkrankow- Top Poster

- Posts : 3025
Join date : 2012-10-02
Location : Ohio
 Re: WIZARD - a "Wonderful Wizard"
This is progress so far
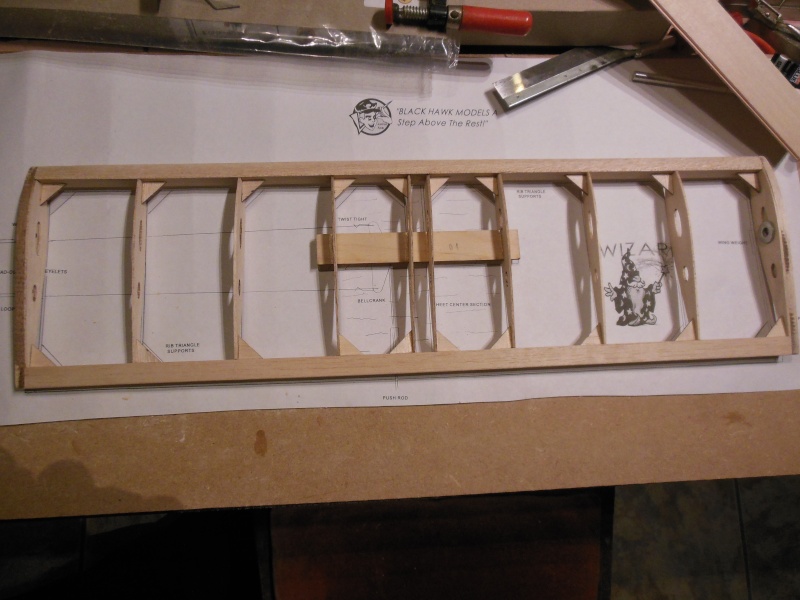
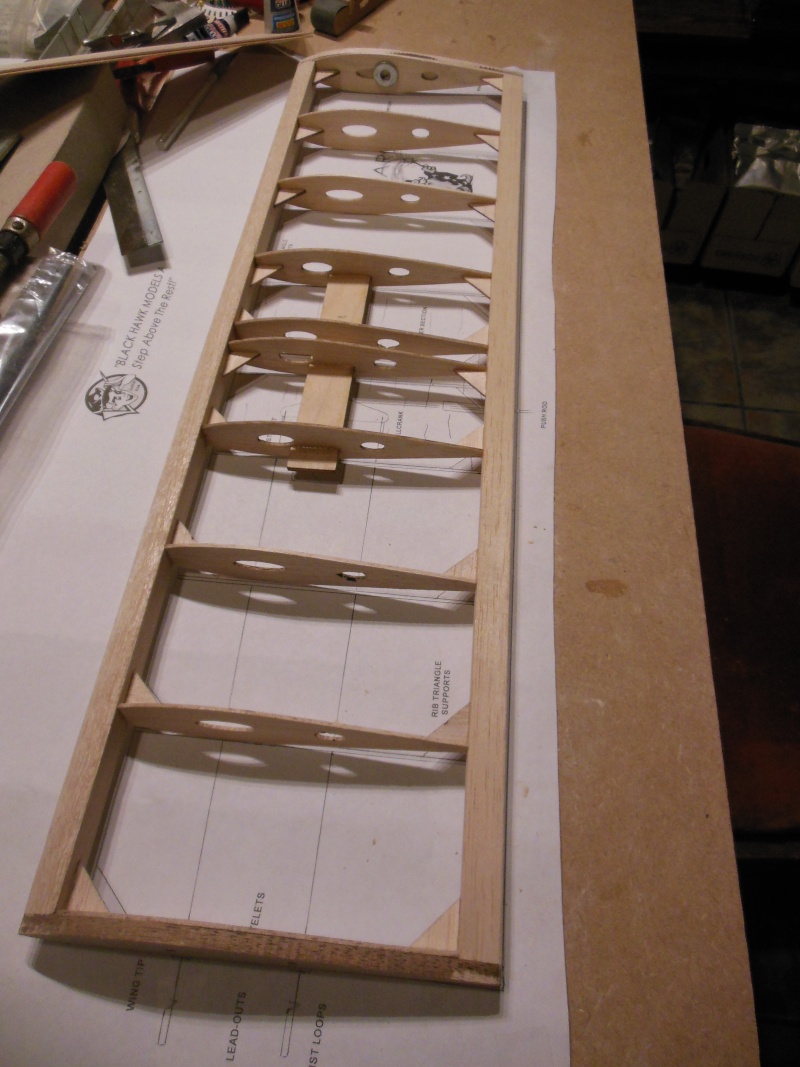
Very quick to put together but the leading edge is very, very hard balsa and that took some time to shape. I normally use a little plane and spokeshave but had tp resort to my carving knives. Very hard balsa - it needs a lttle more smooth sanding now.
I kept looking at the profile fuselage and scowling - then I realised it was good for checking the profile of the wing!.

ian1954- Diamond Member

- Posts : 2688
Join date : 2011-11-16
Age : 69
Location : England
 Re: WIZARD - a "Wonderful Wizard"
Good work!
A really hard leading edge is a good thing if you haven't flown in a while. The profile fuse will help when you crash as well!
Ron
A really hard leading edge is a good thing if you haven't flown in a while. The profile fuse will help when you crash as well!
Ron

Cribbs74- Moderator


Posts : 11895
Join date : 2011-10-24
Age : 50
Location : Tuttle, OK
 Re: WIZARD - a "Wonderful Wizard"
I cheated with going electric C/L... I removed all the servos and pushrods from my Fancy Foam FENIX indoor plane. I retained the motor, ESC, Rx and elevator pushrod. I installed a bellcrank, 1/4 oz. outboard tip weight, and 20' SpiderWire lines. The plane is a flat, foam, mid-wing, with a 33 inch span.
Then, off to the church parking lot with a transmitter dangling from a neck strap at 9:30 pm, one night last week. Vrrroom! works neat, and it's kind of cool to have throttle to play with during a flight! I could hover the plane, and perform touch and goes, then- land, before I tanked the battery! No need for a separate timer. You just have to make certain that the throttle stick is not accidentally bumped, on the walk to the handle, after connecting the plane's battery, and powering-up the electronics.
It works, but it was nothing like a fine Tee Dee on the nose, ripping up the sky! I'll take it to one of the indoor sessions, that are held around here, about twice a month. We'll see how that goes! Here's what it looks like, before the conversion.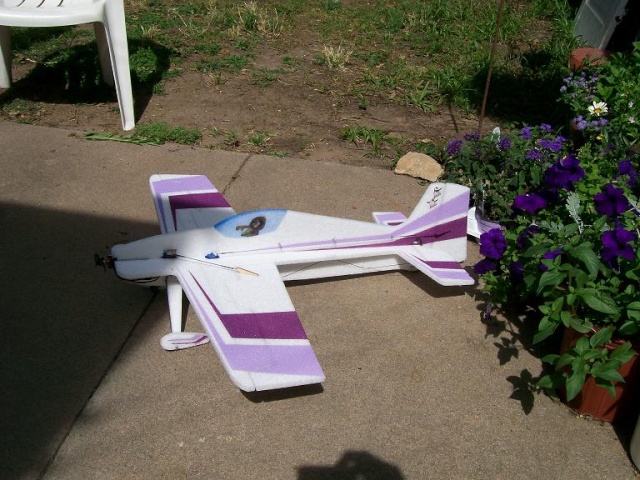


GUS THE I.A.- Gold Member

- Posts : 359
Join date : 2012-08-15
Location : Wichita, Kansas
 Re: WIZARD - a "Wonderful Wizard"
I think that wil be a really nice conversion especially by retaining throttle control. I have thought about this quite a few times (I have a lot of foamy casualties!) and would be interested to see more pictures.
I have only done RTP with throttle control - I imagine one hand stick twiddling with the other handle pulling could get fraught.
I have only done RTP with throttle control - I imagine one hand stick twiddling with the other handle pulling could get fraught.

ian1954- Diamond Member

- Posts : 2688
Join date : 2011-11-16
Age : 69
Location : England
 Re: WIZARD - a "Wonderful Wizard"
I realised today that as I hadn't built a control liner for quite some time, I was a little out of sync with the build. I normally launch into "wings first" but because of the bellcrank thingy and the fact that it will be covered in sheeting meant that I had to complete the tailplane so that I could position the bellcrank and the pushrod.
The tailplane is only 1/8 sheet and I looked at possiblities for the hinge. The recommended hinges are tape but I am not keen on those because the are not easy to make a nice job of covering. The tabs to be cyanoed are quite good but not for material as thin as this, too easy to get it wrong. I then looked at the "stitching" topics in the forum but as I can't sew and my eyesight is not good that could end up as a disaster.
The covering material I have is very tough and two layers stuck together is even tougher but still very flexible. So I decided to use the covering material. I have done this before and it has quite a few advantages,
It is very tough, difficult to tear and there is no air gap between the elevator and the tailplane. It is also very flexible.
Anyway, this is how I go about it.
Start off with a single piece of covering to cover bothe tailplane and elevator
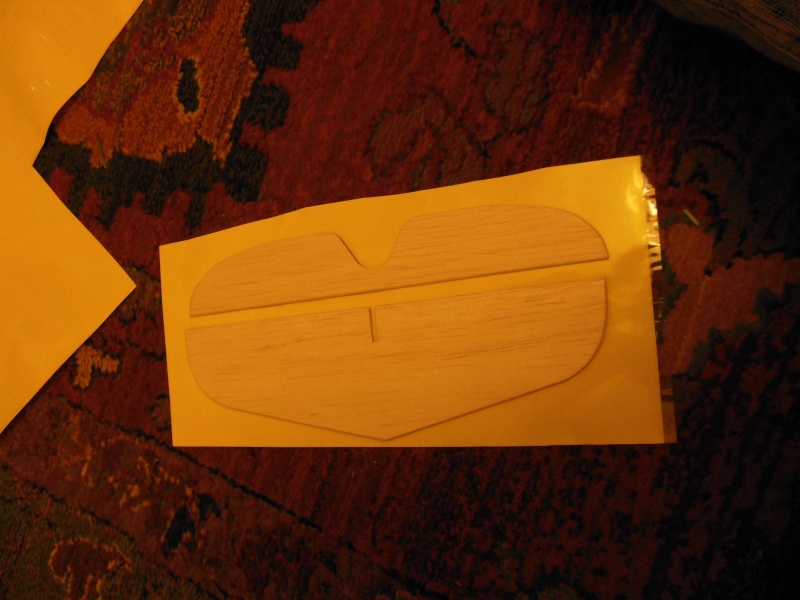
Apply the covering to to elevator and the tailplane and trim.
Then apply the covering to just the tailplane. The adjoining edges had been sanded to a "V" - 90 degree angle. Make sure that the covering is firmly attached to the "V" edge on the tailplane.
Then turn over - lay on the elevator with an even gap (about 1/16") and hold in position with sellotape.
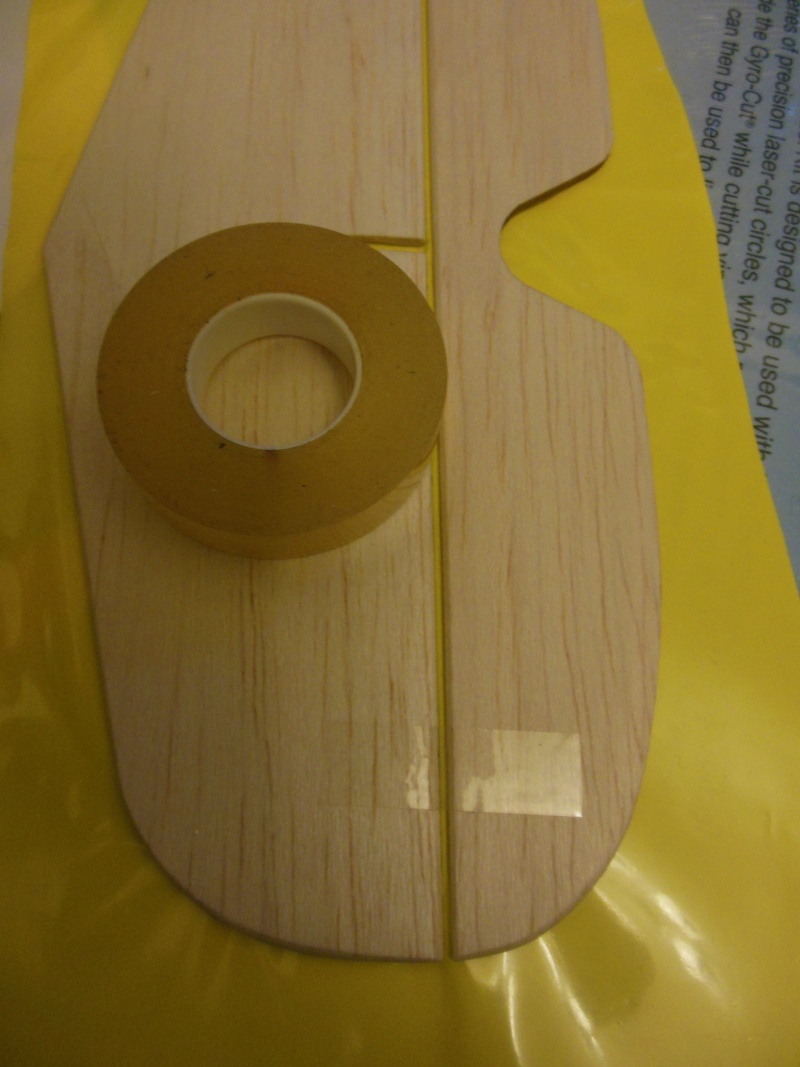
Then turn over and use the point or edge of the iron to form the "V" groove.
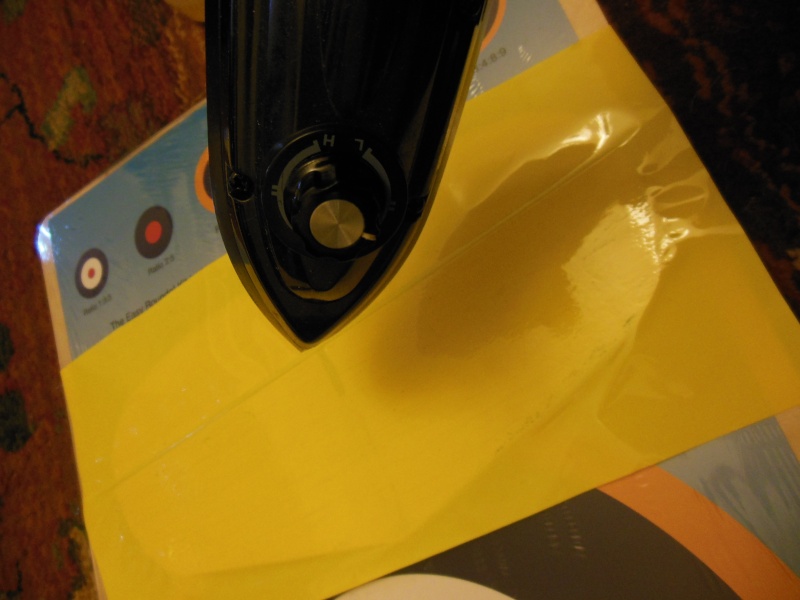
Make sure the the "V" is formed all the way along both edges.

Then continue and apply the covering to the elevator, cover the edges and trim. Then turn over.
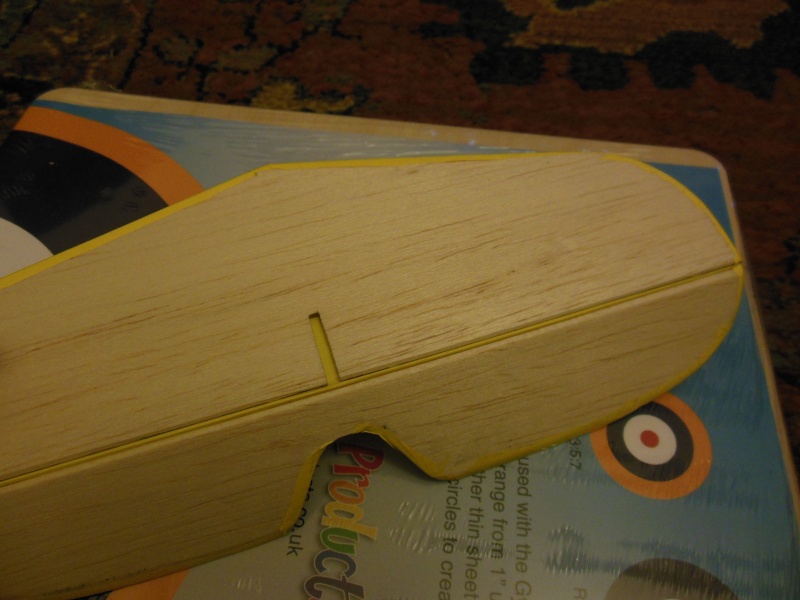
Take another sheet
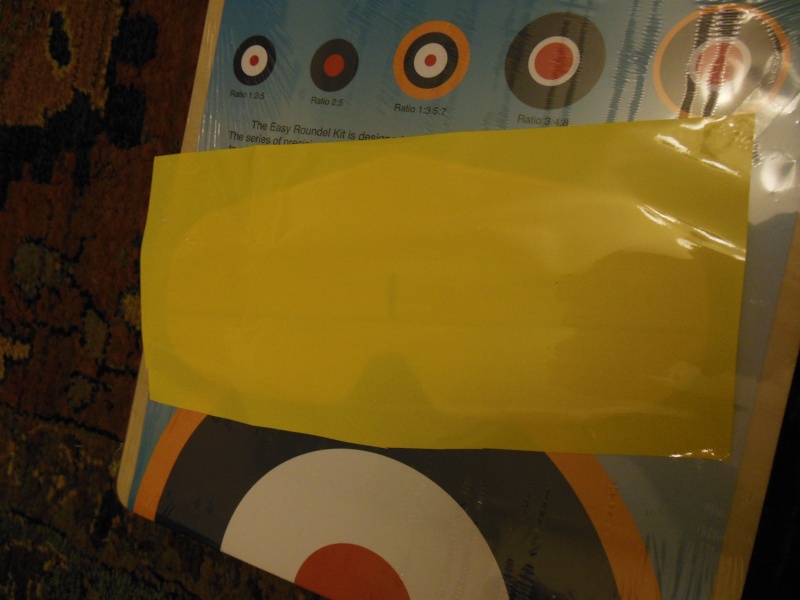
This time use the edge of the iron first and form the "V"groove - ensure that it is stuck firmly
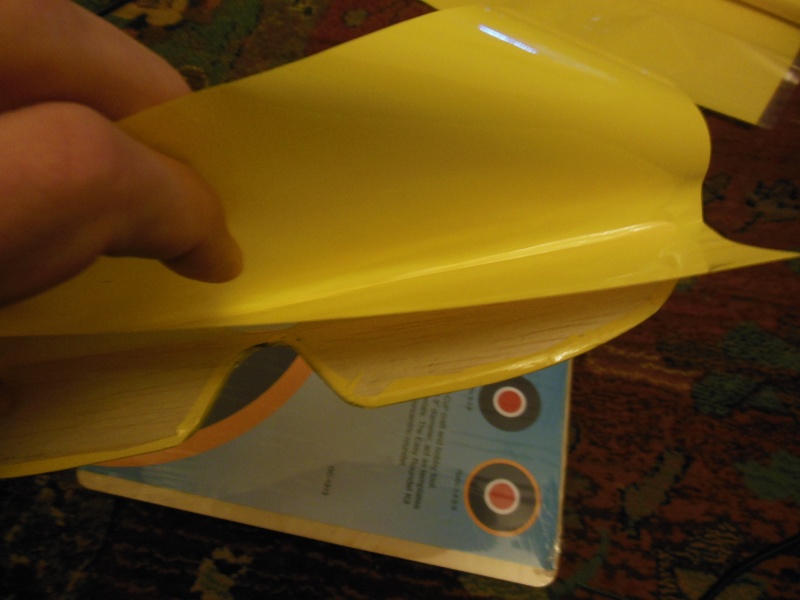
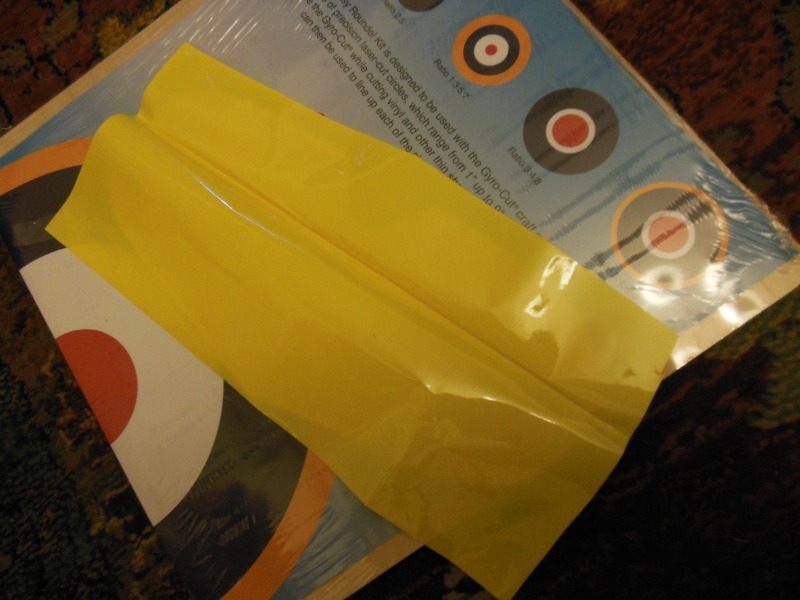
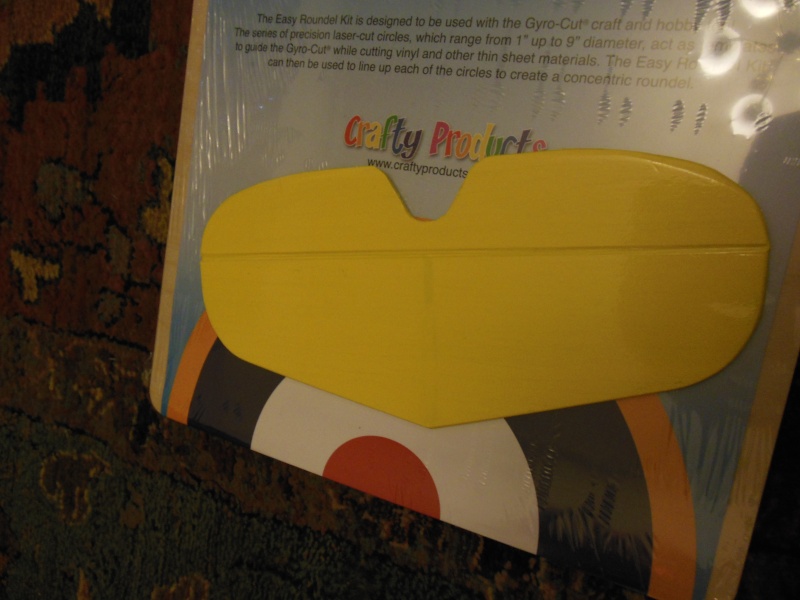
Check for flexibility
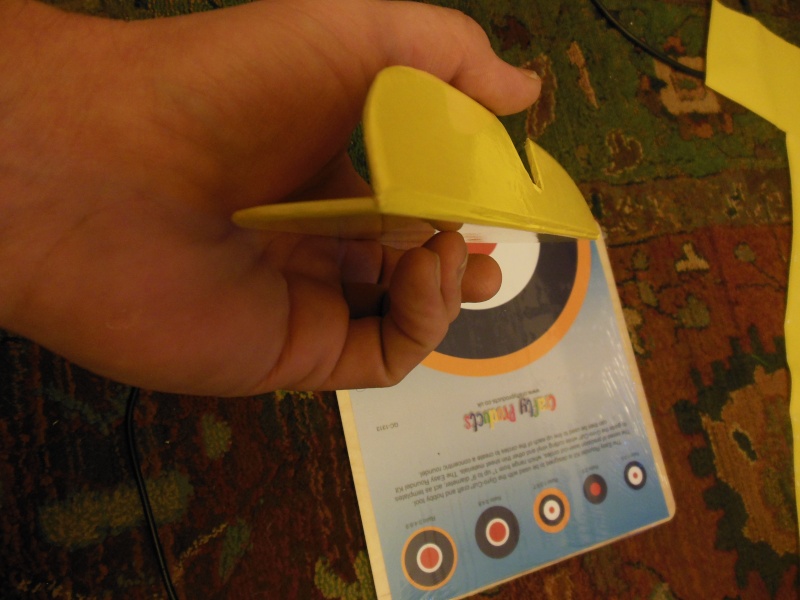
in both directions
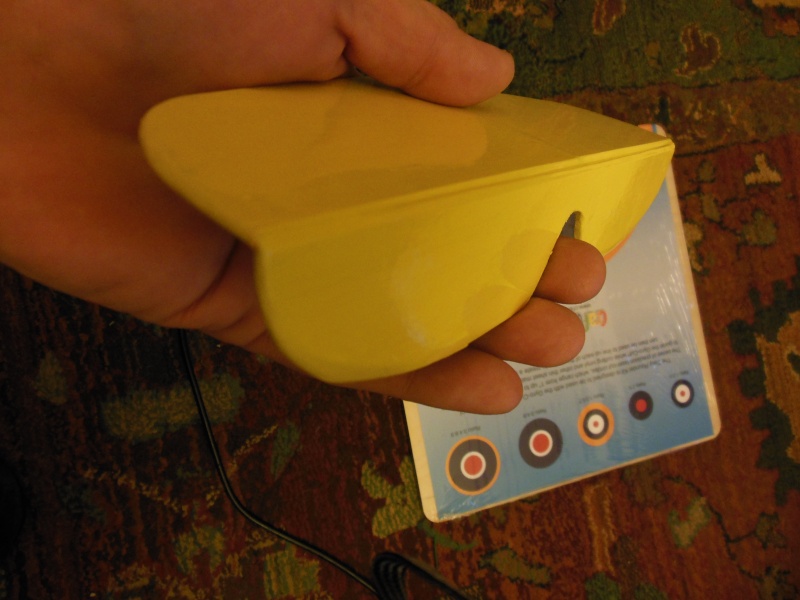
Stick on fin and rudder
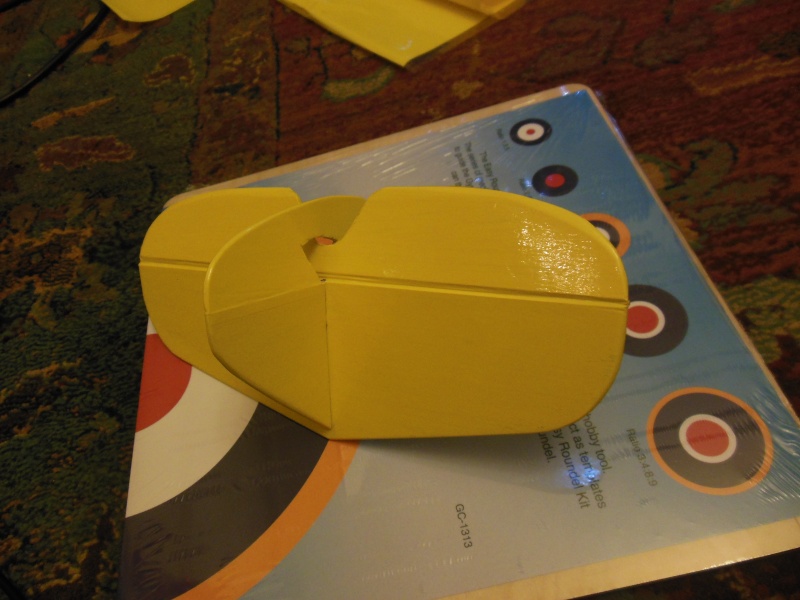
Now ready to be stuck on that strange looking fuselage so that I can finish the wing.
The tailplane is only 1/8 sheet and I looked at possiblities for the hinge. The recommended hinges are tape but I am not keen on those because the are not easy to make a nice job of covering. The tabs to be cyanoed are quite good but not for material as thin as this, too easy to get it wrong. I then looked at the "stitching" topics in the forum but as I can't sew and my eyesight is not good that could end up as a disaster.
The covering material I have is very tough and two layers stuck together is even tougher but still very flexible. So I decided to use the covering material. I have done this before and it has quite a few advantages,
It is very tough, difficult to tear and there is no air gap between the elevator and the tailplane. It is also very flexible.
Anyway, this is how I go about it.
Start off with a single piece of covering to cover bothe tailplane and elevator

Apply the covering to to elevator and the tailplane and trim.
Then apply the covering to just the tailplane. The adjoining edges had been sanded to a "V" - 90 degree angle. Make sure that the covering is firmly attached to the "V" edge on the tailplane.
Then turn over - lay on the elevator with an even gap (about 1/16") and hold in position with sellotape.

Then turn over and use the point or edge of the iron to form the "V" groove.

Make sure the the "V" is formed all the way along both edges.

Then continue and apply the covering to the elevator, cover the edges and trim. Then turn over.

Take another sheet

This time use the edge of the iron first and form the "V"groove - ensure that it is stuck firmly


Check for flexibility

in both directions

Stick on fin and rudder

Now ready to be stuck on that strange looking fuselage so that I can finish the wing.

ian1954- Diamond Member

- Posts : 2688
Join date : 2011-11-16
Age : 69
Location : England
 Re: WIZARD - a "Wonderful Wizard"
Ian,
That will work!
No need to do the tail before the wing though. Just leave the control rod long and cut and bend to length after the tail is glued on.
In fact the stab, elevator and rudder is the last thing I glue on. In the end it's your plane so whatever you choose to do is what's best.
All your models turn out great!
Ron

Cribbs74- Moderator


Posts : 11895
Join date : 2011-10-24
Age : 50
Location : Tuttle, OK

ian1954- Diamond Member

- Posts : 2688
Join date : 2011-11-16
Age : 69
Location : England
 Re: WIZARD - a "Wonderful Wizard"
More progress - but with the fuselage.
The kit as supplied is geared towards bearer supported engines but material supplied also includes plywood and angle braces for the Cox bees. I took these and modded them for electric motor mounting.
I have been testing the electric motor and the timer - appears to run very well with a 7x5 propeller. I also used a watt meter to make sure I wouldn't burn this one out!
However, the landing gear didn't look long enough for a 7x5 propeller (also a potential 8x4) so I lowered the mounting point.
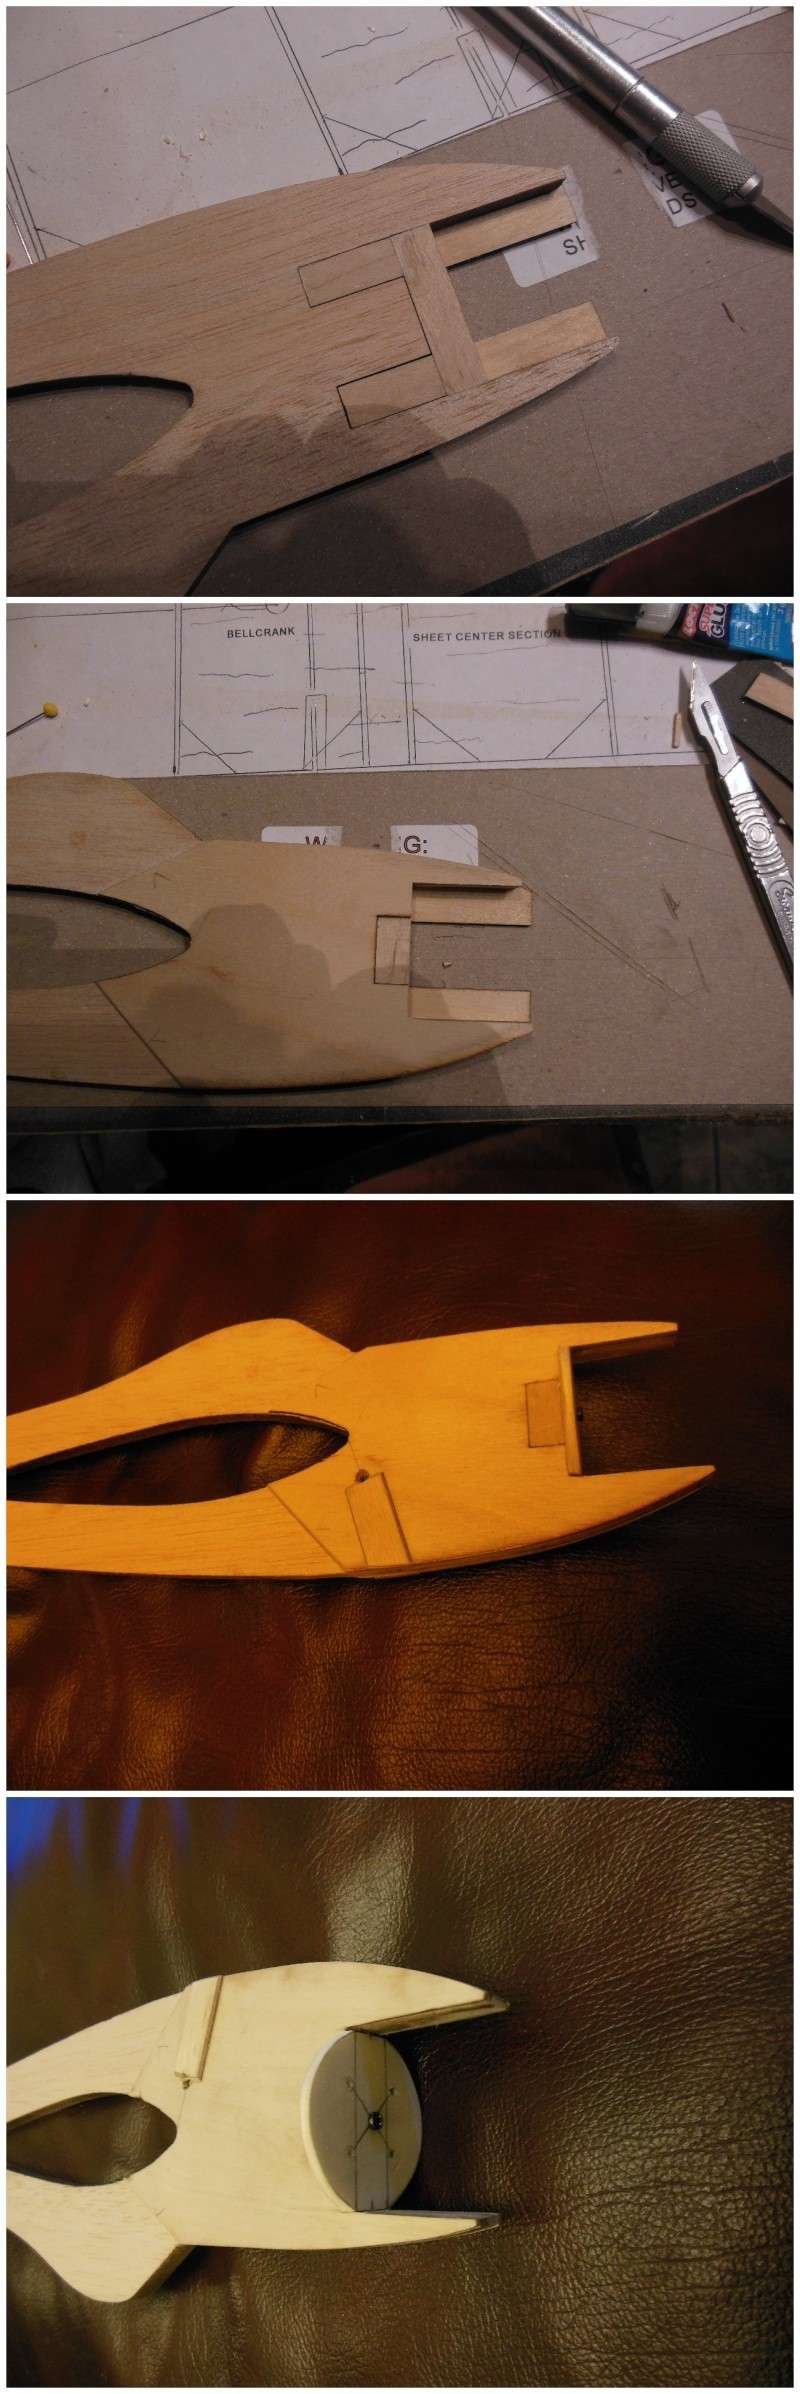


ian1954- Diamond Member

- Posts : 2688
Join date : 2011-11-16
Age : 69
Location : England
 Re: WIZARD - a "Wonderful Wizard"
Super-Slick on the tail-plane hinging Ian! I will be trying that method someday for sure! I'm used to seeing your transparent coverings... I like the opaque Yellow. It looks close to a PT-19 yellow?
Roddie
Roddie
 Re: WIZARD - a "Wonderful Wizard"
How heavy are the electric motors compared to a Bee or TD type engine? Just wondering about the CG although the battery probably weighs a good bit I imagine.
Looking good Ian!
Ron
Looking good Ian!
Ron
Last edited by Cribbs74 on Sat Dec 28, 2013 8:04 pm; edited 1 time in total

Cribbs74- Moderator


Posts : 11895
Join date : 2011-10-24
Age : 50
Location : Tuttle, OK
 Re: WIZARD - a "Wonderful Wizard"
The motor I have selected together with the ESC and timer weighs - 62g (2.187oz).
The battery is 102g (3.6oz) - still not sure where am going to place the battery.
Anyway, this stick fuselage is a doddle to do. Quick and easy - wonder why the speed contest planes are taking so long
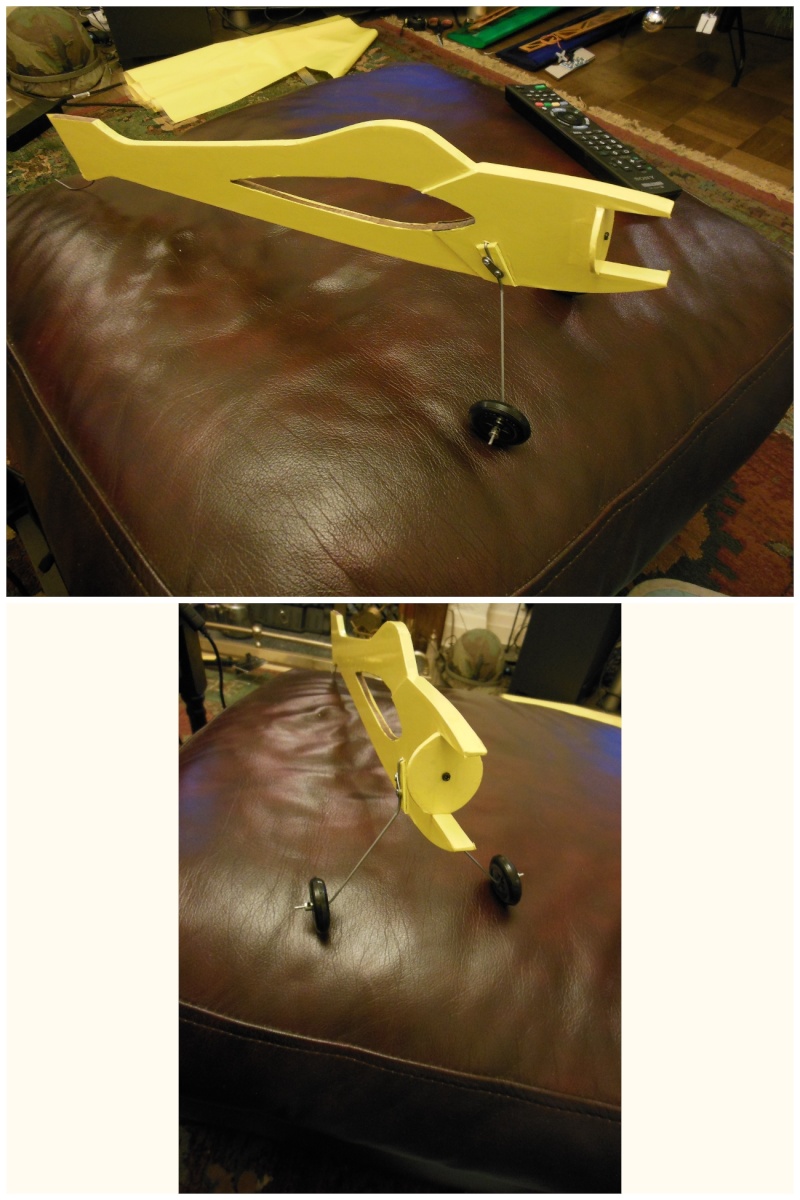
Longest part was waiting for the super glue to dry - 4 seconds is a bit much!
The battery is 102g (3.6oz) - still not sure where am going to place the battery.
Anyway, this stick fuselage is a doddle to do. Quick and easy - wonder why the speed contest planes are taking so long

Longest part was waiting for the super glue to dry - 4 seconds is a bit much!

ian1954- Diamond Member

- Posts : 2688
Join date : 2011-11-16
Age : 69
Location : England
 Re: WIZARD - a "Wonderful Wizard"
Just checked all the rest and I estimate that the plane itself will weigh about 190g (6.7 oz)
All up weight about 354g about 12.5 oz.
All up weight about 354g about 12.5 oz.

ian1954- Diamond Member

- Posts : 2688
Join date : 2011-11-16
Age : 69
Location : England
 Re: WIZARD - a "Wonderful Wizard"
That's a bit on the hefty side for a 1/2A. I assume that motor is more powerful than a TD? Electrics usually are. Not knocking just asking.

Cribbs74- Moderator


Posts : 11895
Join date : 2011-10-24
Age : 50
Location : Tuttle, OK
 Re: WIZARD - a "Wonderful Wizard"
Cribbs74 wrote:That's a bit on the hefty side for a 1/2A. I assume that motor is more powerful than a TD? Electrics usually are. Not knocking just asking.
Knock as loud as you like, I really don't mind. This is new ground for me (the way I like it!). I have seen your videos and you have made and successfully flown quite a few of this type along with other forum members. I read all the posts and descriptions and, generally, offer know comment because on my part - it would be summising.
After all - It was your posts that led me to getting the Wizard (even though I bought the wrong one!)
As for weight - I don't know, but if it is a disaster, we will all know (I will know first though!).
When I have completed the electrickery, I will do my standard "pull test".
With the motor running:-
If it doesn't want to move then it will not fly.
If it tries to pull my arm off then I will have overdone it!
Somewhere in between should be OK.
As a digression - it seems like this kit is in the possession of a few but lurking in the shadows waiting to be built. So here are my comments.
I am not sure about the 1/2 A designation - the recommended motor range is .049 to .060.
It is the easiest kit I have ever built but, like the Brodak NightHawk that I built, the plan (in this case the wing) is not true 1:1 scale. Follow the intructions after preparing all the parts and you won't go wrong.
The leading edge and the trailing edge supplied were the same length and, if I hadn't trimmed them, would have produced a 24 3/4" wing. Whether that is a good idea or not, I don't know, but if I were to build another I would maximise the use of materials and save 25 seconds worth of sawing (
Now, although I will be subjecting it to electrickery, I thought (in deference to all our Cox fanatics) I would show you what it would look like with on of my Bee thingies stuck on the front.

I haven't decorated it yet. I am still mulling that over. After all - when you are flying it - this is all you see.
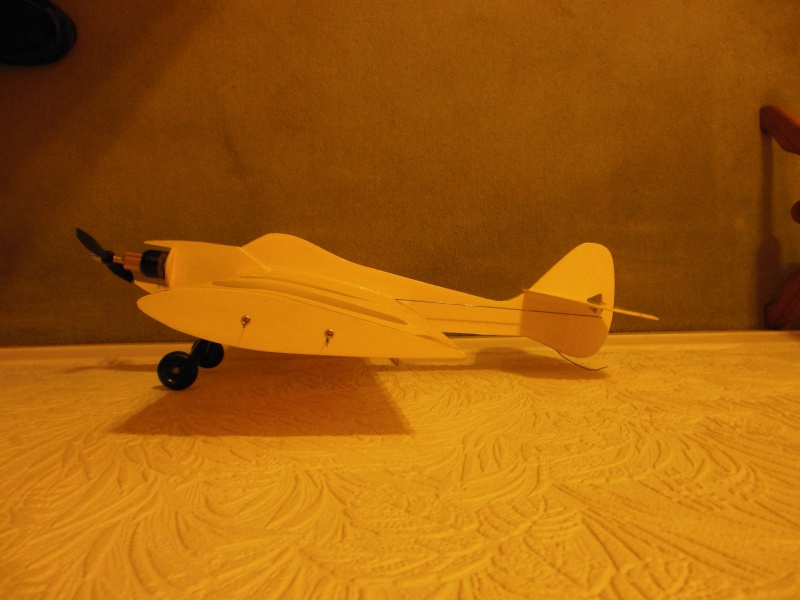
I knew there was a reason for profile models!
Back to weight - the model weighs 183g (6.5oz) and with a Bee thingy on board it weighs 249g (8.78oz). This would make the wing loading (168 sq. in.) -7 1/2 oz per sq.ft.
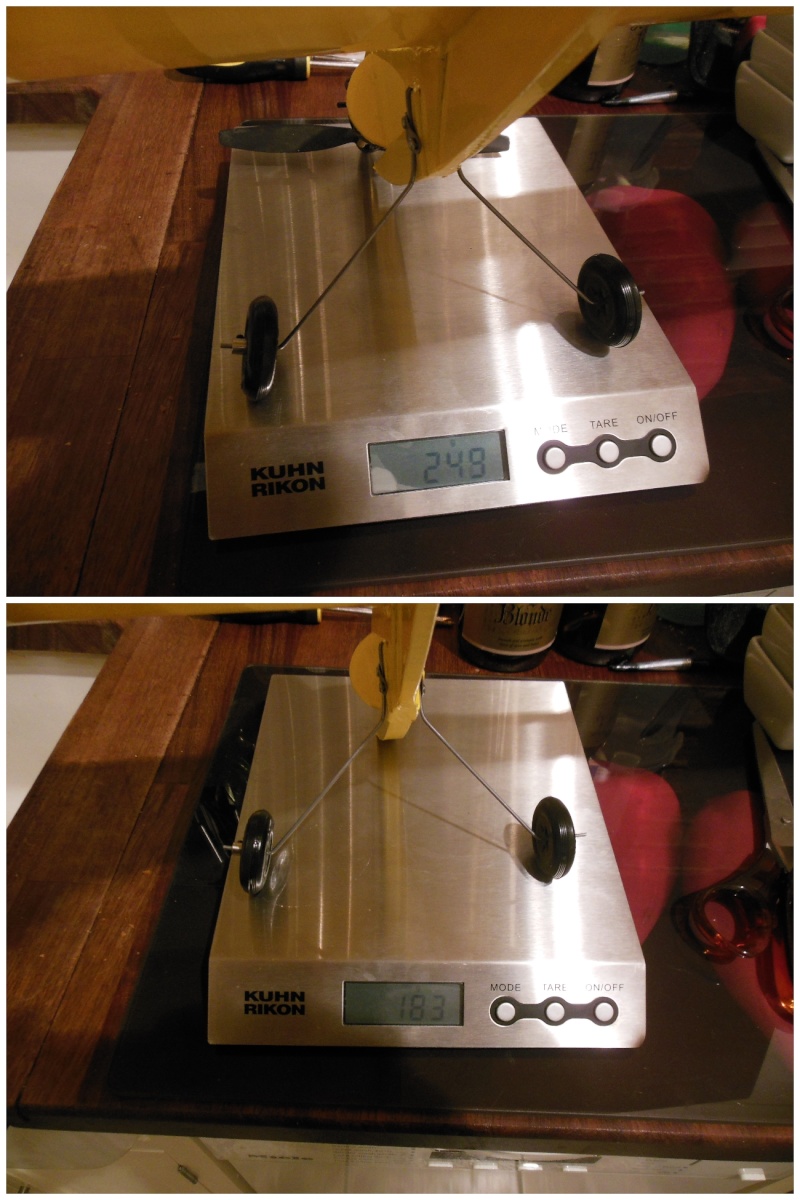
The other thing to note is that with the Bee on the front - it is in balance. No need for balance weight. The set up I ended up with is 3/8" in front of the normal Bee position from the instructions is I use one of the engine bearers sideways on to glue and screw the mount to.
All comments are appreciated.

ian1954- Diamond Member

- Posts : 2688
Join date : 2011-11-16
Age : 69
Location : England
 Re: WIZARD - a "Wonderful Wizard"
A lot of electric motors recess into the mounting bulkhead...are you sure the screw in the center is such a good idea?
Phil
Phil

pkrankow- Top Poster

- Posts : 3025
Join date : 2012-10-02
Location : Ohio
 Re: WIZARD - a "Wonderful Wizard"
pkrankow wrote:A lot of electric motors recess into the mounting bulkhead...are you sure the screw in the center is such a good idea?
Phil
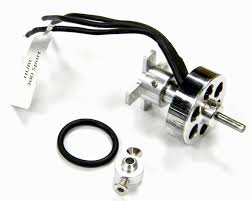
The motor is a Blue Wonder 1500kv - it has an adjustable length mount and, even when set back, clears the screw. The screw is there for security - in this instance I don't trust glue alone.

ian1954- Diamond Member

- Posts : 2688
Join date : 2011-11-16
Age : 69
Location : England
 Re: WIZARD - a "Wonderful Wizard"
OK, you didn't mention that you had a motor already.
Phil
Phil

pkrankow- Top Poster

- Posts : 3025
Join date : 2012-10-02
Location : Ohio
Page 1 of 2 • 1, 2 
 Similar topics
» Looking for plan's for the "Lil Wizard"
» CG on a L'il Wizard
» Bad Weekend For A Wizard.....
» MY FIRST PROP ROD !!! AT age 57
» *Cox Engine of The Month* Submit your pictures! -August 2016-
» CG on a L'il Wizard
» Bad Weekend For A Wizard.....
» MY FIRST PROP ROD !!! AT age 57
» *Cox Engine of The Month* Submit your pictures! -August 2016-
Page 1 of 2
Permissions in this forum:
You cannot reply to topics in this forum

 Rules
Rules