Log in
Search
Latest topics
» Stealth SB-Xby Admin Yesterday at 8:28 pm
» ST .35 STUNT / VOODOO / ZERO POINT ZERO NITRO
by TD ABUSER Yesterday at 7:45 pm
» SUPERTIGER .15 PROJECT
by TD ABUSER Yesterday at 7:42 pm
» For sale -- Cox Custom Carburetors for Tee Dee engines
by sosam117 Yesterday at 5:23 pm
» WHERE ARE YOU BUYING YOUR FUEL AND GLOW PLUGS...?
by TD ABUSER Yesterday at 4:35 pm
» Waiting for Engines from Ken Enya
by sosam117 Yesterday at 4:33 pm
» Unusual Cox 049 cylinder - Need help identifying
by anm2 Yesterday at 4:12 pm
» Jim Walker Bonanza etc.
by rsv1cox Yesterday at 2:57 pm
» What's the Best Reed for Cox Reed Valve Engines.
by roddie Yesterday at 1:37 pm
» Fuel choice
by 1975 control line guy Fri Aug 30, 2024 4:01 pm
» "Fall S.M.A.L.L." Video 3.
by GallopingGhostler Fri Aug 30, 2024 2:37 pm
» Gifted Fox
by Ken Cook Fri Aug 30, 2024 11:12 am
Cox Engine of The Month
August-2024
balogh's

"Cox TD09 R/C Beast of Burden featuring Kamtechnik head and DIY metallic fuel nipple"

PAST WINNERS
balogh's

"Cox TD09 R/C Beast of Burden featuring Kamtechnik head and DIY metallic fuel nipple"

PAST WINNERS
My Mazda RX-7GSL-SE build log with the occasional balsa inclusion
Page 5 of 10
Page 5 of 10 •  1, 2, 3, 4, 5, 6, 7, 8, 9, 10
 Re: My Mazda RX-7GSL-SE build log with the occasional balsa inclusion
In general rotary’s use more fuel. If it’s been laid up a while then I think your mindset is correct, there will be issues. Fingers crossed!

Cribbs74- Moderator


Posts : 11906
Join date : 2011-10-24
Age : 50
Location : Tuttle, OK
 Re: My Mazda RX-7GSL-SE build log with the occasional balsa inclusion
Back in the mid to late 1970's, I remember the owners discussing gas mileage of the newer sedan rotaries, the RX-2, RX-3, RX-4, etc. They were perhaps comparable to the semi-luxury American Buick, Pontiac, Mercury, Chrysler, etc. The engines were very powerful, the cars zipped along quite nicely with excellent acceleration. The downside that made them unpopular for those wanting economy was their poorer gas mileage when compared with same or similar model with the base 4 cylinder. (Plus, many owners did not keep their cooling systems maintained. Overheating, if mild in a piston engine may still be okay, whereas with the rotary resulted in an expensive rotary seals replacement.)
Gas mileage wise, a good comparison would be say, the more modern small pickup trucks with a four cylinder versus the more powerful V-6. 4 cylinder got around 24 MPG, V-6 around 16 MPG around town. Open highway, they get closer although the V-6 is still more thirsty.
My daughter noticed this driving our 2013 Dodge Journey with 3.6L V-6, versus her Kia with 1600 cc 4 cylinder. She was getting around 28 MPG in her Kia around town, but only 19 MPG with the Journey.
A lighter foot on the gas pedal helps, but it is easier with the more powerful engine to have a heavier foot.


GallopingGhostler- Top Poster


Posts : 5513
Join date : 2013-07-13
Age : 70
Location : Clovis NM or NFL KC Chiefs
 Re: My Mazda RX-7GSL-SE build log with the occasional balsa inclusion
I never did check the mileage on my 13B '85, didn't need to, gas was cheap back then.
My bought new 2007 Honda CR-V gets around 25 MPG consistantly, the 2015 Accord about 34/5 both decent for the service, comfort, and reliability that they provide. I don't even think about the Nissan 350Z, cost almost $40 to fill it up from half a tank last week.
I live in West Virginia but shop in Virginia, a 40/50 mile round trip. Coming home and hitting the hills and ridges of WV I watch the computer gas mileage read-out drop about 3 MPG.
Piped in the gas pickup hose line this afternoon but did not try it. Mark shows up tomorrow will try it then, more eyes on what's going on.

rsv1cox- Top Poster


Posts : 10928
Join date : 2014-08-18
Location : West Virginia
 Re: My Mazda RX-7GSL-SE build log with the occasional balsa inclusion
Hi rsv1cox,
The guys I raced with did all the brake/go stuff. (and passing all the rules)
I was up all night, patching/modifying the fibreglass aerodynamics around it. Before race time.
I miss those days. (I like not grinding fibreglass these days !)
I hope you do not mind my 'Wankel' jokes...
Connecting rod/ piston failures were a common fail, back then.
Good Luck with the test run,
Happy Trails,
My Friends,
Dave

HalfaDave- Platinum Member

- Posts : 609
Join date : 2022-12-06
Location : Oakville, Ontario
 Re: My Mazda RX-7GSL-SE build log with the occasional balsa inclusion
I was up all night, patching/modifying the fibreglass
I love the smell of resin/MEK in the morning..............smells like v-i-c-t-o-r-y!
I love the smell of resin/MEK in the morning..............smells like v-i-c-t-o-r-y!

rsv1cox- Top Poster


Posts : 10928
Join date : 2014-08-18
Location : West Virginia
 Re: My Mazda RX-7GSL-SE build log with the occasional balsa inclusion
Hi rsv1cox,
I had no problems with the 'stop/go' pit guys, I called them 'nuts and bolters'... Fun times
My job was putting a minimum wt fibreglalss shell over 'our' car.
Usually, 15minutes to go. Duct tape is your friend...
Think a F1 or Indy with an inline four banger 2L behind the driver. It was an open wheel 'medium' class.
I am still amazed how much down force you can get from the underside...
I took my grinder and 'thinned' the trailing edges of the wings. (legal to the rules)
They flexed on the straights, under braking, they still stuck good.
From 8th place to close to second, in 3 races.
Paul the driver, had this Galaxie500 and I got to ride with him, checking out the track...
Smooth? I have never felt so safe. Passing Porches like they were standing still...
I asked him, How?
His answer, " I am not driving here, I am three corners ahead"....
Hope you don't mind this story,
20 yrs ago I had to give up and stopped epoxy/polyester resins. I am allergic now. (the hardeners are the bad part)
It is not fun. Take care my friends...
I still have fun,
Dave
P.S. I am enjoying the Wankel ride... Thanks !

HalfaDave- Platinum Member

- Posts : 609
Join date : 2022-12-06
Location : Oakville, Ontario
 Re: My Mazda RX-7GSL-SE build log with the occasional balsa inclusion
I'm not sure of the one that Paul drove, but I bought a used 1963 like this one.
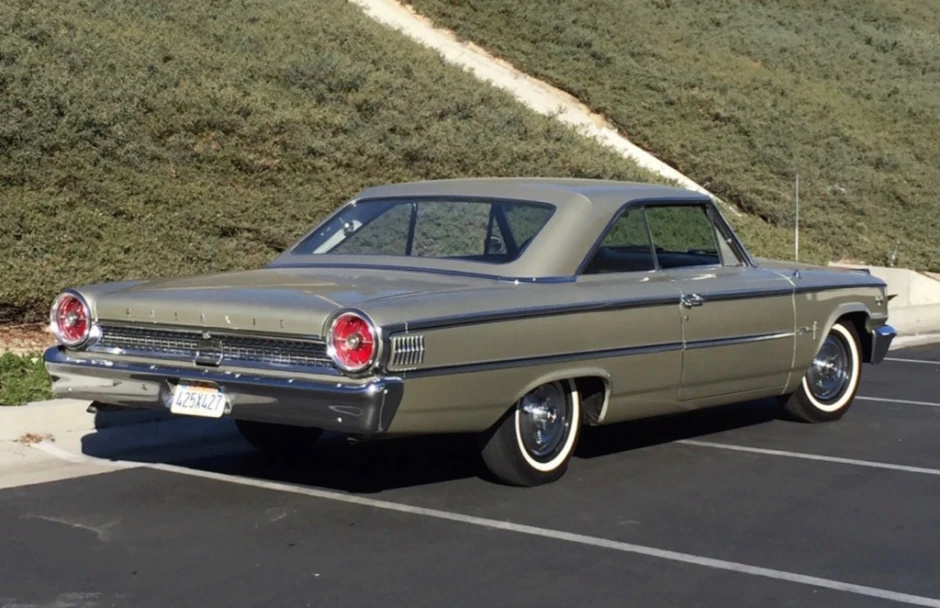
Beautiful thing. Had to have it, an impluse buy. Three speed stick, six cylinder - didn't care it was beautiful. A trophy girlfriend with no other attributes. Owned it/her for 24 hours, returned it the next day.
No luck (expected) on the RX-7. 15 years of nasty gas residue left in the lines from the gas tank in the rear to the engine required a lot of flushing. (Black gas on right.) Even after it started to run clear we installed a final filter then cranked it. Plenty of fuel and spark but no combustion. I suspect fowled fuel injectors. Going to pull the throttle body.

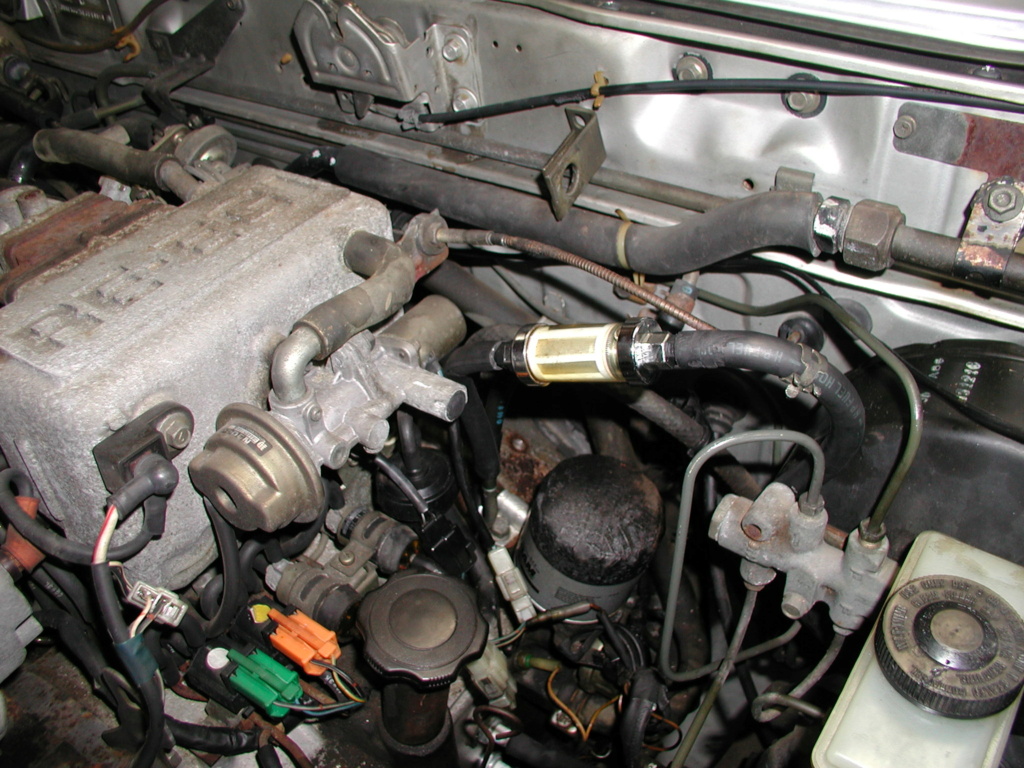
Not working with a Bentley here. Mazda bought on the cheap doing what I do trying to make something out of very little. So far without acknowledging failures I'm batting 100%, but there always is a first time. This is going to take awhile.

Beautiful thing. Had to have it, an impluse buy. Three speed stick, six cylinder - didn't care it was beautiful. A trophy girlfriend with no other attributes. Owned it/her for 24 hours, returned it the next day.
No luck (expected) on the RX-7. 15 years of nasty gas residue left in the lines from the gas tank in the rear to the engine required a lot of flushing. (Black gas on right.) Even after it started to run clear we installed a final filter then cranked it. Plenty of fuel and spark but no combustion. I suspect fowled fuel injectors. Going to pull the throttle body.


Not working with a Bentley here. Mazda bought on the cheap doing what I do trying to make something out of very little. So far without acknowledging failures I'm batting 100%, but there always is a first time. This is going to take awhile.

rsv1cox- Top Poster


Posts : 10928
Join date : 2014-08-18
Location : West Virginia
 Re: My Mazda RX-7GSL-SE build log with the occasional balsa inclusion
thought about you yesterday. I ALMOST followed it to get a pic
a lovely ~mid 80s RX7 in silver slunk past me on the highway commute to work. Just pristine, definitely garage kept and maintained. then I saw the flash of long blonde hair. and realized, if some guy on a motorcycle follows this gal to work, chances are high there will be trouble when it parks
but the car was just spectacular, completely perfect.
those rotaries run great when maintained and driven on salt-free roads.

cstatman- Platinum Member


Posts : 555
Join date : 2021-02-17
Age : 60
Location : San Jose, CA
 Re: My Mazda RX-7GSL-SE build log with the occasional balsa inclusion
cstatman wrote:thought about you yesterday. I ALMOST followed it to get a pic
a lovely ~mid 80s RX7 in silver slunk past me on the highway commute to work. Just pristine, definitely garage kept and maintained. then I saw the flash of long blonde hair. and realized, if some guy on a motorcycle follows this gal to work, chances are high there will be trouble when it parks
but the car was just spectacular, completely perfect.
those rotaries run great when maintained and driven on salt-free roads.
Mark sent me these pictures from a Facebook Marketplace ad in Georgia. The exact same RX-7 that I bought new, he's asking $11,800.
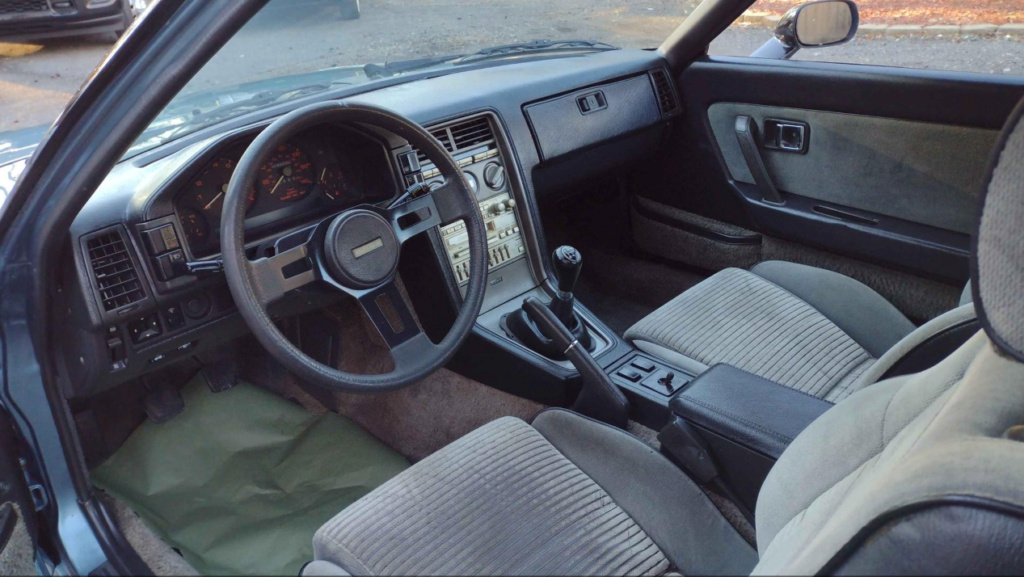
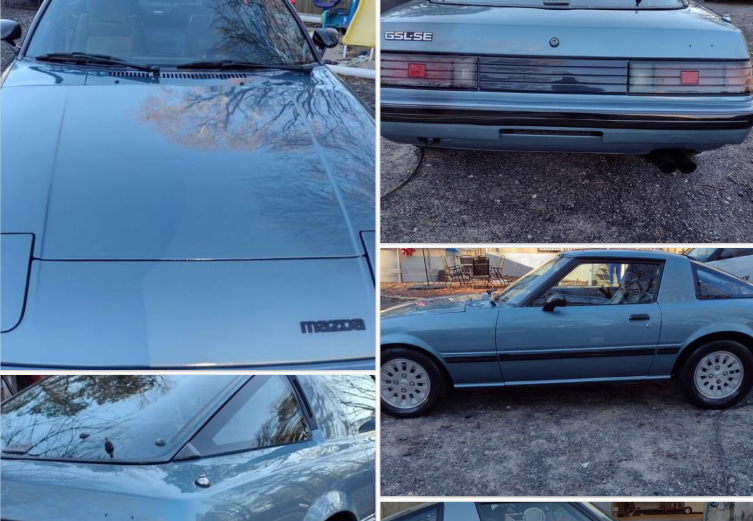
I sold mine, also perfect to a cute little blond name Gina. I still have a copy of the bill of sale. I may have mentioned before that a few months later I tried to buy it back from her.
Wish I had known Betty, the former owner 15 years ago when she parked it. "Care to sell this bucket of bolts?" Would have saved me a lot of trouble.

rsv1cox- Top Poster


Posts : 10928
Join date : 2014-08-18
Location : West Virginia
 Re: My Mazda RX-7GSL-SE build log with the occasional balsa inclusion
Sorry, Bob,
I've owed you this one for a several days now. I've been putting off typing all this out of lazy thumbs.
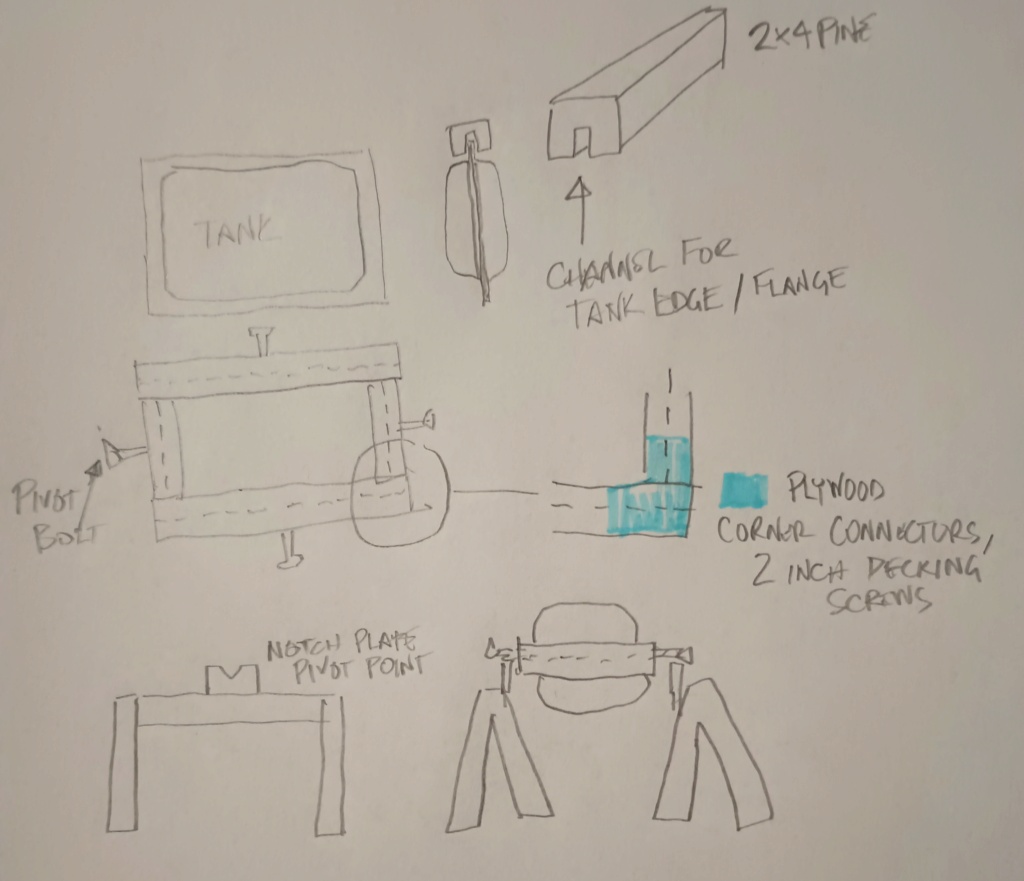
Each time I strip/seal a tank, it goes like this. I build a frame around the four side flanges or seams using 2x4 pine. The pine has a slot cut down into the lumber so the lumber traps the tank. Corners are braced with whatever plywood I have around. The plywood ties the corners of the pine frame so the tank can't shift or drop out of the frame.
Lag screws are run into the frame on all four sides. These lag screws become axles, or pivots. The pivots will sit in V-notch plates screwed into sawhorses. There are four pivots so that the tank can be flipped across two axis as the funk removal, rust removal, and later tank sloshing is performed.
Drain all dead gas (and whatever else you find) from the tank. Mix 1/4 jug of Fantastic 409 with two gallons of boiling hot water. Mixing in the tank is fine...do the hot water first, so the F-409 doesn't become "nullified" by your tank junk. Begin swishing the tank back and forth, and all around on the sawhorses. By using one set of pivots, you will hit four sides of your cuboid tank (say, from front wall, top, back wall, bottom)...switch to the other pivot bolts so you are sloshing across your previous pass (say, from left side wall, top, right side wall, bottom). If the tank appears to be stripped of fuel residue, then your initial degreasing is completed. If not, de-grease again. This time increase to 1/2 bottle of F-409. This is important because acid won't cut through grease/petroleum effectively. Don't worry about rust yet...getting the greasy junk out is the goal right here. You know it is clean/degreased if any later quick-rinse HOT water doesn't have an oily sheen floating on it.
Muriatic acid (pool acid from Lowe's works fine) is sloshed in the tank to remove rust. Really bad tanks will have a hand full of old nuts and bolts tossed in as a "scrubber." The hardware can be chased out later with a magnet-retriever before coating the tank. This may actually cause pinholes in the tank. Unless the tank metal is really thin, this only makes minimizing the mess a bit more effort. Straight, strong, clean metal won't be eaten by the acid very quickly... however, rust sure is! So is any zinc plating. But the new exterior paint job applied later will protect the outside, and your tank coating will protect the inside.
Once the rust removal is completed, a fresh water rinse is performed to neutralize/remove any acid. Then another rinse...just to be sure! Again, sample the waste water for floating oil sheen...just to be sure.
Methanol is used to dry out the water...a half-quart is used to mix/absorb water, then dumped out. Another half-quart is used again, to ensure no water exists inside. This also helps degrease the tank.
Then a shop vac is used to blow air into the tank to dry it. Use the exhaust side so you aren't sucking alcohol into a sparking, old, shop vac (prevents BOOM!). Ensure you cleaned the shop vac pick-up hose so you aren't blowing in a bunch of trash. An airline from a shop compressor can also be used. Just move the airline within the tank from time to time. I like to set the tank in the sun while I do the drying part. Solar energy helps evaporate any water, and the moving shop air displaces the moisture-laden air. Do not be alarmed by minor/thin flash-rust, or by the "blackened" appearance of the metal (it may appear to be like black-oxide hardware). Minor flash rust will act a "toothing" agent. However, minor greasy patches will surely keep the sealer from adhering! At this point, you should NOT observe a "gassy" odor in the tank.
Note that the switch from "acid bath to water bath to dry" is back to back, on a day you can invest in the whole process...otherwise the tank will flash-rust. If it flash rusts significantly, start over.
Once dry, investigate the tank for heavy flash rust. If the tank appears to be acceptably clean, then begin the coating process.
It may require several passes through each of the cleaning phases. This is especially true if the tank has significant varnishing/gooping.
I use rubber pipe caps for capping off the big fuel inlet, or a piece of large diameter fuel hose with an appropriate can in the hose as a plug. Smaller lines/vents get capped off with a short fuel line and bolt. I try to recognize the tank's natural venting, and will. use it to vent the tank while acid-prepping the tank. Clear vinyl hose is used so I can see when my solutions are going "up the vent," and into a 2-liter soda bottle set higher than the tank in the sawhorses for recovery/re-use. I've used 1/16" steel plate and cork sheet to block off sending unit holes. Plywood is a good backer for the metal.plate so even pressure is applied to the cork.at.the sealing surface. Motorcycle filler holes get blocked by a similar plate, but with ONE bolt hole in the middle, and a T-bar that (when loose) slips into the tank. The bolt gets tightened to draw the T-bar up against the inside of the tank, this trapping the plate and cork gasket against the sealing surface the gas cap normally seals against.
The hardest part is discovering where baffles, pickup tubes and vent lines run inside the tank. The worst tank baffles were in a VW Bug tank...they prevent fuel sloshing back and forth within the tank, as well as any sealer!
Pickup/vent lines need to be blown clear with a bit of air as the tank flips and flops in the sawhorses so they don't get plugged up. Old motorcycle control cables can also be used to roto-rooter the lines clear before they plug up during the sealing cycle.
Pickup screens will plug completely. Cut the tank open close to the pickup and remove the screen. A patch can be cut from scrap sheet steel and secured with small sheet metal screws, pop-rivets or solder (or any combination of the three). The patch will be sealed by the coating later. I used a 1-1/4 inch hole saw to cut the Honda Shadow bottom tank open at the pickup screen area, then the screen was removed with pliers. The patch was propane-torch soldered into place using rosin-flux solder (not acid-flux, with a 1/4 inch overlap all the way around, then pressure tested to 30 psi. The patch held, so I continued with sealing the tank.
Any pinholes can be soldered closed, and bigger holes patched as above, or even using cloth patches. I soaked 1" square gun cleaning patches in Por-15 to patch a few holes in the bottom of my TR6 tank, then once the patches cured, I sealed the tank as normal. Those holes were effectively "double-sealed" from both inside and outside.
I'm available for questions. I hope this helps.
I've owed you this one for a several days now. I've been putting off typing all this out of lazy thumbs.

Each time I strip/seal a tank, it goes like this. I build a frame around the four side flanges or seams using 2x4 pine. The pine has a slot cut down into the lumber so the lumber traps the tank. Corners are braced with whatever plywood I have around. The plywood ties the corners of the pine frame so the tank can't shift or drop out of the frame.
Lag screws are run into the frame on all four sides. These lag screws become axles, or pivots. The pivots will sit in V-notch plates screwed into sawhorses. There are four pivots so that the tank can be flipped across two axis as the funk removal, rust removal, and later tank sloshing is performed.
Drain all dead gas (and whatever else you find) from the tank. Mix 1/4 jug of Fantastic 409 with two gallons of boiling hot water. Mixing in the tank is fine...do the hot water first, so the F-409 doesn't become "nullified" by your tank junk. Begin swishing the tank back and forth, and all around on the sawhorses. By using one set of pivots, you will hit four sides of your cuboid tank (say, from front wall, top, back wall, bottom)...switch to the other pivot bolts so you are sloshing across your previous pass (say, from left side wall, top, right side wall, bottom). If the tank appears to be stripped of fuel residue, then your initial degreasing is completed. If not, de-grease again. This time increase to 1/2 bottle of F-409. This is important because acid won't cut through grease/petroleum effectively. Don't worry about rust yet...getting the greasy junk out is the goal right here. You know it is clean/degreased if any later quick-rinse HOT water doesn't have an oily sheen floating on it.
Muriatic acid (pool acid from Lowe's works fine) is sloshed in the tank to remove rust. Really bad tanks will have a hand full of old nuts and bolts tossed in as a "scrubber." The hardware can be chased out later with a magnet-retriever before coating the tank. This may actually cause pinholes in the tank. Unless the tank metal is really thin, this only makes minimizing the mess a bit more effort. Straight, strong, clean metal won't be eaten by the acid very quickly... however, rust sure is! So is any zinc plating. But the new exterior paint job applied later will protect the outside, and your tank coating will protect the inside.
Once the rust removal is completed, a fresh water rinse is performed to neutralize/remove any acid. Then another rinse...just to be sure! Again, sample the waste water for floating oil sheen...just to be sure.
Methanol is used to dry out the water...a half-quart is used to mix/absorb water, then dumped out. Another half-quart is used again, to ensure no water exists inside. This also helps degrease the tank.
Then a shop vac is used to blow air into the tank to dry it. Use the exhaust side so you aren't sucking alcohol into a sparking, old, shop vac (prevents BOOM!). Ensure you cleaned the shop vac pick-up hose so you aren't blowing in a bunch of trash. An airline from a shop compressor can also be used. Just move the airline within the tank from time to time. I like to set the tank in the sun while I do the drying part. Solar energy helps evaporate any water, and the moving shop air displaces the moisture-laden air. Do not be alarmed by minor/thin flash-rust, or by the "blackened" appearance of the metal (it may appear to be like black-oxide hardware). Minor flash rust will act a "toothing" agent. However, minor greasy patches will surely keep the sealer from adhering! At this point, you should NOT observe a "gassy" odor in the tank.
Note that the switch from "acid bath to water bath to dry" is back to back, on a day you can invest in the whole process...otherwise the tank will flash-rust. If it flash rusts significantly, start over.
Once dry, investigate the tank for heavy flash rust. If the tank appears to be acceptably clean, then begin the coating process.
It may require several passes through each of the cleaning phases. This is especially true if the tank has significant varnishing/gooping.
I use rubber pipe caps for capping off the big fuel inlet, or a piece of large diameter fuel hose with an appropriate can in the hose as a plug. Smaller lines/vents get capped off with a short fuel line and bolt. I try to recognize the tank's natural venting, and will. use it to vent the tank while acid-prepping the tank. Clear vinyl hose is used so I can see when my solutions are going "up the vent," and into a 2-liter soda bottle set higher than the tank in the sawhorses for recovery/re-use. I've used 1/16" steel plate and cork sheet to block off sending unit holes. Plywood is a good backer for the metal.plate so even pressure is applied to the cork.at.the sealing surface. Motorcycle filler holes get blocked by a similar plate, but with ONE bolt hole in the middle, and a T-bar that (when loose) slips into the tank. The bolt gets tightened to draw the T-bar up against the inside of the tank, this trapping the plate and cork gasket against the sealing surface the gas cap normally seals against.
The hardest part is discovering where baffles, pickup tubes and vent lines run inside the tank. The worst tank baffles were in a VW Bug tank...they prevent fuel sloshing back and forth within the tank, as well as any sealer!
Pickup/vent lines need to be blown clear with a bit of air as the tank flips and flops in the sawhorses so they don't get plugged up. Old motorcycle control cables can also be used to roto-rooter the lines clear before they plug up during the sealing cycle.
Pickup screens will plug completely. Cut the tank open close to the pickup and remove the screen. A patch can be cut from scrap sheet steel and secured with small sheet metal screws, pop-rivets or solder (or any combination of the three). The patch will be sealed by the coating later. I used a 1-1/4 inch hole saw to cut the Honda Shadow bottom tank open at the pickup screen area, then the screen was removed with pliers. The patch was propane-torch soldered into place using rosin-flux solder (not acid-flux, with a 1/4 inch overlap all the way around, then pressure tested to 30 psi. The patch held, so I continued with sealing the tank.
Any pinholes can be soldered closed, and bigger holes patched as above, or even using cloth patches. I soaked 1" square gun cleaning patches in Por-15 to patch a few holes in the bottom of my TR6 tank, then once the patches cured, I sealed the tank as normal. Those holes were effectively "double-sealed" from both inside and outside.
I'm available for questions. I hope this helps.
944_Jim- Diamond Member


Posts : 2014
Join date : 2017-02-08
Age : 59
Location : NE MS
 Re: My Mazda RX-7GSL-SE build log with the occasional balsa inclusion
Thanks Jim, I saved it to my Wordpad.
I will have to remove the tank and clean it, no choice. They are just to expensive to replace. Stand-by
New problem, the radio is blowing fuses........... Electrical = clean not greasy -- Bob
I will have to remove the tank and clean it, no choice. They are just to expensive to replace. Stand-by
New problem, the radio is blowing fuses...........

rsv1cox- Top Poster


Posts : 10928
Join date : 2014-08-18
Location : West Virginia
 Re: My Mazda RX-7GSL-SE build log with the occasional balsa inclusion
Bob, if you have a laptop handy, it may be worth picking up one of those $25 USB endoscope cameras.
Try to find one with a 6 ft cord. It can be taped to a clothes hanger so you can "scope" the tank insides as you clean it.
Best would be to be able to see all over inside through the float unit hole.
I never used a whole gallon of acid in a tank. I also keep boxes of baking powder nearby to neutralize any spilled acid. I also neutralize the waste stream prior to disposal.
_________________
Never enough time to build them all...always enough time to smash them all!

944_Jim- Diamond Member


Posts : 2014
Join date : 2017-02-08
Age : 59
Location : NE MS
 Re: My Mazda RX-7GSL-SE build log with the occasional balsa inclusion
944_Jim wrote:Bob, if you have a laptop handy, it may be worth picking up one of those $25 USB endoscope cameras.
Try to find one with a 6 ft cord. It can be taped to a clothes hanger so you can "scope" the tank insides as you clean it.
Best would be to be able to see all over inside through the float unit hole.
I never used a whole gallon of acid in a tank. I also keep boxes of baking powder nearby to neutralize any spilled acid. I also neutralize the waste stream prior to disposal.
Thanks Jim, My son has one and used it to look inside the tank when I drained it. Very rusty in there.
Bleeding brakes
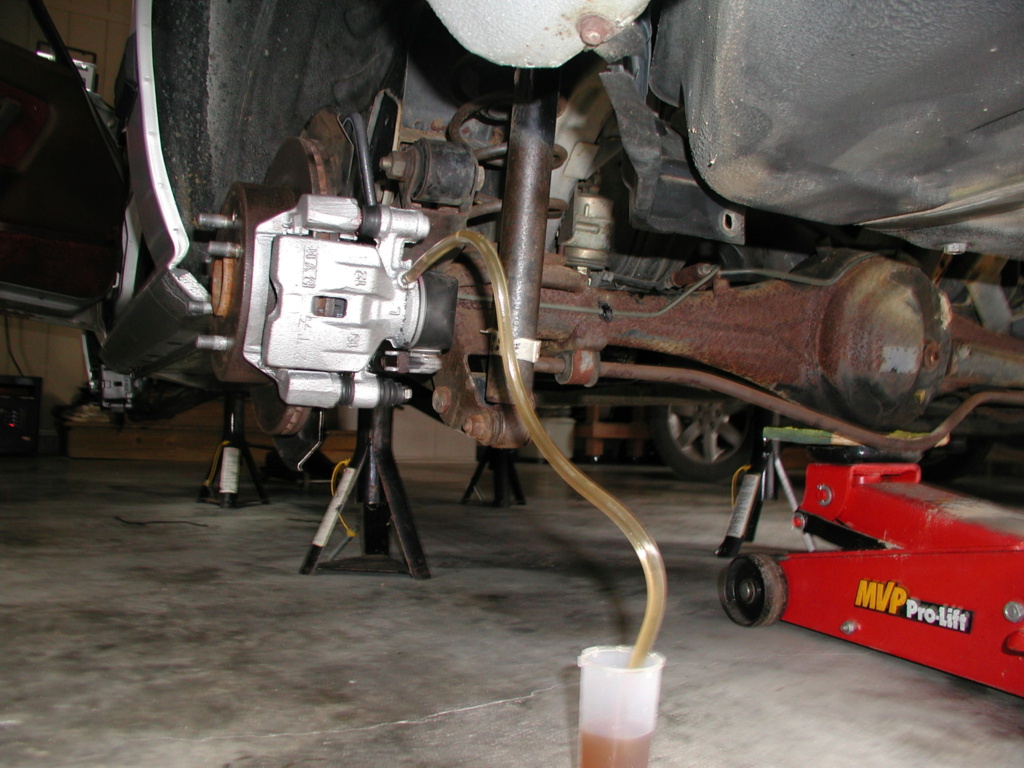
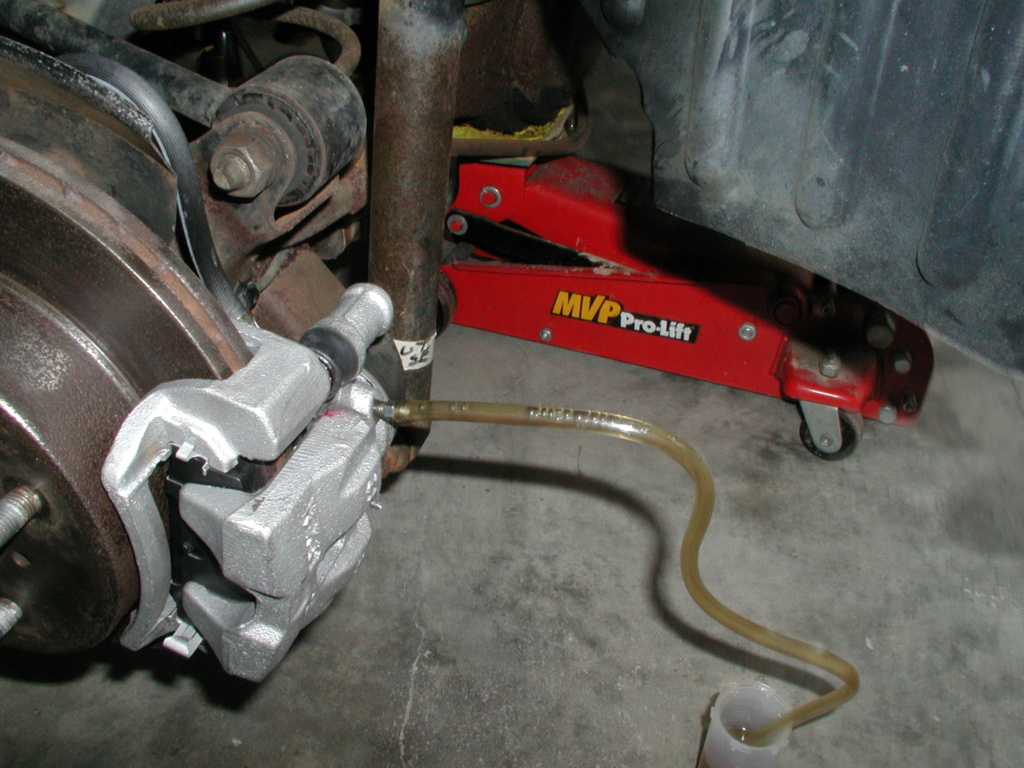

Can't find new/repro rotors and Mazda doesn't support these anymore. I will have to have these turned. Still plenty of metal there.

rsv1cox- Top Poster


Posts : 10928
Join date : 2014-08-18
Location : West Virginia
 Re: My Mazda RX-7GSL-SE build log with the occasional balsa inclusion
Looks like it is coming along, Bob, looks good. Some time back, I remembered something about manufacturers required to stock 10 years worth of parts. 3rd parties will continue to make parts if profitable.
That old of RX is rare enough on the highway now (most relegated to salvage yards and some recycled as scrap metal), that many stocks of parts have been exhausted.
You definitely have a collector car now.
That old of RX is rare enough on the highway now (most relegated to salvage yards and some recycled as scrap metal), that many stocks of parts have been exhausted.
You definitely have a collector car now.

GallopingGhostler- Top Poster


Posts : 5513
Join date : 2013-07-13
Age : 70
Location : Clovis NM or NFL KC Chiefs
 Re: My Mazda RX-7GSL-SE build log with the occasional balsa inclusion
It's not exactly a Corvette but it does have a following. The RX-7 forum has a membership that the CEF could only hope for.
Going to finish bleeding the brakes today. Got fluid to all four calipers but air bubbles remain. Worst one was the right front, fluid came out like heavy cream.
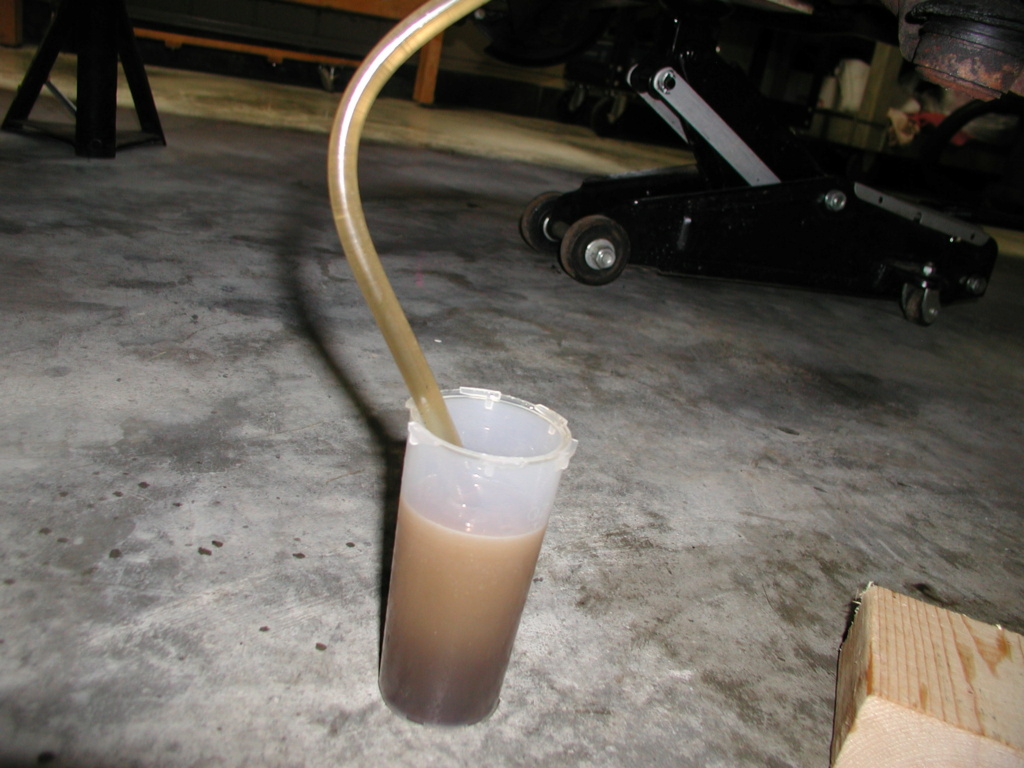
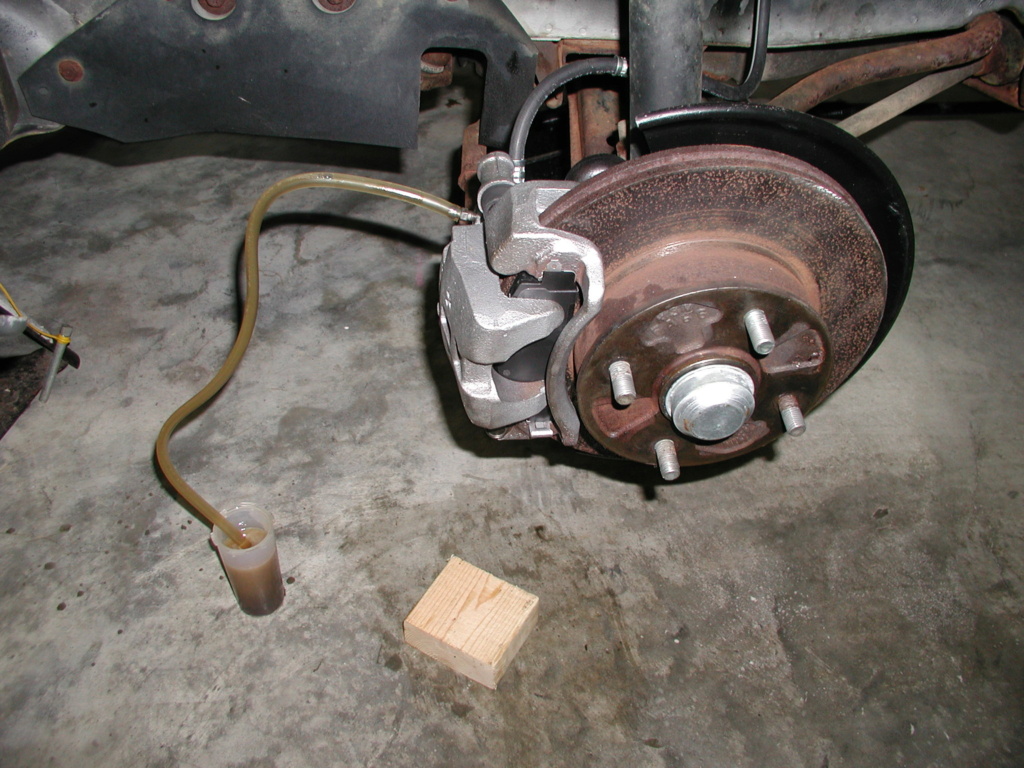
My West Virginia redneck helper. Effective and he works cheap.

Going to finish bleeding the brakes today. Got fluid to all four calipers but air bubbles remain. Worst one was the right front, fluid came out like heavy cream.


My West Virginia redneck helper. Effective and he works cheap.


rsv1cox- Top Poster


Posts : 10928
Join date : 2014-08-18
Location : West Virginia
 Re: My Mazda RX-7GSL-SE build log with the occasional balsa inclusion
Bob,
If you are still having problems changing/bleeding, may I recommend a pressure bleeder? I built mine with a 1 qt plant sprayer, some vinyl hose, a screw-in tire valve, and a spare master cylinder cover. This makes for a quick, effective, one-man operation. I also made adapter plates for the clutch master,.and a couple of my long-term keepers. The set up works just fine with "silly-cone" brake fluid as well as DOT3.
Oh, and I use DOT3 only in ABS-equipped vehicles. The purple-stuff goes in everything else at brake system overhaul time (motorcycles, TR6x2, Porsche 944).
I can post pictures of mine in pieces and jigged up on my FIL's TR6 this weekend if you like.
_________________
Never enough time to build them all...always enough time to smash them all!

944_Jim- Diamond Member


Posts : 2014
Join date : 2017-02-08
Age : 59
Location : NE MS
 Re: My Mazda RX-7GSL-SE build log with the occasional balsa inclusion
Thanks Jim, pictures are always nice.
I used the "silly-cone" purple stuff in my MG rebuild. Worked well, went together with no problems. I rebuilt each caliper replaced the master cylinder, and used new rotors all the way around. MG has great support in aftermarket parts, and cheap most are made in India . This Mazda, a different story.
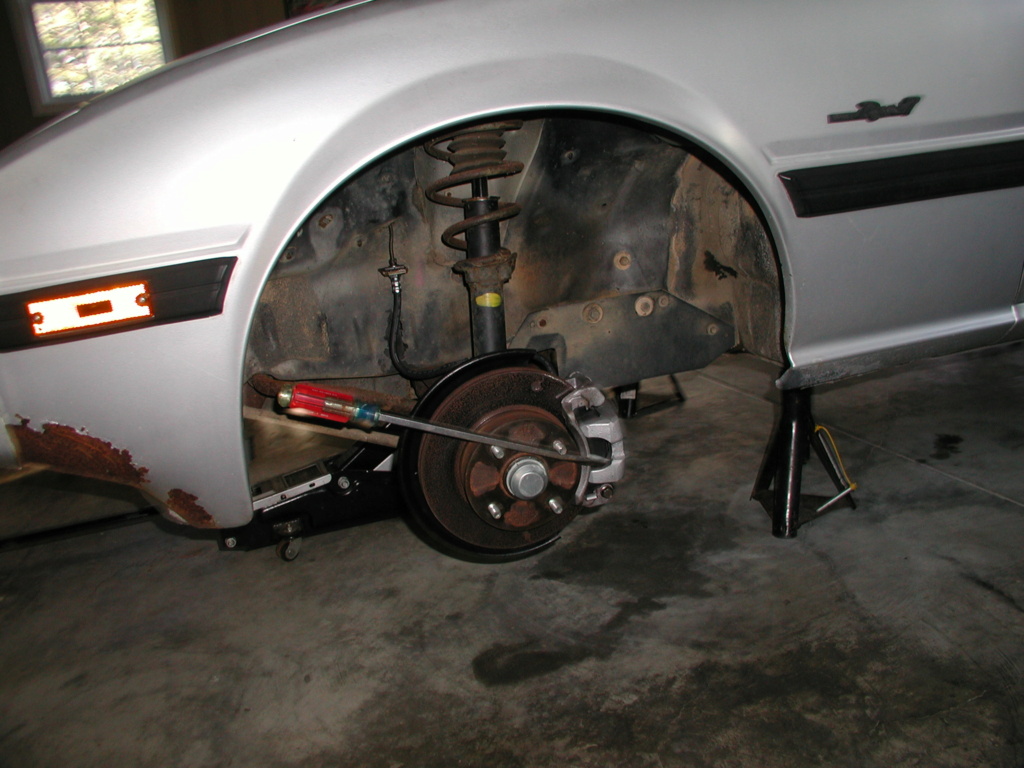
I have Mark's vacuum bleeder but don't trust it. Used my WV helper instead. Same thing only I'm a jumping jack pumping the brake, then locking it and checking the outcome while refilling the master cylinder. Also I can only gauge what's in the line to the cup, bubbles or not.
Getting clear fluid out of each caliper but still a soft pedal. Checked each wheel, front left drags alot, rest somewhat. 20/30 miles will run them in. Nothing is leaking. Waiting for Mark.
Can't find correct GSL-SE rotors. They are different from the GSL RX-7. Bigger. I may have to have these turned.


rsv1cox- Top Poster


Posts : 10928
Join date : 2014-08-18
Location : West Virginia
 Re: My Mazda RX-7GSL-SE build log with the occasional balsa inclusion
[quote="rsv1cox"]
Getting clear fluid out of each caliper but still a soft pedal. Checked each wheel, front left drags alot, rest somewhat. 20/30 miles will run them in. Nothing is leaking. Waiting for Mark.
Just a quick thought, try putting nuts on the rotors to hold them solidly to the hubs, maybe the soft pedal is caused by the rotors moving slightly when applying brake pressure? Just a thought.

pman1111- Silver Member

- Posts : 95
Join date : 2022-01-15
 Re: My Mazda RX-7GSL-SE build log with the occasional balsa inclusion
rsv1cox wrote:
Getting clear fluid out of each caliper but still a soft pedal. Checked each wheel, front left drags alot, rest somewhat. 20/30 miles will run them in. Nothing is leaking. Waiting for Mark.
You may want to check any/all brake "hoses" Robert. They can fail (bulge/balloon) without leaking; which could be causing a soft pedal-feel.
 Re: My Mazda RX-7GSL-SE build log with the occasional balsa inclusion
Thanks guys, but I have touched those bases. New brake flex hoses all-around. But, please keep those comments coming.
Haven't heard from Rod, CEF's master mechanic though. So I must either be doing something all right, or all wrong. Perhaps the latter. He's off to NZ on vacation having fun while I'm in stuff up to my elbows.
Disregard the dribble on the fenders interior, penetrating oil overflow on the fitting. Not to worry, new coil-overs will be installed and the whole interior fender wells detailed. I'm at the very beginning of a long process. Took me six years to do my Corvette.
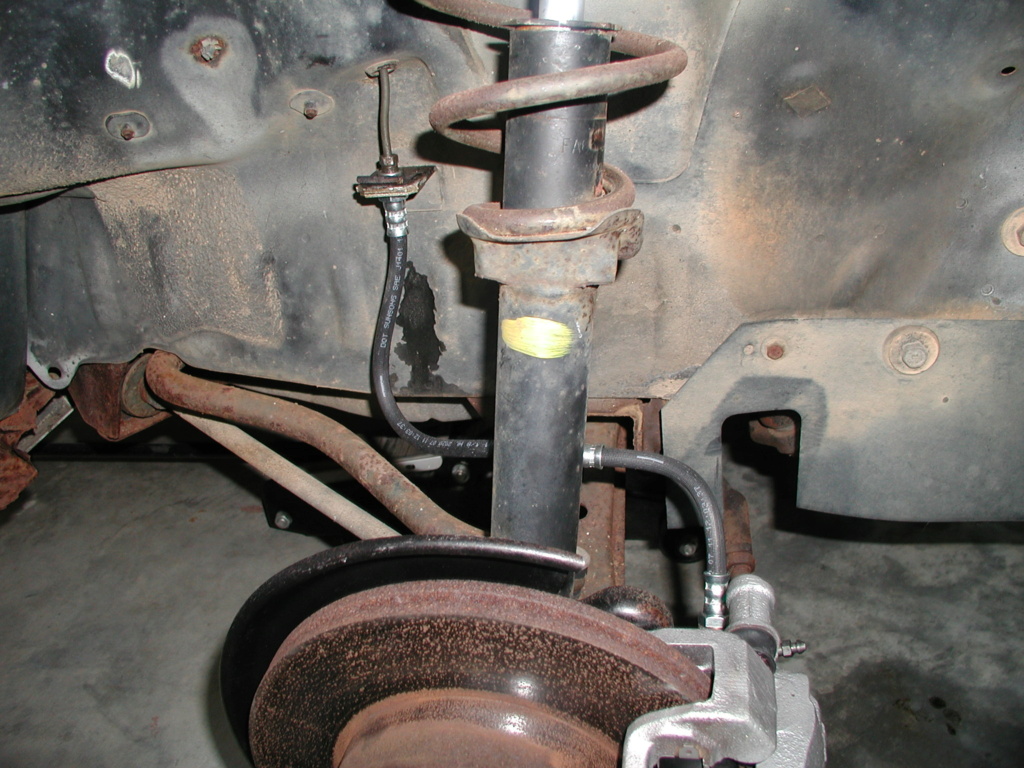
Got sick of looking at the rusty spot (picture above). Electric disk grinder and Rustoleum at least arrests it. Whole car will be sanded. Thankfully no rust through.

Haven't heard from Rod, CEF's master mechanic though. So I must either be doing something all right, or all wrong. Perhaps the latter. He's off to NZ on vacation having fun while I'm in stuff up to my elbows.
Disregard the dribble on the fenders interior, penetrating oil overflow on the fitting. Not to worry, new coil-overs will be installed and the whole interior fender wells detailed. I'm at the very beginning of a long process. Took me six years to do my Corvette.

Got sick of looking at the rusty spot (picture above). Electric disk grinder and Rustoleum at least arrests it. Whole car will be sanded. Thankfully no rust through.


rsv1cox- Top Poster


Posts : 10928
Join date : 2014-08-18
Location : West Virginia
 Re: My Mazda RX-7GSL-SE build log with the occasional balsa inclusion
Bob,
Just as you describe, I have never gotten a good bleed using vacuum on bleeder screws either.
I do want to try the one-way check valve bleeders some time, but suspect they will work best with pressure bleeding as they can still leak past the threads as normal ones do.
The quick and skinny, but not cheap:
I'll probably buy a Motive bleeder set up for the two Ford Focii I maintain. I like the idea of commercially made adapters/caps as long as I have multiples of the same vehicle. But since I'm cheap, I won't buy a Motive adapter for each single vehicle type. Therefore, I'd build adapters for the rest of the fleet.
https://www.motiveproducts.com/collections/brake-bleeder-kits
The quick and skinny...and cheap (my current set up):
http://faculty.ccp.edu/faculty/dreed/Campingart/jettatech/bleeder/index.htm
I'll try to get pictures of mine later tonight, or tomorrow. Mine won't be a direct copy, but effectively the same thing. Please note I built mine for Girling hydraulics, and a chain/plate for other master cylinders (Porsche, Ford Windstar). But the overall game plan is the same as "quick and skinny, and cheap"
I won't ever try to Mity-Vac a brake system again, and I bought one primarily for brake work close to thirty years ago!
_________________
Never enough time to build them all...always enough time to smash them all!

944_Jim- Diamond Member


Posts : 2014
Join date : 2017-02-08
Age : 59
Location : NE MS
 Re: My Mazda RX-7GSL-SE build log with the occasional balsa inclusion
Looking forward to seeing it Jim.
Two man is best. Mark and I have done many, '59 Corvette, probably his '65 Mustang and Spitfire but I don't remember them, my MG's and now this Mazda.
I appreciate this old car, lost my wife and two dogs, nothing left to gain my attention in this remote section of West Virginia.

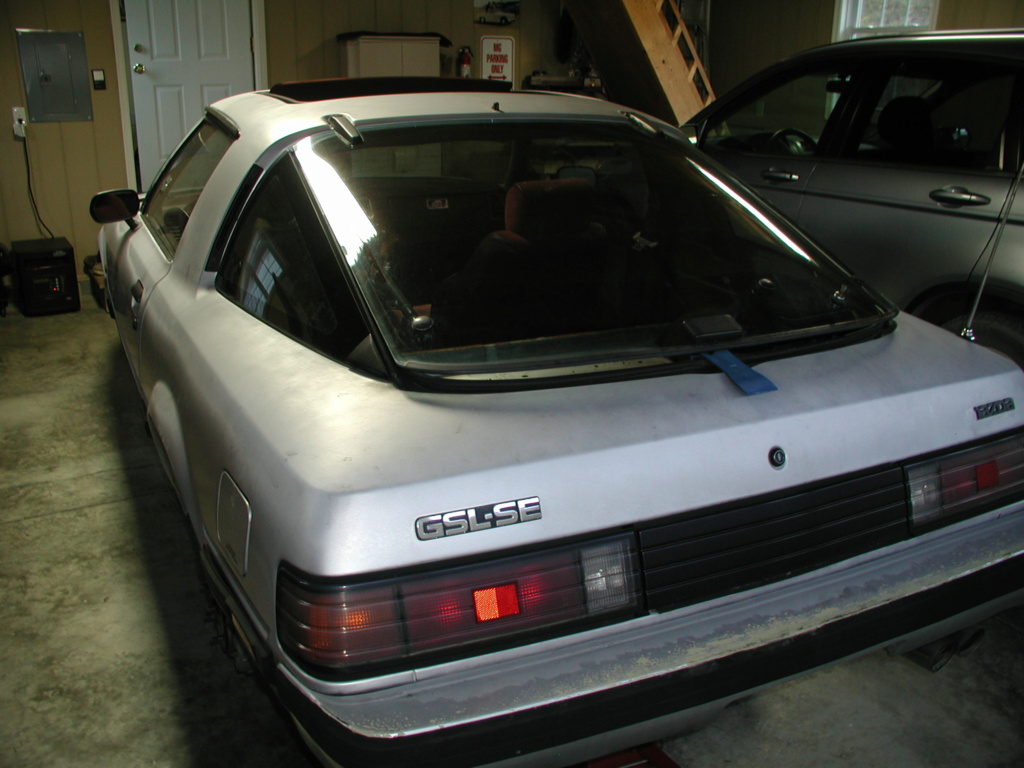
Workbench/garage gets cleaned after every day, coveralls tossed in the washing machine and I get dunked in the shower. Come-on Springtime.
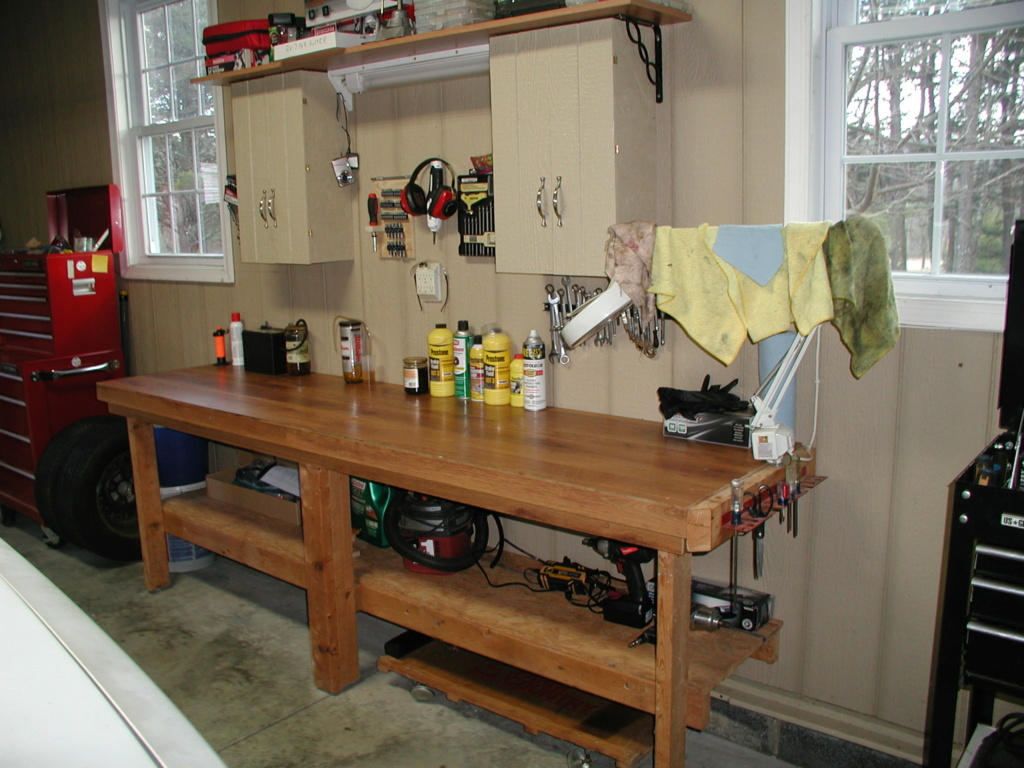
Two man is best. Mark and I have done many, '59 Corvette, probably his '65 Mustang and Spitfire but I don't remember them, my MG's and now this Mazda.
I appreciate this old car, lost my wife and two dogs, nothing left to gain my attention in this remote section of West Virginia.


Workbench/garage gets cleaned after every day, coveralls tossed in the washing machine and I get dunked in the shower. Come-on Springtime.


rsv1cox- Top Poster


Posts : 10928
Join date : 2014-08-18
Location : West Virginia
 Re: My Mazda RX-7GSL-SE build log with the occasional balsa inclusion
Hey Bob, I can tell from the state of your workshop what an awesome job end to end you will/are doing of that Mazda. That is the way to be able to work and get things done properly by investing the little bit of time into your workshop organisation and cleanliness, it reflects in the jobs that come out of the workshop. As a super villain once said "Impressive. Most Impressive" 

GaryB
'Yabby'

GaryB
'Yabby'

Yabby- Platinum Member


Posts : 711
Join date : 2021-06-08
Location : Yorke Peninsula South Australia
 Re: My Mazda RX-7GSL-SE build log with the occasional balsa inclusion
My luck ran out along with the brake fluid. Out of the master cylinder that is. 
Found a puddle on the garage floor yesterday evening. All my pumping finally killed the seals.
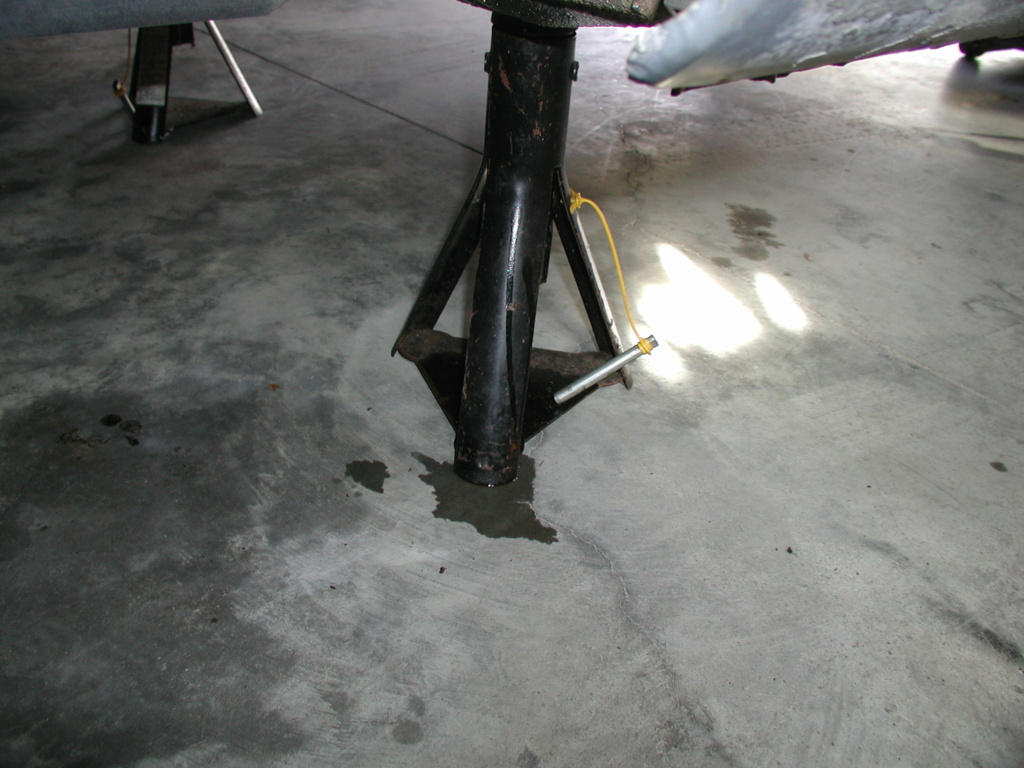
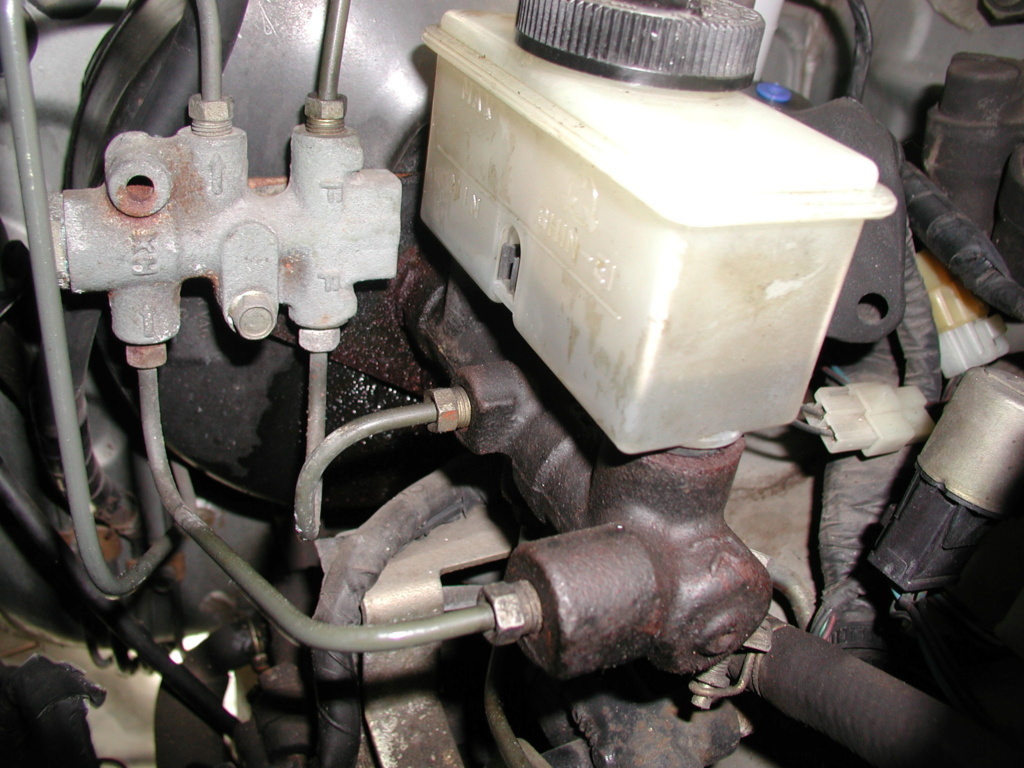
Just to complicate - Mazda attached the four-way bracket to the master cylinder studs. Aligning everything and holding pressure against the plunger...........try to spin on nuts. Couple of hours for a ten minute job.
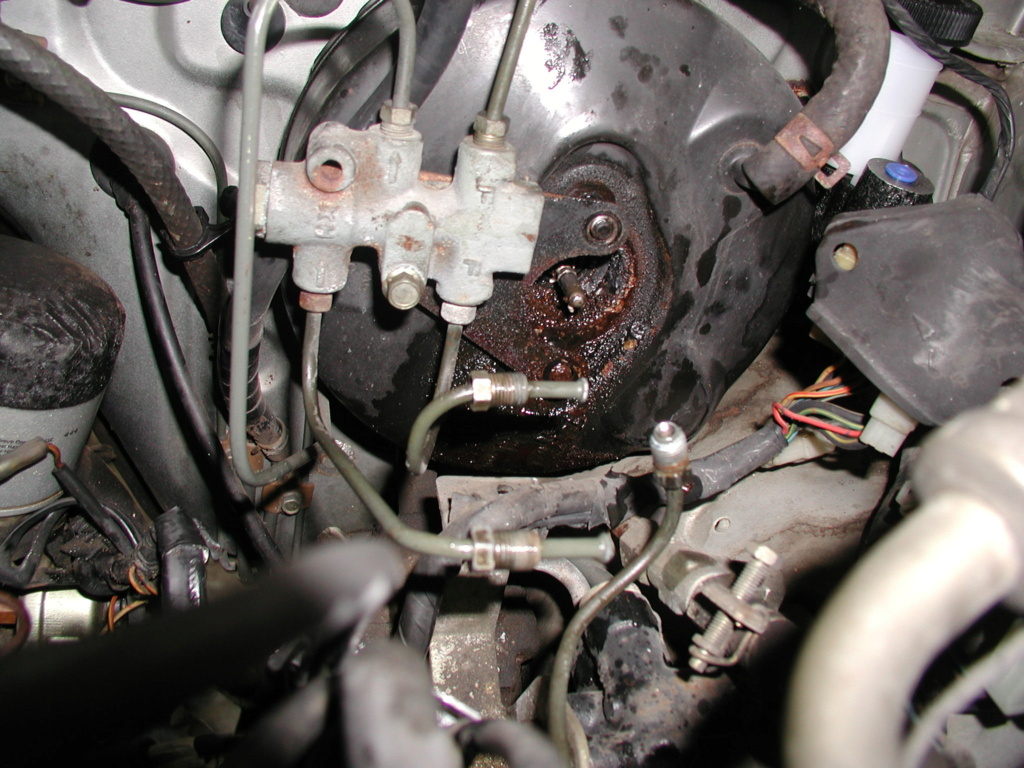
Booster entrance got cleaned. Simple Green, brushes, microfibre towel, vacuum cleaner suction.
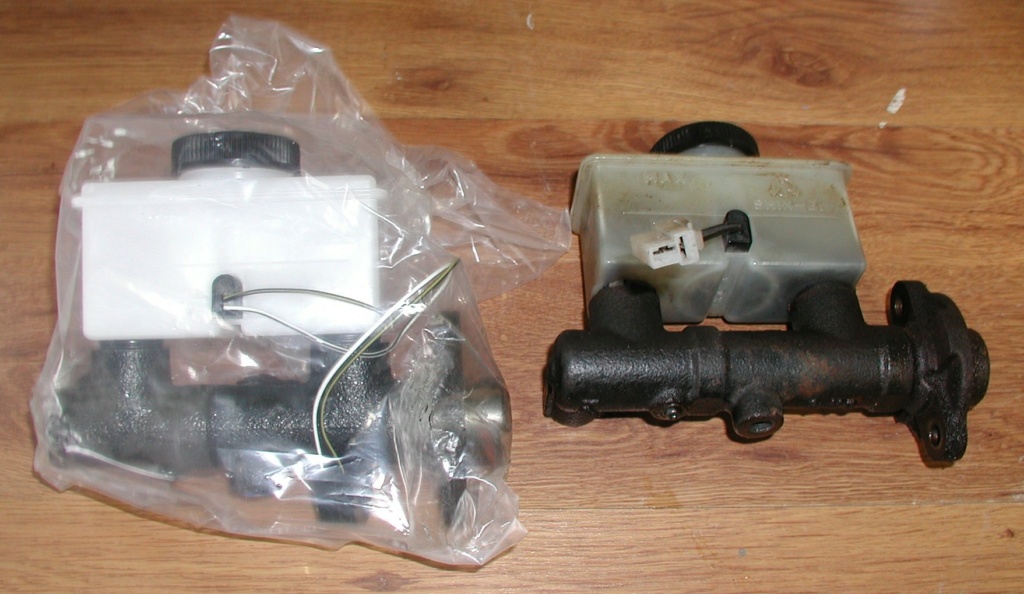
Got out the reproduction (No max/min marks.) Installed it this morning. Two hours of finger spinning nuts in impossible to get at locations. A magnet retrieved the get-aways.

Found a puddle on the garage floor yesterday evening. All my pumping finally killed the seals.


Just to complicate - Mazda attached the four-way bracket to the master cylinder studs. Aligning everything and holding pressure against the plunger...........try to spin on nuts. Couple of hours for a ten minute job.

Booster entrance got cleaned. Simple Green, brushes, microfibre towel, vacuum cleaner suction.

Got out the reproduction (No max/min marks.) Installed it this morning. Two hours of finger spinning nuts in impossible to get at locations. A magnet retrieved the get-aways.


rsv1cox- Top Poster


Posts : 10928
Join date : 2014-08-18
Location : West Virginia
 Re: My Mazda RX-7GSL-SE build log with the occasional balsa inclusion
Yesterday was a very good day. Mark over and we got the three major jobs done.
Brakes bled the old fashioned way and working great.
Clutch master and slave cylinders installed. No easy job.
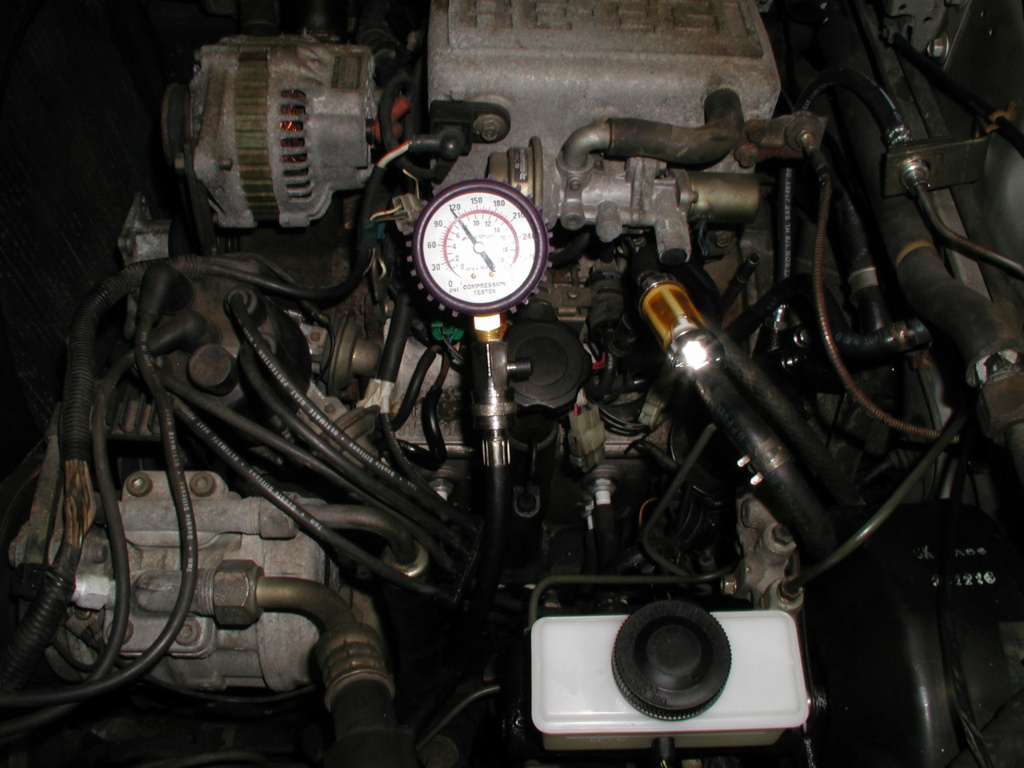
And, rotor compression tested surprisingly great.
We had sweated this one. Bad compression means major bucks. 75 psi or less these wankels are not going to start. 75-100 is acceptable. 100 and above great. We were testing around 112 psi.
Mark did the clutch master and slave install. Not sure how he did it. Impossible locations to get at. Finally on the master we just unscrewed the top stud from the body, passed it through the firewall and I screwed it back on engine side with long nosed pliers. Then Mark spun the nut on with his fingers and tightened with a flex head wrench.
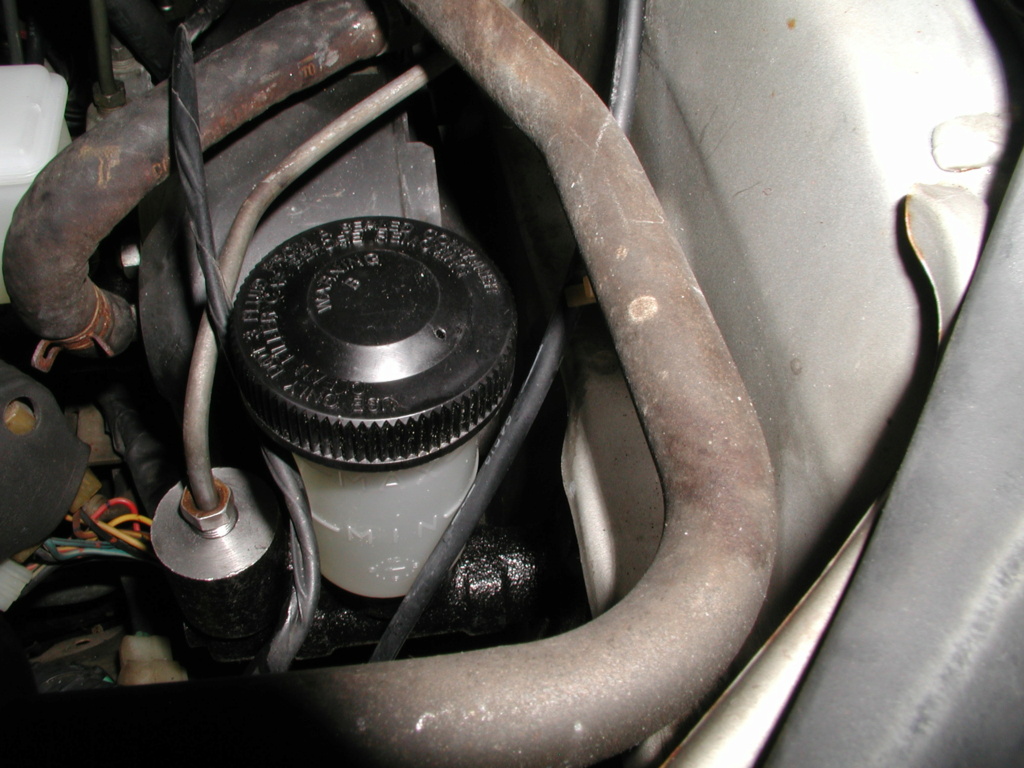
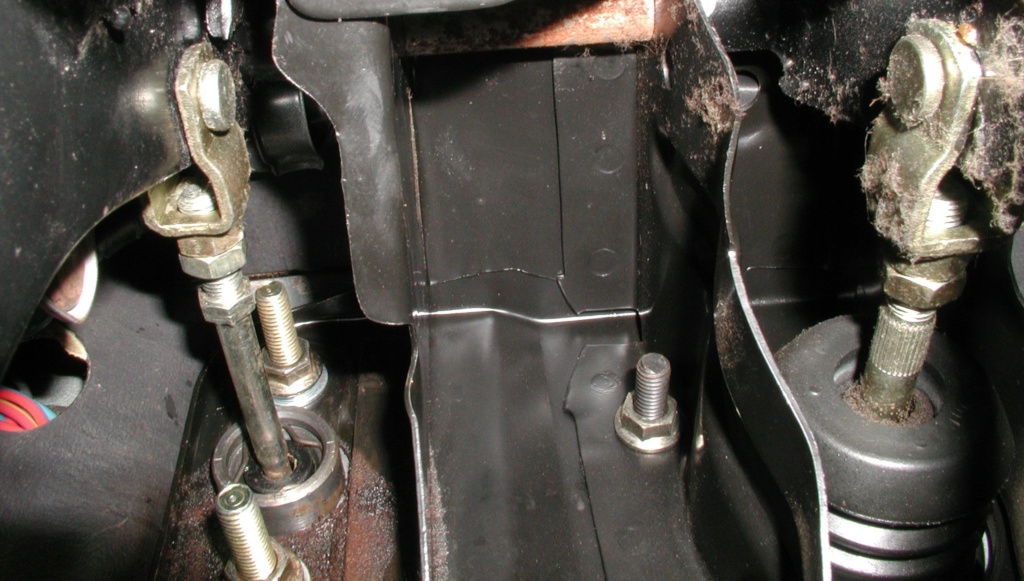
For you clutchless drivers, clutch is on the left.... Is anybody reading this stuff?
Brakes bled the old fashioned way and working great.
Clutch master and slave cylinders installed. No easy job.
And, rotor compression tested surprisingly great.
We had sweated this one. Bad compression means major bucks. 75 psi or less these wankels are not going to start. 75-100 is acceptable. 100 and above great. We were testing around 112 psi.

Mark did the clutch master and slave install. Not sure how he did it. Impossible locations to get at. Finally on the master we just unscrewed the top stud from the body, passed it through the firewall and I screwed it back on engine side with long nosed pliers. Then Mark spun the nut on with his fingers and tightened with a flex head wrench.


For you clutchless drivers, clutch is on the left.... Is anybody reading this stuff?

rsv1cox- Top Poster


Posts : 10928
Join date : 2014-08-18
Location : West Virginia
Page 5 of 10 •  1, 2, 3, 4, 5, 6, 7, 8, 9, 10
 Similar topics
» TD-3 balsa replica build
» Cox FW190 Balsa Build
» "Spook" can it be done?
» COX Super Stunter - Balsa build ... 40 years later..
» Bee’s in my Balsa!
» Cox FW190 Balsa Build
» "Spook" can it be done?
» COX Super Stunter - Balsa build ... 40 years later..
» Bee’s in my Balsa!
Page 5 of 10
Permissions in this forum:
You cannot reply to topics in this forum

 Rules
Rules


