Log in
Search
Latest topics
» Stealth SB-Xby Admin Yesterday at 8:28 pm
» ST .35 STUNT / VOODOO / ZERO POINT ZERO NITRO
by TD ABUSER Yesterday at 7:45 pm
» SUPERTIGER .15 PROJECT
by TD ABUSER Yesterday at 7:42 pm
» For sale -- Cox Custom Carburetors for Tee Dee engines
by sosam117 Yesterday at 5:23 pm
» WHERE ARE YOU BUYING YOUR FUEL AND GLOW PLUGS...?
by TD ABUSER Yesterday at 4:35 pm
» Waiting for Engines from Ken Enya
by sosam117 Yesterday at 4:33 pm
» Unusual Cox 049 cylinder - Need help identifying
by anm2 Yesterday at 4:12 pm
» Jim Walker Bonanza etc.
by rsv1cox Yesterday at 2:57 pm
» What's the Best Reed for Cox Reed Valve Engines.
by roddie Yesterday at 1:37 pm
» Fuel choice
by 1975 control line guy Fri Aug 30, 2024 4:01 pm
» "Fall S.M.A.L.L." Video 3.
by GallopingGhostler Fri Aug 30, 2024 2:37 pm
» Gifted Fox
by Ken Cook Fri Aug 30, 2024 11:12 am
Cox Engine of The Month
August-2024
balogh's

"Cox TD09 R/C Beast of Burden featuring Kamtechnik head and DIY metallic fuel nipple"

PAST WINNERS
balogh's

"Cox TD09 R/C Beast of Burden featuring Kamtechnik head and DIY metallic fuel nipple"

PAST WINNERS
T-Bee-D1 (a Rod-de-sign)
Page 5 of 8
Page 5 of 8 •  1, 2, 3, 4, 5, 6, 7, 8
 Re: T-Bee-D1 (a Rod-de-sign)
The straight line fin is more in keeping with the lines of the rest of the aircraft.

rsv1cox- Top Poster


Posts : 10928
Join date : 2014-08-18
Location : West Virginia
 Re: T-Bee-D1 (a Rod-de-sign)
rsv1cox wrote:The straight line fin is more in keeping with the lines of the rest of the aircraft.
Yes.. you're right Robert. I am a bit torn.. because there's currently a 50/50 opinion on which fin looks nicer.. between people on and off-forum who've ogled the two shapes.
 Re: T-Bee-D1 (a Rod-de-sign)
Hi roddie,
That straight line fin, looks like a Mach2 FlightStreak fin to me.
The curved one,
Is like, ' Fonzie jumping the Shark', to me... And looks tail heavy.
Just my opinion...
I am enjoying this thread.
Keeping things simple,
Is way harder,
Than you think,
Take care,
Have fun,
Dave
That straight line fin, looks like a Mach2 FlightStreak fin to me.
The curved one,
Is like, ' Fonzie jumping the Shark', to me...
Just my opinion...
I am enjoying this thread.
Keeping things simple,
Is way harder,
Than you think,
Take care,
Have fun,
Dave

HalfaDave- Platinum Member

- Posts : 609
Join date : 2022-12-06
Location : Oakville, Ontario
 Re: T-Bee-D1 (a Rod-de-sign)
HalfaDave wrote:Hi roddie,
That straight line fin, looks like a Mach2 FlightStreak fin to me.
The curved one,
Is like, ' Fonzie jumping the Shark', to me...And looks tail heavy.
Just my opinion...
I am enjoying this thread.
Keeping things simple,
Is way harder,
Than you think,
Take care,
Have fun,
Dave
Dave..... thank you. I thought that same tail-heavy perception.. with the radiussed-shape fin.
 Re: T-Bee-D1 (a Rod-de-sign)
Tonight, i decided to "finish-glue" the wing and stab. fuselage-joints using 30-minute epoxy. There were areas which had only been "tacked".. that needed to be anchored.
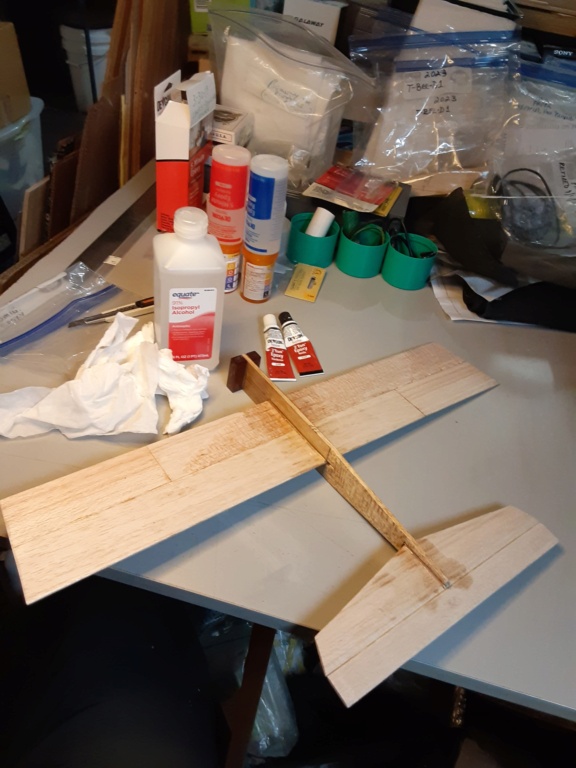
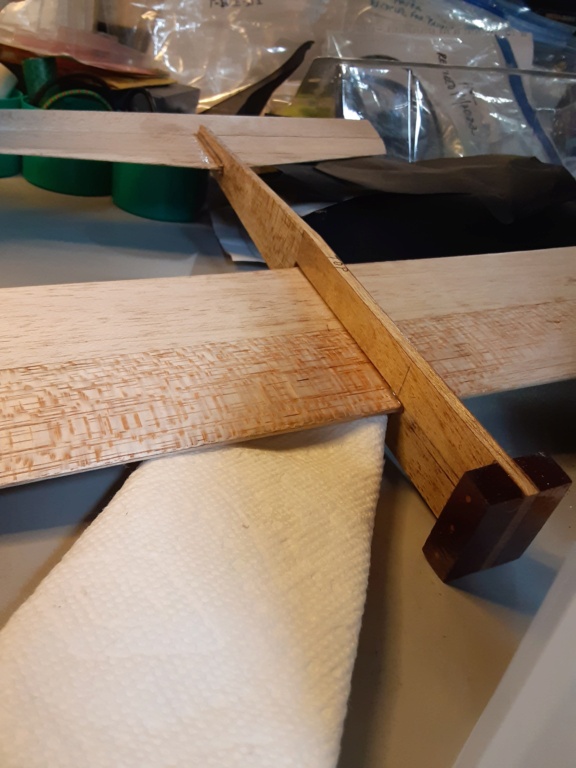
I did that using a short-bristled "flux-brush" liberally spreading the epoxy into any and all voids in the joints. This type of gluing helps to keep your airplane somewhat-salvageable.. in the event that you have a deviation from your flight-plan.
So yea.. the 30 min. pot-life epoxy was mixed... and liberally applied where needed. Then I dampened a paper-towel/pad with 91% isopropyl alcohol.. and proceeded to wipe-down the structure.
I wiped any excess glue from my hands.. and applied a quality moisturizer.
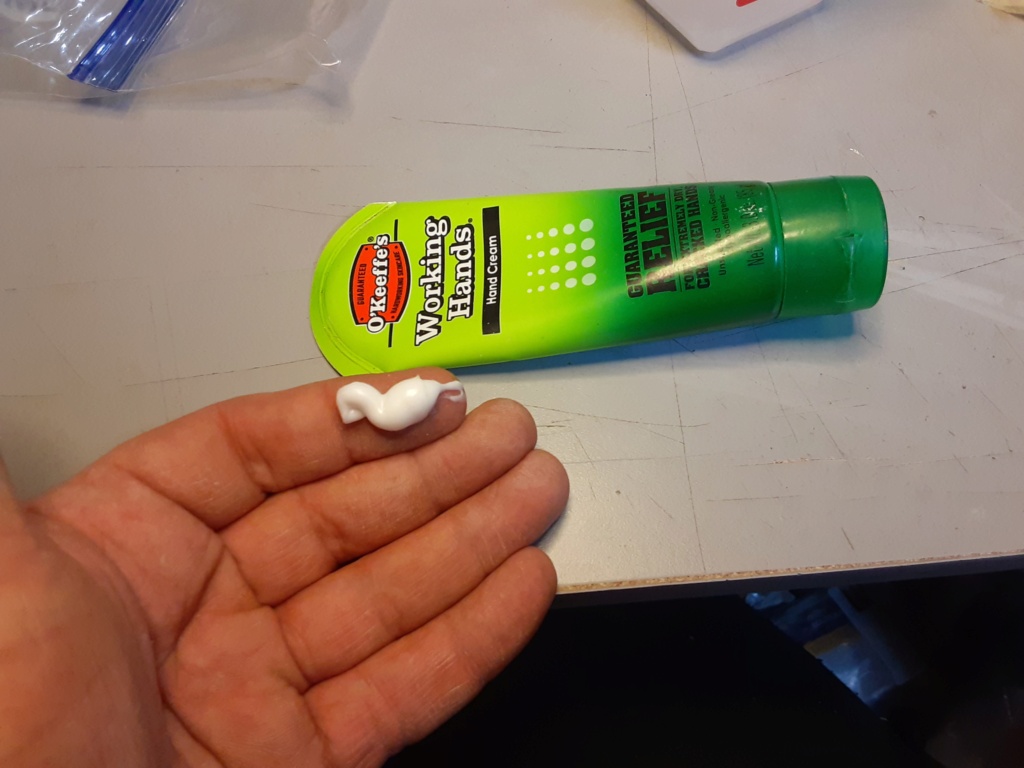
It's important to always protect your health while enjoying your hobbies,


I did that using a short-bristled "flux-brush" liberally spreading the epoxy into any and all voids in the joints. This type of gluing helps to keep your airplane somewhat-salvageable.. in the event that you have a deviation from your flight-plan.
So yea.. the 30 min. pot-life epoxy was mixed... and liberally applied where needed. Then I dampened a paper-towel/pad with 91% isopropyl alcohol.. and proceeded to wipe-down the structure.
I wiped any excess glue from my hands.. and applied a quality moisturizer.

It's important to always protect your health while enjoying your hobbies,
Last edited by roddie on Thu Feb 16, 2023 12:05 am; edited 1 time in total (Reason for editing : added intel)
 it's a done-deal now...
I went with the geometric styled fin.. and fastened it to the tail using a cut-off toothpick like you see on the canopy (first photo).. to help keep it from being inadvertently broken-off in the event of a mishap. A Dubro hinge-slotting kits' centering-guide was used to help drill the holes for the toothpicks.
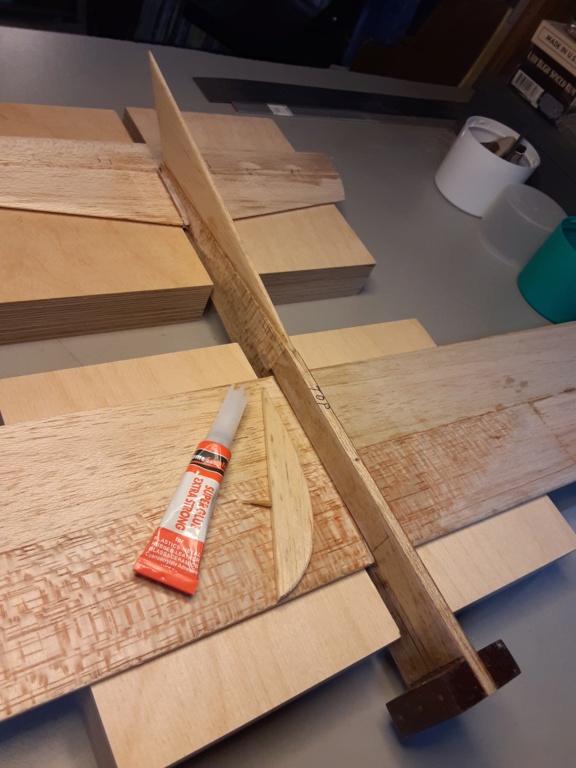
It's a done deal now.. finish-glued with thin CA.

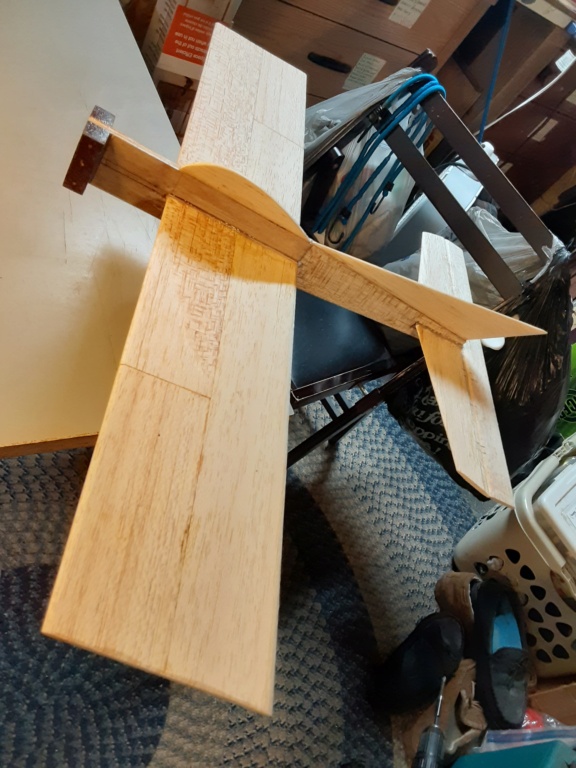
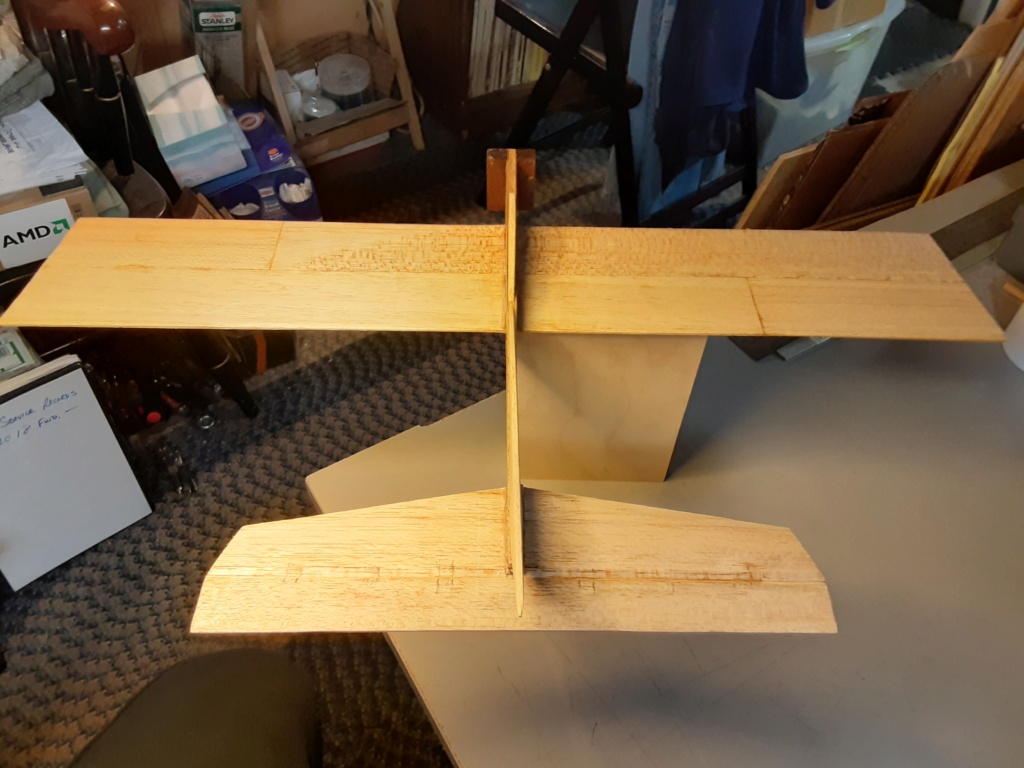
I need to revise my drawing to reflect the latest layout.

It's a done deal now.. finish-glued with thin CA.


I need to revise my drawing to reflect the latest layout.
 Re: T-Bee-D1 (a Rod-de-sign)
Drawing revised weeks ago.. but it's a mess. My fault for alternate layouts early-on.
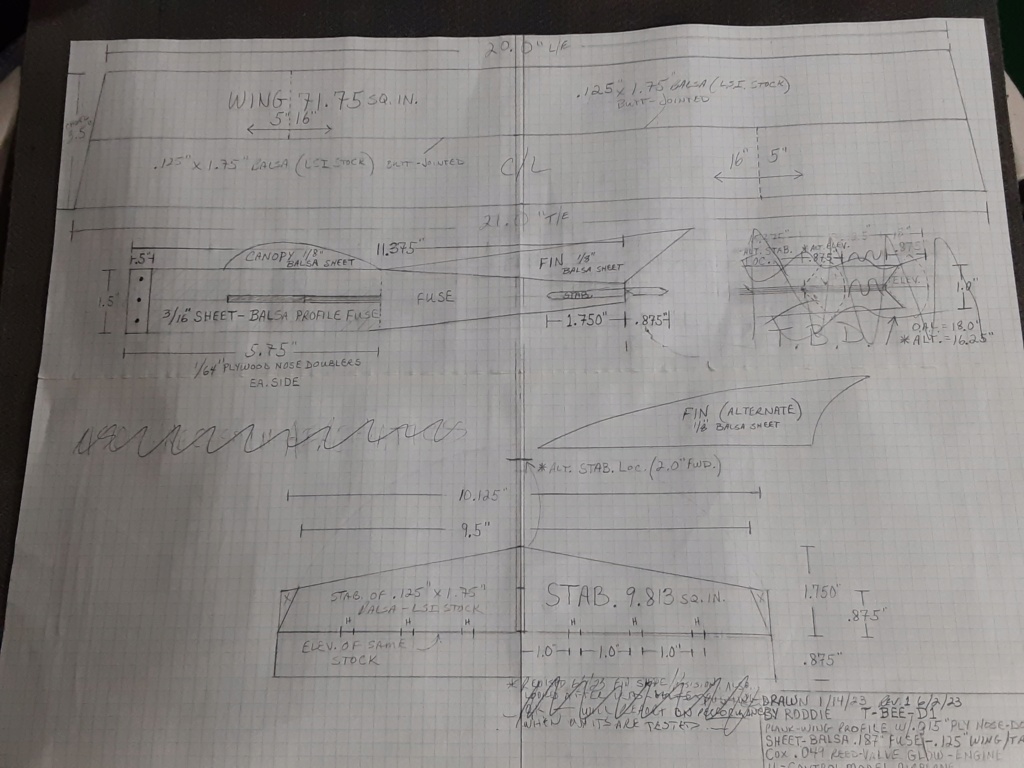
so.............. I need to bush my bellcrank and elev. horn to accept a lighter-weight .025" hard/music-wire pushrod for the elevator. It's a SHORT coupling @ 8-9".. hinging on a few things..
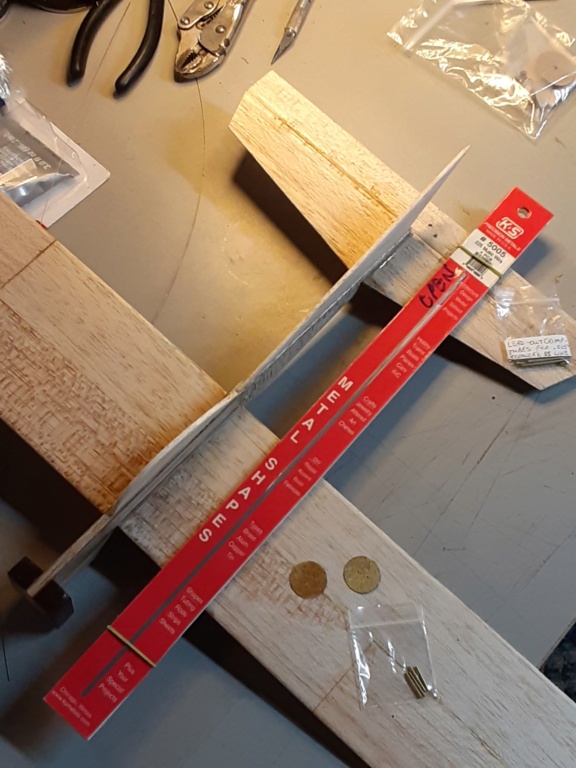
I'll work-up a safety-pin "eye" for a 1/2way support to prevent deflection of the pushrod under pressure. These wire-sizes are smaller than I'm used to.. but I'm trying to design lighter-weight models.
I'm hoping to get this airplane in the sky by the 4th of July.

so.............. I need to bush my bellcrank and elev. horn to accept a lighter-weight .025" hard/music-wire pushrod for the elevator. It's a SHORT coupling @ 8-9".. hinging on a few things..

I'll work-up a safety-pin "eye" for a 1/2way support to prevent deflection of the pushrod under pressure. These wire-sizes are smaller than I'm used to.. but I'm trying to design lighter-weight models.
I'm hoping to get this airplane in the sky by the 4th of July.
 Re: T-Bee-D1 (a Rod-de-sign)
Looking good Roddie  …. Since the fourth is your target date maybe a patriotic paint scheme?
 …. Since the fourth is your target date maybe a patriotic paint scheme?
rdw777- Diamond Member


Posts : 1520
Join date : 2021-03-11
Location : West Texas
 Re: T-Bee-D1 (a Rod-de-sign)
Yes, nice job , I also think Red White And Blue would be cool for the forth. Actually one of the wings would look good painted like a flag

akjgardner- Diamond Member


Posts : 1554
Join date : 2014-12-28
Age : 65
Location : Greensberg Indiana
 Re: T-Bee-D1 (a Rod-de-sign)
Hi Roddie,
Looking good...
For light pushrods I have used 1/16th KS al. tube over thin wire and Z bends. (a small 45deg zed for fine adjustment.)
The elec guys use heatshrink tube bushings to good effect.
I remember a kid, who 'waxed' his Swordsman 23 with floor polish. Amberiod glue was high tech then.
Somehow, the wax, prevented the balsa from getting fuel soaked.
Any paint / dope after that, peeled off in flight !
Good times.
Thanks for sharing,
Take care,
Have fun,
Dave

HalfaDave- Platinum Member

- Posts : 609
Join date : 2022-12-06
Location : Oakville, Ontario
 Re: T-Bee-D1 (a Rod-de-sign)
Coming along nicely brother , what ever the paint don't forget it needs a week or so to gas off and harden  Decal on the Flag LOL

getback- Top Poster


Posts : 10326
Join date : 2013-01-18
Age : 67
Location : julian , NC
 Re: T-Bee-D1 (a Rod-de-sign)
Taking your replies into consideration Robert, Joe, Dave and Eric; there's several "days-worth" of rain/moisture in the forecast.. so I'm not sure how soon I'll be able to do any painting. I've got more than one iron in the fire though.. 
Truth is; there's plenty of work that I want/need to do before finishing. The firewall needs a plywood-plate for my method of installing any engine requiring a firewall mounting. Not that it's a big deal.. but just something requiring mixing epoxy.. and being ready with clamps that are easy and effective.
I also need to decide on the engine-layout. Definitely a Cox reed-valve .049.. but that leaves a lot of freedom for what to use; regarding fuel-induction, cylinder-porting, fuel-blend.. AND... orientation.
I like having the needle inboard/horizontal.. and the cylinder outboard/horizontal. This airplane has no landing-gear so that's a necessary set-up any way you look at it.
 Re: T-Bee-D1 (a Rod-de-sign)
Hi roddie,
My favourite CL Cox .049 is a 'screw on, backplate, fine needle, reedie.'
Mounted horizontal, as you say. Protects the NV.
Mount the prop at 2 o'clock BTC, drop of prime, a nice flick, it is going...
The fuel line goes to the inside of the circle, so I use a (un-pressured) bladder tank made from a thumb of a thin plastic glove.
Way easier than you think.
It is like putting on a 'brand new tank' on a BabyBee or Black Widow, every time.
Your results may vary.
A 'wiped on' (plastic glove, again) layer of CA glue is a fast way to seal balsa from 'Cox goo'...
Way lighter, faster and cheaper than epoxy.
Vinyl stickers are heavy/add up.
A clear coat, over a great paint job, is impossible to repair.
Again, your results may vary...
Take care,
Have fun,
Dave

HalfaDave- Platinum Member

- Posts : 609
Join date : 2022-12-06
Location : Oakville, Ontario
 Re: T-Bee-D1 (a Rod-de-sign)
HalfaDave wrote:Hi roddie,
My favourite CL Cox .049 is a 'screw on, backplate, fine needle, reedie.'
Mounted horizontal, as you say. Protects the NV.
Mount the prop at 2 o'clock BTC, drop of prime, a nice flick, it is going...
The fuel line goes to the inside of the circle, so I use a (un-pressured) bladder tank made from a thumb of a thin plastic glove.
Way easier than you think.
It is like putting on a 'brand new tank' on a BabyBee or Black Widow, every time.
Your results may vary.
A 'wiped on' (plastic glove, again) layer of CA glue is a fast way to seal balsa from 'Cox goo'...
Way lighter, faster and cheaper than epoxy.
Vinyl stickers are heavy/add up.
A clear coat, over a great paint job, is impossible to repair.
Again, your results may vary...
Take care,
Have fun,
Dave
Wow Dave.. my bad.. I hadn't seen this reply til now. Thank you for your interest. CA glue is awesome.. but I have developed an allergy to it. I do use it though; I have to limit my exposure. A spot-repair can bring on sinus irritation in me.
That said; I've given the model a little attention in the last few days. I had done some general sanding.. but knew that I wanted to make fillets at the wing/stab. fuse-junctions.
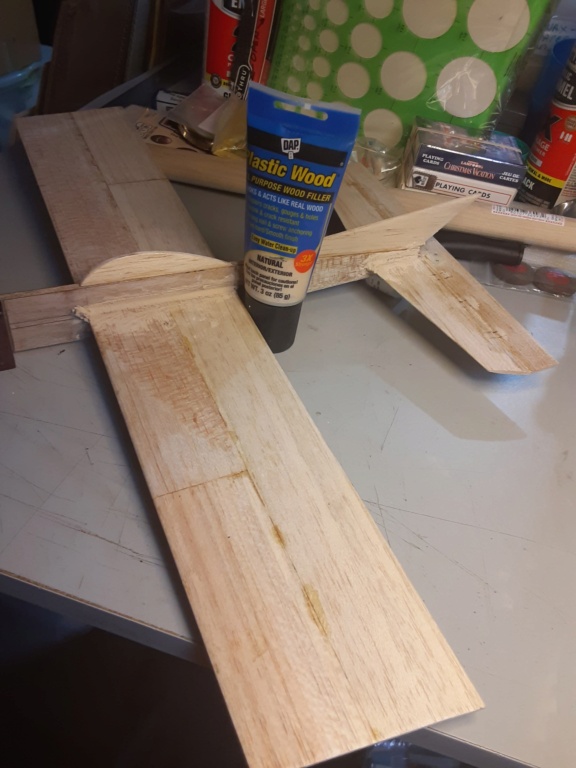
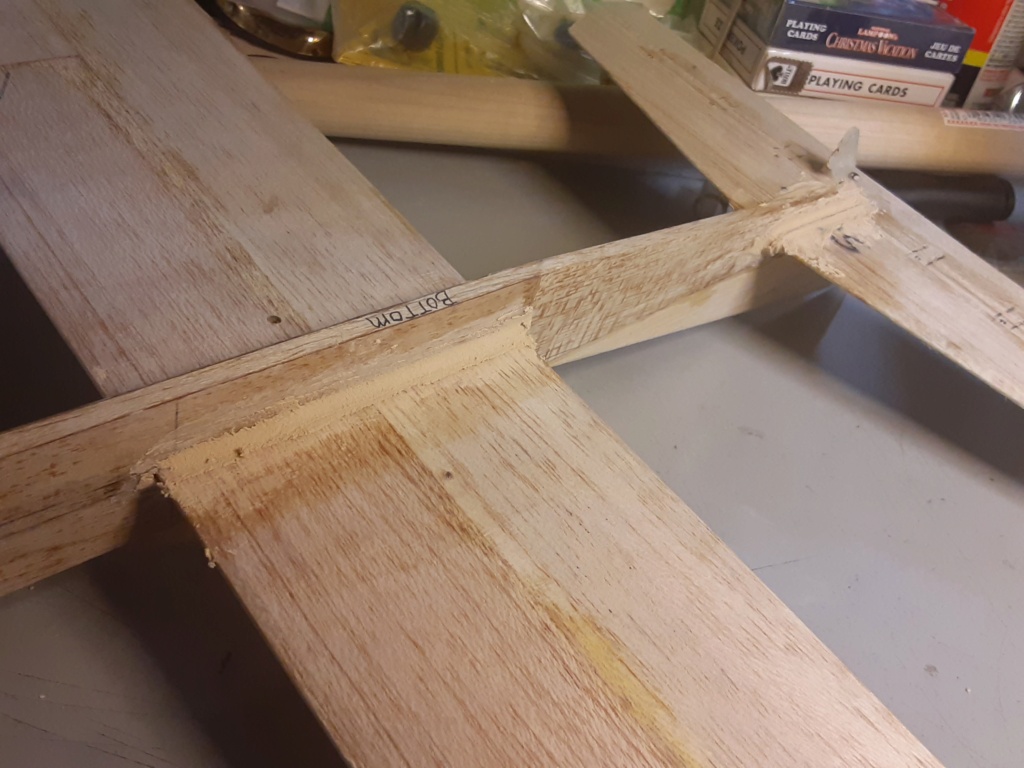
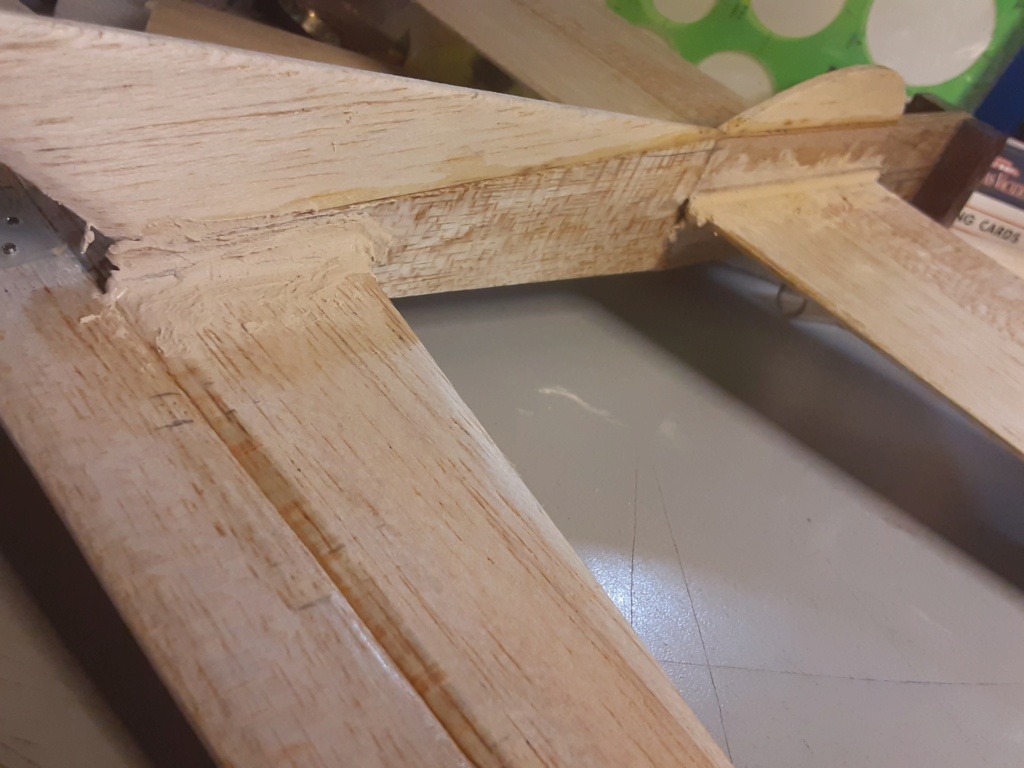
Then I sanded a little.. and a little more.. then sprayed a primer-coat. Here's a view of my house from my shed..
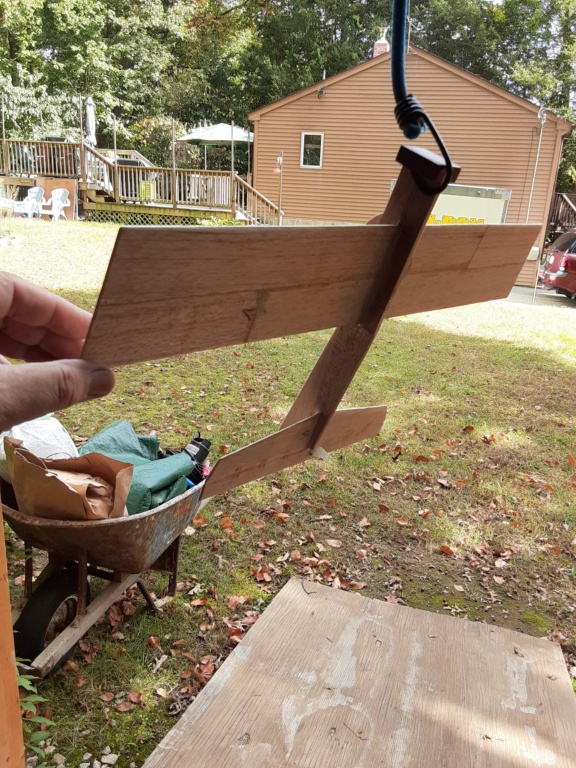
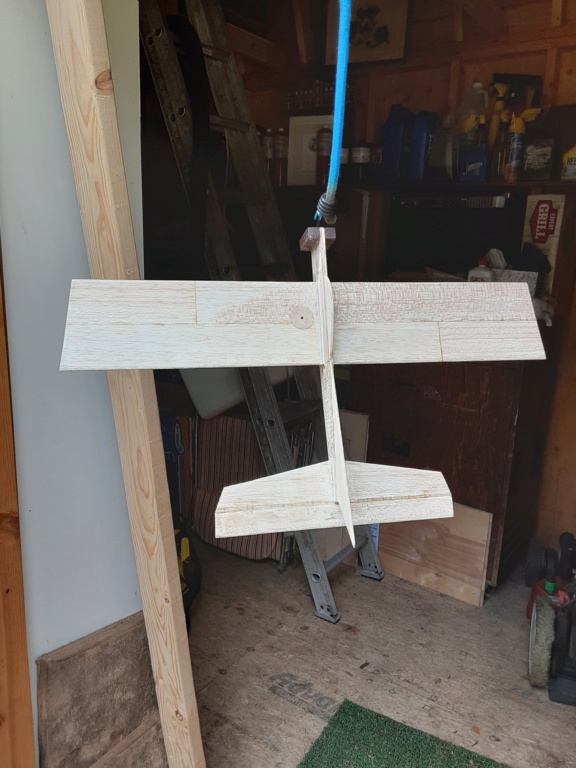
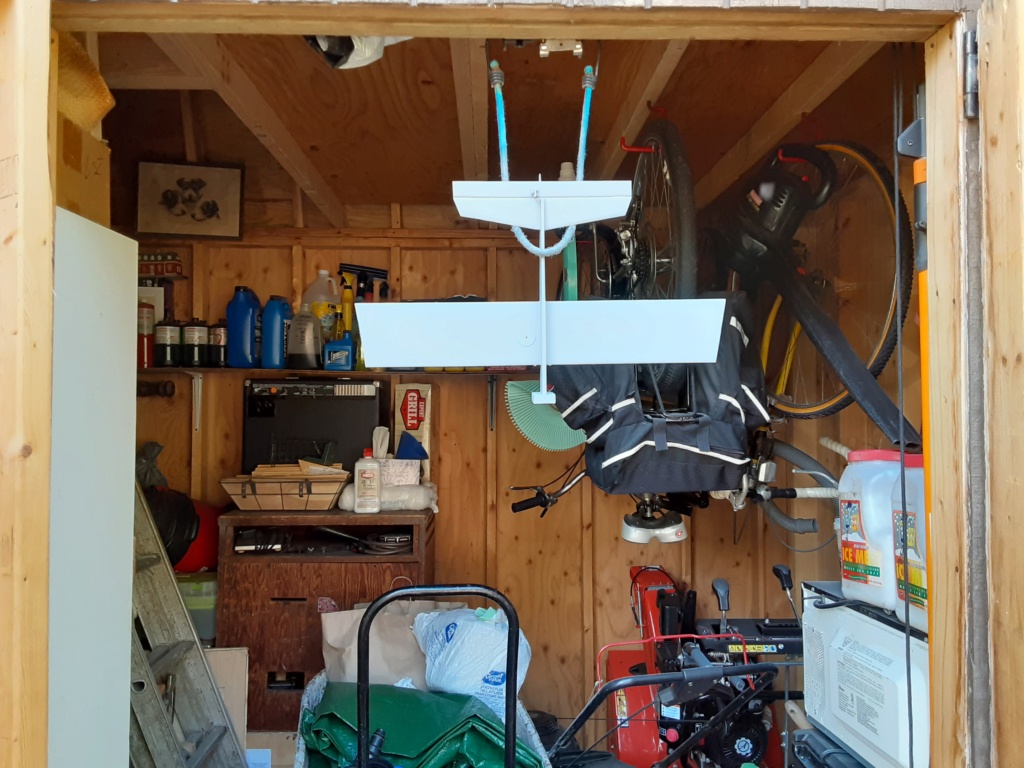
after sanding.. I'm really psyched to spray a 1st coat of base-color.

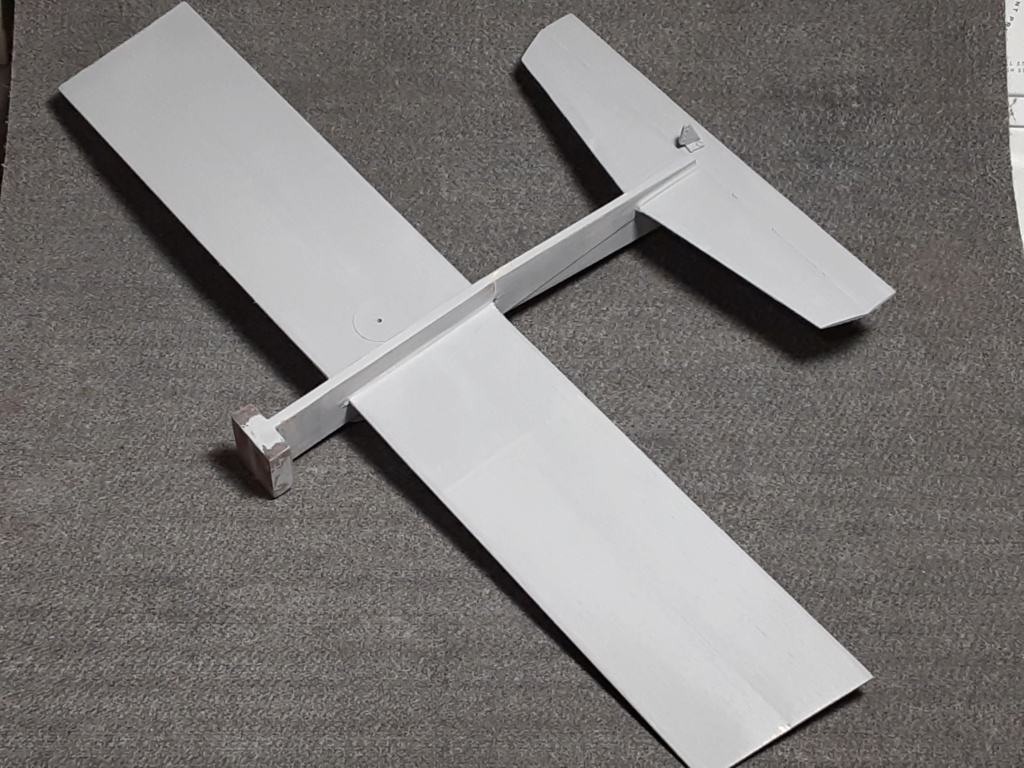
 Re: T-Bee-D1 (a Rod-de-sign)
I gotta apologize for the thread title. I wanna' change it to Tee-Bee-Dee 1 or TBD-1............ which is meant to imply the use of Cox Bee-type engines of various configurations to "bee" determined. This would cover the Babe Bee through Killer Bee variants. 
So.......... this afternoon, I went ahead and mixed-up some epoxy for a Birch firewall plate.
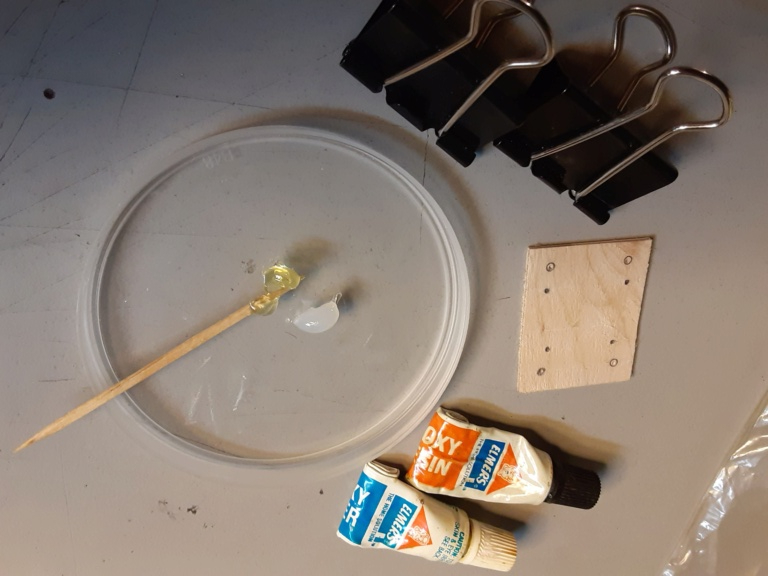
I'm using "binder-clips" for this gluing operation. They work VERY WELL and are cheap clamps to have in your arsenal.

This configuration provides a robust mount. I've used it in all my designs..
So.......... this afternoon, I went ahead and mixed-up some epoxy for a Birch firewall plate.

I'm using "binder-clips" for this gluing operation. They work VERY WELL and are cheap clamps to have in your arsenal.

This configuration provides a robust mount. I've used it in all my designs..
 Re: T-Bee-D1 (a Rod-de-sign)
Very nice design Roddie and I also like the word-play used in your TBD acronym.
On another matter, would a fairing added behind the engine mount, tapering towards the leading edges help eliminate vortices and reduce the drag?
On another matter, would a fairing added behind the engine mount, tapering towards the leading edges help eliminate vortices and reduce the drag?

balogh- Top Poster


Posts : 4852
Join date : 2011-11-06
Age : 65
Location : Budapest Hungary
 Re: T-Bee-D1 (a Rod-de-sign)
balogh wrote:Very nice design Roddie and I also like the word-play used in your TBD acronym.
On another matter, would a fairing added behind the engine mount, tapering towards the leading edges help eliminate vortices and reduce the drag?
Thanks Andras! Yes; cheek-blocks of 3/8" (10mm) balsa were typically used in the Goldberg 1/2A slab-wing models. I'll give that some thought.. but I want to reserve the "outboard side" for tucking-in an external wedge-tank or balloon tank behind those hardwood nose-blocks, in the event that I mount an engine that requires one.
I tend to overbuild my designs.. and I need to back-off from that practice. This model; although small.. is using the balsa that I obtained while working for the sign company years ago. I have a LOT of it.. but most of it is C-grain and heavier than what I should be using for a slab-wing.
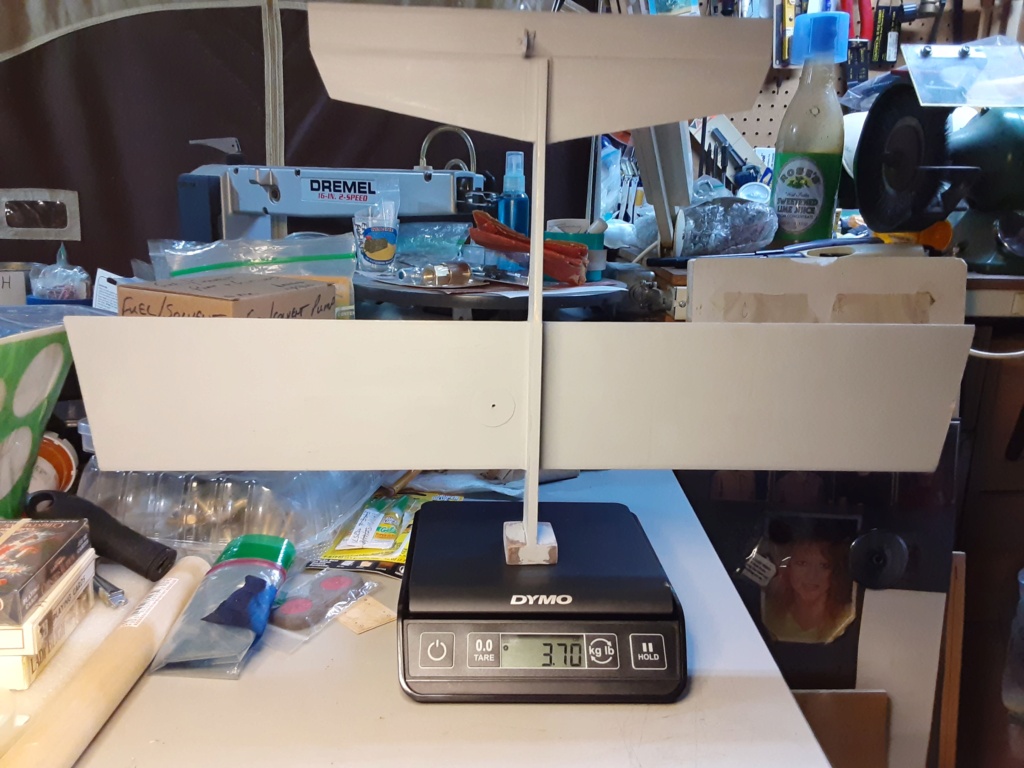
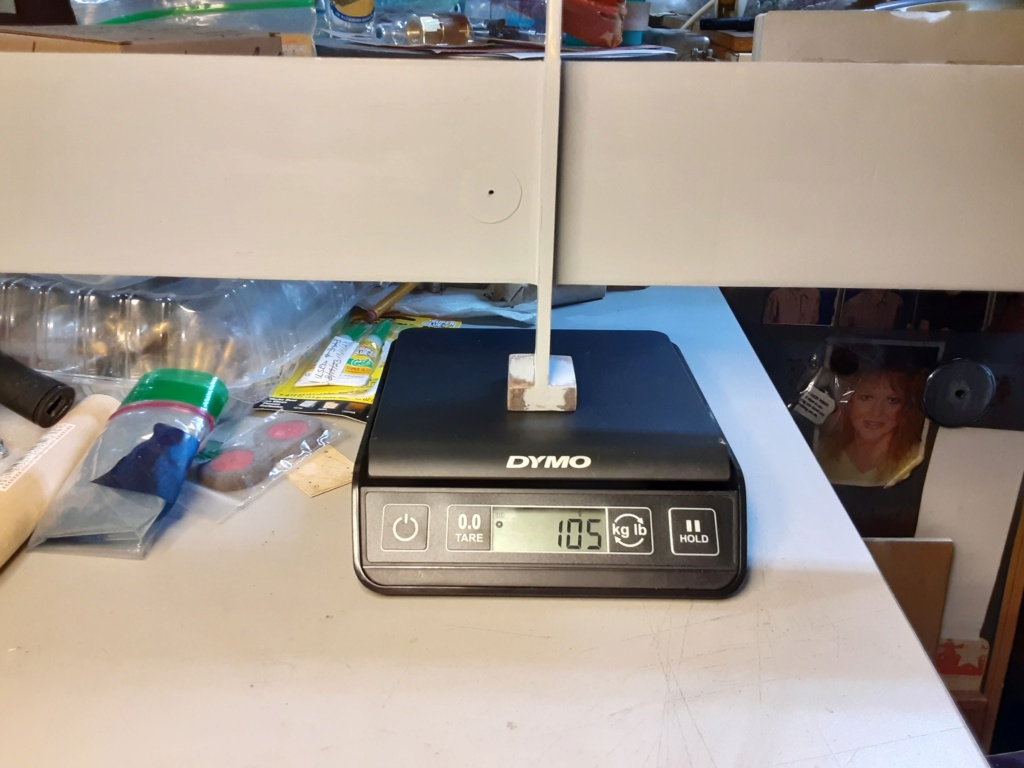
The model already weighs 3.7oz. (105 gr.) without any hardware.
 Re: T-Bee-D1 (a Rod-de-sign)
"after sanding.. I'm really psyched to spray a 1st coat of base-color."
So true. Base color is important. I usually keep both white and gray primers on the shelf. White for the lighter colors, whites, grays, yellows and darker for the blues, blacks, and reds. Even more important in the automotive world.
Your straight-forward uncomplicated design is in sharp contrast to your beautiful "Rare Bear."

rsv1cox- Top Poster


Posts : 10928
Join date : 2014-08-18
Location : West Virginia
 Re: T-Bee-D1 (a Rod-de-sign)
Hey Roddie ,Don’t know if you have said yet , but what kind of paint are you using ?

akjgardner- Diamond Member


Posts : 1554
Join date : 2014-12-28
Age : 65
Location : Greensberg Indiana
 Re: T-Bee-D1 (a Rod-de-sign)
rsv1cox wrote:"after sanding.. I'm really psyched to spray a 1st coat of base-color."
So true. Base color is important. I usually keep both white and gray primers on the shelf. White for the lighter colors, whites, grays, yellows and darker for the blues, blacks, and reds. Even more important in the automotive world.
Your straight-forward uncomplicated design is in sharp contrast to your beautiful "Rare Bear."
Robert, Thank You for your comments. I haven't decided on a color scheme for this model yet. I used the grey primer rather than white because it seems easier to "see" how heavy your laying the coats down. That said; I still ended up with a few runs. I always paint outdoors because the odor of any type of aromatic-solvent will instantly cause Lynne to get a migraine headache. Once the cold weather sets in, my paint-projects are limited to "brushing" small items/amounts in my basement workshop.
Thanks also for your kind words regarding my Rare Bear. Hard to believe that it's been 10 years since I built it.
 Re: T-Bee-D1 (a Rod-de-sign)
akjgardner wrote:Hey Roddie ,Don’t know if you have said yet , but what kind of paint are you using ?
Hi Joe, Acrylic enamel "rattle-can... is the plan". I have Krylon white and blue.. and Rust-Oleum red and yellow. All are of the gloss variety. I'm not sure yet what combination I'll end up using. The red and blue tones are perfect for a classic red, white and blue scheme. It would be my first airplane to use those three colors together.
 Re: T-Bee-D1 (a Rod-de-sign)
 Been tagging along for the build , Looking good . I was wondering about the firewall blocks also they help a lot if you donk it in on it nose , helps in keeping from snapping the nose off at the fuse . And weight I would say you will come out at 6-7 grs. even with them ,, I have never used any kind of wood filler although seems most people do Weight ? Good to see you building again.

getback- Top Poster


Posts : 10326
Join date : 2013-01-18
Age : 67
Location : julian , NC
 Re: T-Bee-D1 (a Rod-de-sign)
getback wrote:Been tagging along for the build , Looking good . I was wondering about the firewall blocks also they help a lot if you donk it in on it nose , helps in keeping from snapping the nose off at the fuse . And weight I would say you will come out at 6-7 grs. even with them ,, I have never used any kind of wood filler although seems most people do Weight ? Good to see you building again.


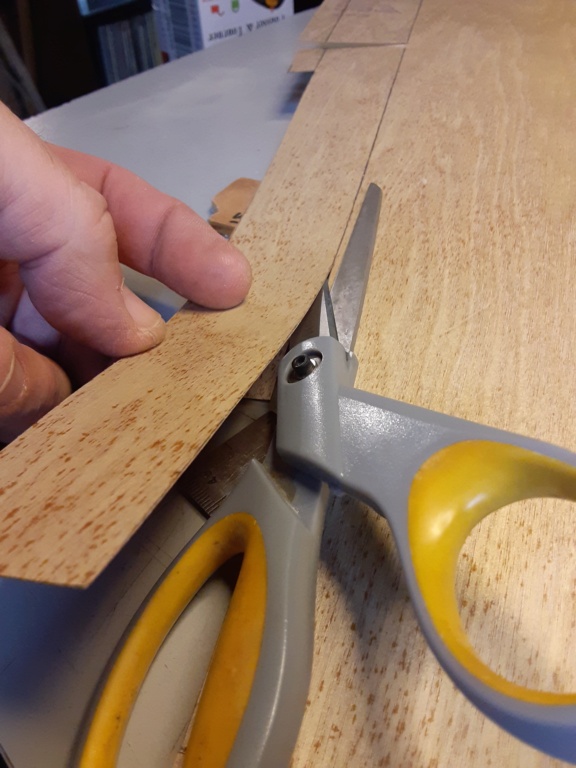
Hi Eric, Just to "recap" the construction of the fuse; the nose-end has .015" (1/64") plywood doublers that extend back to the wing's trailing-edge point.
The 1/64" plywood is sold as "wing-skin" material (generally for use on foam wings) Sig used to supply it in 12" X 24" sheets. It cuts easily with a decent pair of scissors.
I poked a grid of pinholes in the 3/32" balsa fuse where the doublers would contact..
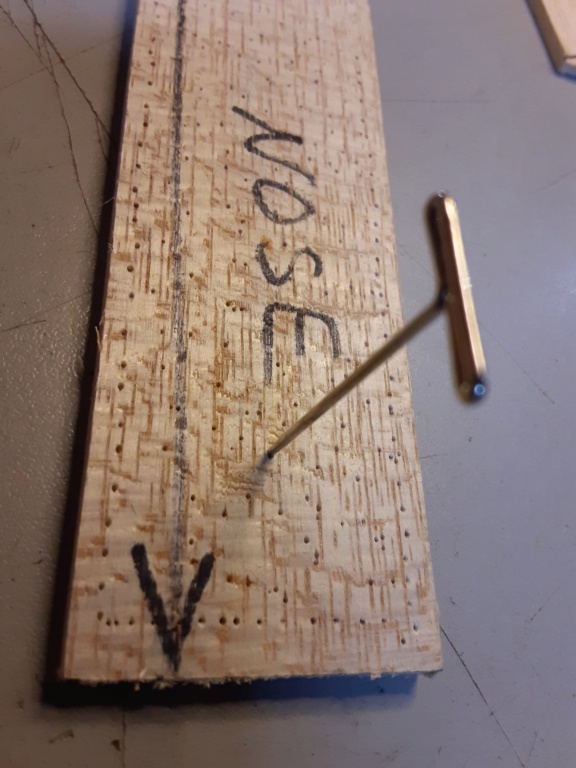
and used 5-min. epoxy and clamps to adhere them.
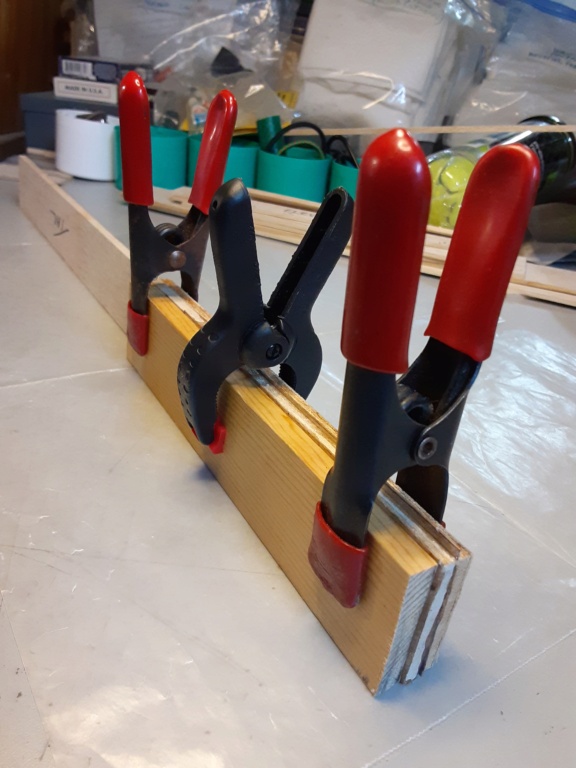
yes.... and the hardwood blocks were also set with epoxy..
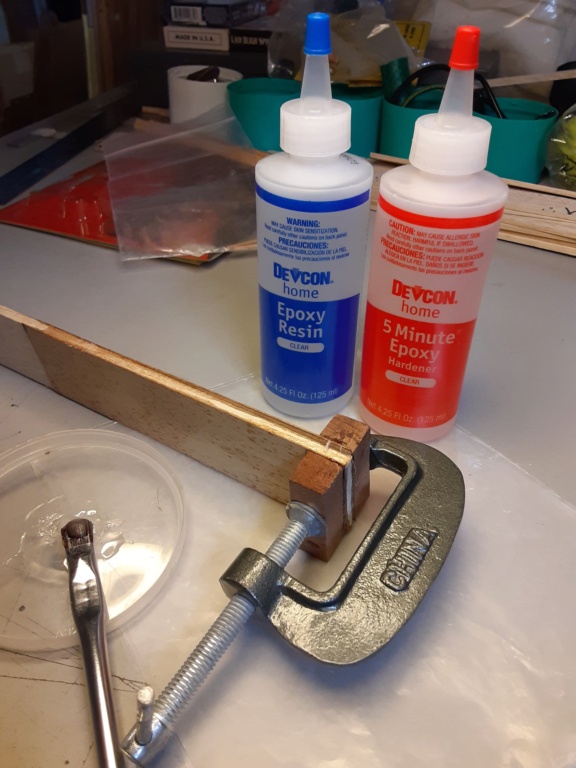
and pinned-through..

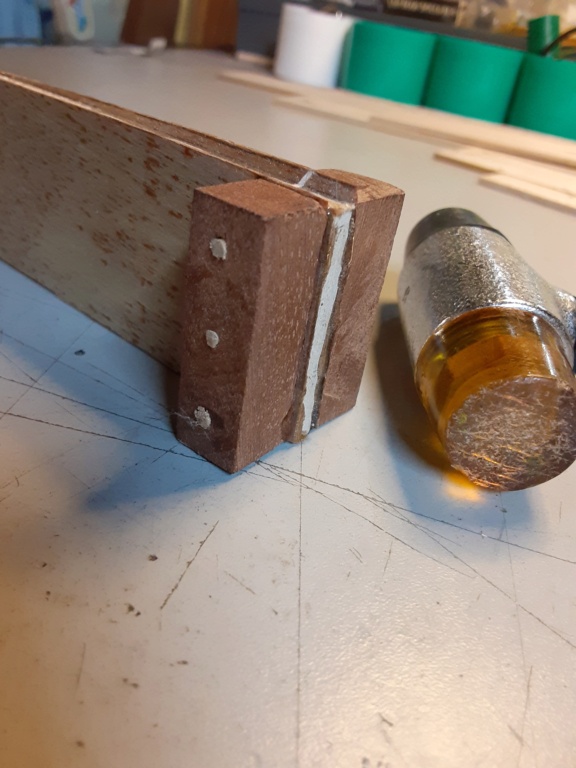
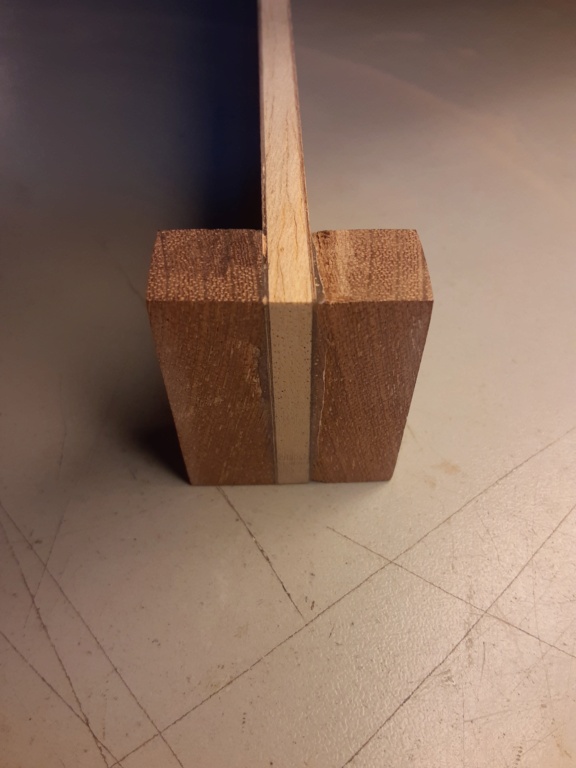
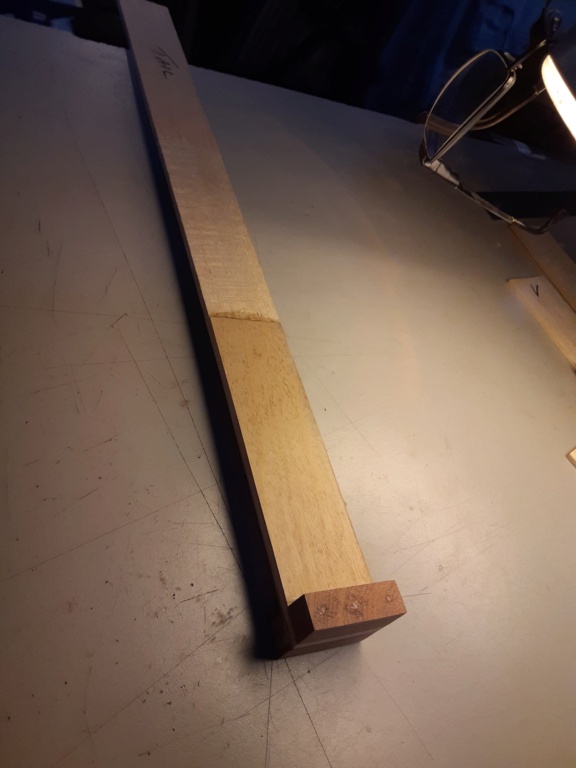
so...
It was a biotch to cut the wing-slot after installing the doublers though. I wouldn't do it that way again.
Yea... I know; it's a HEAVY way to do it.. but doing things this way tends to make me happy. Maybe I won't be as happy when a considerable doink, leaves my airframe is intact.. and my engine's crankcase mashed...
Next comes my tip-weight method.. (the weather here in Southern New England is forecast over the next several days to be warm enough to spray some rattle-can outdoors..)
 wingtip weight
Here's another example of what I've been using for U-Control/Half-A class wingtip weight on the last few models that I've built.
An American Penny/1 cent piece ($.01) weighs between 2-3 gr. and has a .750" (19.05mm) dia. The thickness is approx. .059". (1.5mm)
The "slab-wing" on this model has an average thickness of .130" (3.3mm) which leaves an approx. .028" (.7mm) difference in thickness.
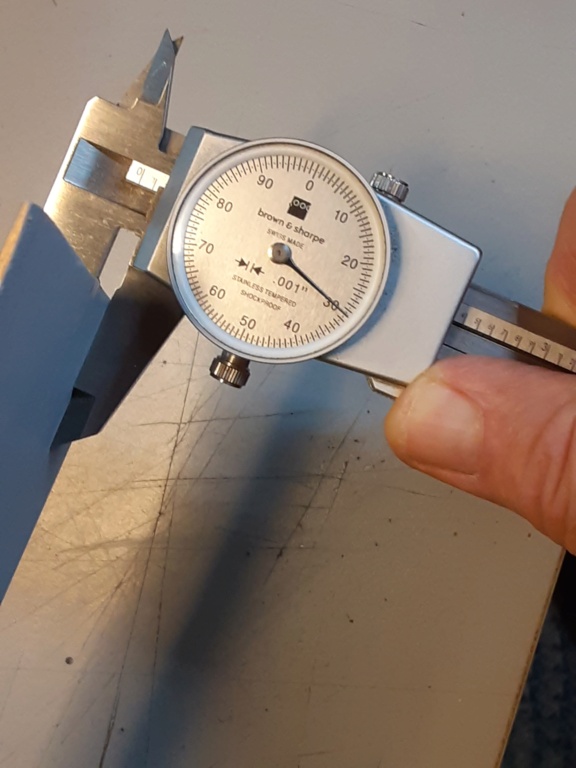
Knowing these measurements allows me to calculate the thickness of shim(s) to place the coin (tip-weight) near to center.. to allow encapsulation within the wing.
So.... I use a .750" hole-saw to cut a core for the coin. To avoid mangling the balsa.. I clamp sacrificial wood above and below the area to be cored, which provides a cleaner cut.
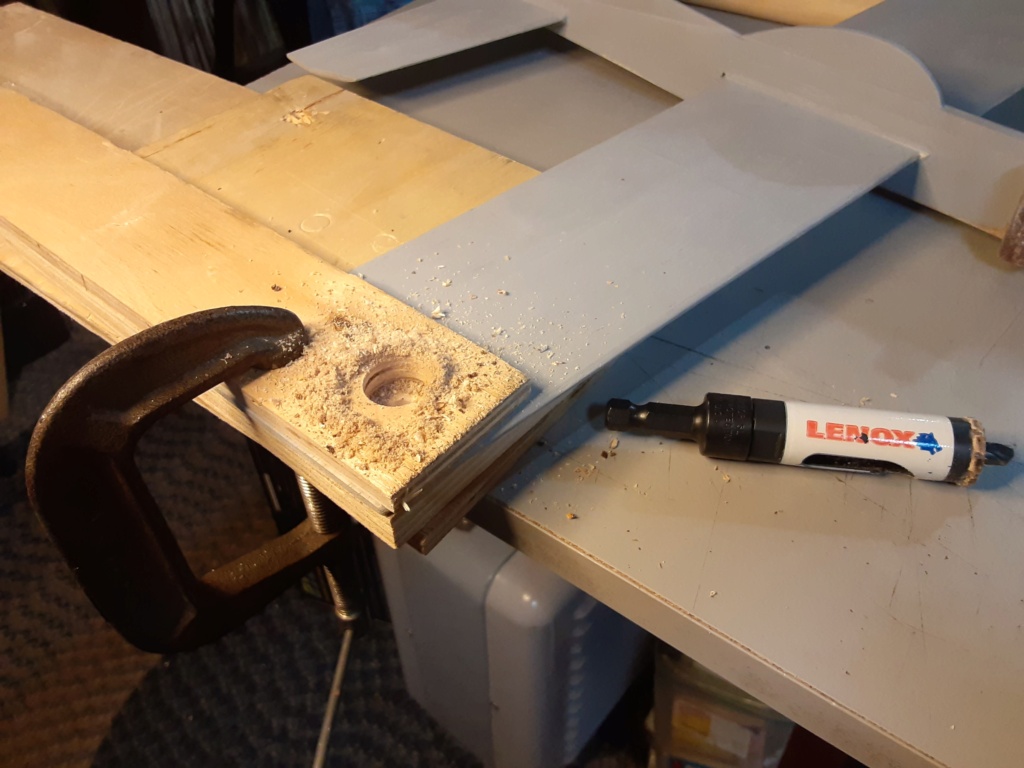
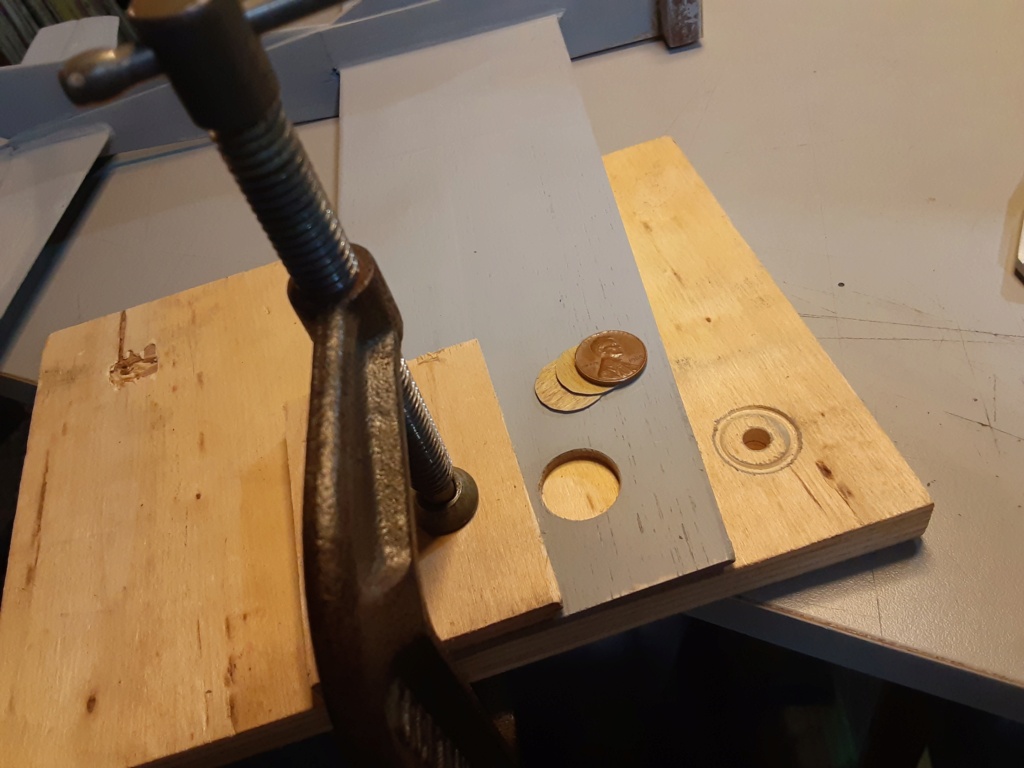
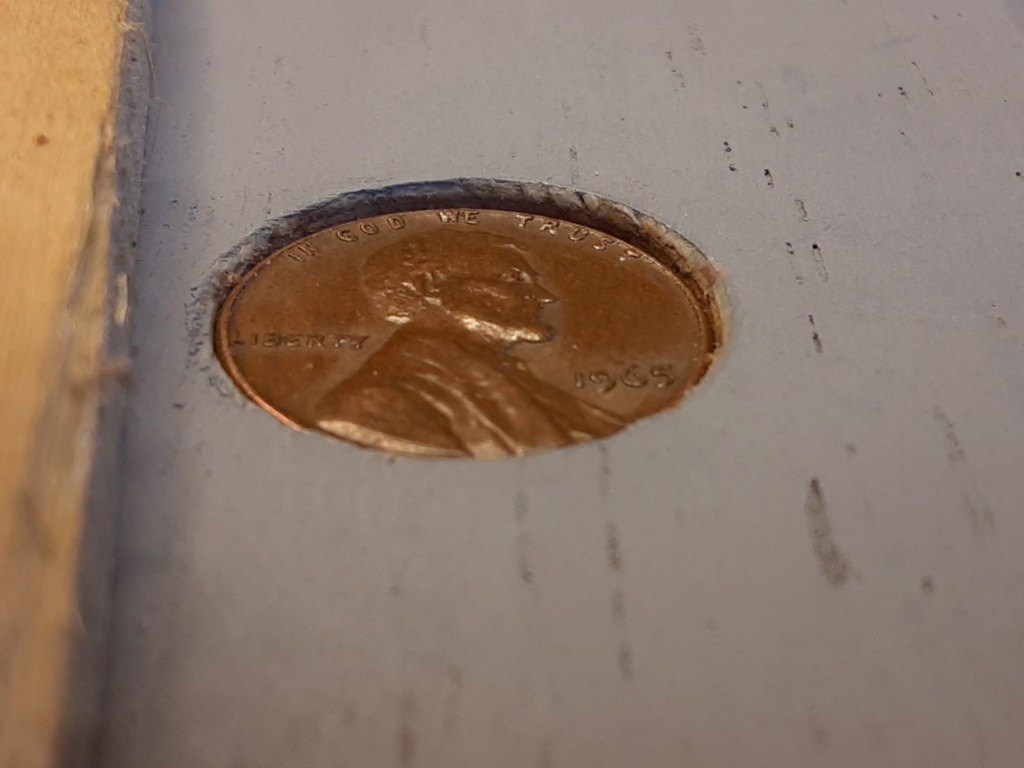
I wanted a mostly Copper penny.. so I opted for this nice "65" which came out of a recent bagful of "saved change". I was 5 in "65"...
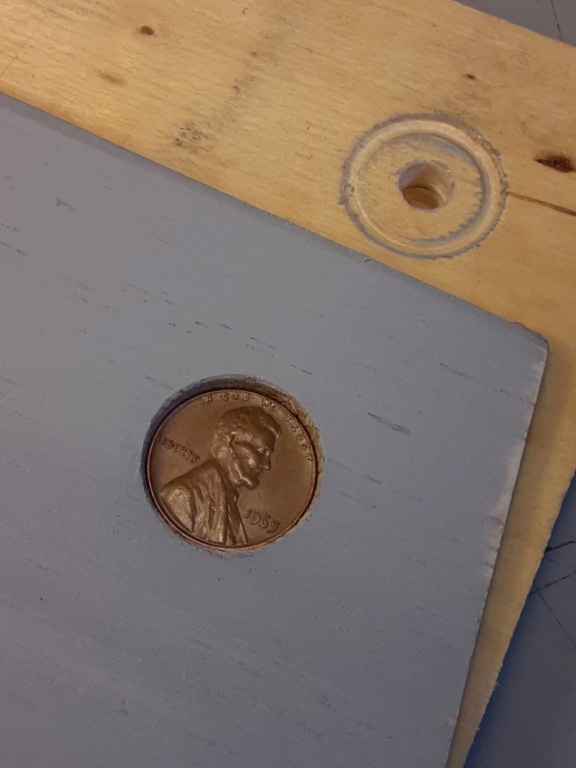
My shims brought the coin up to this height.
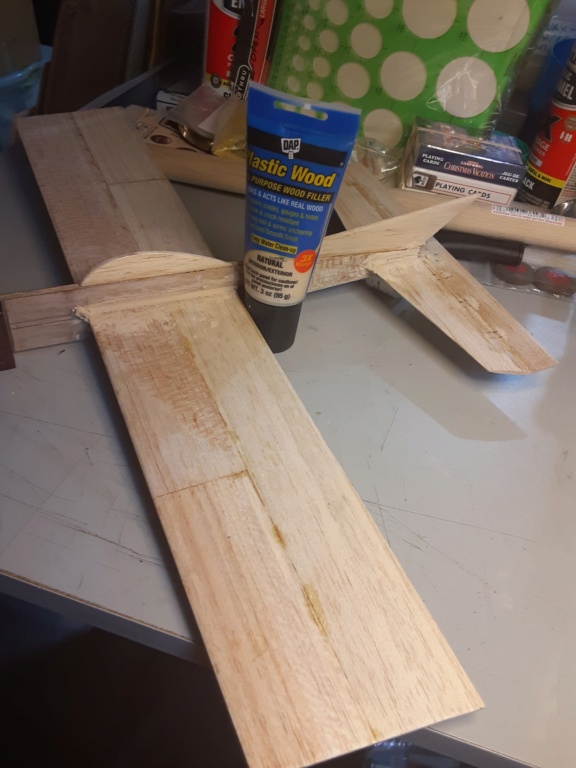
I've used "DAP" brand wood-filler for this job on a couple of other models.. as well as filleting. I like the way it "sands".

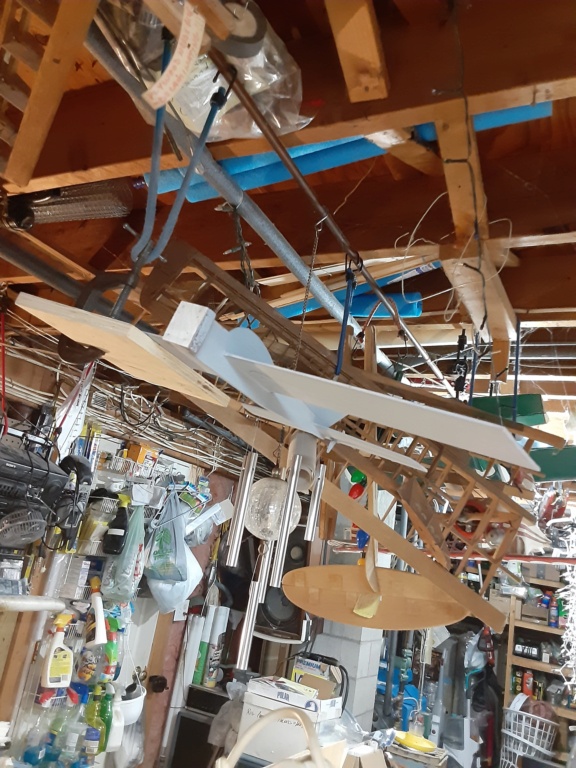
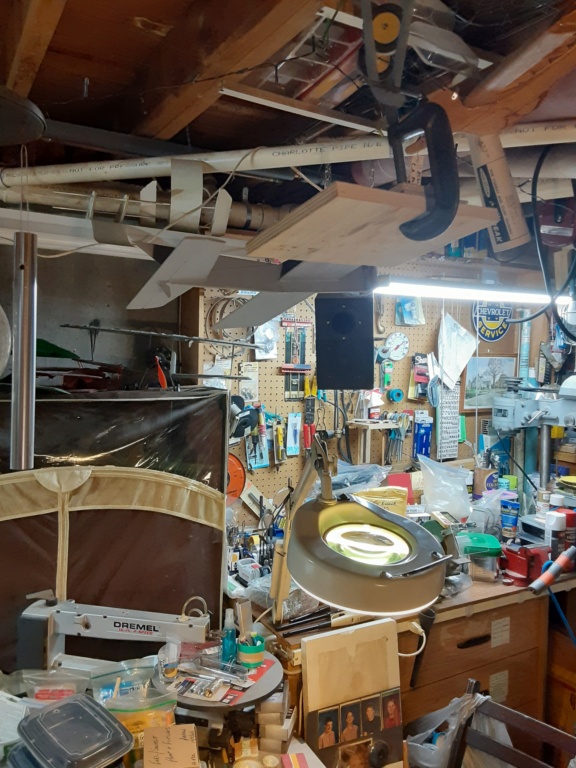
Here's a couple of "Hangar-shots"... hanging up.. and out of the way while the wood-filler dries.. (I LoVe BuNgEe CoRdS)
cool angle here... (excuse please; the shop clutter... Where's Waldo?)
An American Penny/1 cent piece ($.01) weighs between 2-3 gr. and has a .750" (19.05mm) dia. The thickness is approx. .059". (1.5mm)
The "slab-wing" on this model has an average thickness of .130" (3.3mm) which leaves an approx. .028" (.7mm) difference in thickness.

Knowing these measurements allows me to calculate the thickness of shim(s) to place the coin (tip-weight) near to center.. to allow encapsulation within the wing.
So.... I use a .750" hole-saw to cut a core for the coin. To avoid mangling the balsa.. I clamp sacrificial wood above and below the area to be cored, which provides a cleaner cut.


I wanted a mostly Copper penny.. so I opted for this nice "65" which came out of a recent bagful of "saved change". I was 5 in "65"...

My shims brought the coin up to this height.

I've used "DAP" brand wood-filler for this job on a couple of other models.. as well as filleting. I like the way it "sands".


Here's a couple of "Hangar-shots"... hanging up.. and out of the way while the wood-filler dries.. (I LoVe BuNgEe CoRdS)
cool angle here... (excuse please; the shop clutter... Where's Waldo?)


 Re: T-Bee-D1 (a Rod-de-sign)
Hey Roddie that sacrificial wood plank placed over the balsa to prevent it from mangling when drilled is a great idea! Thanks for that!

balogh- Top Poster


Posts : 4852
Join date : 2011-11-06
Age : 65
Location : Budapest Hungary
Page 5 of 8 •  1, 2, 3, 4, 5, 6, 7, 8
 Similar topics
» Stopped by the local sign shop today.
» Sign of the times
» ***The Traveling Engine TD .049*** SIGN UP!
» Brodak Stop Sign
» Can't sign up for Yahoo - But Comet RTF question
» Sign of the times
» ***The Traveling Engine TD .049*** SIGN UP!
» Brodak Stop Sign
» Can't sign up for Yahoo - But Comet RTF question
Page 5 of 8
Permissions in this forum:
You cannot reply to topics in this forum

 Rules
Rules


