

 Rules
Rules
by Onelife Today at 1:04 pm
» Happy Anzac Day!
by GallopingGhostler Today at 12:44 pm
» Revivng Some Childhood Classics
by rsv1cox Today at 7:17 am
» Introducing our Cox .049 TD Engines
by getback Today at 6:20 am
» Project Cox .049 r/c & Citabrian Champion
by getback Today at 6:17 am
» Roddie's flat-bottomed boat..
by Levent Suberk Today at 12:23 am
» Cox powered jet-pump for model Sprint Boat
by roddie Yesterday at 10:25 pm
» Micro Draco Gets to Fly on a Beautiful Morning.
by rdw777 Yesterday at 8:15 pm
» Jim Walker Firebaby
by rdw777 Yesterday at 8:06 pm
» Hydro-bat by Vic Smeed: engine probs
by GallopingGhostler Yesterday at 5:12 pm
» Roddie-Rigger.. a 2005 original design
by roddie Yesterday at 3:39 pm
» [solved]most Efficent Glowhead Clip for Norvel Engine
by batjac Wed Apr 24, 2024 10:33 pm


RSM P51d build
Page 1 of 2 • 1, 2 ![]()

RSM P51d build
![]() ian1954 Sun Nov 09, 2014 11:24 am
ian1954 Sun Nov 09, 2014 11:24 am
https://www.coxengineforum.com/t7104-leading-edge-profile-sander
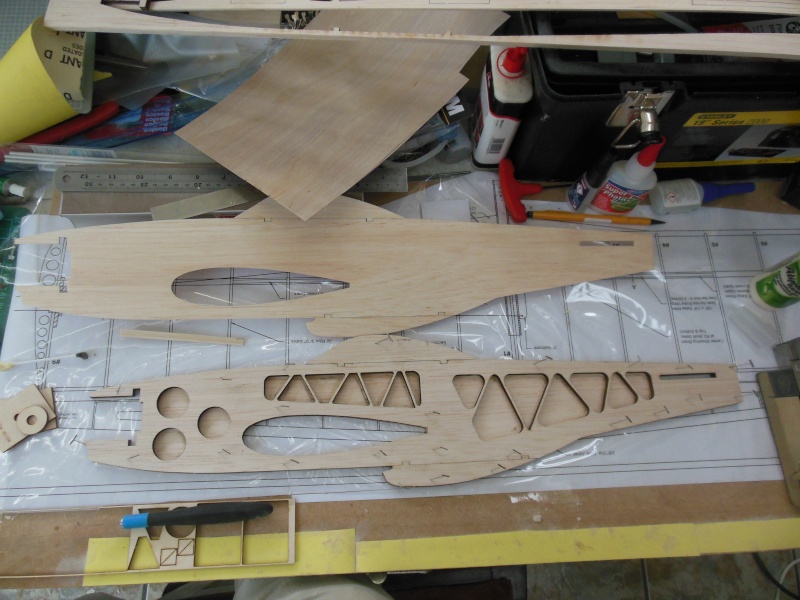
I have kept a track of it and noted some of the issues I had (all minor). The first thing to note is that the materials are excellent but I had trouble following the instructions. Like most kits, I have come to the conclusion that they are often written in hindsight by skilled builders (or designers) and a degree of knowledge or aptitude is often assumed.
Pictures are worth a thousand words!
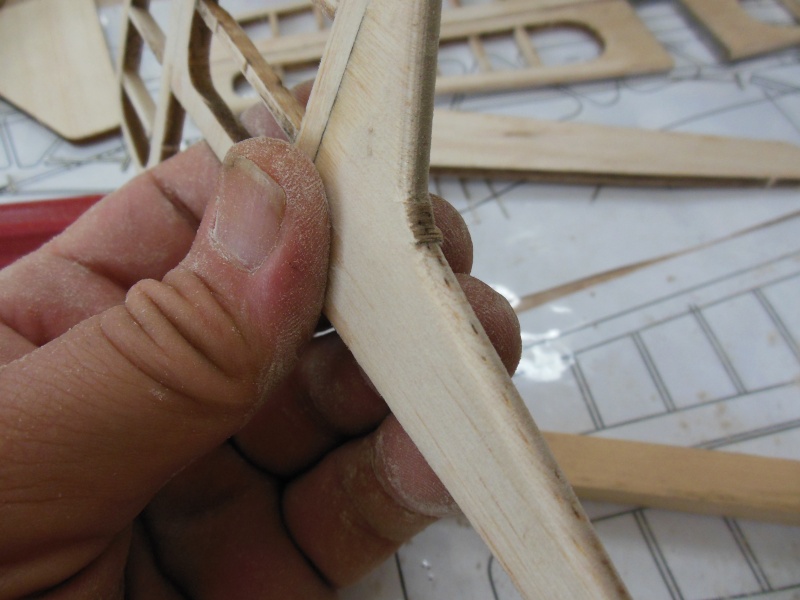
The wings were an easy build until it came to the tips. The kit was supplied with adjustable lead out. It was rectangular in shape but only just larger than the slot cut in the ribs. So I shaved off a smidgen along the length and rounded the edges.
This enabled it to fit neatly into the rib.


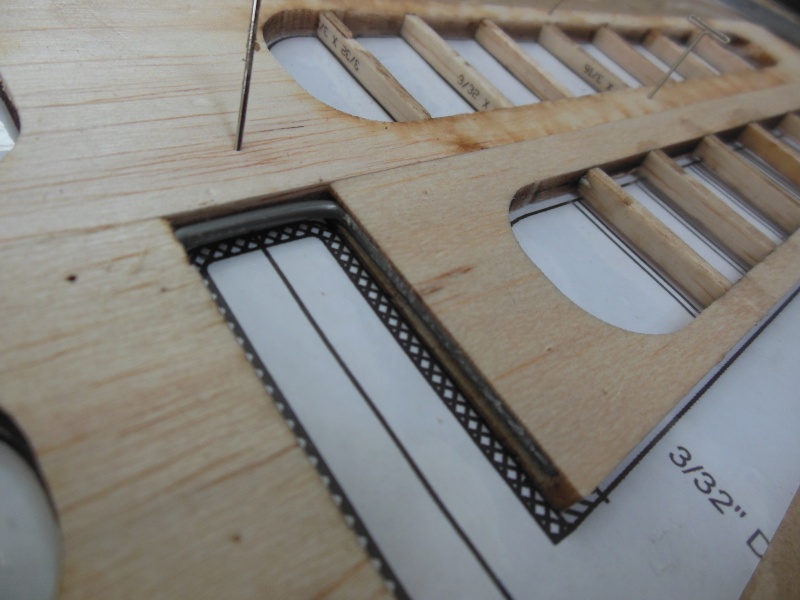
There was also a wing tip weight box

I didn't want it proud of the wing surface and so I trimmed it to fit the rib shape. Should allow me to cover the wing neatly just leaving the lid (I also curved the edge of this)
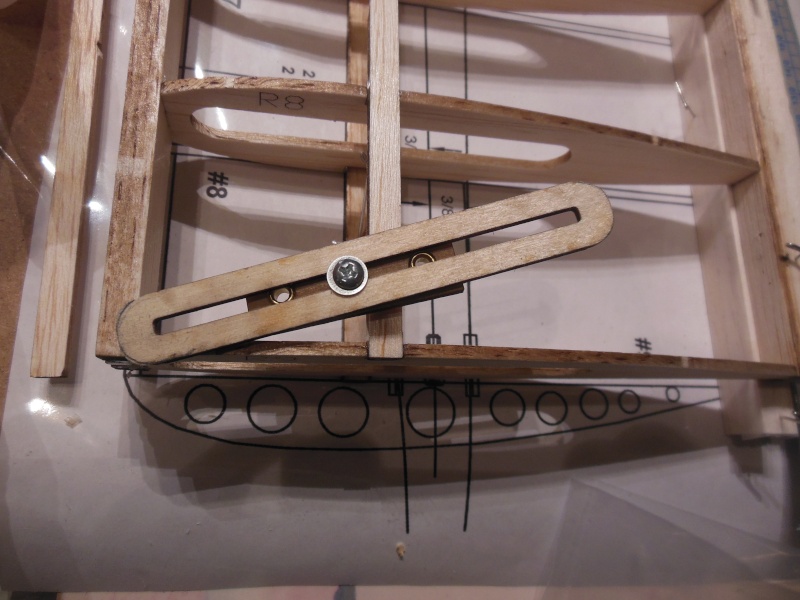
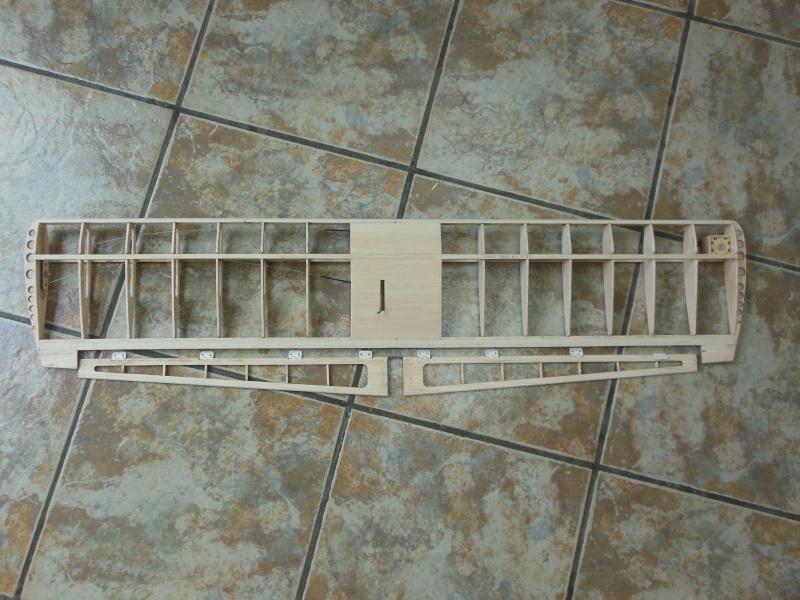
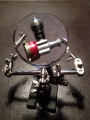
The bellcrank fitted neatly

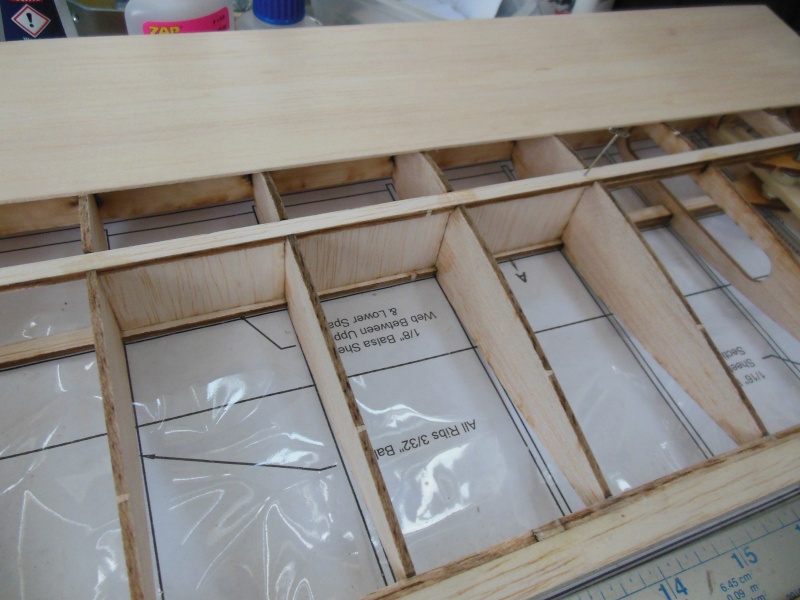
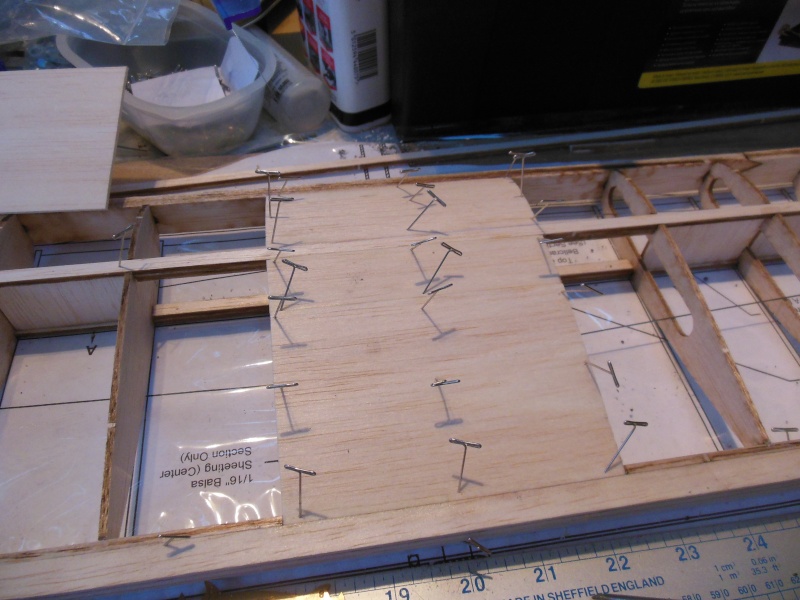
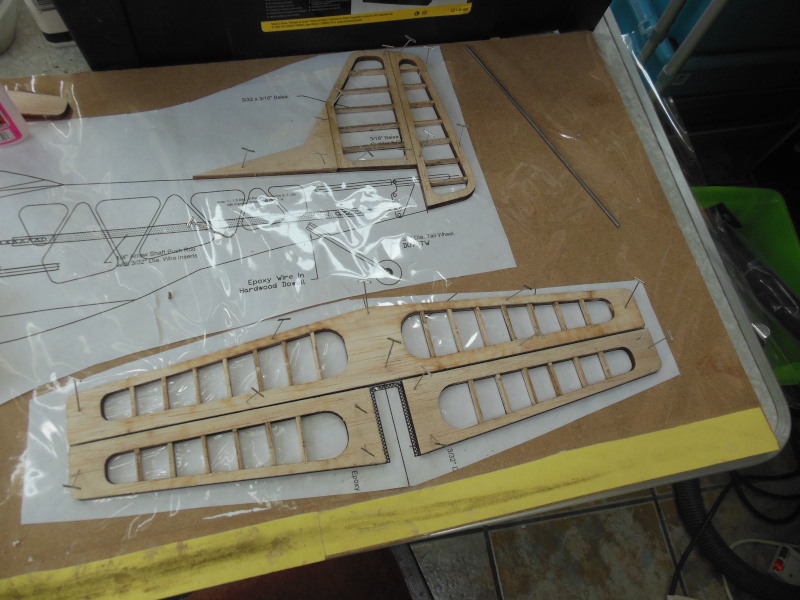
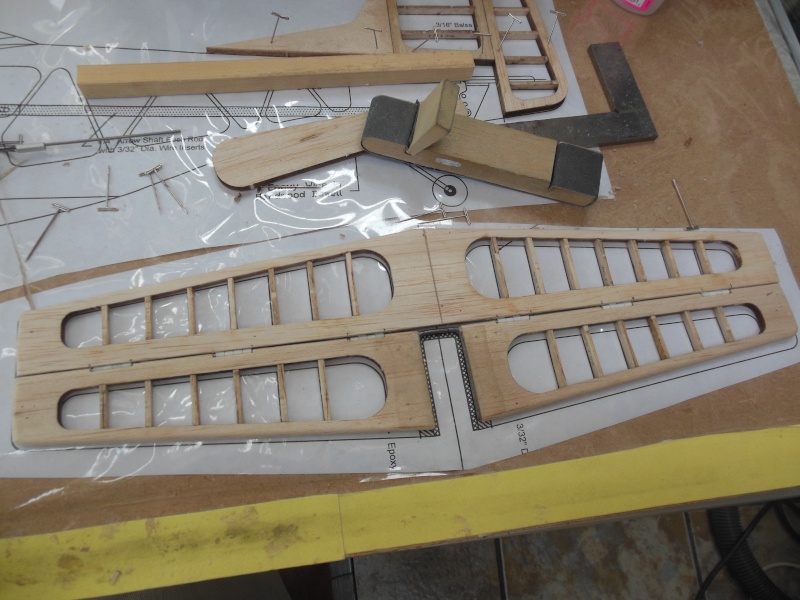
Webbing and sheeting
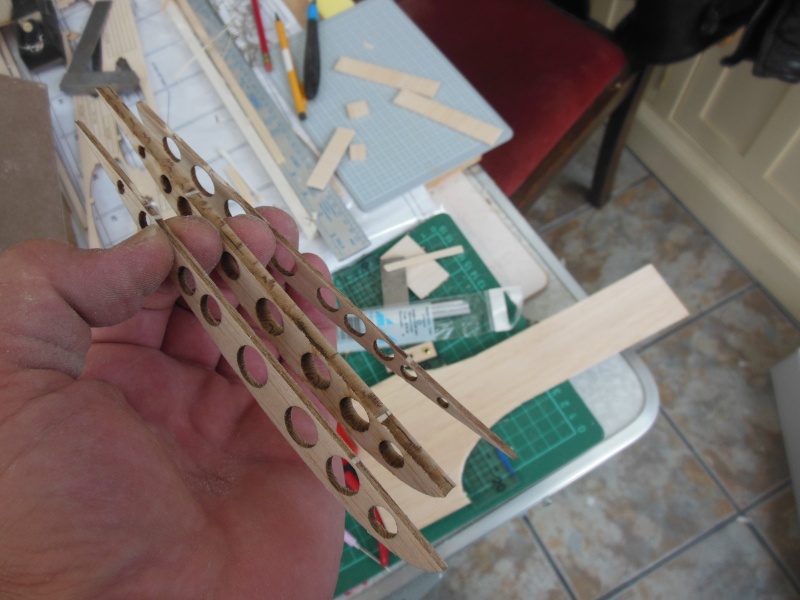
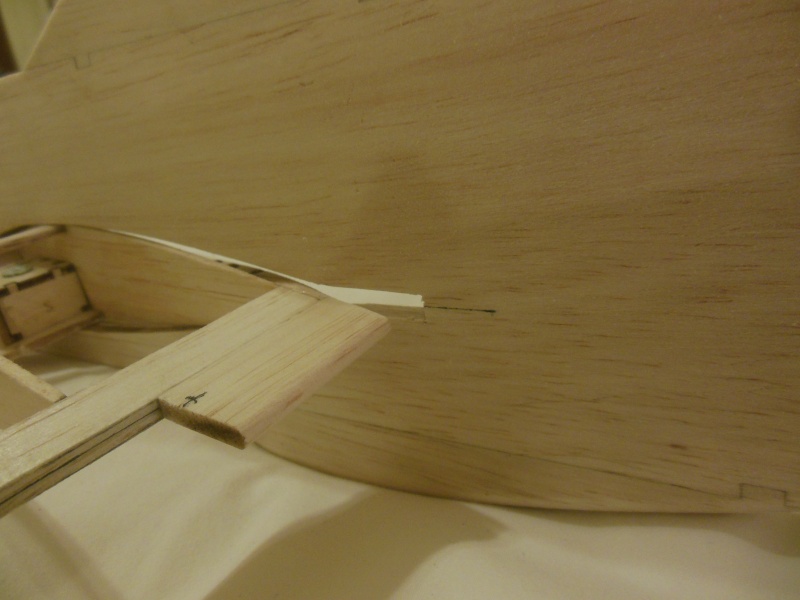
Then I came to another tricky bit. The wing tips - all ready cut and lightened - How can you place these centrally without interfering with the lead outs?
I decided to split it - the picture shows one original tip in the middle, the two outer ones split. Again the quality of the wood allowed me to do this with an xacto blade!

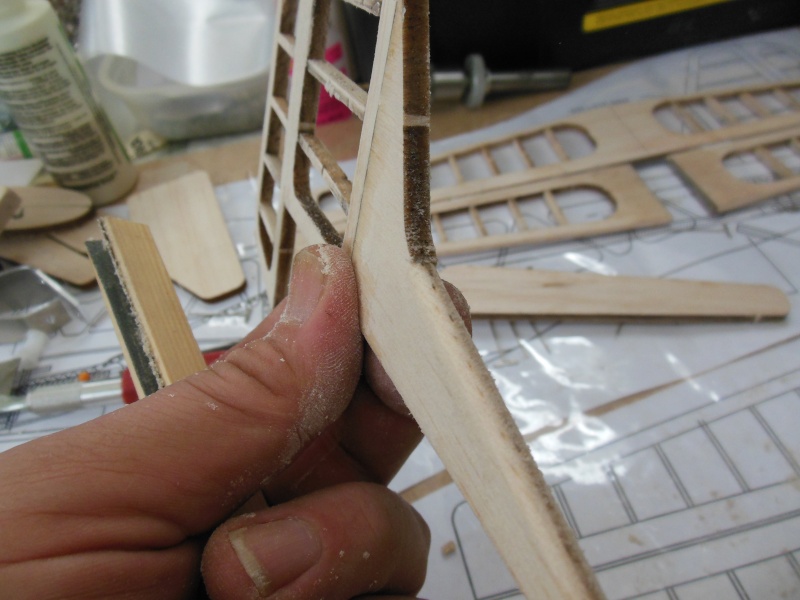
I then made an insert to widen it and used 1/64 ply to prevent the lead outs wearing the balsa. At this stage I also realised that the tip would bind the adjusting screw so I allowed a slot.
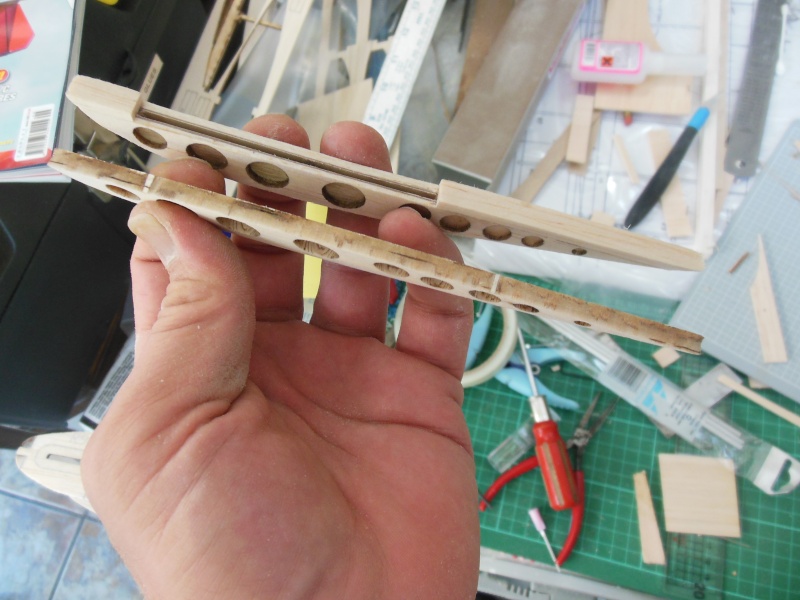
and made the other tip match. The wood split just as easily on the second tip. While probably not necessary - symmetry has an appeal.

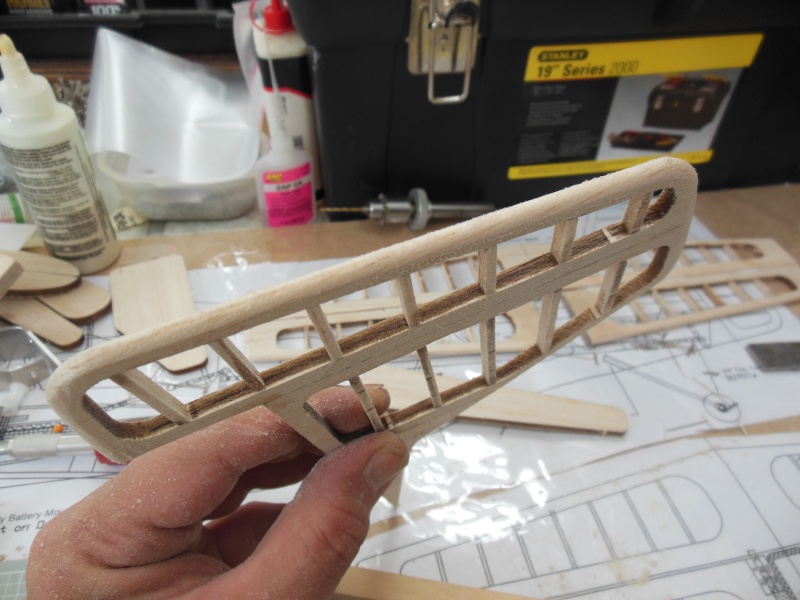
The finished result


This was blended with the leading edge using the constructed sanding block
The finished wing awaiting ailerons
To be continued ....................

ian1954- Diamond Member

- Posts : 2688
Join date : 2011-11-16
Age : 69
Location : England
Re: RSM P51d build
![]() ian1954 Sun Nov 09, 2014 11:48 am
ian1954 Sun Nov 09, 2014 11:48 am
The parts

add glue
more glue and build ailerons while waiting for set

Epoxying ply, slow setting hence clamps

ian1954- Diamond Member
- Posts : 2688
Join date : 2011-11-16
Age : 69
Location : England
Re: RSM P51d build
![]() pkrankow Sun Nov 09, 2014 11:49 am
pkrankow Sun Nov 09, 2014 11:49 am
Got any more clamps?
Phil

pkrankow- Top Poster

- Posts : 3025
Join date : 2012-10-02
Location : Ohio
Re: RSM P51d build
![]() rsv1cox Sun Nov 09, 2014 12:07 pm
rsv1cox Sun Nov 09, 2014 12:07 pm
I looked it up, I guess with the inner fuse section it would be the "built-up" kit rather than the profile. I see that you use both CA and epoxy according to application. CA sure makes the build go faster and many times frees up a hand or two.
I also like the "Pentastar" that RSM offers.
Good luck with your build. What are you thinking of using as a cover/paint?
Bob

rsv1cox- Top Poster


Posts : 10551
Join date : 2014-08-18
Location : West Virginia
Re: RSM P51d build
![]() ian1954 Sun Nov 09, 2014 12:47 pm
ian1954 Sun Nov 09, 2014 12:47 pm
pkrankow wrote:Generally a balsa plug is glued to the lid of a weight box with relief for the screw head. A half of a half rib can allow for sheeting the gap around the box so the box is perfectly faired in with material for covering to attach to.
Got any more clamps?
Phil
Wish I had have known this before building.
ian1954- Diamond Member
- Posts : 2688
Join date : 2011-11-16
Age : 69
Location : England
Re: RSM P51d build
![]() ian1954 Sun Nov 09, 2014 12:55 pm
ian1954 Sun Nov 09, 2014 12:55 pm
rsv1cox wrote:Very nice. Love it.
What are you thinking of using as a cover/paint?
Bob
Not decided yet but it isn't going to be iron on stuff. I have amassed dope and like the smell of it. I have Silk, Starspan tissue, heavy and medium weight tissue, nylon ......as I don't have to fuel proof it - any old paint as long as it is light. I usually mess up painting and have been practising with spray gun and airbrushes.
I am not a fine wine and have not improved with age!
ian1954- Diamond Member
- Posts : 2688
Join date : 2011-11-16
Age : 69
Location : England
Re: RSM P51d build
![]() ian1954 Sun Nov 09, 2014 2:20 pm
ian1954 Sun Nov 09, 2014 2:20 pm
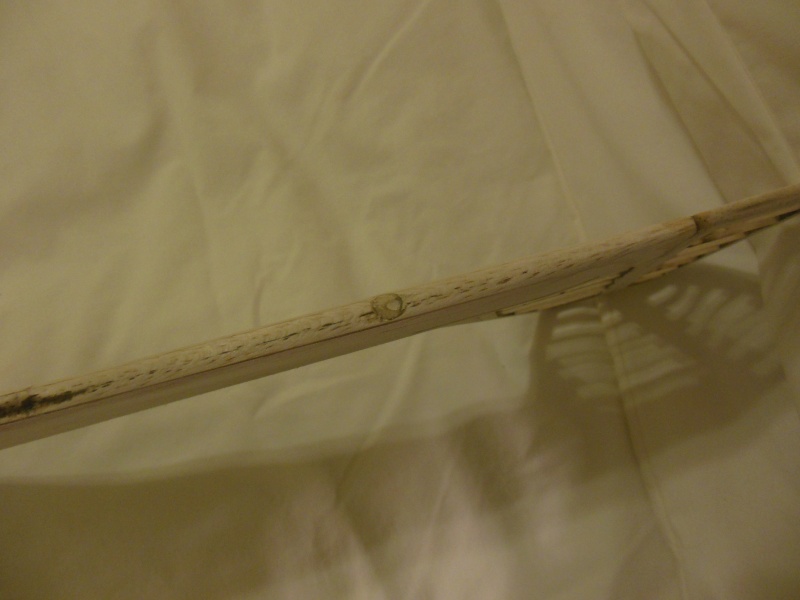
A departure from the plan, I inset the piano wire. It was then epoxied in place with a covering of glass fibre.

I made another profiled sanding block to round the edges.
One edge done and reversed in the block

The block

It speeds things up
We are talking seconds and not minutes. Outside curves and corners not a problem. Inside curves, a bit of hand sanding is needed to finish.
ian1954- Diamond Member
- Posts : 2688
Join date : 2011-11-16
Age : 69
Location : England
Re: RSM P51d build
![]() ian1954 Sun Nov 09, 2014 2:33 pm
ian1954 Sun Nov 09, 2014 2:33 pm

As original, they would have been to big and protruded through the balsa.

I did the same thing for the ailerons
I also made the mistake of glueing on the fixed aileron tips more of that later. It seemed the easiest way to line everything up.
ian1954- Diamond Member
- Posts : 2688
Join date : 2011-11-16
Age : 69
Location : England
pkrankow- Top Poster
- Posts : 3025
Join date : 2012-10-02
Location : Ohio
Re: RSM P51d build
![]() Cribbs74 Sun Nov 09, 2014 6:59 pm
Cribbs74 Sun Nov 09, 2014 6:59 pm
Ron

Cribbs74- Moderator
-
Posts : 11895
Join date : 2011-10-24
Age : 50
Location : Tuttle, OK
Re: RSM P51d build
![]() pkrankow Sun Nov 09, 2014 8:50 pm
pkrankow Sun Nov 09, 2014 8:50 pm
Phil
pkrankow- Top Poster
- Posts : 3025
Join date : 2012-10-02
Location : Ohio
Re: RSM P51d build
![]() Cribbs74 Sun Nov 09, 2014 9:08 pm
Cribbs74 Sun Nov 09, 2014 9:08 pm
If Ian requires a trim adjustment it would be easy to cut that tab off at the joint and create a tab.
Ron
Cribbs74- Moderator
-
Posts : 11895
Join date : 2011-10-24
Age : 50
Location : Tuttle, OK
Re: RSM P51d build
![]() Mark Boesen Sun Nov 09, 2014 10:56 pm
Mark Boesen Sun Nov 09, 2014 10:56 pm
Looks great, should be a good plane for you. That fuselage reminds me of Larry Cunningham's Mo'best design, one of the best flying profiles out there.
Mark Boesen- Top Poster
- Posts : 3976
Join date : 2011-09-01
Age : 65
Location : Rockford, Il -

Re: RSM P51d build
![]() ian1954 Mon Nov 10, 2014 4:41 pm
ian1954 Mon Nov 10, 2014 4:41 pm

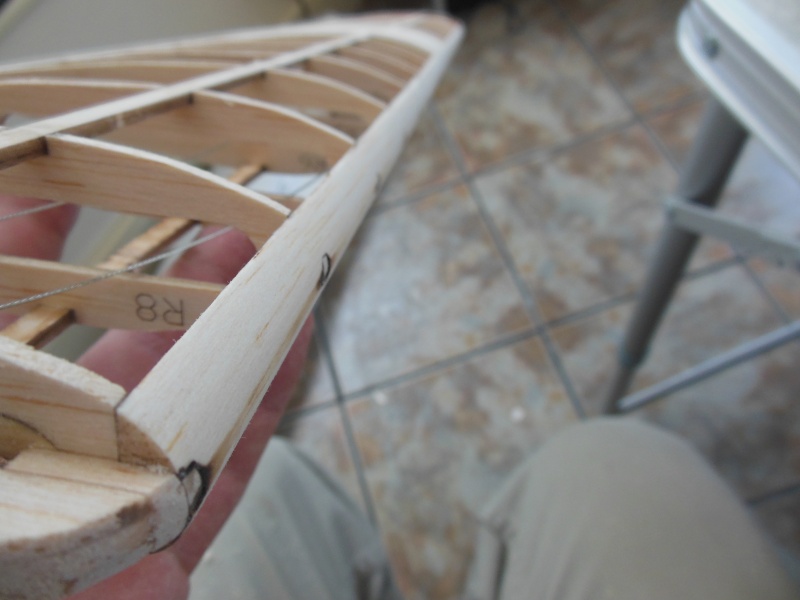
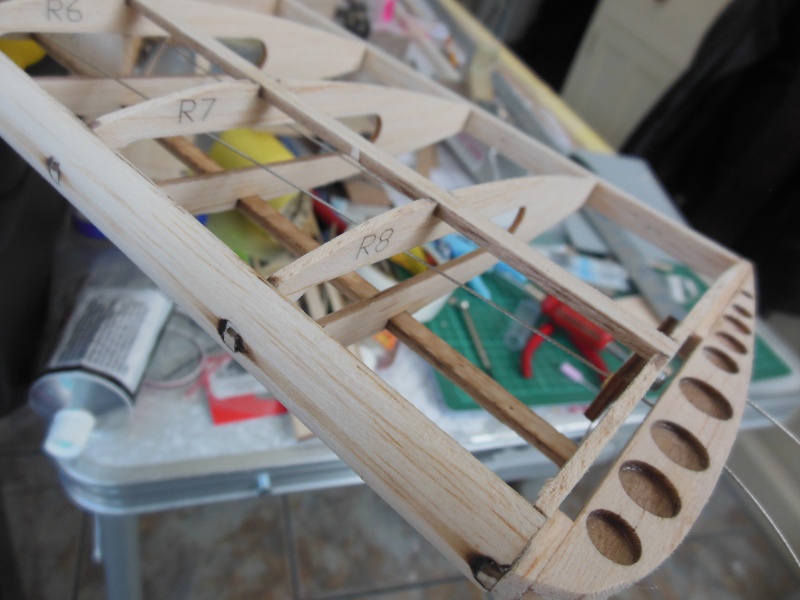
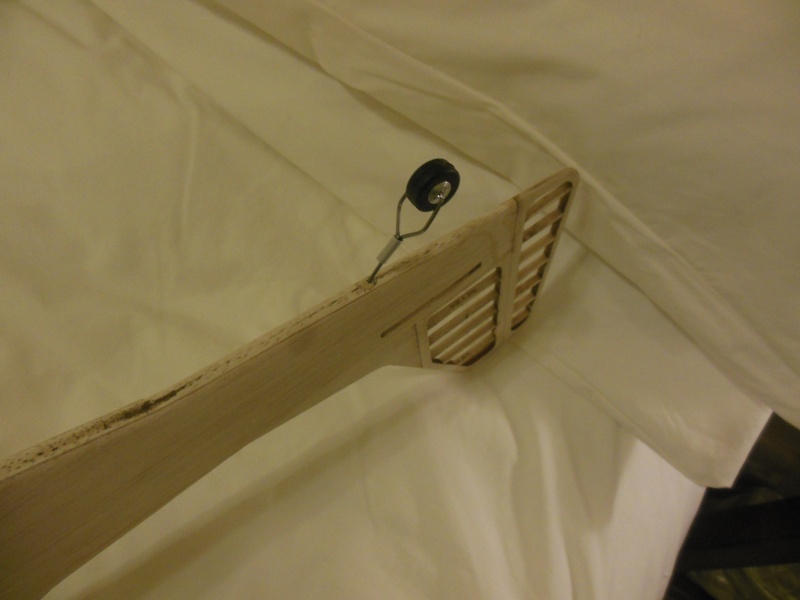
The fuselage seems very robust and is also light.
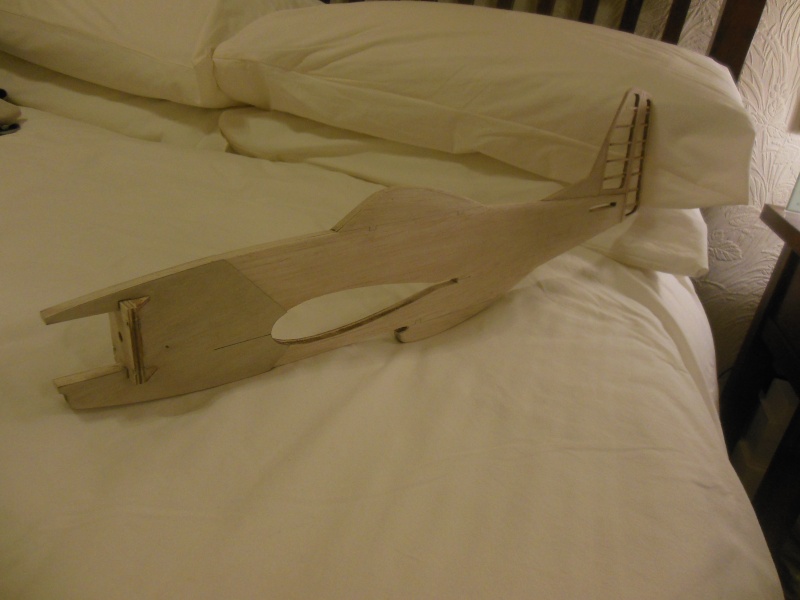

There is a dowel at the back
for mounting a tail wheel
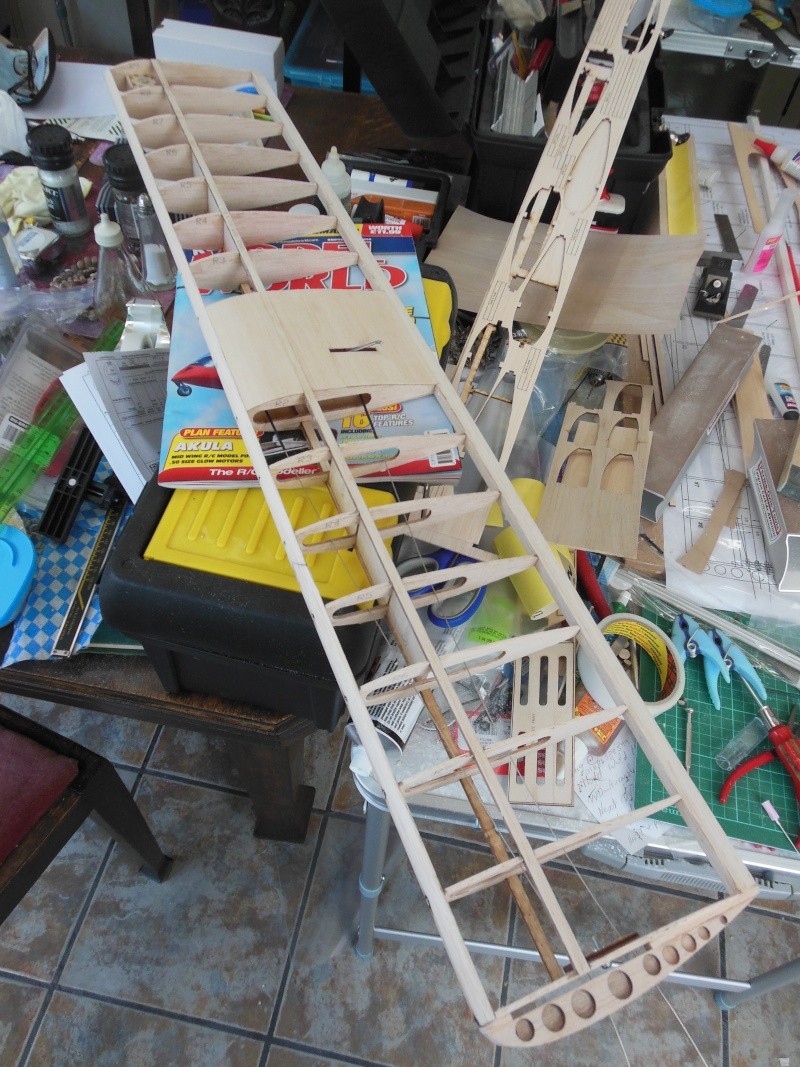
I am the stage of starting covering. This is it temporarily assembled.
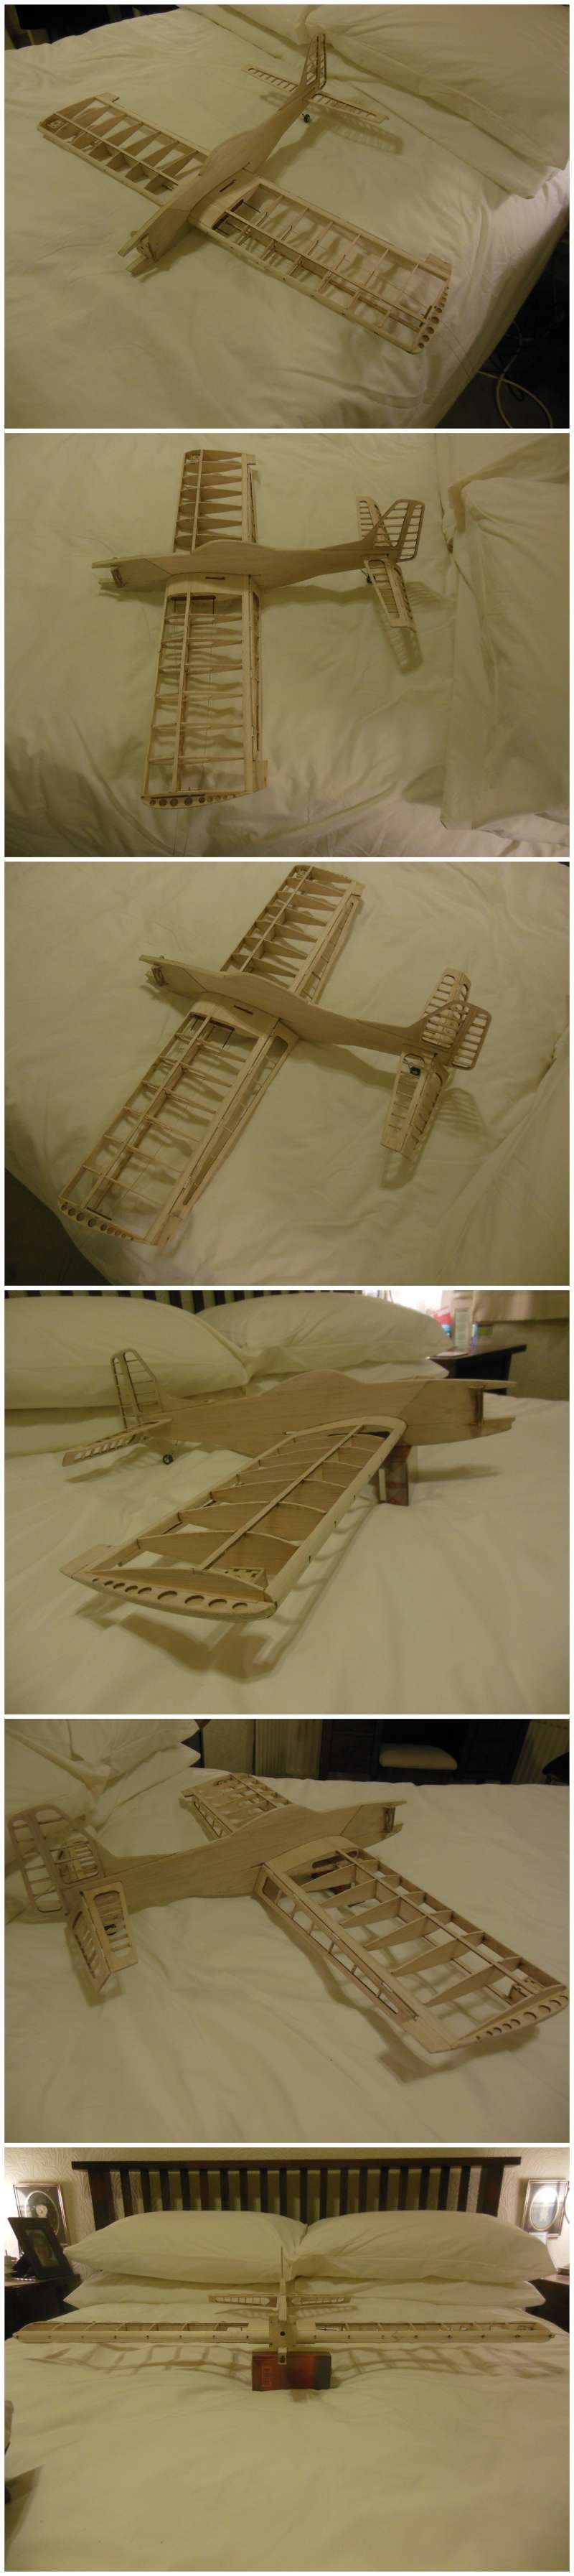
A few hints on covering would be appreciated. I do intend to use either silk or tissue but, for example, should I cover the whole wing before attaching the fuselage?
Or glue and assemble wings etc to the fuselage first?
ian1954- Diamond Member
- Posts : 2688
Join date : 2011-11-16
Age : 69
Location : England
Re: RSM P51d build
![]() pkrankow Mon Nov 10, 2014 5:20 pm
pkrankow Mon Nov 10, 2014 5:20 pm
Painting the sheeting with fuel proof paint, including inside the bell crank exit, is a good idea. If you cover the whole wing prior to installation, paint it anyways. I like to glue the wing in, then paint, then cover (with film), typically.
I have tried the ARF method and don't like it too much.
Phil
pkrankow- Top Poster
- Posts : 3025
Join date : 2012-10-02
Location : Ohio
Re: RSM P51d build
![]() Cribbs74 Mon Nov 10, 2014 7:02 pm
Cribbs74 Mon Nov 10, 2014 7:02 pm
I would assemble then cover. As Phil suggested do the hinge gluing after the fact.
Cribbs74- Moderator
-
Posts : 11895
Join date : 2011-10-24
Age : 50
Location : Tuttle, OK
Re: RSM P51d build
![]() RknRusty Mon Nov 10, 2014 7:52 pm
RknRusty Mon Nov 10, 2014 7:52 pm
Before you glue the flap horns in place, if they are particularly hard metal you may want to anneal them so as to be able to twist a flap for flying trim without breaking the flap. I didn't know that when I built my Yak-9 and tried to adjust a flap and only succeeded in cracking the wood, giving up and adding a trim tab to the outboard wing to level it in flight.
Rusty
_________________
...and never Ever think about how good you are at something...
while you're doing it!
My Hot Rock & Blues Playlist

RknRusty- Rest In Peace

- Posts : 10869
Join date : 2011-08-10
Age : 68
Location : South Carolina, USA
Re: RSM P51d build
![]() pkrankow Mon Nov 10, 2014 8:45 pm
pkrankow Mon Nov 10, 2014 8:45 pm
RknRusty wrote:...
Before you glue the flap horns in place, if they are particularly hard metal you may want to anneal them so as to be able to twist a flap for flying trim without breaking the flap. I didn't know that when I built my Yak-9 and tried to adjust a flap and only succeeded in cracking the wood, giving up and adding a trim tab to the outboard wing to level it in flight.
Rusty
Annealing is difficult and dicey, on a small part like this it is pretty difficult. Deeply drawing the temper is more realistic, although the softest state of the metal won't be achieved. IF YOU REALLY THINK IT IS NECESSARY Heat the steel to dull red in dim light. Use wet towel on the ends if it is glued, keep the towel wet with a squirt bottle. Allow the metal to cool evenly (with the ends wet if glued in).
(to anneal the metal has to be raised above "critical" for the phase change, about 1450-1650F for most steels, then cooled over about 24 hours in dry fluffy ashes or similar insulation. Since the wire is so small a heat mass of added steel would need heated and packed at the same time.)
If you anneal wrong the metal may be harder or more brittle than before starting. If the wire is annealed drill rod deeply drawing temper will not heat the metal to "critical" and the metal will remain at the same hardness that it started at. Steel has to be hardened to temper, tempering is not hardening, but is softening.
Apologies for waxing pedantic.
Long hardwood adjusting handles can be made to fit the flaps tightly and allow tweaking of the flaps.
Phil
pkrankow- Top Poster
- Posts : 3025
Join date : 2012-10-02
Location : Ohio
Re: RSM P51d build
![]() RknRusty Mon Nov 10, 2014 9:23 pm
RknRusty Mon Nov 10, 2014 9:23 pm
_________________
...and never Ever think about how good you are at something...
while you're doing it!
My Hot Rock & Blues Playlist
RknRusty- Rest In Peace
- Posts : 10869
Join date : 2011-08-10
Age : 68
Location : South Carolina, USA
Re: RSM P51d build
![]() getback Tue Nov 11, 2014 7:41 am
getback Tue Nov 11, 2014 7:41 am
 Should be a good flyer from the looks . Eric
getback- Top Poster
-
Posts : 10114
Join date : 2013-01-18
Age : 66
Location : julian , NC
Re: RSM P51d build
![]() ian1954 Thu Nov 13, 2014 11:18 am
ian1954 Thu Nov 13, 2014 11:18 am
Ken warns against dyeing in another topic as he has seen many example fade over time. I suppose exposure to sunlight will definitely cause this but if you are just after a colour (and still learning to fly control line) then it seems a quicker way to "finish" a model.
I have now covered quite a few models with the iron on stuff and, while a relatively quick way to cover, the various coverings I have tried don't seem to impart much strength to the model as I remember from using silk or nylon coverings.
Maybe I'm right, maybe I'm wrong but I won't know until I try it. It may end up heavier than I expect but I'm all for trying.
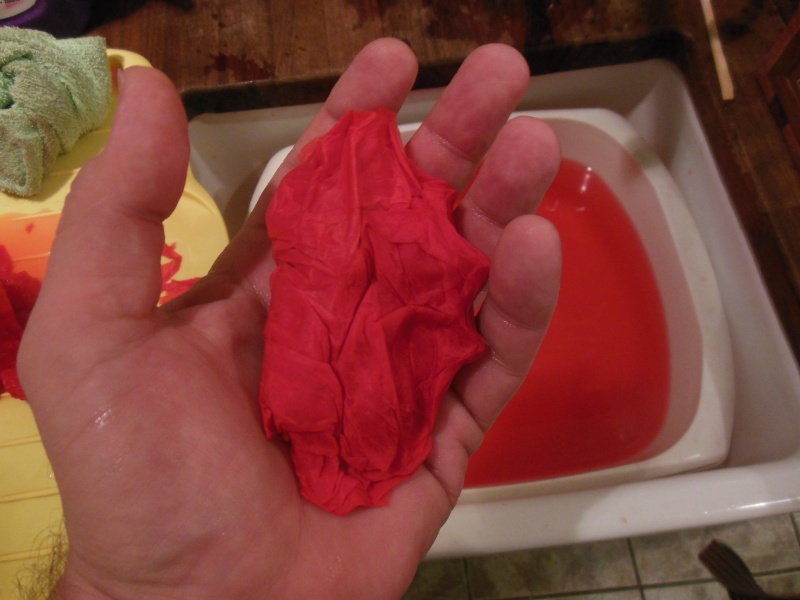
Anyway. I learned that not all tissues are suitable for this process.
Here is the silk being soaked.

I then bunged in two different tissues - one called Starspan and another from my "stock" - they both appeared as strong as each other dry and weighed the same.
Here is two sheets of Starspan squeezed after rinsing.
Here is the slop left by my stock tissue.
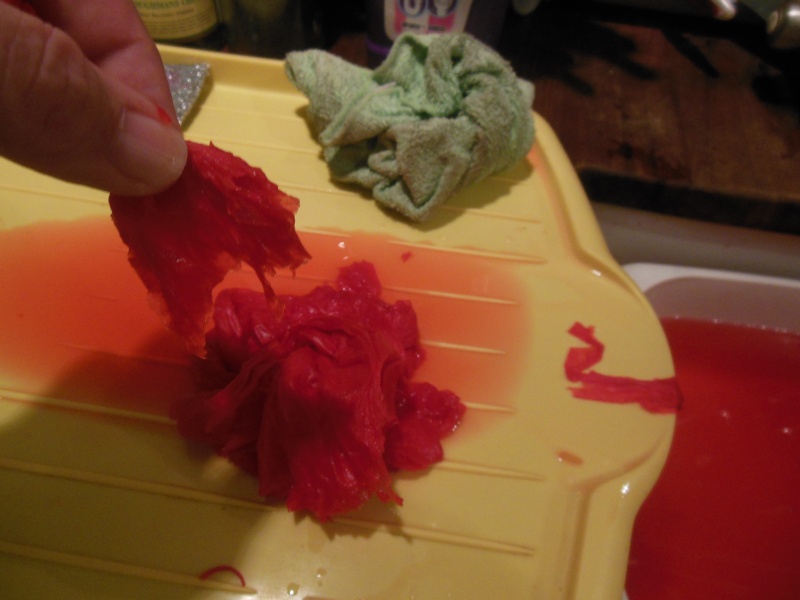
I did wonder what would have happened covering with that when wet.
Due to the absence of SWTSMBO - not that it would make much difference - here is the tissue drying nicely

and the silk

ian1954- Diamond Member
- Posts : 2688
Join date : 2011-11-16
Age : 69
Location : England
Re: RSM P51d build
![]() KariFS Thu Nov 13, 2014 11:44 am
KariFS Thu Nov 13, 2014 11:44 am
If I ever build a combat plane it's going to be tie-dyed silk

KariFS- Diamond Member
- Posts : 2002
Join date : 2014-10-10
Age : 52
Re: RSM P51d build
![]() ian1954 Thu Nov 13, 2014 11:57 am
ian1954 Thu Nov 13, 2014 11:57 am
It is not a quick dip job. The final colour depends on the amount of water, salt and dye used. The instruction recomended mixing according to the weight of material. I suppose that is OK for cottons and wools but silk and tissue weigh next to nothing and are thin.
I used a more concentrated mix than recommended. They said 6 litres of water, I uses 11/2 reduced the amount of salt but kept the dye amount the same.
ian1954- Diamond Member
- Posts : 2688
Join date : 2011-11-16
Age : 69
Location : England
Re: RSM P51d build
![]() getback Thu Nov 13, 2014 12:24 pm
getback Thu Nov 13, 2014 12:24 pm
 Eric
Eric
getback- Top Poster
-
Posts : 10114
Join date : 2013-01-18
Age : 66
Location : julian , NC
Re: RSM P51d build
![]() ian1954 Thu Nov 13, 2014 12:39 pm
ian1954 Thu Nov 13, 2014 12:39 pm
getback wrote:Well that looks just Dandy never seen it done / and I have not heard of preshrinking silk for light frame constructionIs that pretty much the same as what ur doing to color the silk , soak and dry before you apply? Its always good to learn something on CEF
I am not sure that it will be pre shrunk. This particular silk is close weave and so will not shrink much anyway. It will still need applying wet and a little stretching. Some silks shrink so much they can distort a frame. This will be all "trial and error"
Tis all new to me, although silk is expensive - it is not as expensive as it used to be. I have covered with nylon before but that wil not take a "household dye".
But if practical, I suppose preshrinking silk could be a good idea but I wouldn't know what to recommend.
I have seen wrinkled wing coverings with dope smooth out by themselves after a couple of months. I think dope takes a lot longer than often but thought to cure. It skins quickly but underneath the solvent can take some time to evaporate.
ian1954- Diamond Member
- Posts : 2688
Join date : 2011-11-16
Age : 69
Location : England
Page 1 of 2 • 1, 2 ![]()
» The BTC-2 build
» Guillows Cessna 150 build circa 1970 (Build Log)
» Looking for first RC build...
» Help Deciding on Kit