

 Rules
Rules
by rsv1cox Today at 8:55 am
» Artwork for Otto Kuhni
by GallopingGhostler Today at 8:26 am
» Internet buy
by bsadonkill Today at 8:19 am
» Jim Walker Firebaby
by getback Today at 7:42 am
» Sherline lathe wont run
by getback Today at 7:15 am
» Roddie's water-cooling bottle for bench-running
by roddie Yesterday at 7:38 pm
» Feed Station Zebra.. Spring 2022
by roddie Yesterday at 5:59 pm
» **VOTE-ON-THE-NEXT-COX-ENGINE-OF-THE-MONTH** (May 2024)
by GallopingGhostler Yesterday at 11:12 am
» Jim Walkers FireBee - This is going to be fun
by rsv1cox Yesterday at 7:43 am
» Baja Bug / Dune Buggy Recoil Starter
by vambrosini Mon May 13, 2024 8:57 pm
» Wanted: Pull Starter reapir kit for a Cox Dune Buggy.
by vambrosini Mon May 13, 2024 8:55 pm
» cox dune buggy/ baja bug
by vambrosini Mon May 13, 2024 8:49 pm


Repair of the JR SATAN

Repair of the JR SATAN
![]() OVERLORD Sun Sep 29, 2013 9:21 am
OVERLORD Sun Sep 29, 2013 9:21 am
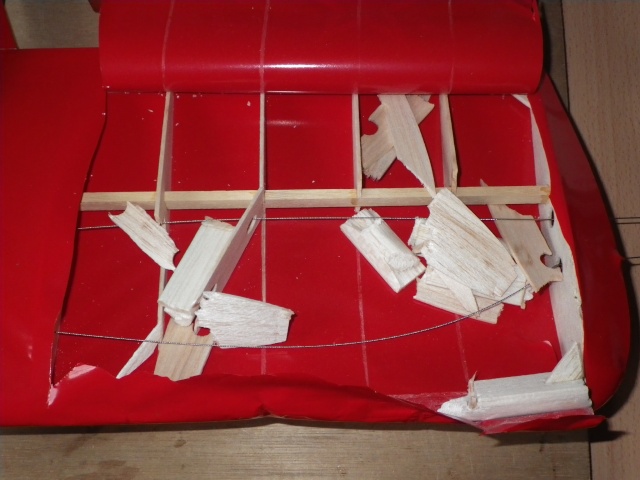
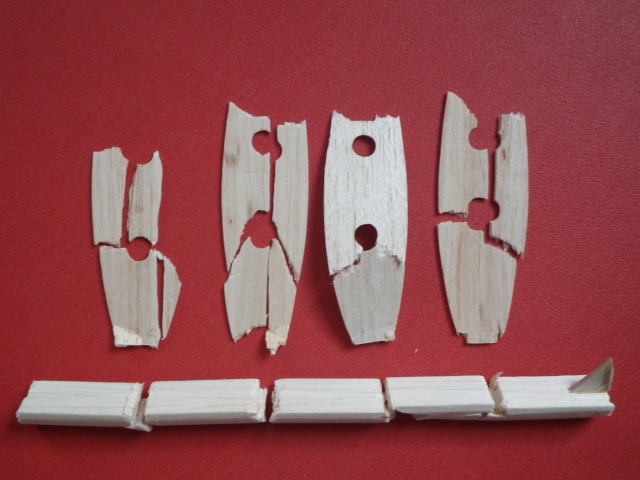
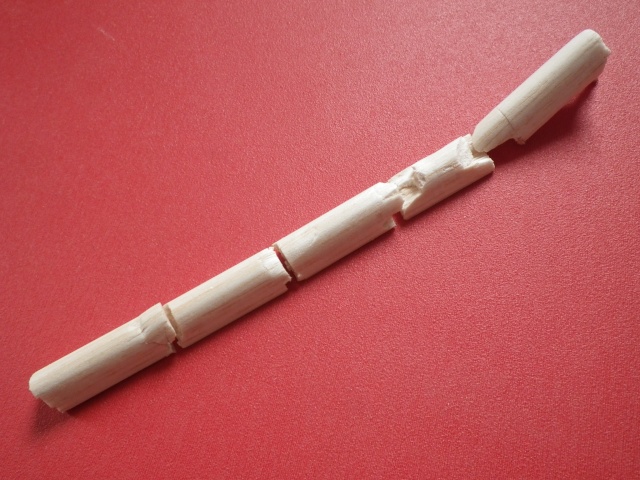
After removing the bits, this is what was left of it:

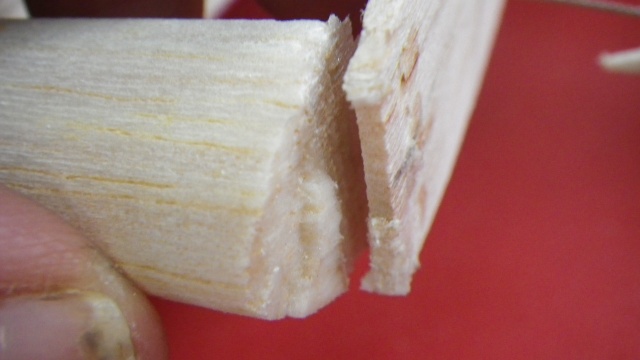
In order to do some damage analysis to check if the construction could be improved or find out how it broke, I puzzled it all together again. You can see 3 impacts on the leading edge where the tree hit the wing. The leading edge broke in way of the rib notches.
That were the weakest points of the LE, but why? The ribs were not glued properly to the LE. I used CA glue after assembling LE and ribs and thought the capilary action would take care of the rest. Not quite!!
 The ribs were only glued at their surfaces and in the corners where they meet the LE, so no penetration at all! The forward rib edges are mostly still in 1 piece.

Next thing to do is getting new balsa to start repairing!
Lieven

OVERLORD- Diamond Member

- Posts : 1791
Join date : 2013-03-19
Age : 57
Location : Normandy, France
Re: Repair of the JR SATAN
![]() ian1954 Sun Sep 29, 2013 9:46 am
ian1954 Sun Sep 29, 2013 9:46 am
I have had a close look it the pictures and the way the wing has broken. Although I wouldn't expect a model to fare well after hitting a tree - It looks as if the balsa, particularly on the leading edge, is soft. The grain or figure looks soft - not the best choice for a leading edge especially if you have cross cut part way to accept rib.
Here we have hard, medium and soft balsa.
I would always suggest hard balsa for the leading edge and medium for ribs. Hard balsa can be over 4x the weight of soft and medium over 2x. Also a lot of sheet balsa varies in the sheet itself.
Rgds,
Ian

ian1954- Diamond Member
- Posts : 2688
Join date : 2011-11-16
Age : 69
Location : England
Re: Repair of the JR SATAN
![]() roddie Sun Sep 29, 2013 11:02 am
roddie Sun Sep 29, 2013 11:02 am
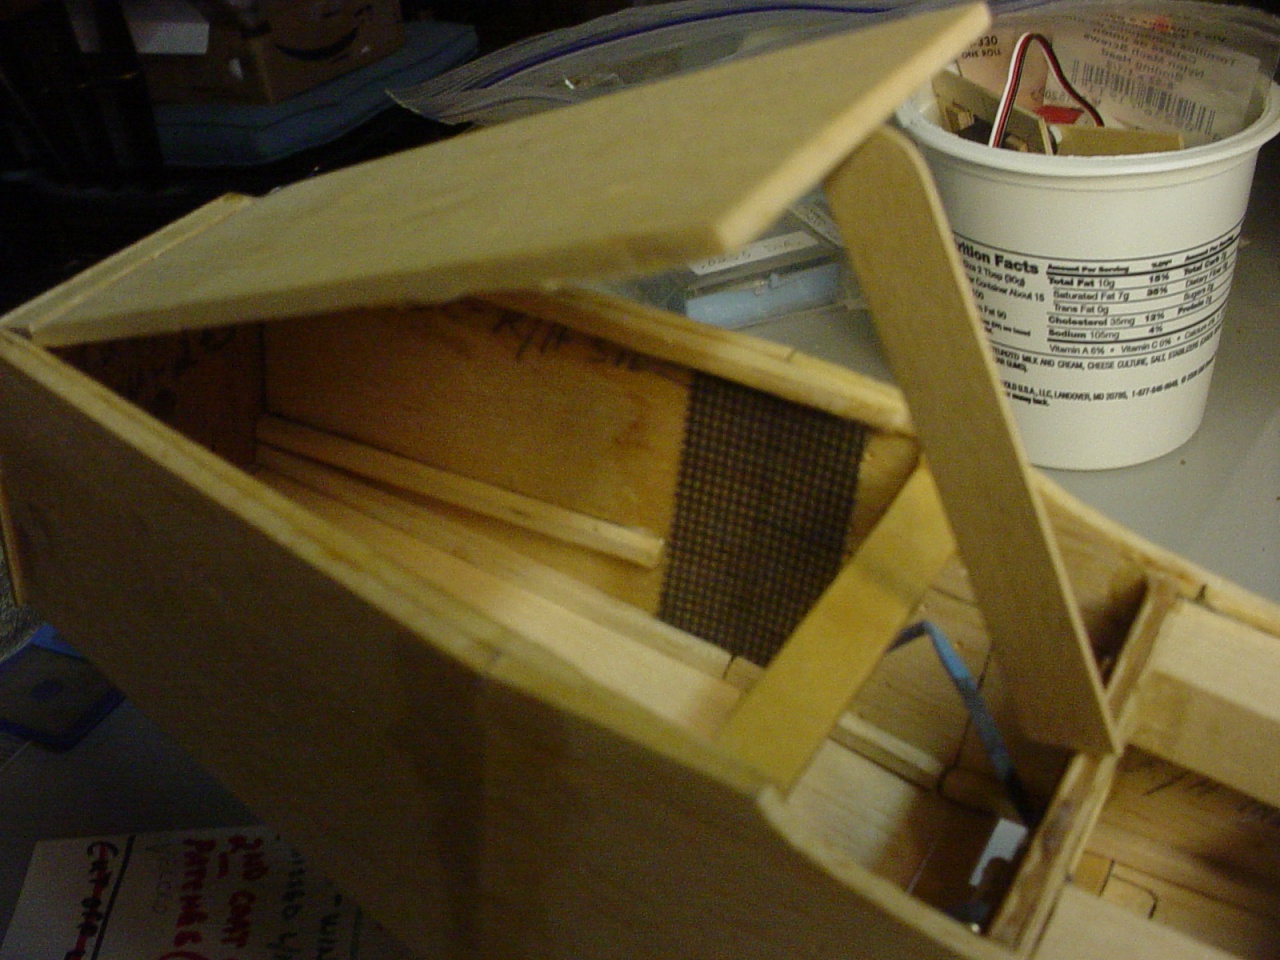
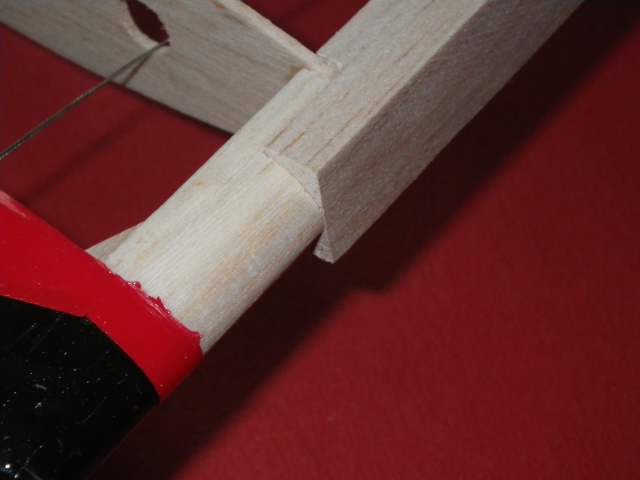
In my opinion, your wing "as built" had the perfect "crumple-zone" for such an impact. The spar looks undamaged... and that's really the only part where you want the most strength in a wing. The replacement L/E could be joined near the root, with a short (1") piece of aluminum tubing roughed-up and "dowelled" in, for support. Keep your repairs "A"-grain lightweight balsa. On internal structures that have broken or need strengthening; I cut small patches of fiberglass window-screen mat'l. and bridge the joint/break... "tacking" with CA... then brushing-on epoxy using a short-bristled plumbing flux brush. It forms a lightweight and very strong patch.
Here's a photo that shows a joint that I chose to strengthen in this way.
 " />
" />
roddie- Top Poster

- Posts : 8316
Join date : 2013-07-17
Age : 64
Location : N. Smithfield, Rhode Island -

Re: Repair of the JR SATAN
![]() Cribbs74 Sun Sep 29, 2013 3:24 pm
Cribbs74 Sun Sep 29, 2013 3:24 pm
The good thing is it's a quick repair.
Ron

Cribbs74- Moderator


Posts : 11897
Join date : 2011-10-24
Age : 50
Location : Tuttle, OK
Re: Repair of the JR SATAN
![]() ian1954 Sun Sep 29, 2013 3:42 pm
ian1954 Sun Sep 29, 2013 3:42 pm
My favourite control line, apart from "Blue Pants" was the "Dominator" - the Dominator was a survivor. Definitely hard balsa leading edge! Although some used soft balsa at the front of it because it was easier to sand but only for the rounded portion. You can see this in the contructor's link below.
http://www.flyinglines.org/kb.dominator.html
ian1954- Diamond Member
- Posts : 2688
Join date : 2011-11-16
Age : 69
Location : England
Re: Repair of the JR SATAN
![]() duke.johnson Sun Sep 29, 2013 6:18 pm
duke.johnson Sun Sep 29, 2013 6:18 pm

duke.johnson- Diamond Member
- Posts : 1734
Join date : 2012-11-05
Age : 52
Location : Rochester, Washington
Re: Repair of the JR SATAN
![]() roddie Sun Sep 29, 2013 9:07 pm
roddie Sun Sep 29, 2013 9:07 pm
Wow... c'mon Ian... I had 2 gigs this weekend, and I'm tired. I looked forward to coming home to our beloved forum I.S.O. some "Love"ian1954 wrote:It seems that me and Roddie have opposing views on builds. Roddie prefers crumple zones and I prefer aeroplanes that will bounce of the ground.

roddie- Top Poster
- Posts : 8316
Join date : 2013-07-17
Age : 64
Location : N. Smithfield, Rhode Island -
Re: Repair of the JR SATAN
![]() OVERLORD Mon Sep 30, 2013 9:13 am
OVERLORD Mon Sep 30, 2013 9:13 am
Ron, That's because the piece of balsa I used was wider than the leading edge on the drawing while I left the ribs the same size. That's also the reason why there is a flat part on top and bottom. The centre sheet of wood should in fact butt against the back of the leading edge with a rounded flare. Because the LE is wider, I glued the centre sheeting on top of the LE and sanded it.Cribbs74 wrote:It looks to me that the leading edge notches were cut a little deep.
Ron
When I bought the wood to make the model in Jan of this year, I was still the unexperienced balsa buyer: as long as the dimensions were ok, that "wood" do for me. Later, by reading other plans and posts, I realised that the LE wood was indeed soft but light. So that's the way it went.
Lieven
OVERLORD- Diamond Member
- Posts : 1791
Join date : 2013-03-19
Age : 57
Location : Normandy, France
Re: Repair of the JR SATAN
![]() Cribbs74 Mon Sep 30, 2013 9:55 am
Cribbs74 Mon Sep 30, 2013 9:55 am
I hope you don't think I was criticizing. You did an excellent job with the build. Much better than I can do. I was just trying to figure out why the wood gave way so much.
In reality you hit a tree and even hard balsa would snap given the same scenario. Here's to a quick rebuild!
Ron
Cribbs74- Moderator
-
Posts : 11897
Join date : 2011-10-24
Age : 50
Location : Tuttle, OK
Re: Repair of the JR SATAN
![]() OVERLORD Mon Sep 30, 2013 10:54 am
OVERLORD Mon Sep 30, 2013 10:54 am
Lieven
OVERLORD- Diamond Member
- Posts : 1791
Join date : 2013-03-19
Age : 57
Location : Normandy, France
Re: Repair of the JR SATAN
![]() roddie Mon Sep 30, 2013 11:27 am
roddie Mon Sep 30, 2013 11:27 am
Hi Lieven, I used to have to fly 1/2-A in a small side yard. I had about 60 ft. to work with... between the house, a stone wall, shrubs and a tree-line. I measured-in 30 ft. for the center of the circle, where I used the "lid" of a 5 gal. pail with hole drilled through the center to accept a long (8") aluminum gutter nail. Hammer the nail through the lid, into the grass/dirt... and you have a reference point to feel with your foot. It takes a little getting used to at first... but soon becomes second nature. I used 25 ft. lines... and although there "were" times I got a little dizzy, I never hit anything... because I always had a 5 ft. "safe-zone" to work with. Maybe that's a little "tight"... but it worked for me.OVERLORD wrote: I just wonder, to avoid such things again, how do you stay on the same spot while turning round and round and round?
Lieven
If you paint the lid "green"... you can leave it in place and just trim around it when you do your lawn-mowing. That way, it isn't real noticeable... and you don't have to measure-off every time.
roddie- Top Poster
- Posts : 8316
Join date : 2013-07-17
Age : 64
Location : N. Smithfield, Rhode Island -
Re: Repair of the JR SATAN
![]() Cribbs74 Mon Sep 30, 2013 12:03 pm
Cribbs74 Mon Sep 30, 2013 12:03 pm
The dizzies go away after a while. In your case you had multiple problems as the plane wasn't flying right so you were spinning and fighting at the same time.
Roddie's suggestion about marking the center is a good one. Some use a rag or other things. I use a paver stone as it doesn't move.
Once you stop getting dizzy you don't move much off of center anymore.
Ron
Cribbs74- Moderator
-
Posts : 11897
Join date : 2011-10-24
Age : 50
Location : Tuttle, OK
Re: Repair of the JR SATAN
![]() RknRusty Mon Sep 30, 2013 3:07 pm
RknRusty Mon Sep 30, 2013 3:07 pm
_________________
...and never Ever think about how good you are at something...
while you're doing it!
My Hot Rock & Blues Playlist

RknRusty- Rest In Peace

- Posts : 10869
Join date : 2011-08-10
Age : 68
Location : South Carolina, USA
Re: Repair of the JR SATAN
![]() OVERLORD Thu Oct 24, 2013 2:02 pm
OVERLORD Thu Oct 24, 2013 2:02 pm
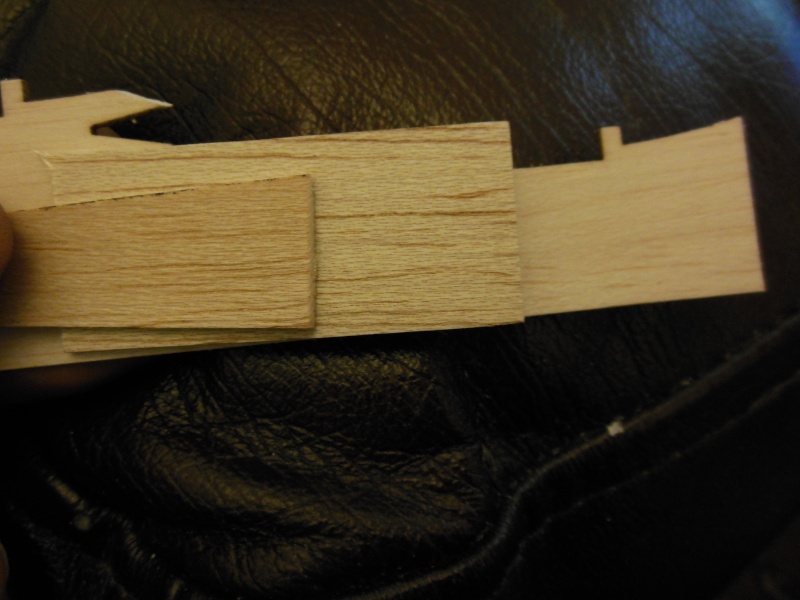
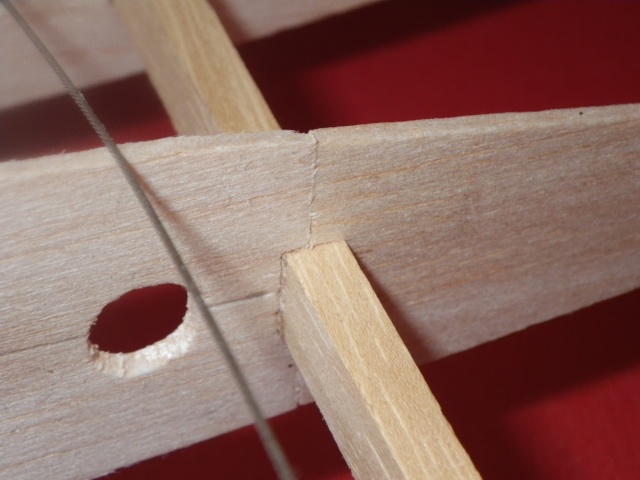
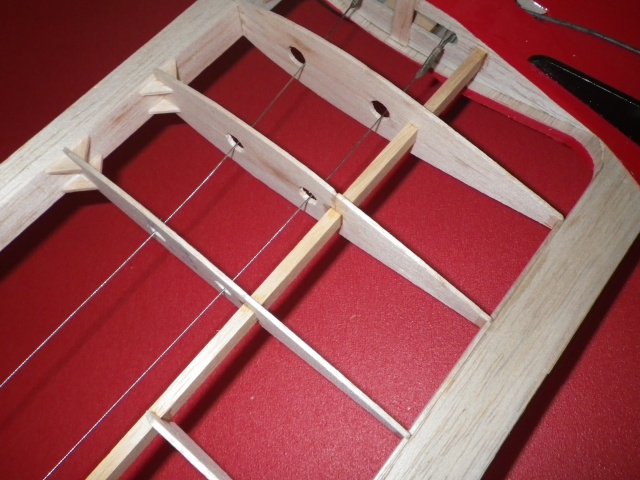
After cleaning the bits out, I shaped the edges of the LE flat and square and glued in a new piece of balsa. I cut out the rib parts, beginning at the spar up to the LE, cut out the holes for the lead outs and glued the ribs in place with brackets on both sides for reinforcement. The broken parts behind the leading edge will be filled in separately.
Lieven
OVERLORD- Diamond Member
- Posts : 1791
Join date : 2013-03-19
Age : 57
Location : Normandy, France
Re: Repair of the JR SATAN
![]() roddie Thu Oct 24, 2013 3:34 pm
roddie Thu Oct 24, 2013 3:34 pm
Roddie
roddie- Top Poster
- Posts : 8316
Join date : 2013-07-17
Age : 64
Location : N. Smithfield, Rhode Island -
Re: Repair of the JR SATAN
![]() OVERLORD Fri Nov 15, 2013 11:46 am
OVERLORD Fri Nov 15, 2013 11:46 am
Lieven


OVERLORD- Diamond Member
- Posts : 1791
Join date : 2013-03-19
Age : 57
Location : Normandy, France
Re: Repair of the JR SATAN
![]() roddie Fri Nov 15, 2013 2:34 pm
roddie Fri Nov 15, 2013 2:34 pm
 The lap-joint on the l/e must have taken some time. It all looks beautiful!
roddie- Top Poster
- Posts : 8316
Join date : 2013-07-17
Age : 64
Location : N. Smithfield, Rhode Island -
Cribbs74- Moderator
-
Posts : 11897
Join date : 2011-10-24
Age : 50
Location : Tuttle, OK
Re: Repair of the JR SATAN
![]() OVERLORD Fri May 09, 2014 9:27 am
OVERLORD Fri May 09, 2014 9:27 am

Lieven
OVERLORD- Diamond Member
- Posts : 1791
Join date : 2013-03-19
Age : 57
Location : Normandy, France
Re: Repair of the JR SATAN
![]() getback Sat May 10, 2014 8:20 am
getback Sat May 10, 2014 8:20 am


getback- Top Poster
-
Posts : 10158
Join date : 2013-01-18
Age : 66
Location : julian , NC
Re: Repair of the JR SATAN
![]() RknRusty Sat May 10, 2014 9:17 am
RknRusty Sat May 10, 2014 9:17 am
_________________
...and never Ever think about how good you are at something...
while you're doing it!
My Hot Rock & Blues Playlist
RknRusty- Rest In Peace
- Posts : 10869
Join date : 2011-08-10
Age : 68
Location : South Carolina, USA
Re: Repair of the JR SATAN
![]() Ken Cook Sat May 10, 2014 10:06 am
Ken Cook Sat May 10, 2014 10:06 am

Ken Cook- Top Poster
- Posts : 5484
Join date : 2012-03-27
Location : pennsylvania
Re: Repair of the JR SATAN
![]() roddie Sat May 10, 2014 12:01 pm
roddie Sat May 10, 2014 12:01 pm
roddie- Top Poster
- Posts : 8316
Join date : 2013-07-17
Age : 64
Location : N. Smithfield, Rhode Island -
Re: Repair of the JR SATAN
![]() OVERLORD Sat May 10, 2014 1:33 pm
OVERLORD Sat May 10, 2014 1:33 pm
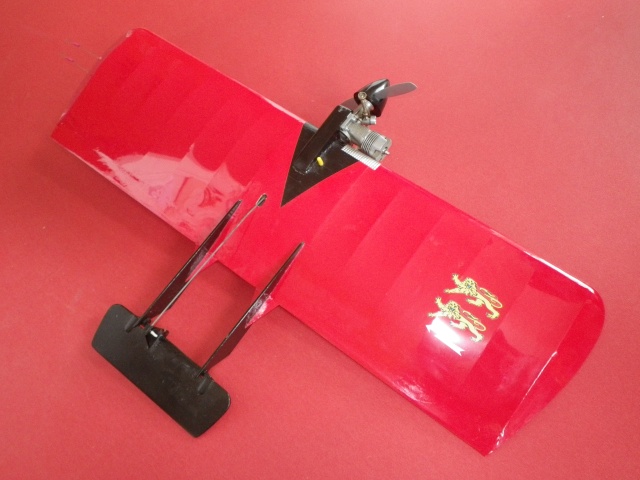
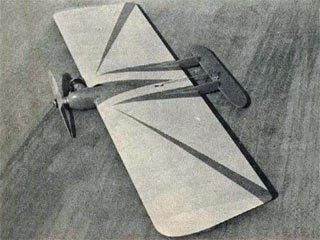
To me, both Satans and the Voodoo are very good looking. I don't know why but they seem to look much better than other combat planes. The Jr Satan has a 29' span. You can find the drawing on Outerzone. That's where I got my plan from: http://www.outerzone.co.uk/plan_details.asp?ID=1816
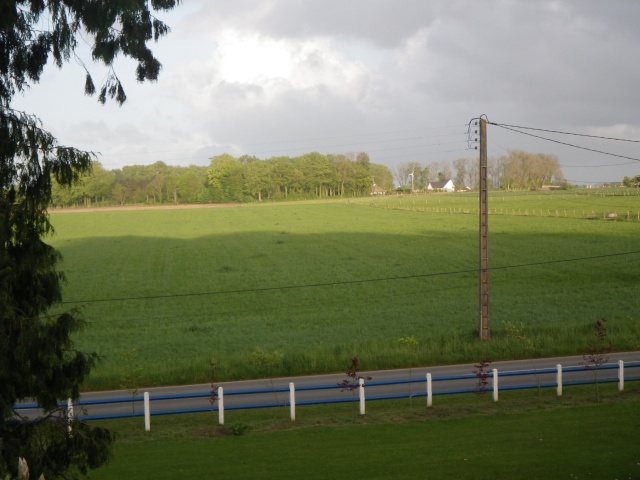
I'm gonna give it a try as soon as the weather gets better. We have rain and a lot of Wind at the moment. I hope I can fly across the road instead of my neighbours garden. At least there are no trees that can move into my way. I maybe have to wait until they cut the grass 'cause that's rather high at the moment.
Lieven
OVERLORD- Diamond Member
- Posts : 1791
Join date : 2013-03-19
Age : 57
Location : Normandy, France
» Cox .051 Tee Dee Repair
» Wing repair
» Repair/Upgrade
» "Phred's Phault"